Andrea Schewe Design
  • Home
  • Costumes
    • Reader's Gallery
    • Fantasy Costumes
    • Theatrical
    • Historic >
      • Easier to make
    • International
    • Costumes for Kid's and Babies
  • Crafts
    • Home Decor >
      • Pillows
    • Fashion Accessories
    • Doll Clothes
    • For Kids and Babies
  • Blog
    • Past Blogs by subject >
      • My patterns by number
      • Sewing basics
      • Personal sewing Projects
      • Fashion History
      • Fun and funny stuff
      • Guest Bloggers
      • Crafts and Home Dec
  • Links
  • Contact

Simplicity #1460 - the neck edge

5/28/2015

5 Comments

 
Picture
Picture
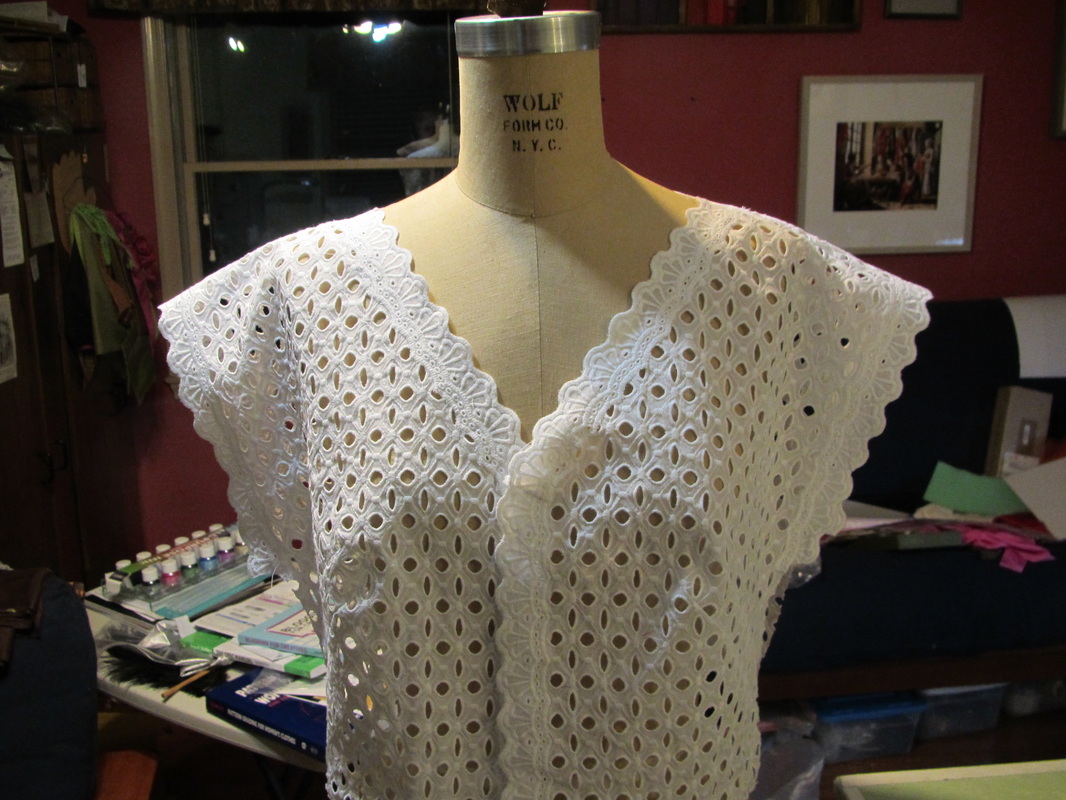
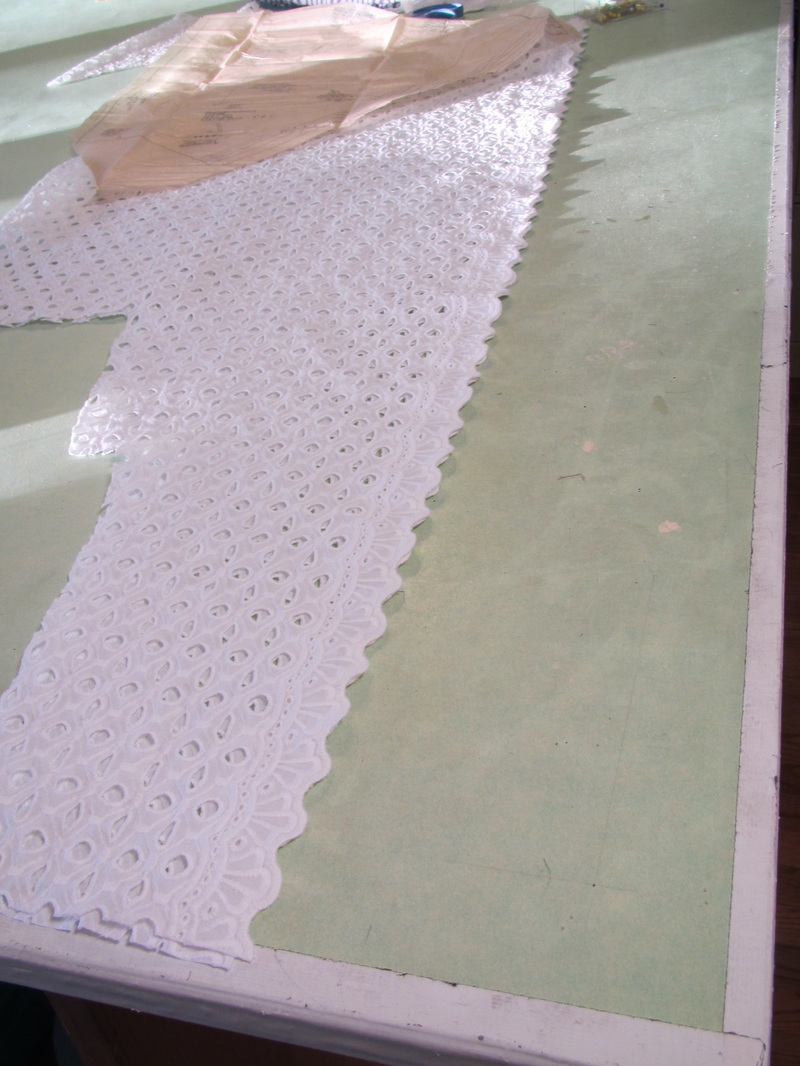
This is what I did for the neckline on the top I made with my white eyelet I bought in Singapore.  Read the previous blog about starting this project.
Picture
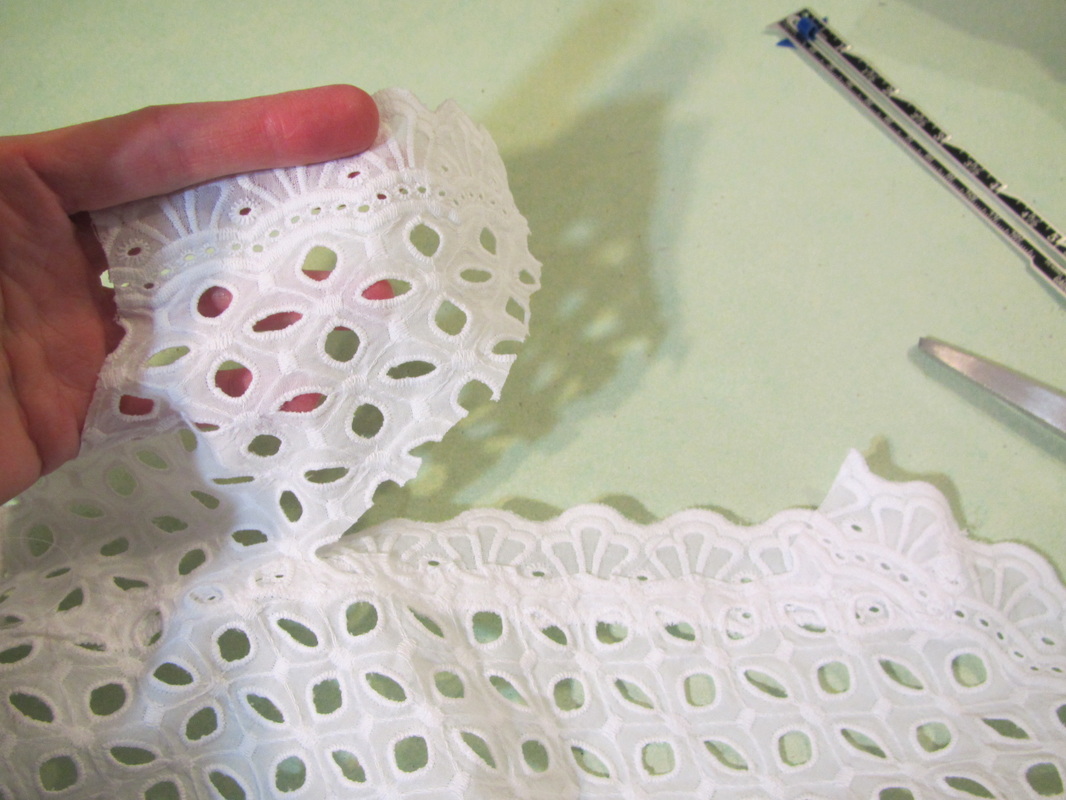
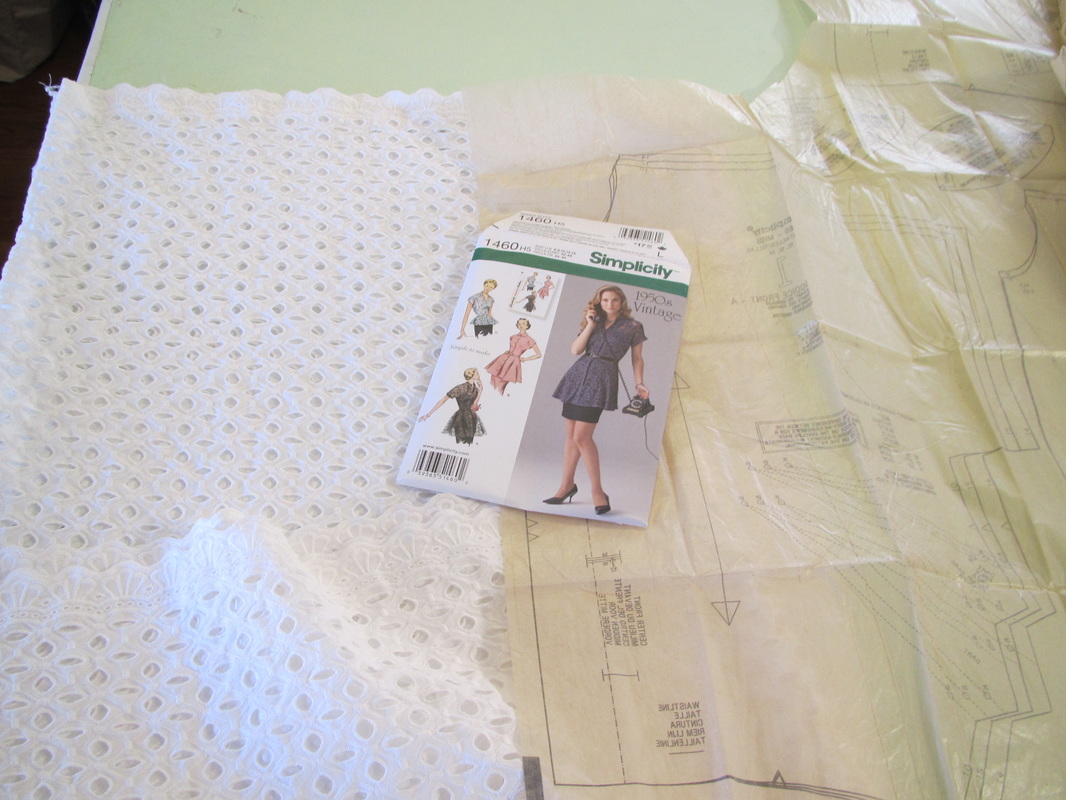
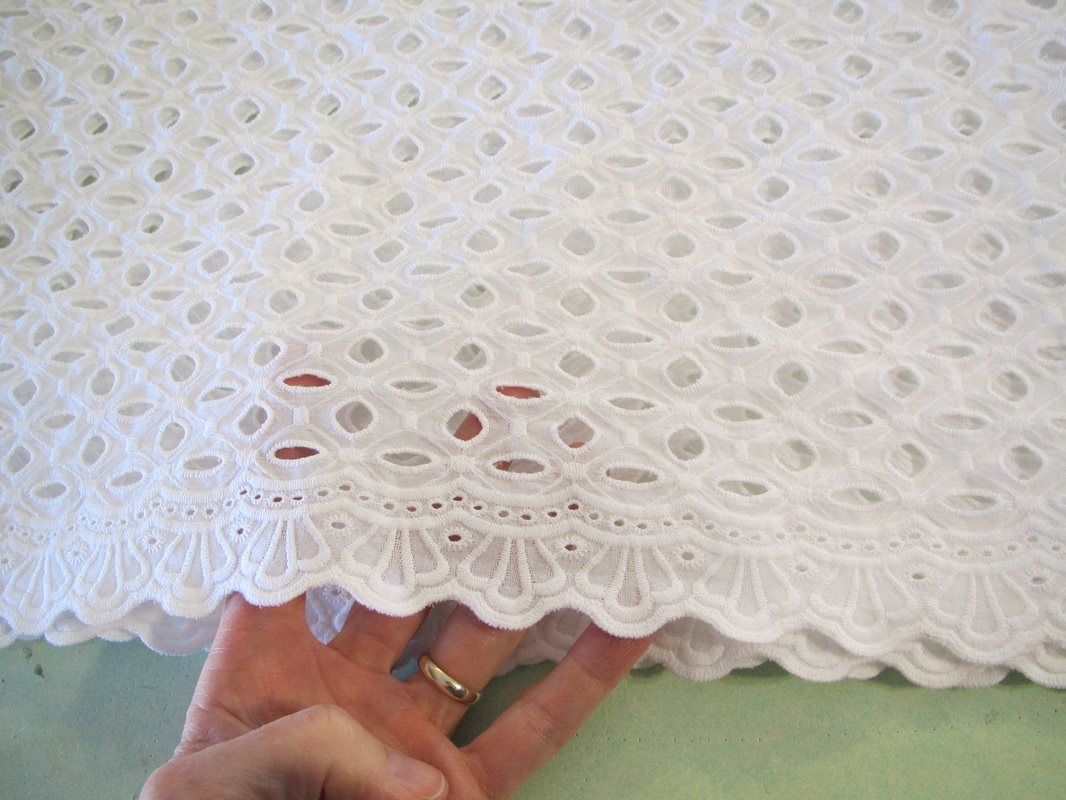
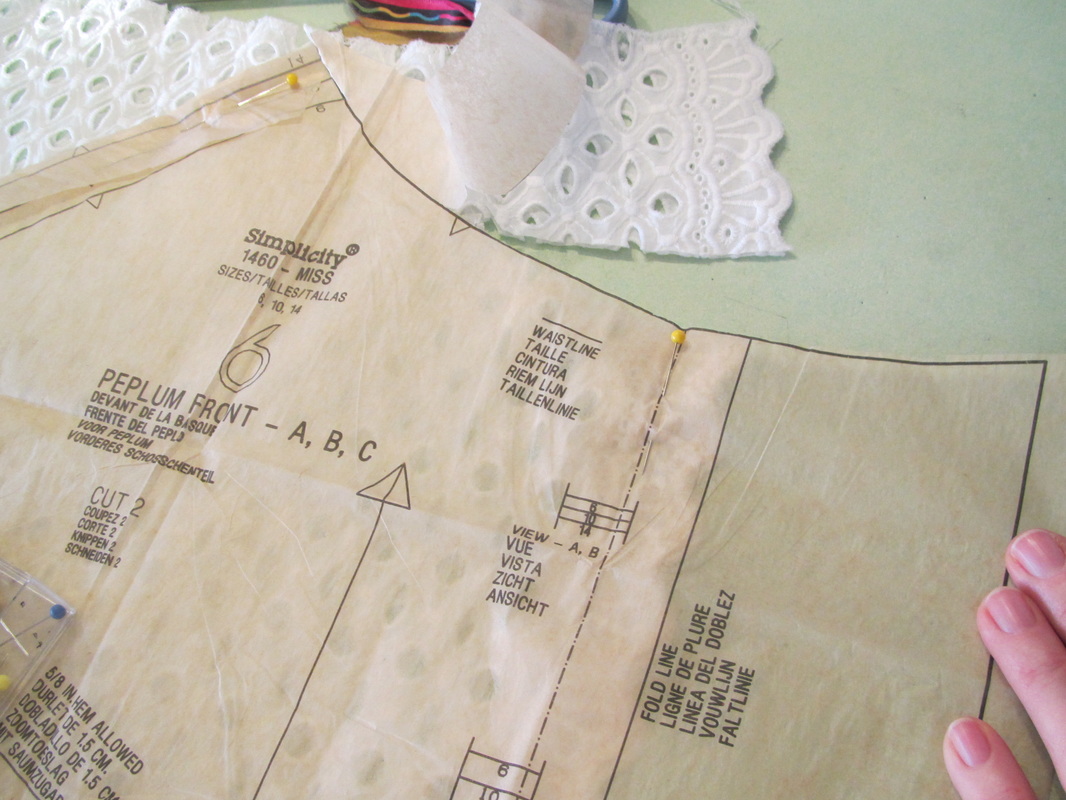
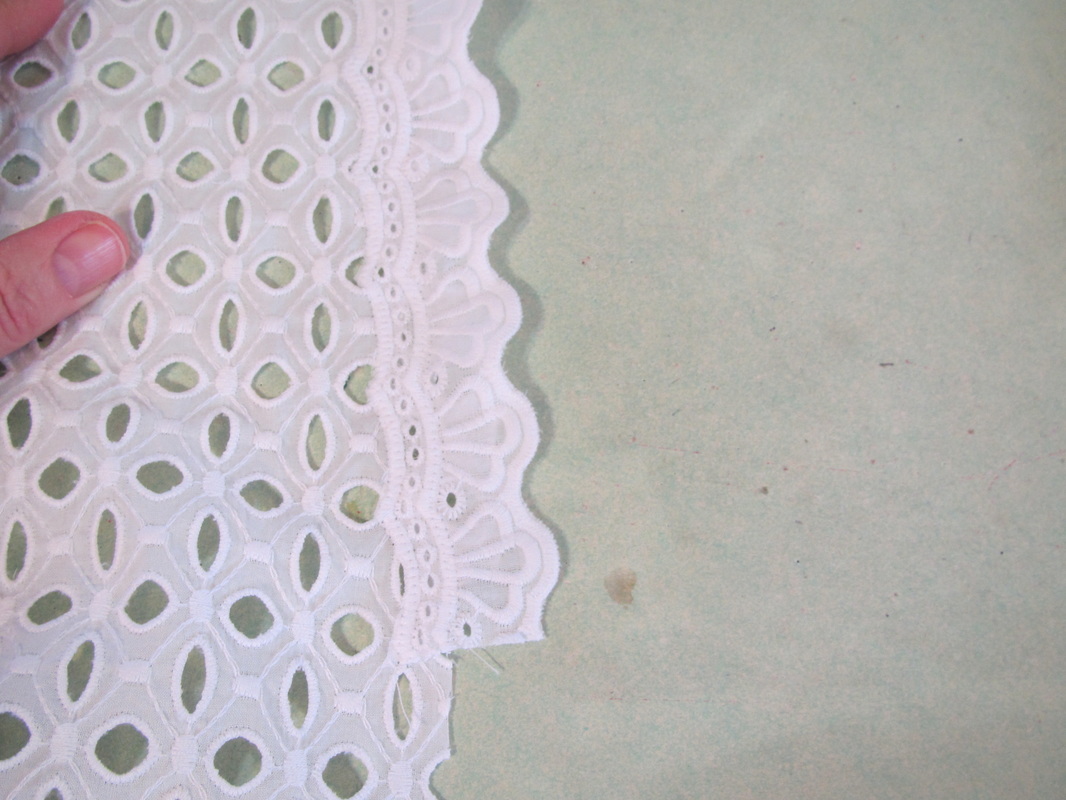
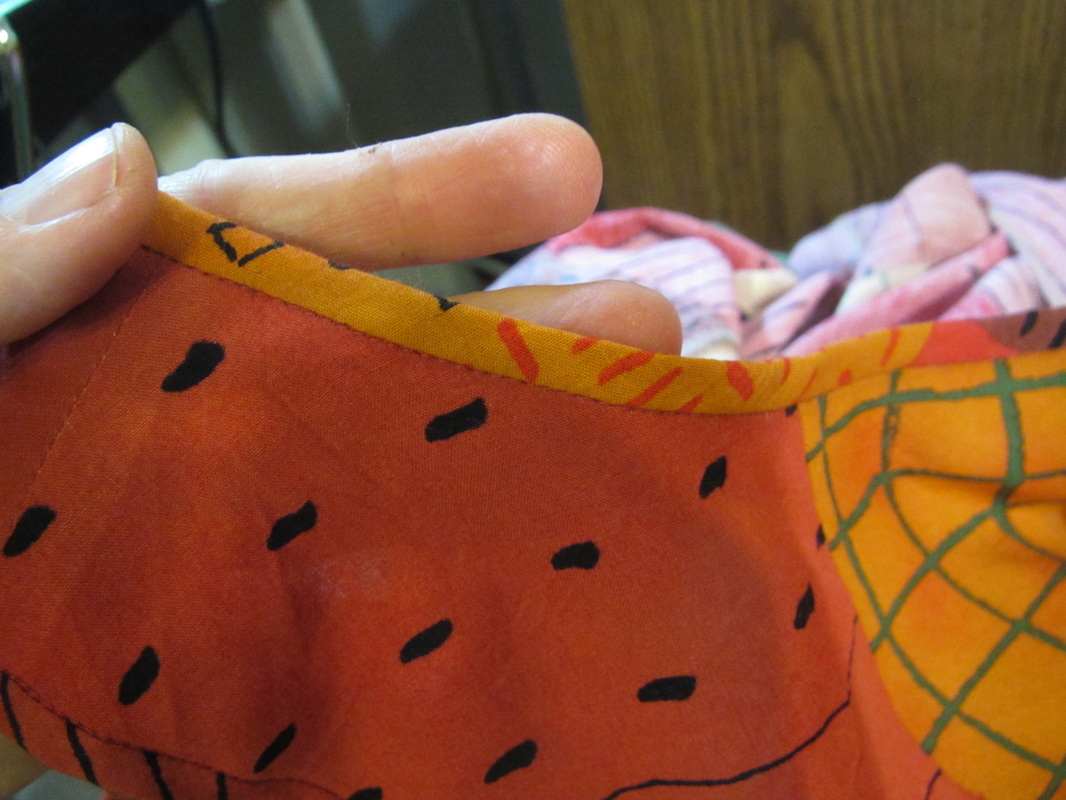
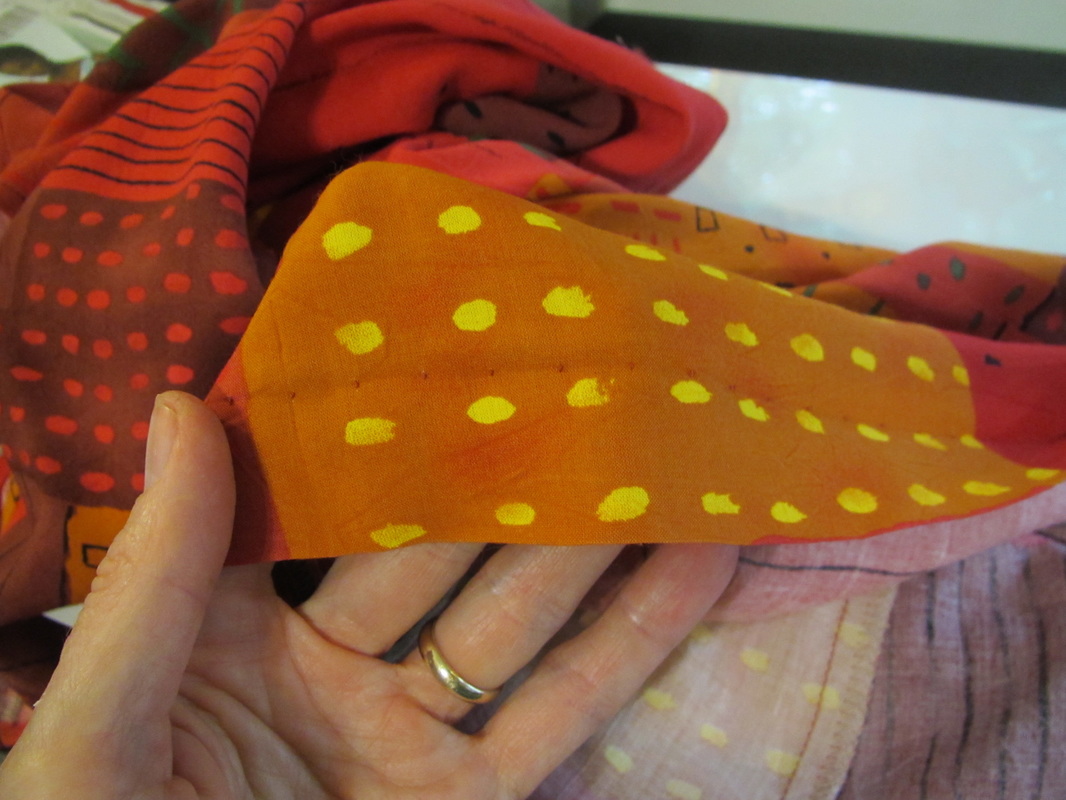
The pattern I'm using has a rounded neckline close to the neck, BUT I want to use as much of the wonderful eyelet border from my fabric as possible, so I am going to make it work at the neck! 


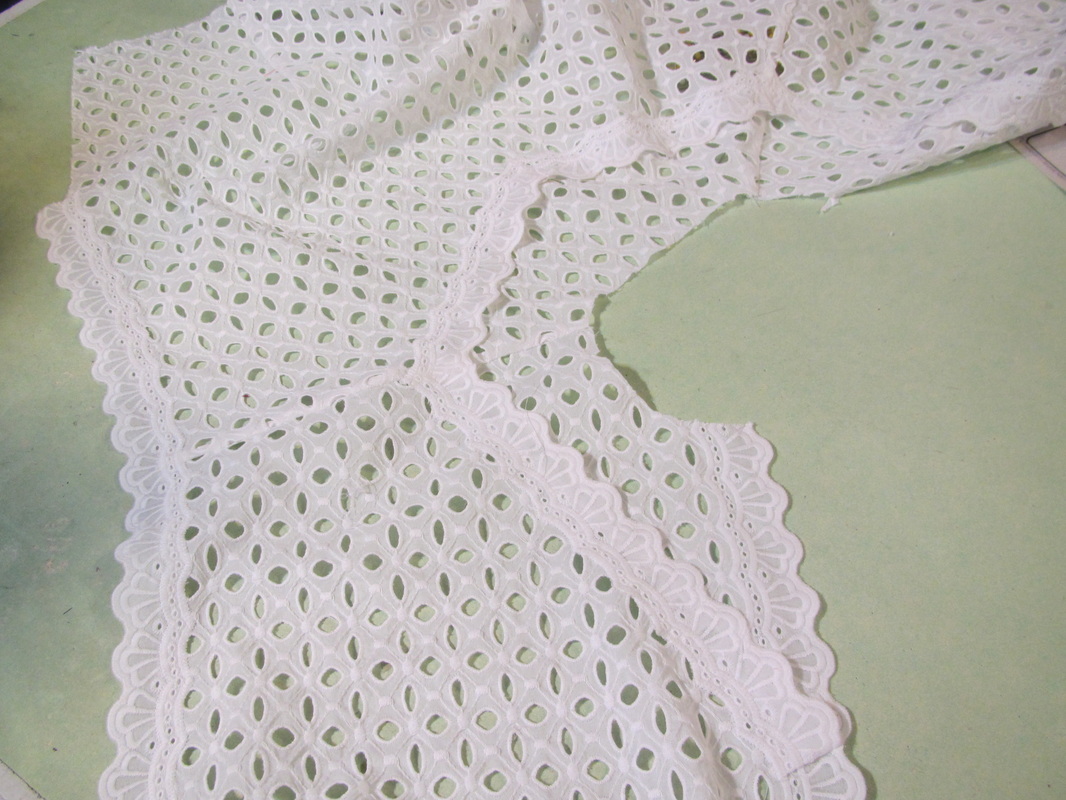
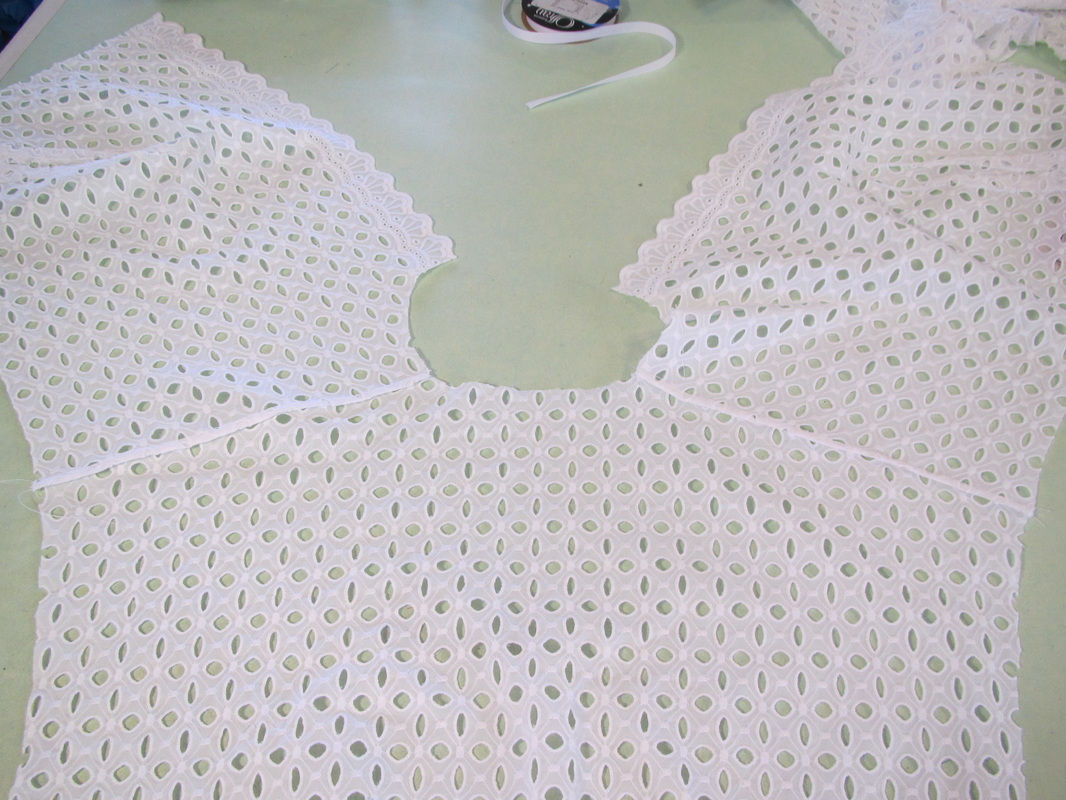
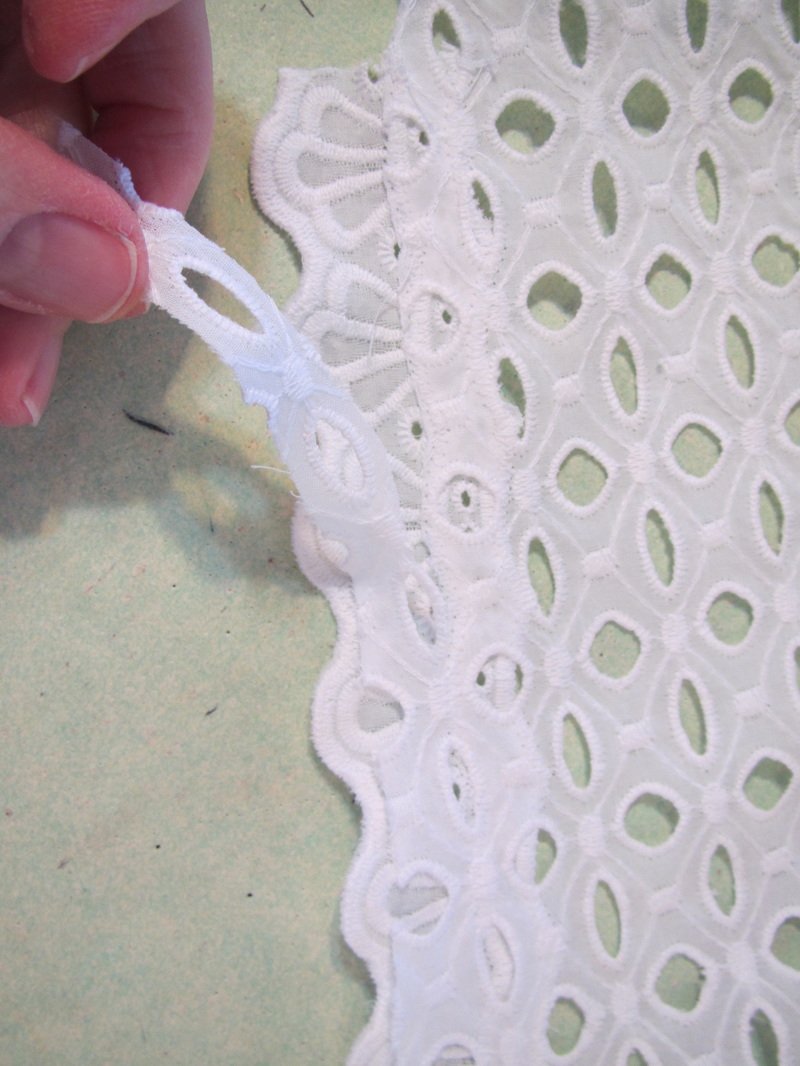
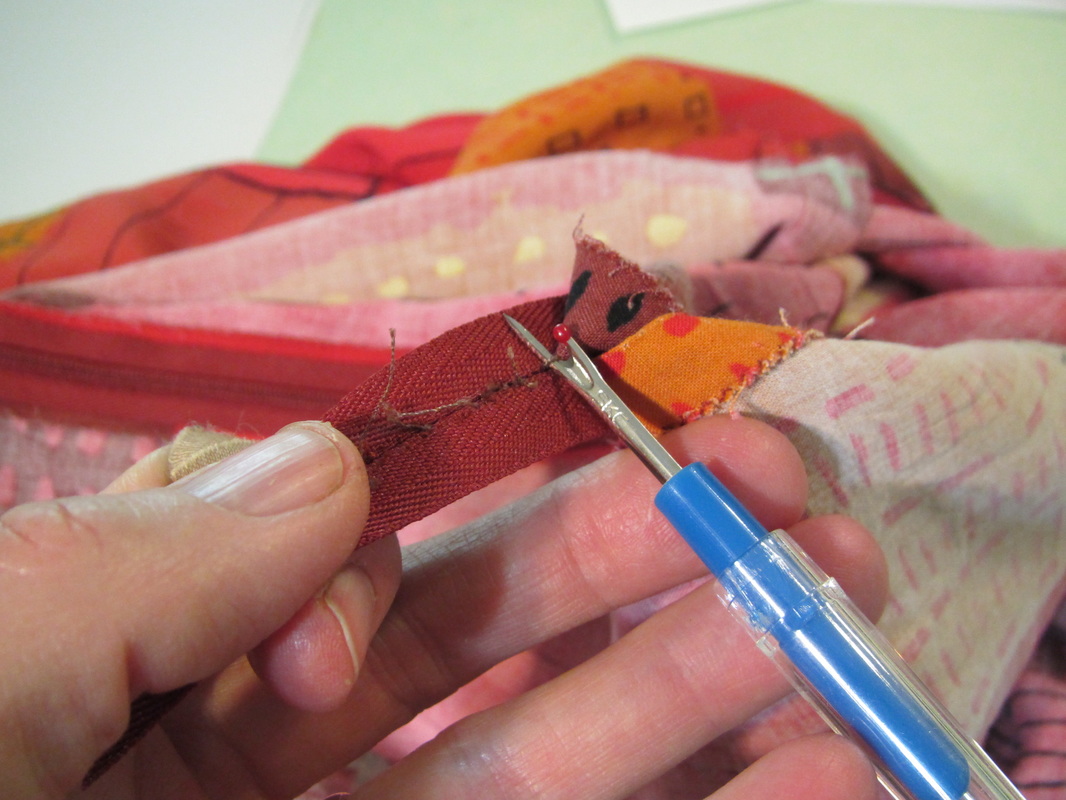
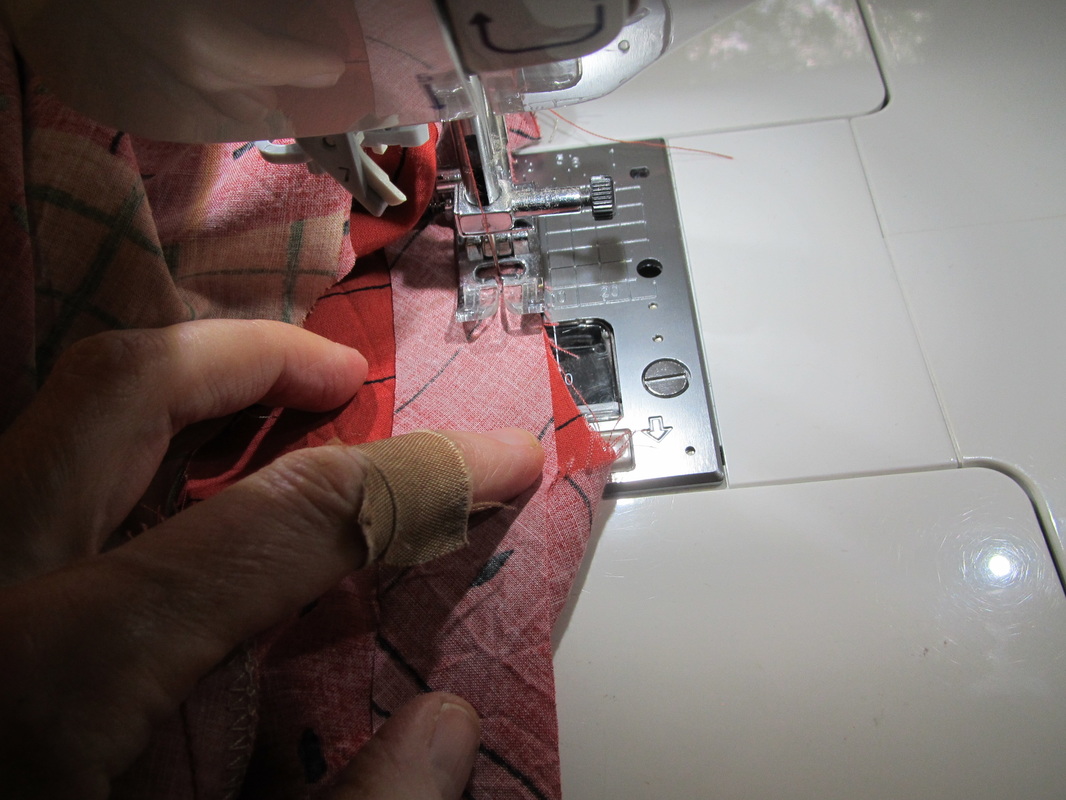
Since the strips of border need to be used on straight edges, I'm going to make these round neck edges straight.
Picture
Picture
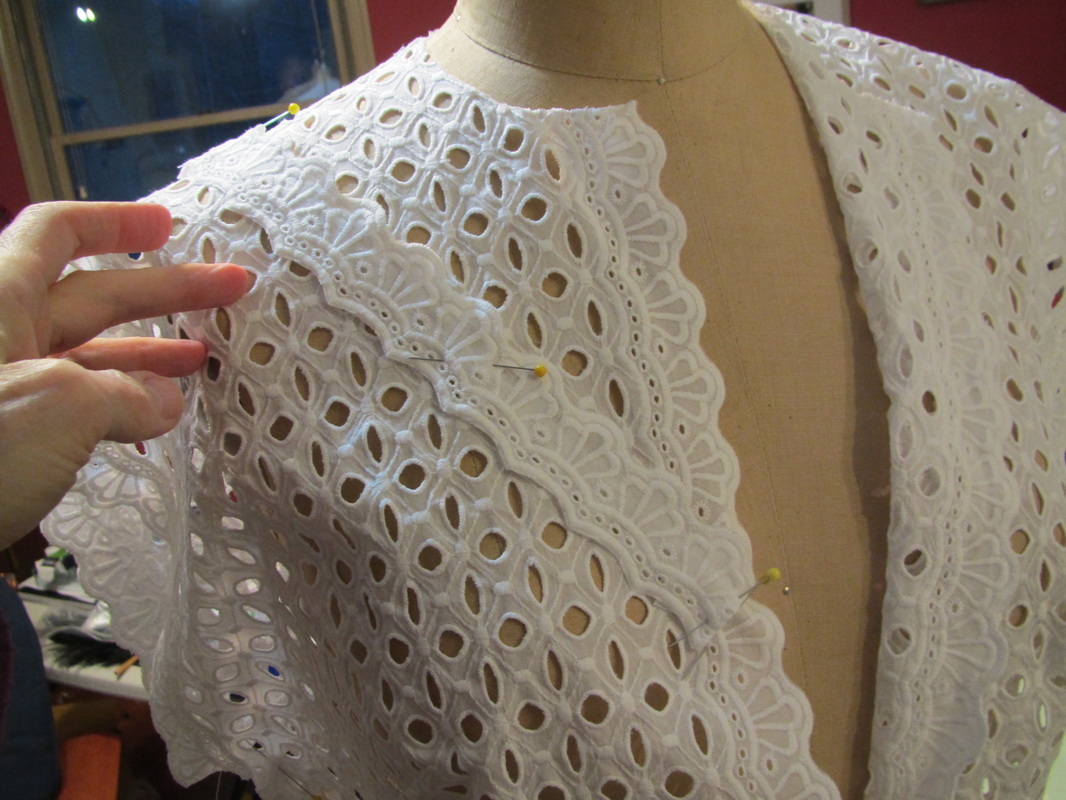
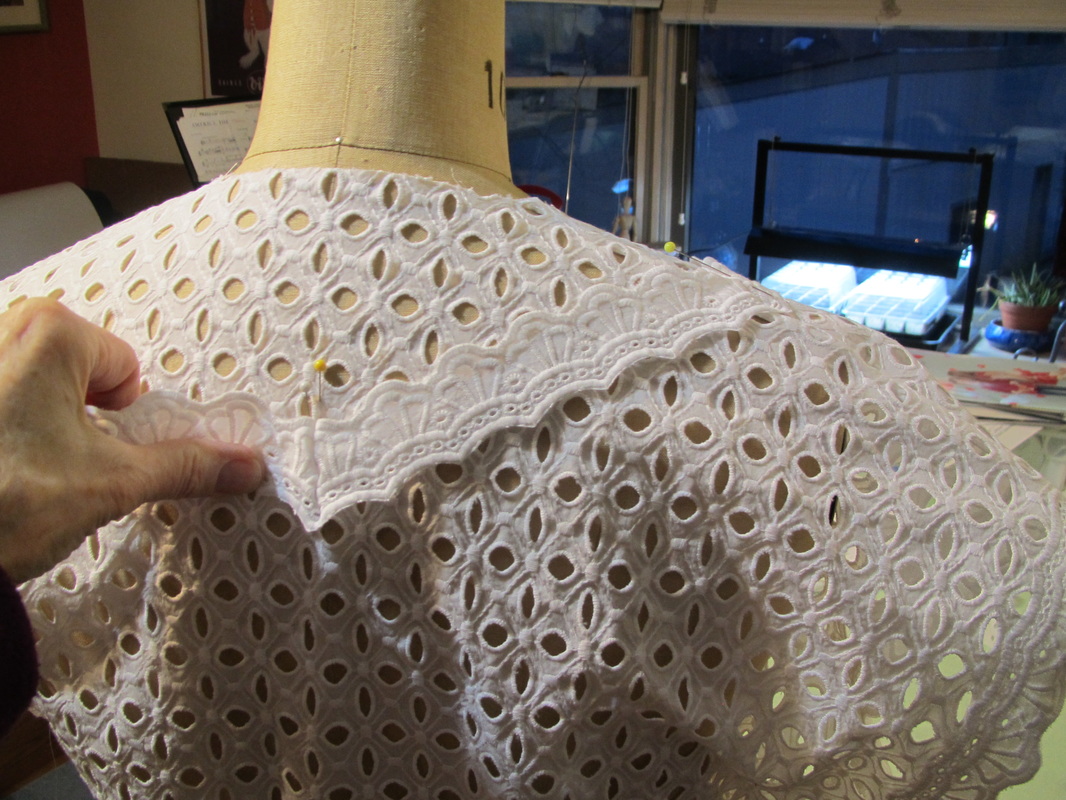
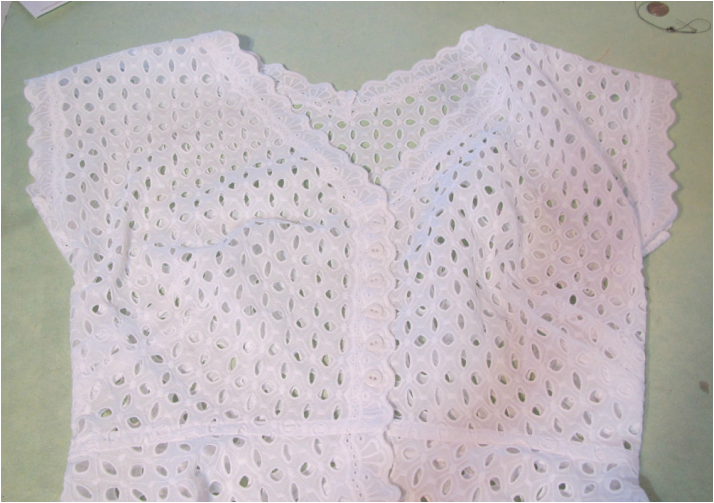
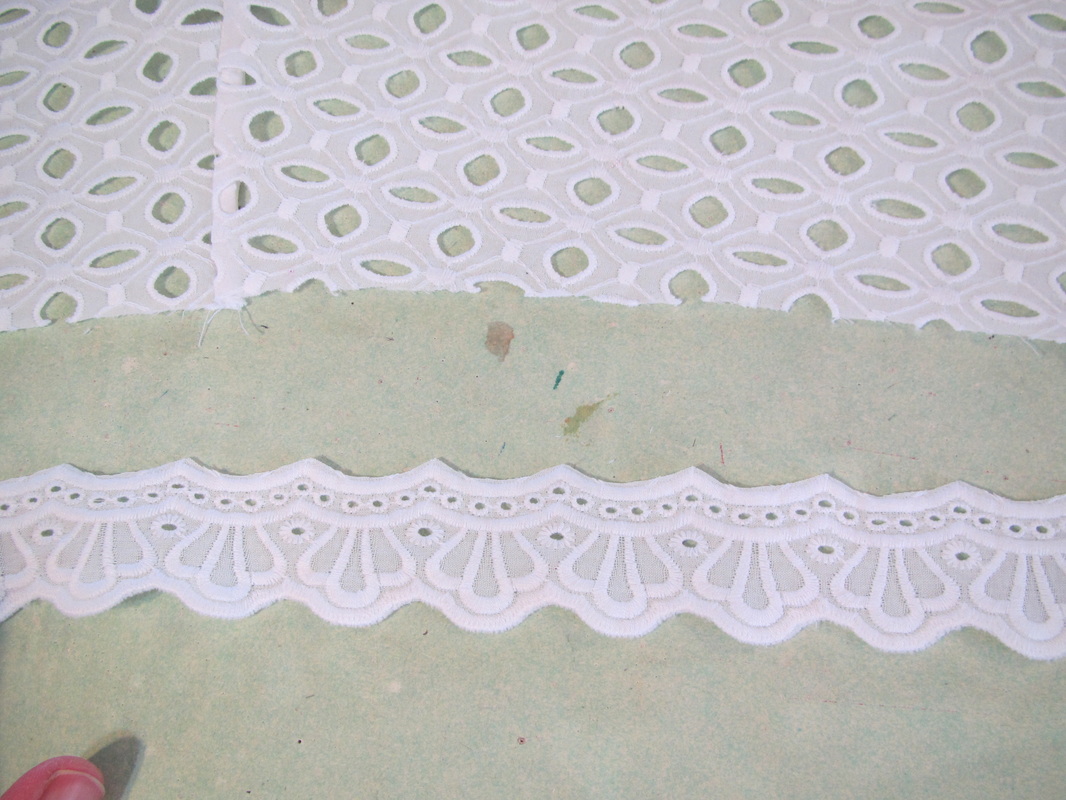
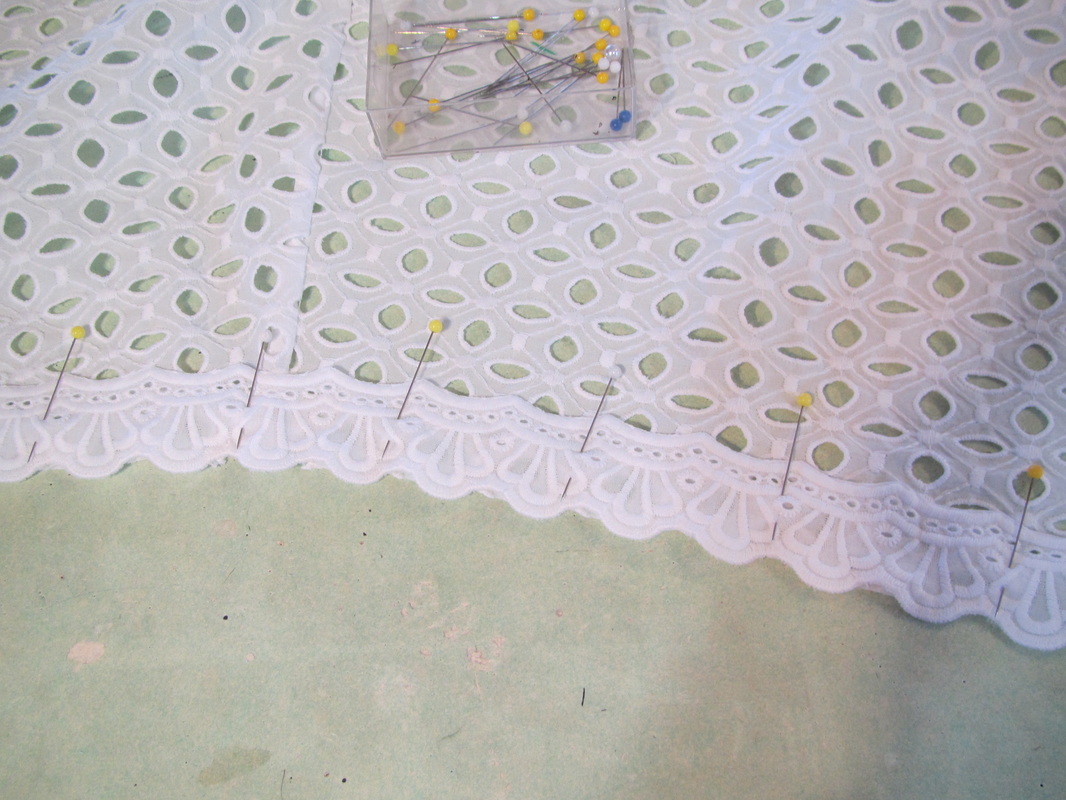
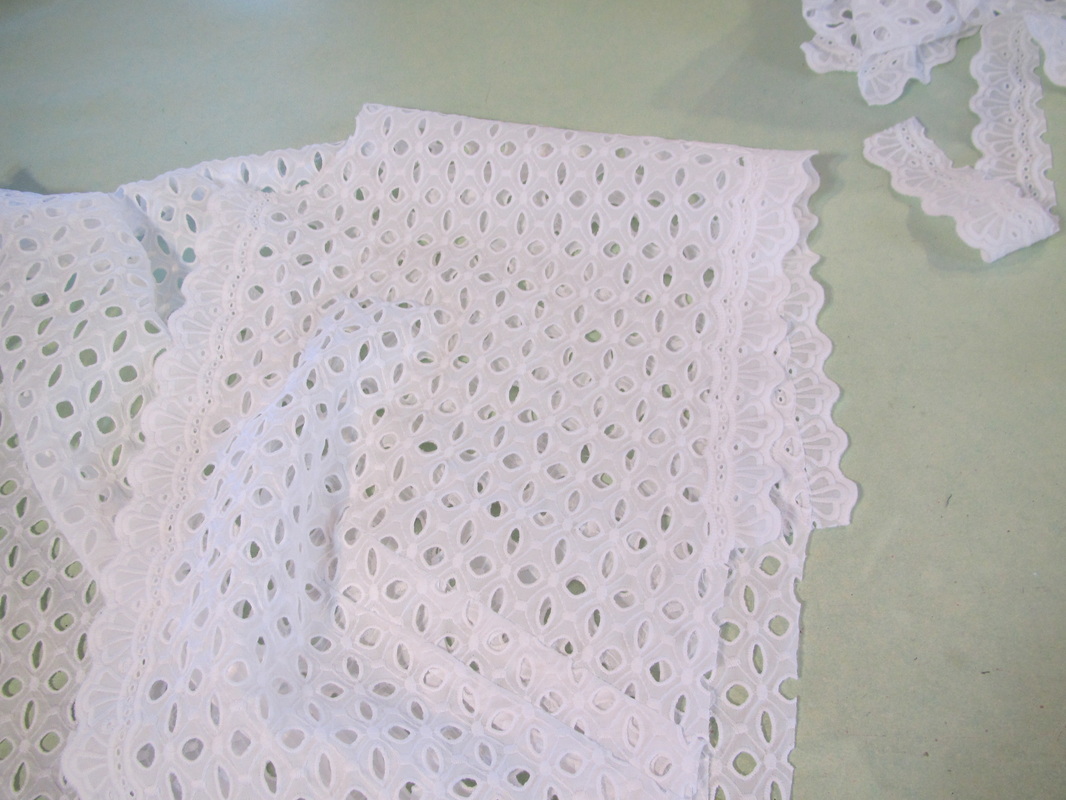
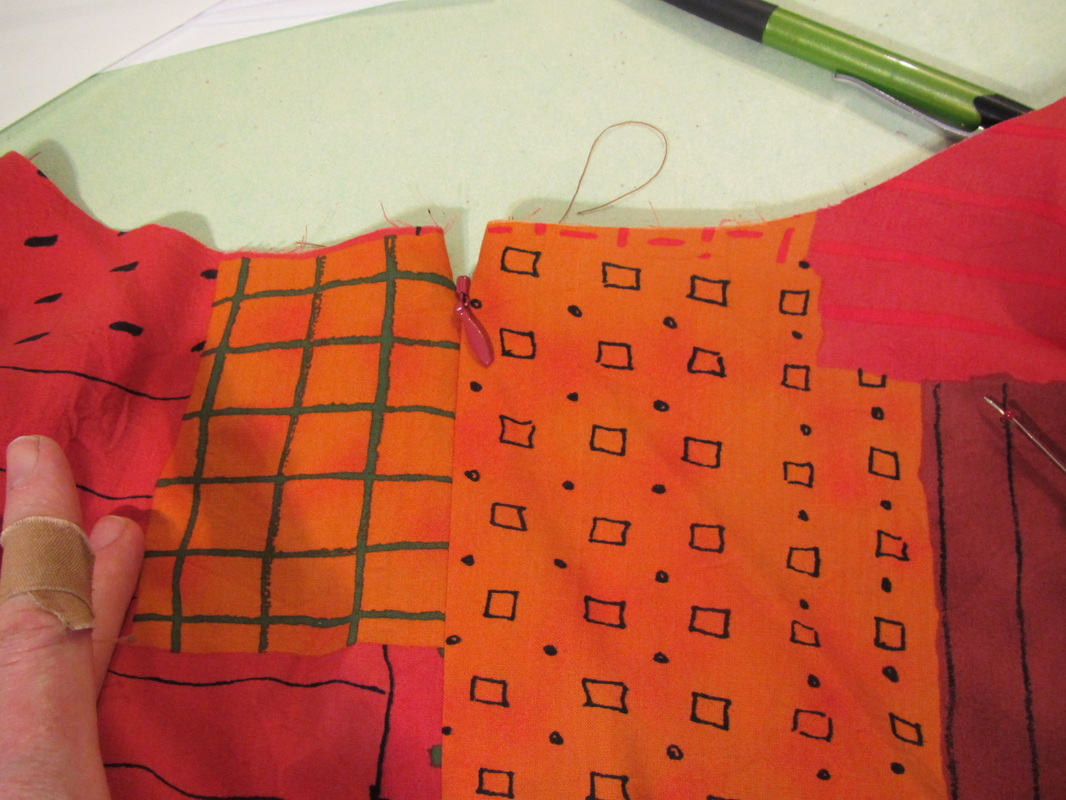
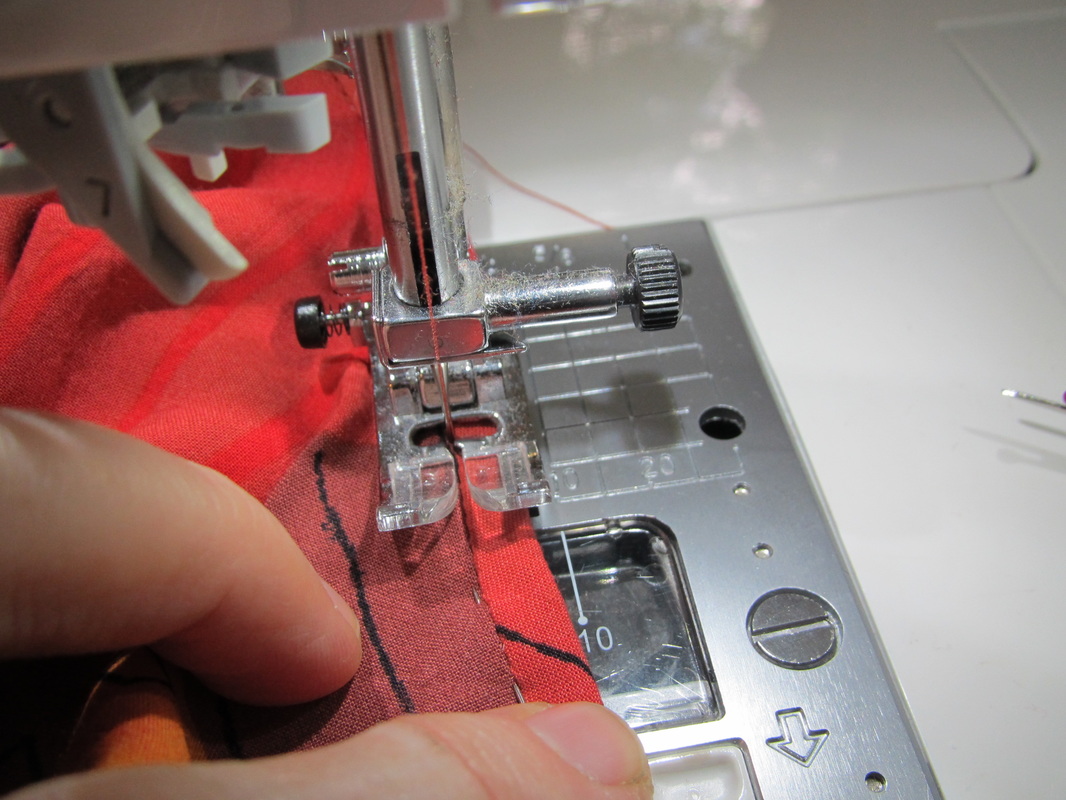
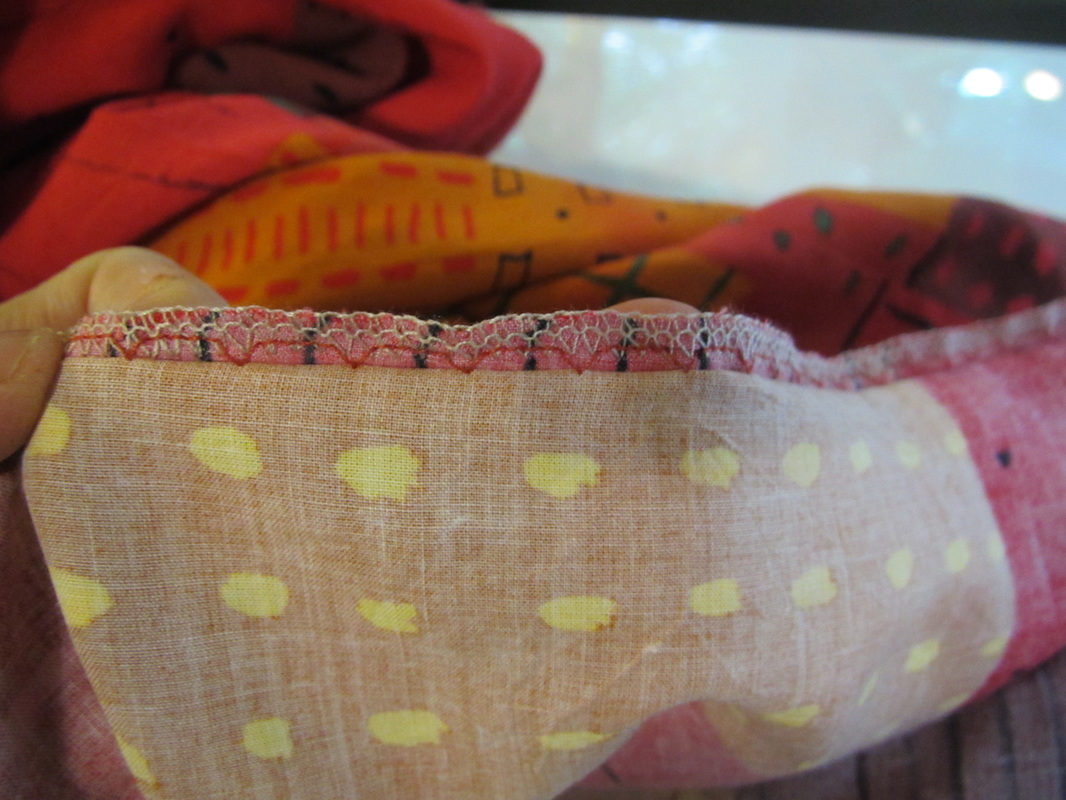
This is where a good dress form comes in REALLY handy!  I simply take lengths of the border that I have trimmed and pin it to the neck of this over blouse where I think it looks best. Notice I mitered it where it meets at center back.
Picture
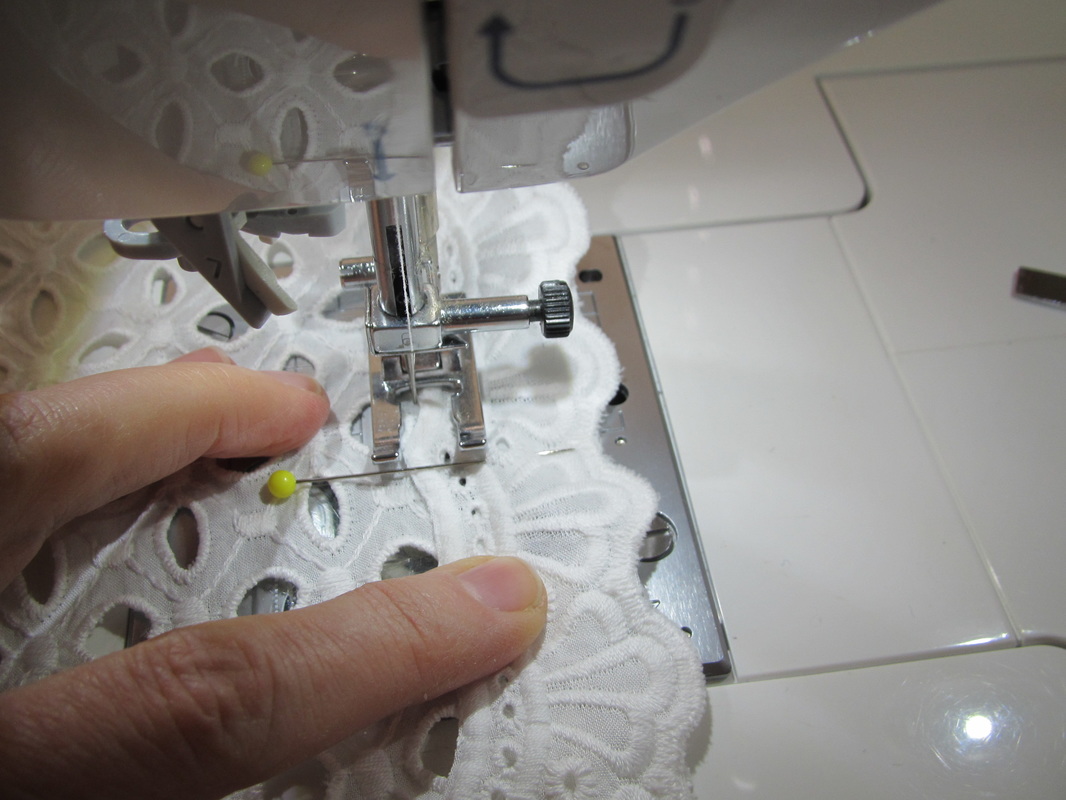
I zig zag it down the same way I did the border at the sleeve edge. (shown in the previous blog)
Picture
Then trim away the excess from the back.
Picture
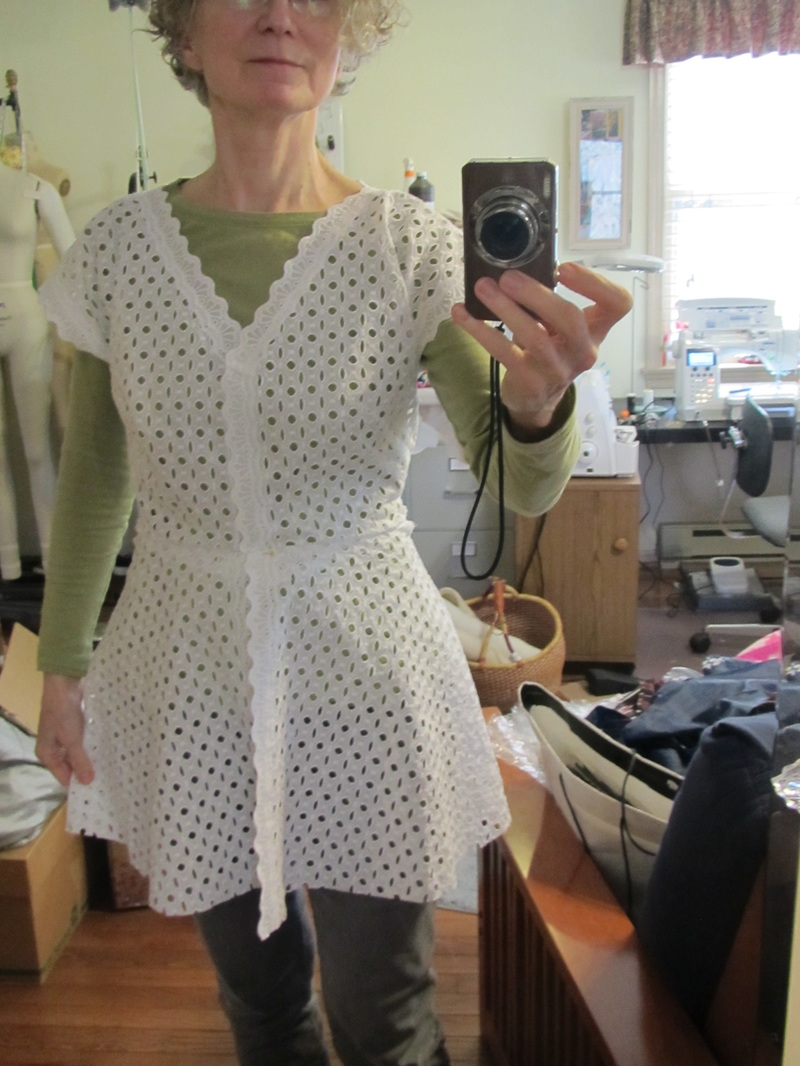
After finishing the basic assembly, time to try it on. I needed to let it out a tad at the waist!
Picture
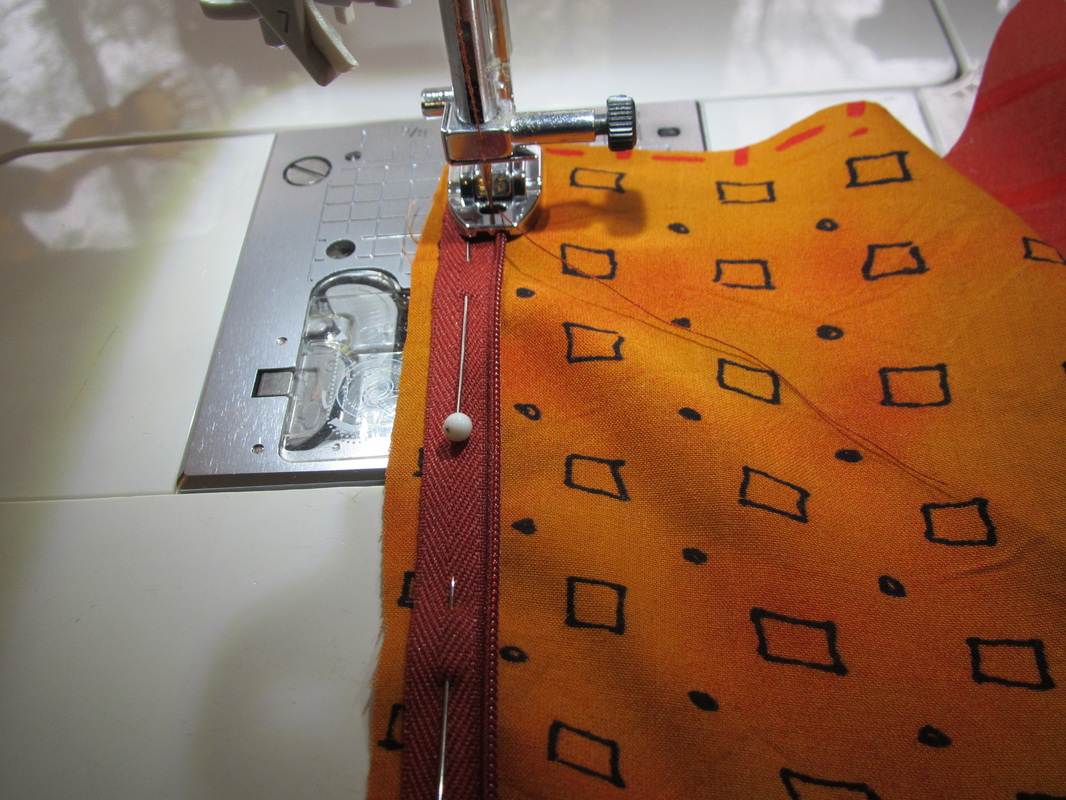
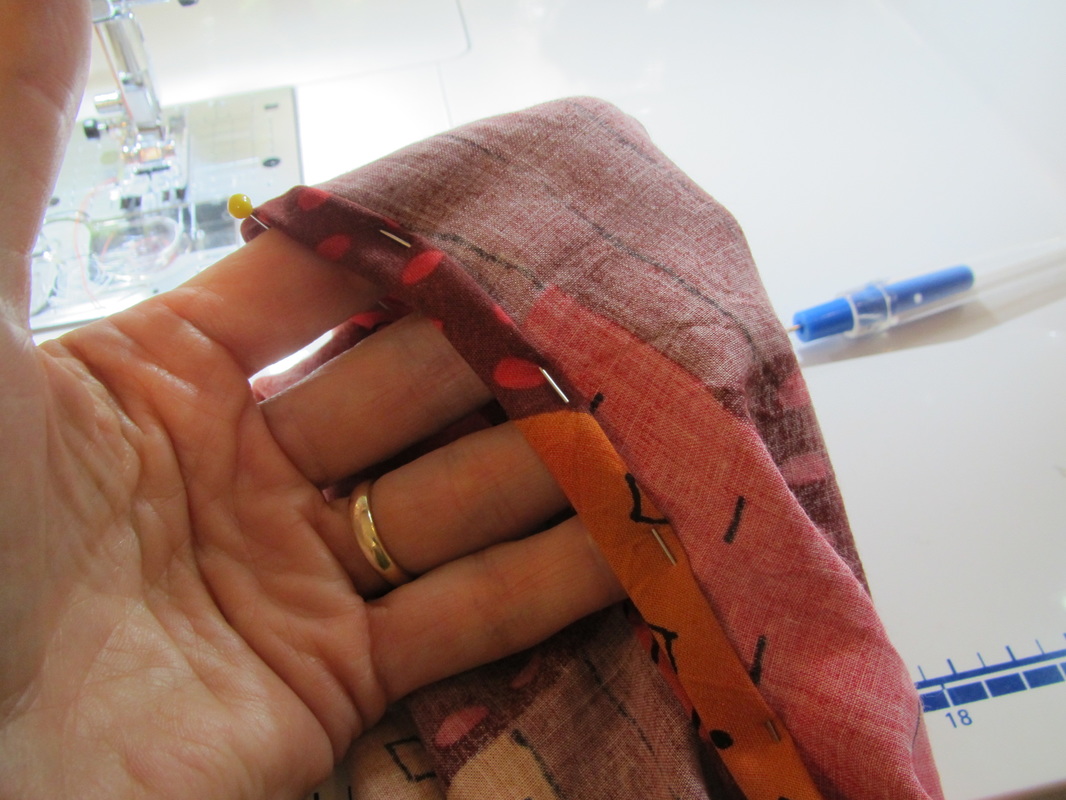
This is a very "see-through" garment, so all the inside finishing needs to be very clean.

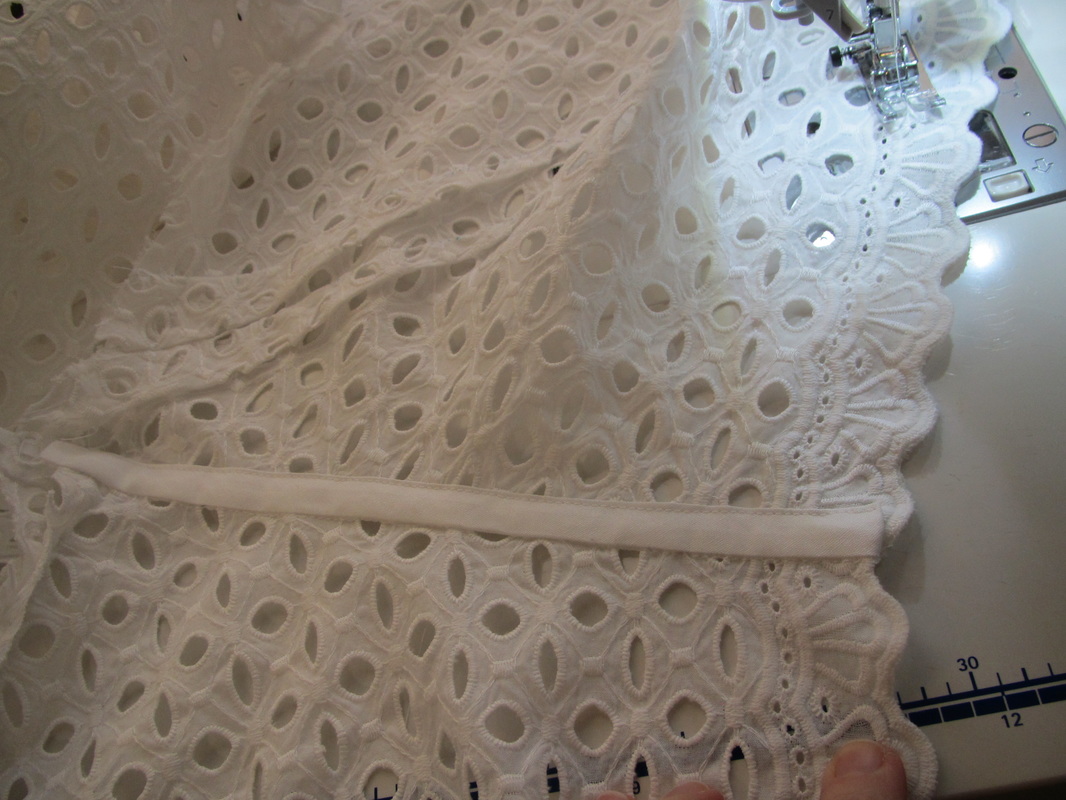
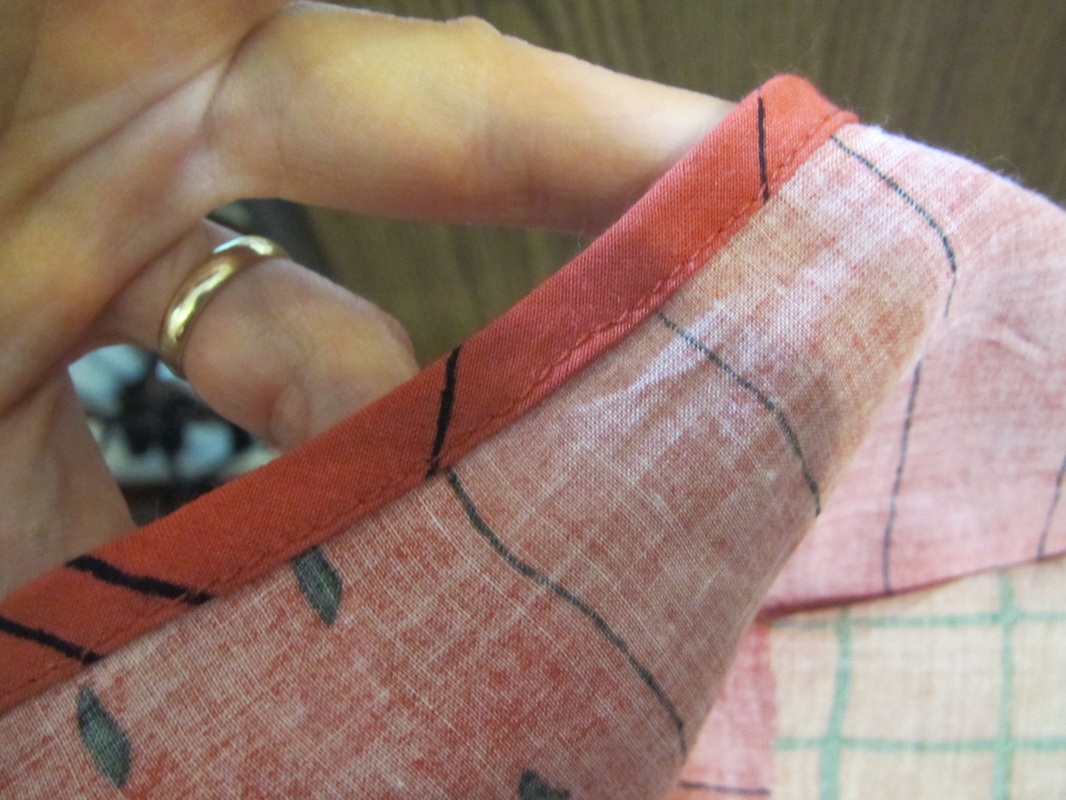
I finish the waist seam with bias tape.
Picture
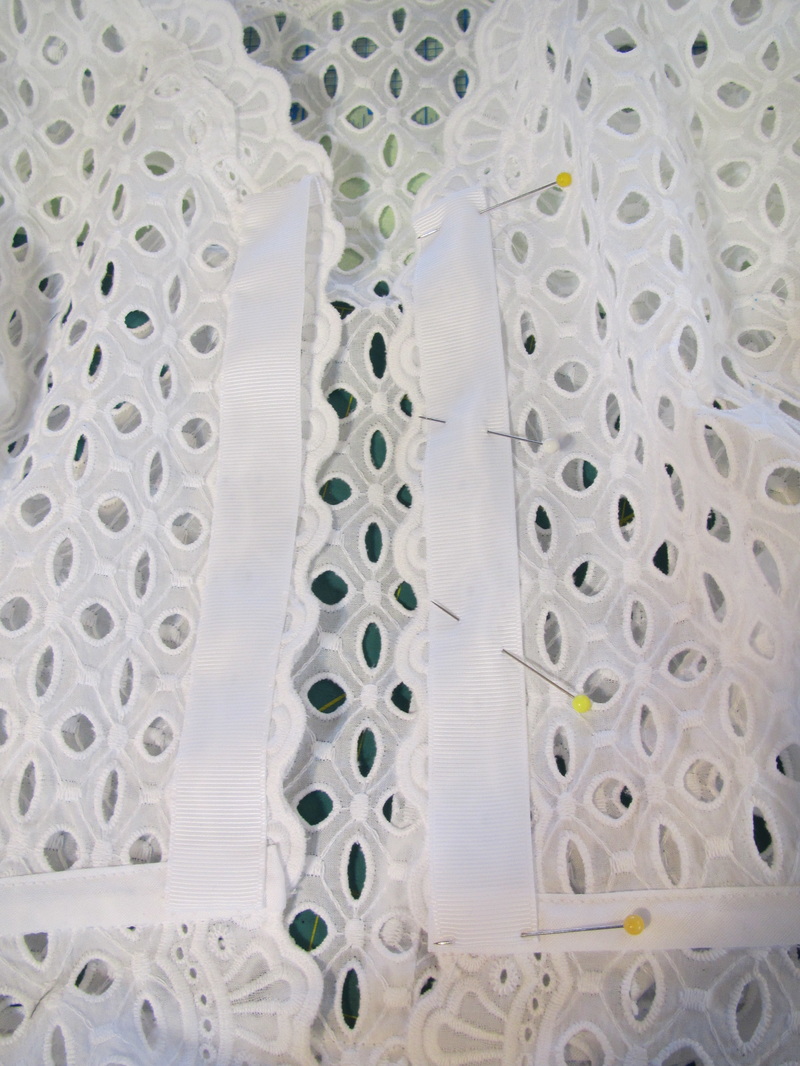
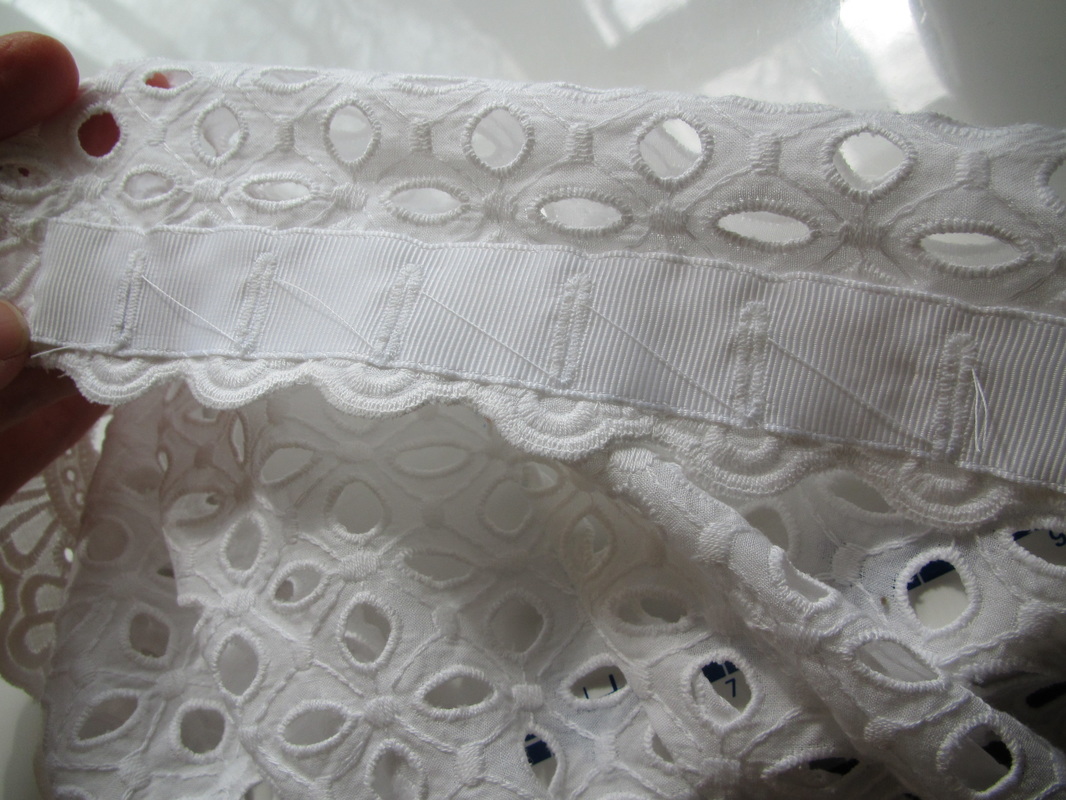
And I hand sew 1" grosgrain ribbon where the buttons and buttons holes will go for support. Remember I did away with the fabric that should have folded back and formed a facing so I could have the eyelet border right on the edge.  
Picture
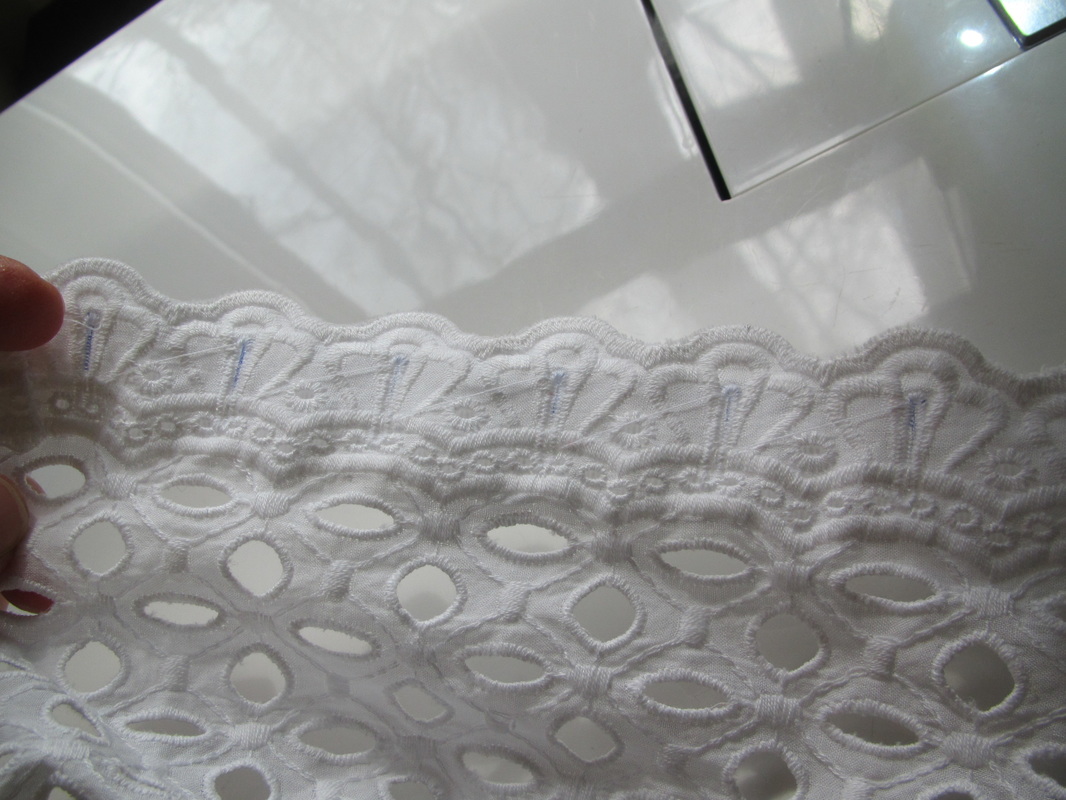
I had a hard time deciding where to put the button holes. I didn't think I wanted so many, but ... really ... the only thing that made sense was to put one in the middle of each motif.
Picture
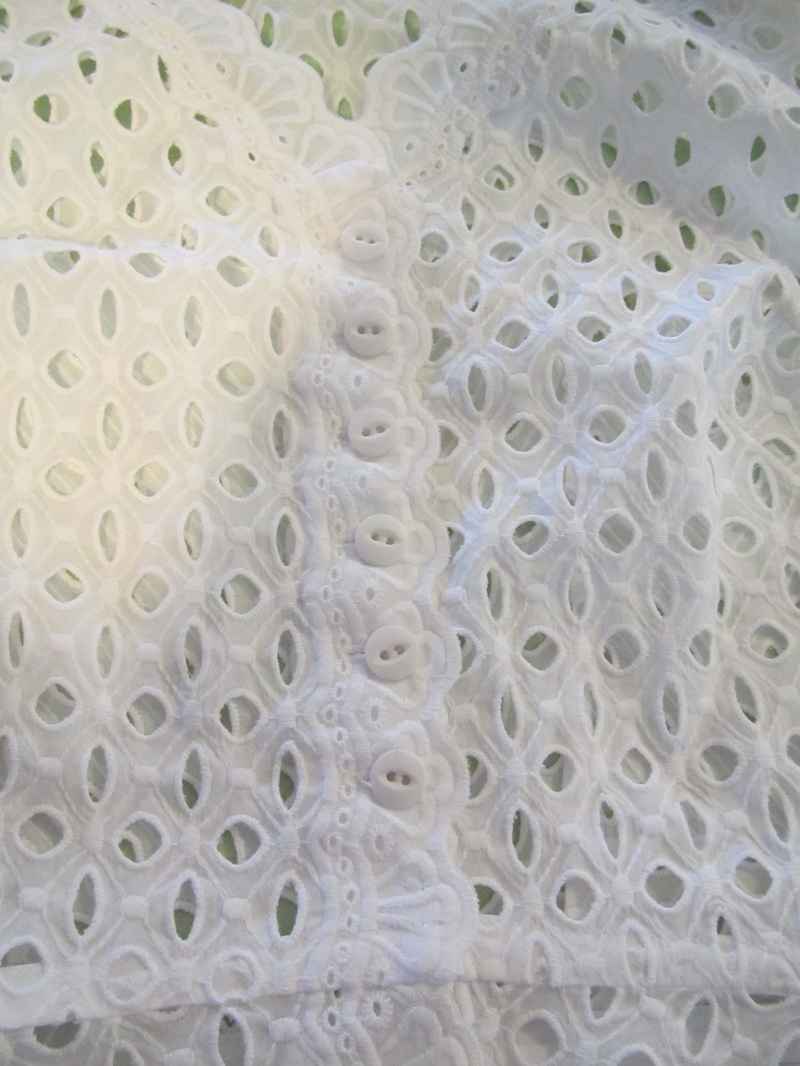
This is what it looks like from the back.
Picture
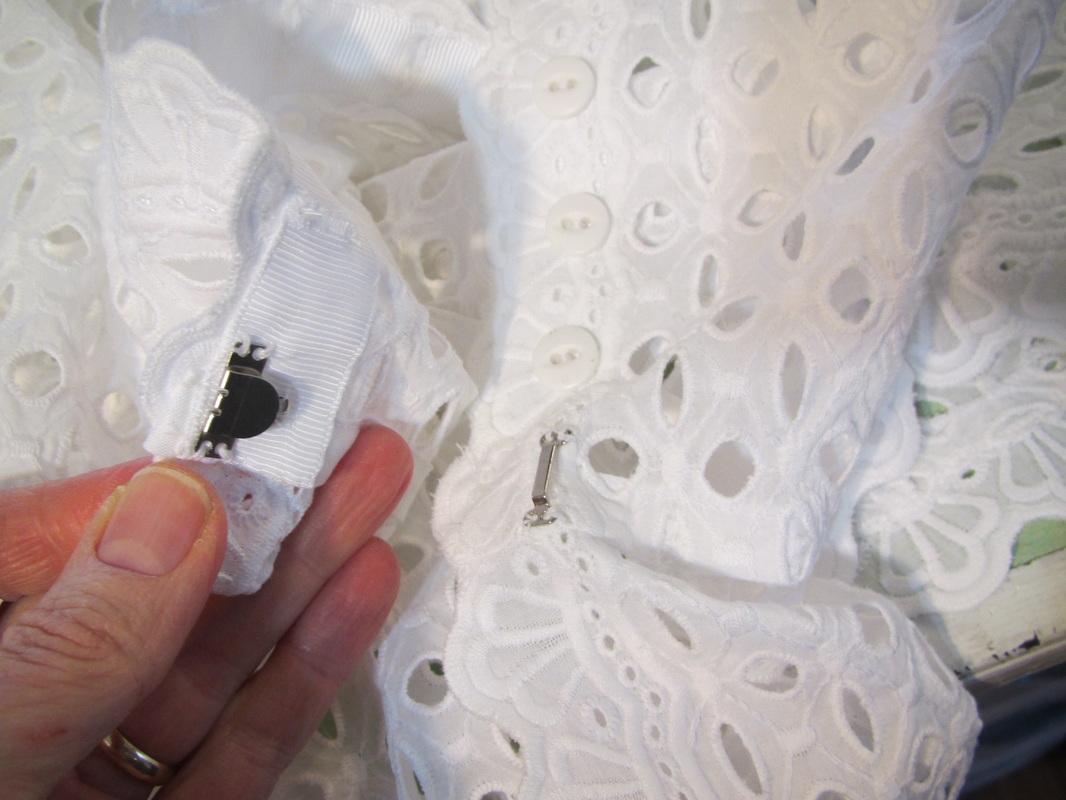
I used a hook right at the waist. 
Picture
Which leaves a bit of a gap between the last button and the waist seam. But this won't matter because I intend to wear this with a belt.
Picture
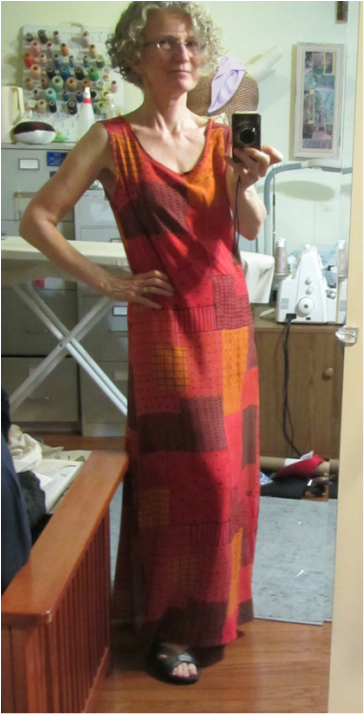
Here it is all finished ... I will amend this blog once I get a photo of me modeling it.


Waiting for warmer weather!

5 Comments

Simplicity #1460 - working with eyelet

5/25/2015

0 Comments

 
Picture
I love this pattern!
Picture
And I love this fabric. It's one of the pieces I bought two summers ago when I was in Singapore. Because it is so close to India and Japan and China, there are lots of great fabrics stores. My cousin, who lives there, knew all the places to go.

Read my blog about my shopping day there.
Picture
Anyway, this eyelet has the prettiest border and I wanted to use it to the best effect. Where ever possible, I placed it exactly on the finished edge of straight pieces.

Since the bottom of skirt on this garment is curved, the border can't be used there. So, I plan to use it up the front and at the sleeve and neck edges.

For the front I simply disregard the fold back along the front edge and place the pattern so the border lines up with the finished front edge.
Picture
I made sure to cut all my pieces in such a way that there would be long strips of the border that could be cut and appliquéd on edges where I couldn't use it intact.
Picture
This is how I got the border edge on the sleeve hem.

First I sewed the shoulders with french seams. The wholes are very large in this eyelet and I thought that would look best if the seam allowance showed through those wholes.
Picture
Then I trimmed a length of eyelet border to fit the sleeve edge.
Picture
Pinned it in place.
Picture
And zig zagged it down.
Picture
Then, trimmed away the excess in the back.
Picture
It almost looks like the border was woven there!
Picture
So, the sleeve edge and the front edge are taken care of, but the neck is going to be a challenge.

I can only use the border on straight edges ... hmmm.

Next blog with be all about figuring out the neck.
0 Comments

Wacky Bras

5/22/2015

0 Comments

 
Picture
OK ... I am still in wild, wacky and silly mode.

I have been working and working and working on stuff I can't blog about yet.  I'm exhausted and in this state, I find this kind of thing very entertaining. Hope you do, too.

I keep looking at this illustration and wonder what happens when the wearer of this breast supporter turns the upper part of her torso to look over her shoulder?
Picture
Google has a website where you can see patents. I came across this while doing bra research and have been saving it for a while.

Here is some of the description for this bra.

BREAST SUPPOETER This invention relates to new and useful improvements in breast supporters for vent the flapping of the brea sts while walking, which always is an undesired feature in. women afflicted with breasts of unusual proportions.

The spring means is however, of such a nature as to permit the stems to move downwardly when the user of the support bends over, so that the brackets will v tion with the plate is a narrower keeper plate so not bind, and thus produce discomfort.

Use this link if you want to read the entire patent.
Picture
This breast supporter is remarkably modern for being invented in 1909.

Read some of the description below.

To all whom 'it may rconcern."- 

Be 1t known that I, MADELETNE GABEAU, 

a citizen of the Republic of France, and a resident of Paris, France, have inventedV I be supportedvinamanner permitting'ad# .justmento theposition of thebreasts'without disguising theirqformand without dan-'-` 15 ger of discomfortto' the wea-rer'. v

.The support proper consistsota flexible textile coveringd suitably shaped .to more or less envelop'and protect they whole oi' each `breast-separating breast
. In order to sustain this envelop and` permit of drawing .itinore yor lessftightly 'so kas to-adjust itacross the bosom',`jeI preotherwiseat the' back.' 

And click this if you want to see the whole patent.

Picture
And, last, this one is particularly interesting because is is supporting the breasts with shoulder straps and it was made in 1893!

Here is text from this invention, which is actually written in legible English.

The object of the invention is to provide a new and improved breast supporter, which is simple and durable in construction, designed to take the place of the usual corset, and to be worn more principally with loose dresses of the so called empire style.

The improved breast supporter is provided with a plate A, made of sheet metal, cardboard or other suitable material and preferably covered with silk, canvas or other desirable fabric. The plate A is bent to conform to the shape of the human body at the front directly under the breasts, the ends of the plate terminating near the arm pits. The top edge of the plate A, is approximately of an inverted V-shape with the apex at the middle and extending between the breasts, and the sides of the V, are concaved to conform to the contour of the breasts at their bases or largest diameters.

But, I'm not so sure about wearing a bra made of sheet metal! HA!

Here is the link for the full description for this bra.

Hope to be back next week talking about fun projects.
0 Comments

Fun on Monday

5/18/2015

2 Comments

 
Picture
SO ... I had an adventure on Friday getting up to New York to visit Simplicity's offices and all I'm good for today is some funny stuff I've found on the web recently.

My adventure was ... I REALLY needed to get to Simplicity to choose costume from the ones they still have in their storage closet that will be sent to San Diego in July for a display of my work at the American Sewing Guild conference where I'm the keynote speaker!!!!

And, because of my current work and extracurricular activities I couldn't afford more that one day to do this. SOOOO, I treated myself to an Amtrak ticket to make a one day Washington to New York to Washington trip a little more bearable.  BUT, there was this little problem of a train derailing two days before my trip on the very tracks I would have been traveling on.

I wisely got a refund for my train tickets and bought bus tickets instead.

BUT, as I was getting on the bus Friday morning, the bus driver wouldn't take my ticket because in my haste buying the bus tickets, I accidentally bought them in the reverse direction. Meaning my ticket had me starting in New York instead of Washington. I went over to the stand by line I got on ... phew!  I was only going to have about 3 1/2 hours at Simplicity at best. So, if I hadn't gotten on that bus, I would have had to just give up the trip.

Anyway, in the afternoon, I then had to worry about getting on to the return bus, which after a fair amount of trouble, I did. But, I was so tired when I got back to Washington, I got on the Metro to go home, in the wrong direction ... grrr. Two stops later got off, got back on in the correct direction. My wonderful hubby picked me up at out Metro stop.

So, that said, a couple more silly things.
Picture
We've all been there.
Picture
And, I don't know if all of you are as confused by the international garment care symbols as I am. But this will set you straight.

2 Comments

Finishing my May Project - Simplicity #1611

5/13/2015

3 Comments

 
Picture
Oh, I think this dress is going to be worn a lot this summer! 

AND it was pretty quick to make. After so much handing sewing for my somewhat insane quilt project, I am going sew this entire dress by machine.

Click on this to read about cutting the dress out.
Picture
Sometimes you know a dress was meant to be ... I had, in my zipper box, the perfect color of invisible zipper!  


A good metal invisible zipper foot seems expensive, but they are SO much better than the cheap blue plastic kind.  Do they even still sell the blue plastic kind?
Picture
The seam with the zipper looks like it's just the design of the fabric ... cool.
Picture
I assembled the pieces and tried it on.  Perfect! ... so lucky this time. Well, it's not supposed to be very fitted.
Picture
The pattern has a piece to cut bias for the neck and armhole. There is a 1/4" seam allowance around the neck and armhole, but I don't want these openings to get any larger.  I don't want my bra straps to show and I don't want the armhole any lower, so instead of pressing the bias to the inside of the neck and armhole like a facing, I'm going to wrap the bias around these edges which will make a nice finished edge.
Picture
BUT ... ha ha ... I was able to easily pull the dress off without unzipping the zipper, so why have it?  It makes the back seam really stiff. So, away with it ... I just picked it out and sewed up the back with a regular seam.

Wished I would have know that BEFORE I put in the zipper. Oh well.
Picture
Anyway, back to the bias finish on the neck and armhole edge ... 

To make a 1/4" edge I cut the bias 1 1/4" wide. A wrap around edge like that usually needs four times the finished width, but since I'm making this dress all with machine sewing, I want to "stitch in the ditch" and a little extra is needed to do that.
Picture
After the bias is sewn on with a 1/4" seam I wrap it around the edge, folding it in the back and pin it in preparation for machine stitching.
Picture
This is what the back looks like.
Picture
I'm stitching right smack in the middle of the seam (aka "the ditch"), pulling the pins just before I reach them.
Picture
This is what it looks like from the outside ...
Picture
and the inside.
Picture
I'm also going to hem this dress by machine. If you don't know how to use the blind hemming feature on your sewing machine ... check out the Youtube video at the bottom of my blog.
Picture
This is what it looks like from the inside.
Picture
And outside, not bad. And, it looks even better in the sections of fabric that match the thread better.


DONE!
3 Comments

Starting My May Project - Simplicity #1611

5/11/2015

1 Comment

 
Picture
Time for my May project.  I'm actually working on a dress for someone else right now, too. But, I'm not sure if I will blog about it ... need to ask permission.
Picture
Picture
One of the points of my monthly projects was to use up some of the really nice fabrics I have in my stash, but ... this is not from my stash. It's new. I fell in love it when I was shopping for one of my Simplicity projects. Fabric shopping can be dangerous.  This is from fashionfabricsclub.com.
It is 100% rayon. Rayon is a comfortable fabric for a summer dress and it packs well so I would like to be able to take it traveling and be able to wash it. So I really needed to preshrink it. 
Picture
I completely wet it and hung it over a chair on my front porch to let it air dry. I plan to air dry it every time I wash it in the future.
Picture
Then pressed it. I want this to be an easy wearing dress and don't mind a few wrinkles.
Picture
This fabric is so interesting I chose the simplest style. I used to have a similar rayon dress in blue tones that was a summer staple for me.


Miss it!
Picture
The fit of this dress shouldn't be too much of a problem and since I've been sewing for myself a lot recently, I have a sense for what size to make. So after checking the finished garment measurements I decided I would cut a size 12 above the waist and a size 14 below. To do this I drew a gradual line at the side seam from the 12 at the bust line to the 14 at the hip for both the front and back patterns.
Picture
OH, and another thing I checked before cutting was the measurement from the shoulder seam to the bust point.  I often have to lower the dart but this time my measurement and the pattern matched up and the dart didn't need to be changed.


Sewing on Wednesday.
1 Comment

Quilt Progress #2

5/7/2015

2 Comments

 
Picture
Here is my monthly quilt update.

Above is the last photo I will be able to take of a group of inner circles. There are 13 finished out of 64 (I think) needed.
Picture
This may be the only quilt, or anything else, I ever sew completely by hand, but as someone who loves to sew, I wanted to experience this at least this one time.
Picture
The connecting fabrics I ordered arrived (talked about this in progress blog #1), so I've started the golden rings that will frame each of these inner circles.

I think I would loose my mind if I waited to do all the gold fabric at the same time.
Picture
It takes 18 gold hexagons to go around each inner circle. I'm alternating cutting and sewing. Actually trying to cut twice as much as I sew in order to make lots of extra cut sets to take on the road. I see myself doing a lot of this hand sewing away from home.
Picture
Looks like a honey comb ...
Picture
I ordered 8 1/2 yards of this ... a queen quilt is big!
Picture
This black dotted fabric is what I THOUGHT I wanted to make up the single row of hexagons that will connect everything ... but Fabric.com messed up. I ordered 6 1/2 yards and they sent me only a half yard.  I called and just asked for a refund, which they easily gave me.

Maybe this a good thing. I still really am not sure what I want there. A solid fabric might be a better choice. I can make a better choice when more of the circles are finished!
2 Comments

Pattern 1122 - Girl's skirts - organized sewing

5/4/2015

2 Comments

 
Picture
Today, I'm going to show you the basics of sewing these tulle skirts. It really is very simple sewing, but requires a little organization.

It is SO, SO helpful to make labels to pin to your fabric as you are cutting so you don't get all the very similar looking parts mixed up. And, as you can see, I don't take the labels off even after I start sewing the pieces together.


Read my blog about cutting from last week.
Picture
I took photos while sewing the pink and green skirts and will alternate between these two skirts while I show the sewing steps. 

I try to take enough photos while I'm working, but often get very intent on finishing whatever I'm sewing on time, that I don't always take as many photos as I should. So, between the pink and green skirts I have enough to explain things.
Picture
Tulle is so sheer and there is no right or wrong side. If I am not careful I often end up with seam allowances facing inward AND outward on a multi paneled skirt. So, to make sure that all the seam allowances are ALL facing inward, I pin little safety pins on every piece to designate what I have decided to be the right side of the fabric.
Picture
I can hardly see the fabric BUT I can see those safety pins!
Picture
So here I have my first layer all assembled with one row of machine gathering ready to pull up. I only use one line of gathering stitches when sewing tulle for two reasons. #1 with a tulle skirt there always are SO many yards and yards to gather, I don't have the patience to run two rows of gathering and I don't want to waste so much thread. Reason #2 if you cut each length across the grain, the gathers on tulle don't get twisted with a single row of gathers like happens with other fabrics, so two rows aren't really necessary.
Picture
Anyway, this first layer will be sewn to the lower edge of the inner yoke. To equally distribute the fullness of the tulle, I divide both the tulle and inner yoke into 4th's and then 8th's, matching up these divisions and pinning them together ...
Picture
Pull the gathering stitches to fit ...
Picture
and stitch down by machine.
Picture
To get the full effect of the lightness and airiness of tulle, each layer MUST be gathered and applied one by one.

So, here is the second layer divided and pinned in place ready to have the gathering threads pulled up.
Picture
AND, switching to the pink skirt ...

The second layer is all gathered and ready to sew. 
Picture
Now it's time to sew on the main part of the skirt lining, which is cut as a circle skirt. The gathered tulle gets sandwiched between the inner yoke and this circular skirt.
Picture
This is what it looks like from the inside when stitched with the seam finished.
Picture
After stitching the seam but BEFORE I serged it, I opened up the seam and trimmed away some of the tulle that is all bunch up between the yoke and circle skirt to reduce bulk.
Picture
And this is what it looks like from the outside. That strip of pink fabric above the tulle is the inner yoke which now has the circular skirt lining sewn to it.
Picture
Now the two layers of tulle can be gathered and sewn to the upper edge of this inner yoke in the same manner the tulle was sewn to the lower edge.
Picture
The photo shows me gathering and pinning the second of the two layers of tulle to the upper edge of the inner yoke, in preparation for sewing.
Picture
OK ... back to the green skirt and time for the waistband, which is a casing for elastic.
Picture
After this waistband is machine stitched, I again reduce bulk by trimming away fabrics that are between the inner and outer most layers of the seam before finishing with the serger.
Picture
Then the elastic can be inserted into the waistband.


All that is left, is to hem the inner skirt lining and you are done!
2 Comments
<<Previous

    From Andrea 

    These are the everyday sewing adventures of a designer and commercial pattern maker. 

    Archives

    April 2017
    March 2017
    February 2017
    July 2016
    June 2016
    May 2016
    April 2016
    March 2016
    February 2016
    January 2016
    December 2015
    November 2015
    October 2015
    September 2015
    August 2015
    July 2015
    June 2015
    May 2015
    April 2015
    March 2015
    February 2015
    January 2015
    December 2014
    November 2014
    October 2014
    September 2014
    August 2014
    July 2014
    June 2014
    May 2014
    April 2014
    March 2014
    February 2014
    January 2014
    December 2013
    November 2013
    October 2013
    September 2013
    August 2013
    July 2013
    June 2013
    May 2013

    Archives by Subject

    To search for blog posts in specific categories, use the drop down menu above by hovering over the word "Blog"

    Enter your email address:

    Delivered by FeedBurner

    RSS Feed

    Andrea Schewe participates in Amazon's associates program.