
The motifs are such an important part of the dresses from Frozen. And they are a headache, too. But, I think this one is a little easier than Elsa's Coronation gown was.
This is part 2 of a 5 part tutorial. Click this to read part 1 about cutting.
This is part 2 of a 5 part tutorial. Click this to read part 1 about cutting.
| anna_front_bodice.docx |
| annas_skirt_motifs.docx |
Above are the motifs I've modified slightly to make easier to cut. I've combined some, so there aren't as many separate pieces. They will work for all the sizes. Just follow these instructions.
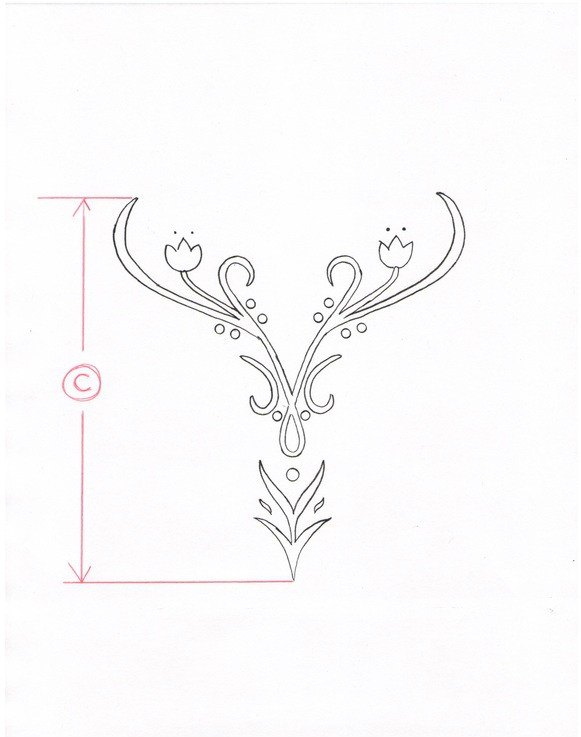
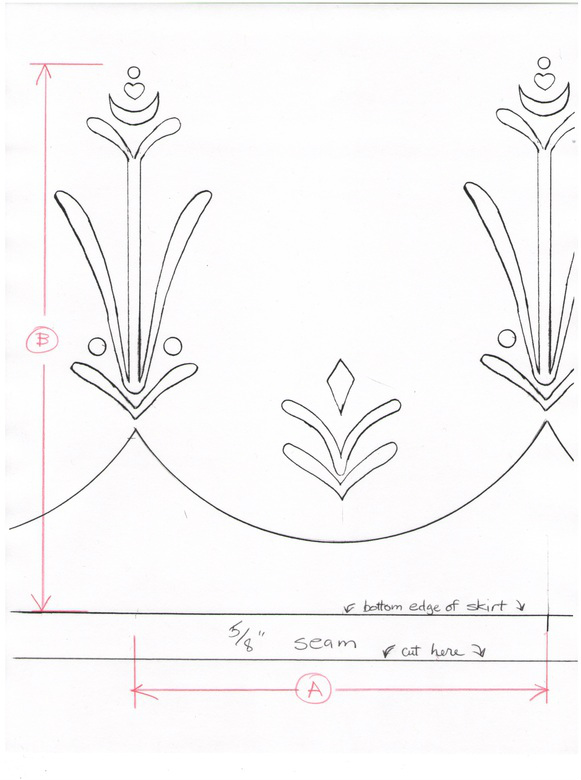
There is one measurement for the bodice motif (C) and two measurements for the skirt motif (A & B). These motifs will most likely need resizing.
These are the measurements I recommend for these dress sizes, given in decimals so you can do the enlarging calculations more easily .
Child 3 - 4: (C) 5.62", (B) 8", (A), 6"
Child 5 - 6: (C) 5.62", (B) 9", (A), 7"
Girl 7 - 8: (C) 6.5", (B) 11", (A), 8.25"
Girl 10 - 14: (C) 7.25", (B) 11.75", (A), 8.75"
Adult: (C) 9", (B) 13", (A), 9.5"
To figure out what percentage to enlarge the motifs. Measure what the A, B, and C are on after the artwork is printed out. Then figure out what size you want those measurements to be and go to this on line Proportion Calculator. There you will find a calculation with 4 boxes.
Fill these boxes in as follows using decimals for any fractions. In the upper left box, put in the size your print out measures, in the box just below fill in the number (100) which stands for one hundred percent. Then in the upper right box, put in the size you want the motif to be. Hit the word "calculate" and the answer will be the percentage amount the artwork needs to be enlarged. This number will probably have to be rounded to reduce the number of decimal points. Enter this number at a copy machine that enlarges and reduces where it asks for percentages to get a copy of the artwork in the size you need.
I am planning to make 10 repetitions of the skirt motif.
It is best to put the motifs on the skirt first, starting at the back. So, by the time you work your way around to the front and especially when you do the bodice motif, you will be good a this.
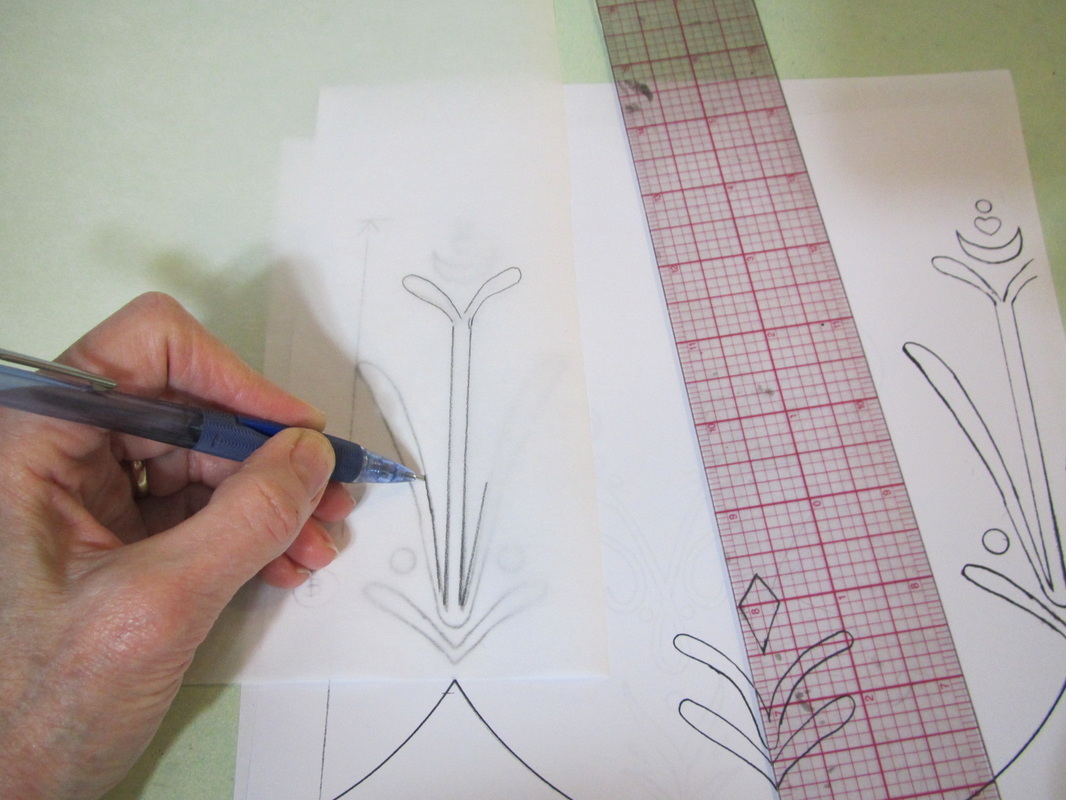
After the artwork has been made the size you need and that probably means some of it is on more than one piece of paper, the first thing to do is lay the paper backed fusible webbing over the resized artwork and trace out as many of all the different motifs needed. Group them by color and squeeze then in as closely as possible to save webbing and fabric.
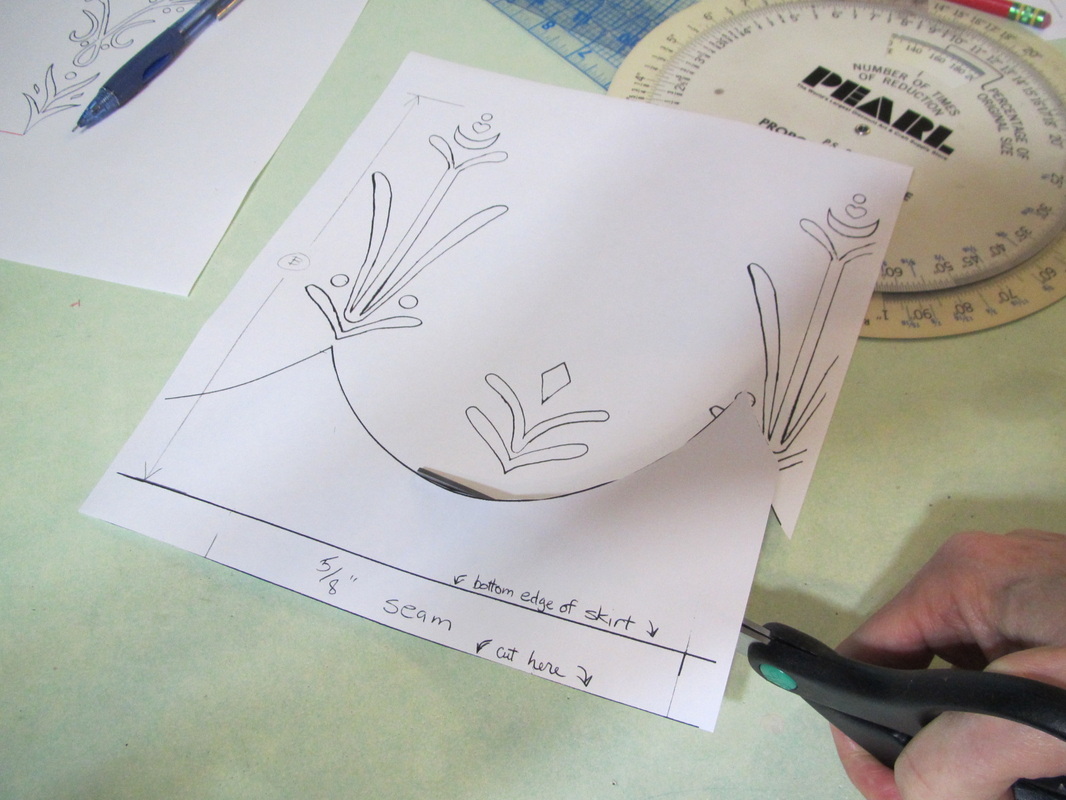
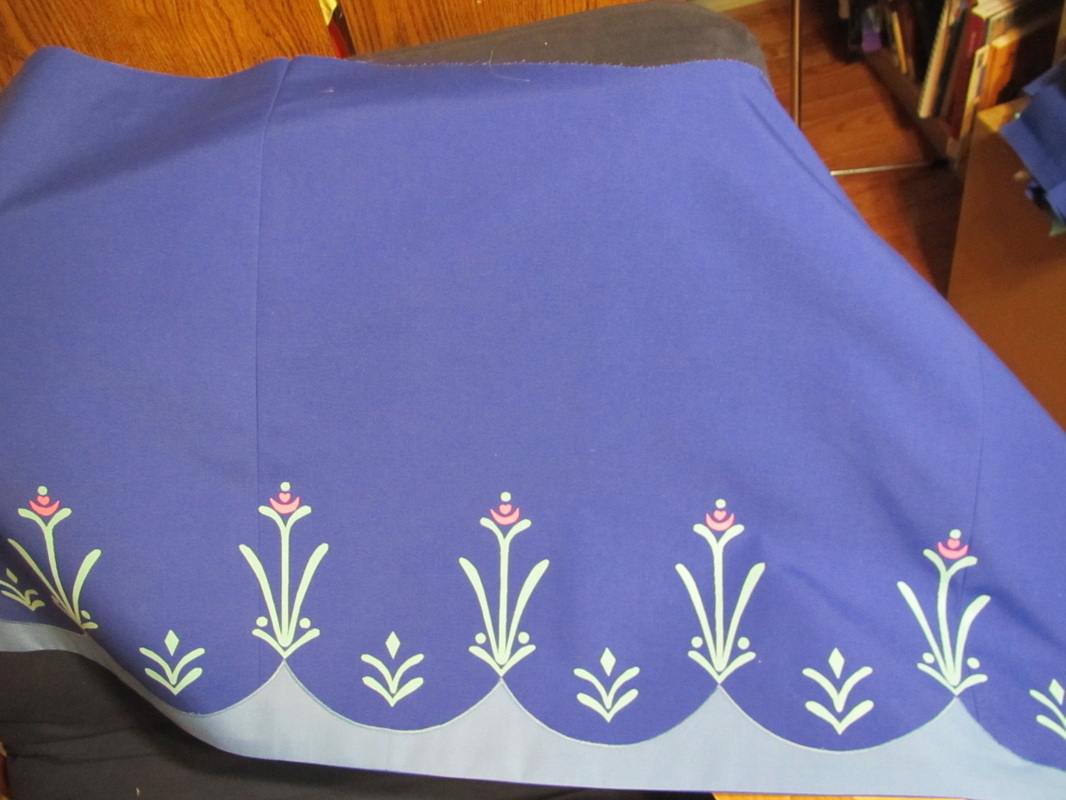
After all the motifs are traced out, cut out the scalloped section of the skirt motif pattern including the 5/8" seam allowance on the bottom. Now, most of you will have enlarged this pattern, so that means the 5/8" will much larger than 5/8", too. Use a ruler and redraw it so it is 5/8" again.
Use this pattern to draw out as much scalloped edging as needed for the bottom of the skirt. It will have to be pieced.
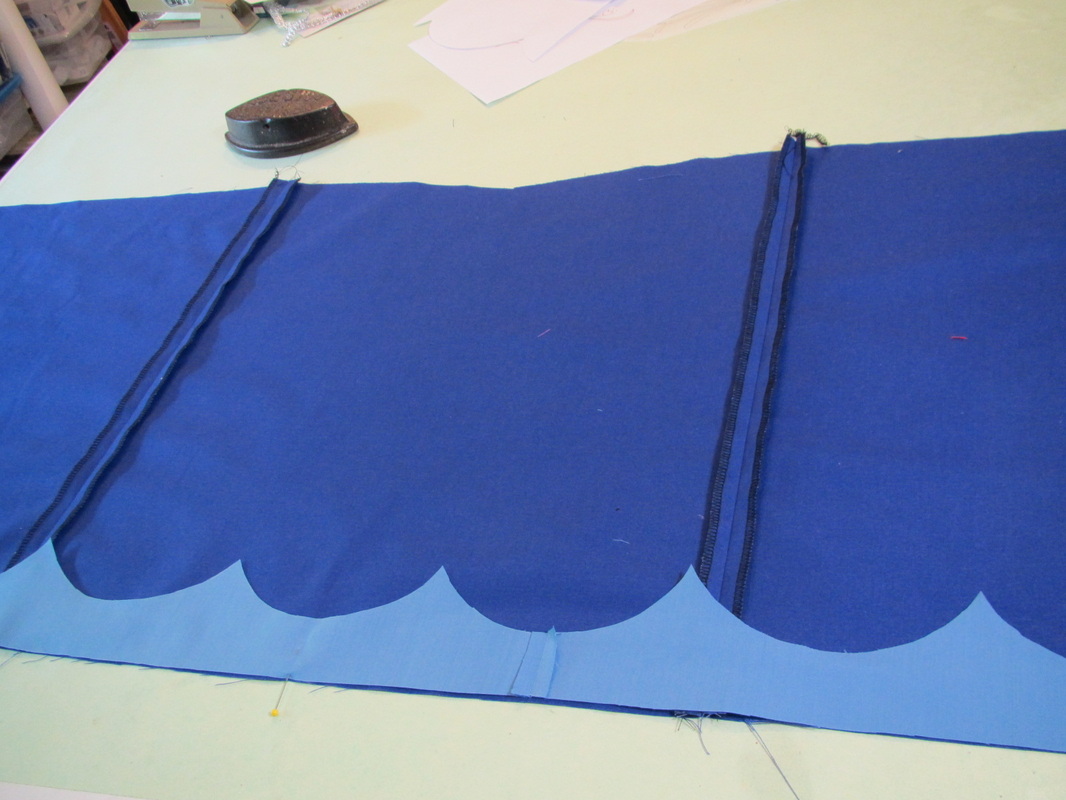
Then assemble the skirt and assemble the scalloped border. Lay the right side of the scalloped border against the wrong side of the skirt. Make sure the center of the low point of the center scallop is exactly in the center front of the skirt.

Stitch these two pieces together along the bottom edge with a 5/8" seam. Press around so the outside of the scallops are over the outside of the skirt. Pin well!
When I was ready to sew, there were many more pins than you see in this photo.
When I was ready to sew, there were many more pins than you see in this photo.
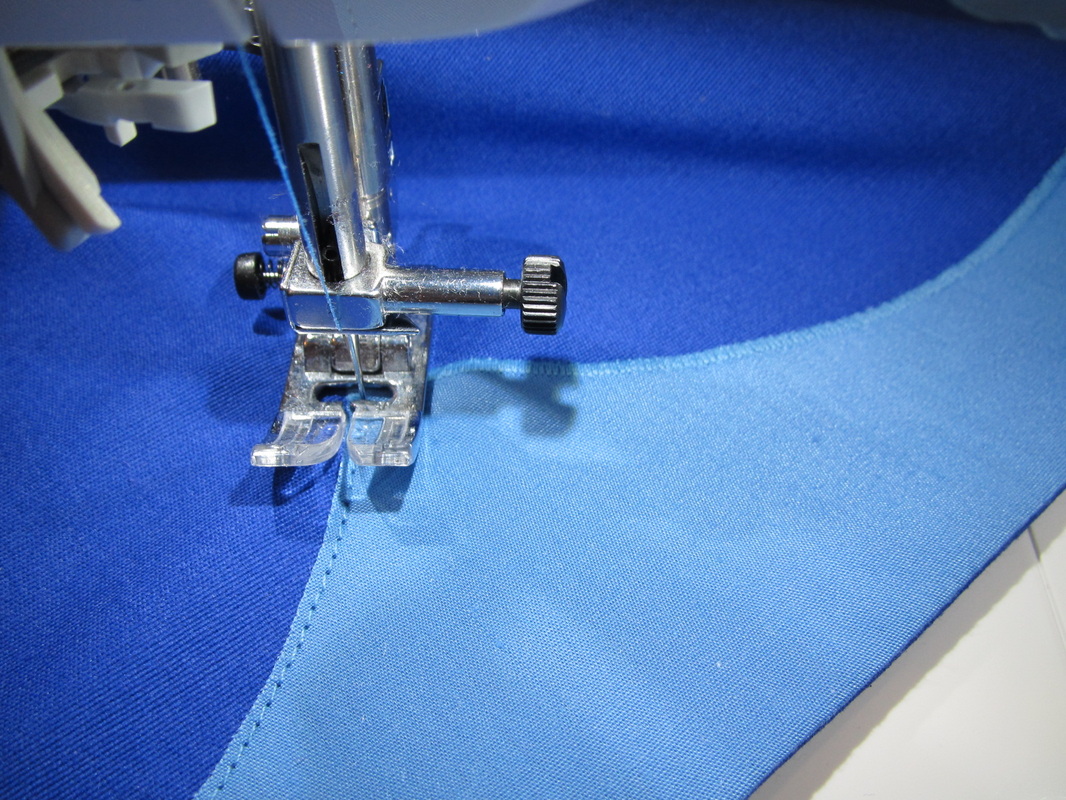
First straight stitch very close to the edge and then go back a second time and go over the straight stitching and cut edge with a narrow close zig zag satin stitch.
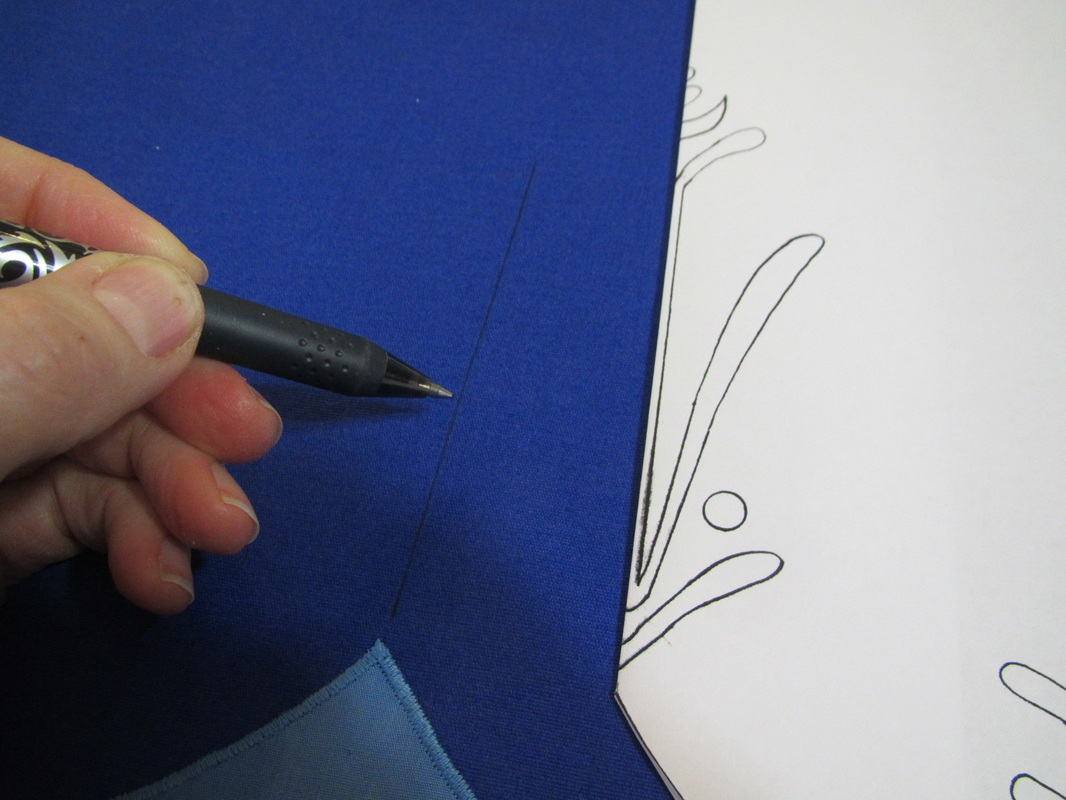
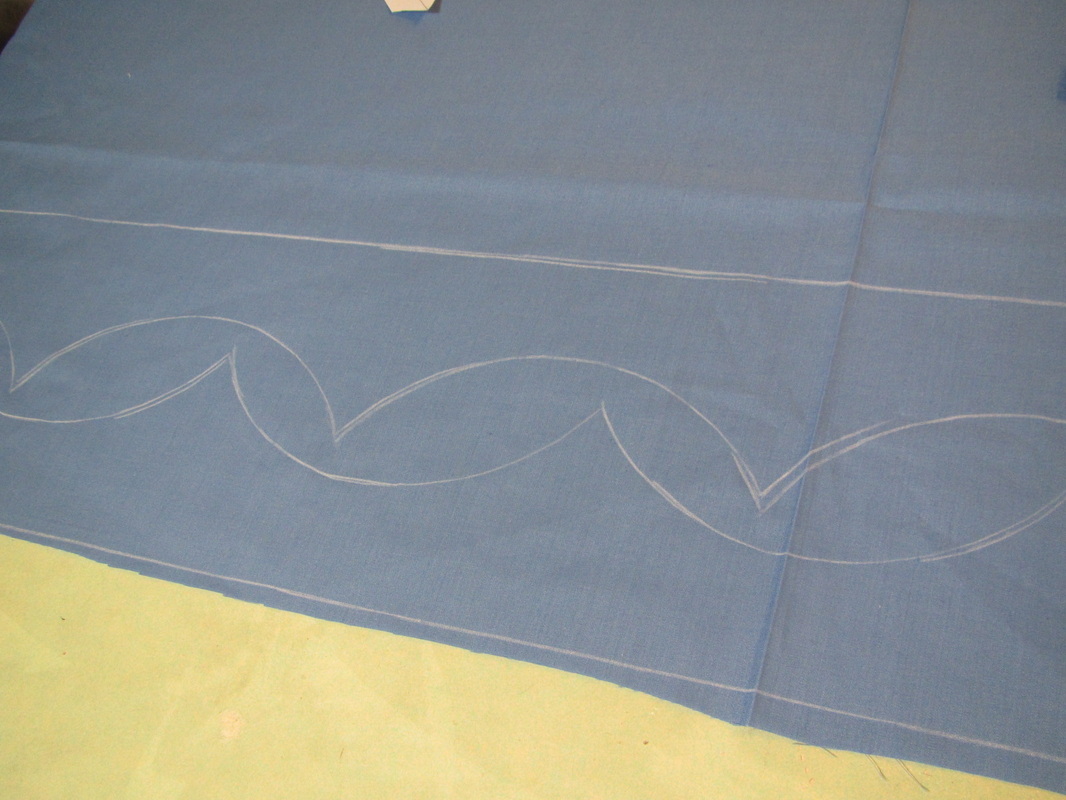
To get the motifs straight, draw vertical lines straight up from the points of each scallop.
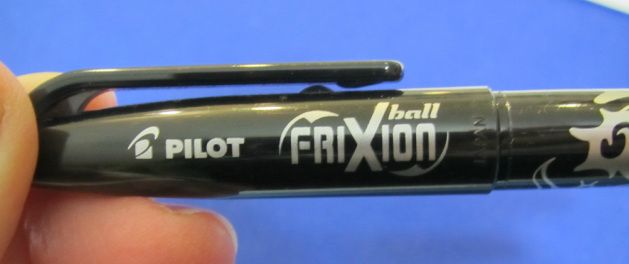
I like to use a Frixion pen by Pilot. Heat makes the ink disappear. So, when you iron, the marks go away. But, I still mark as little as possible.
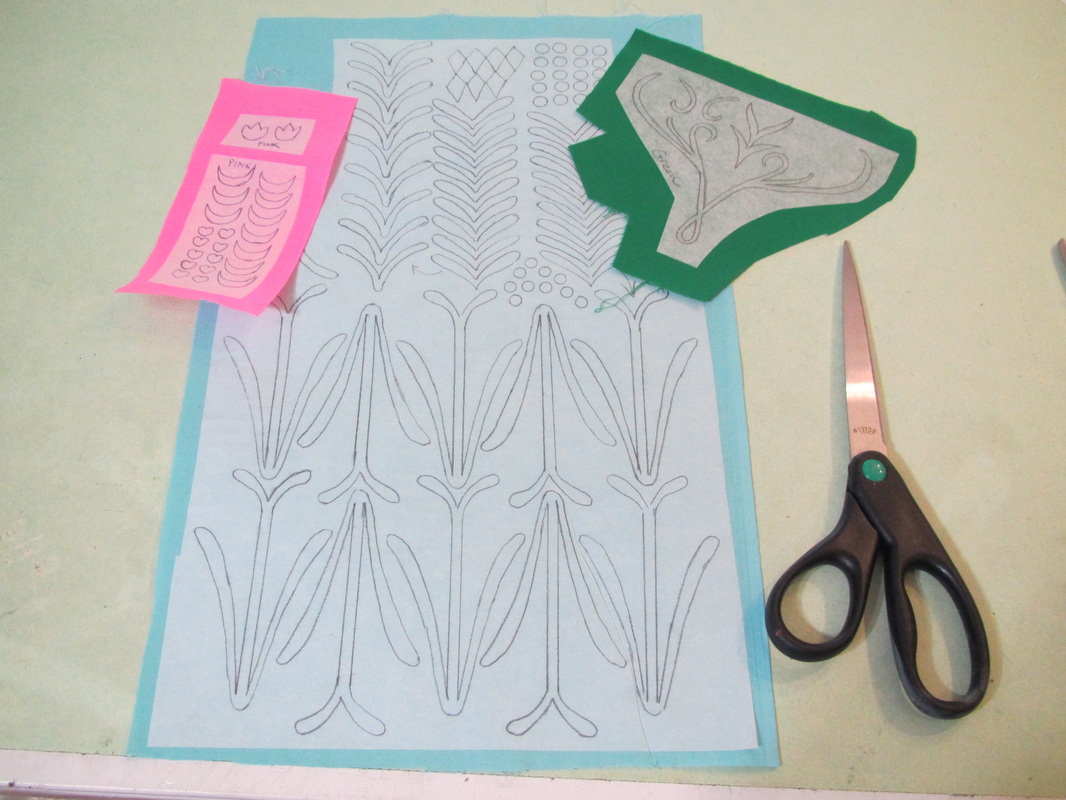
Now it's time to fuse all the sheets of traced motifs onto the fabric. Follow the instructions for the brand of webbing you are using.
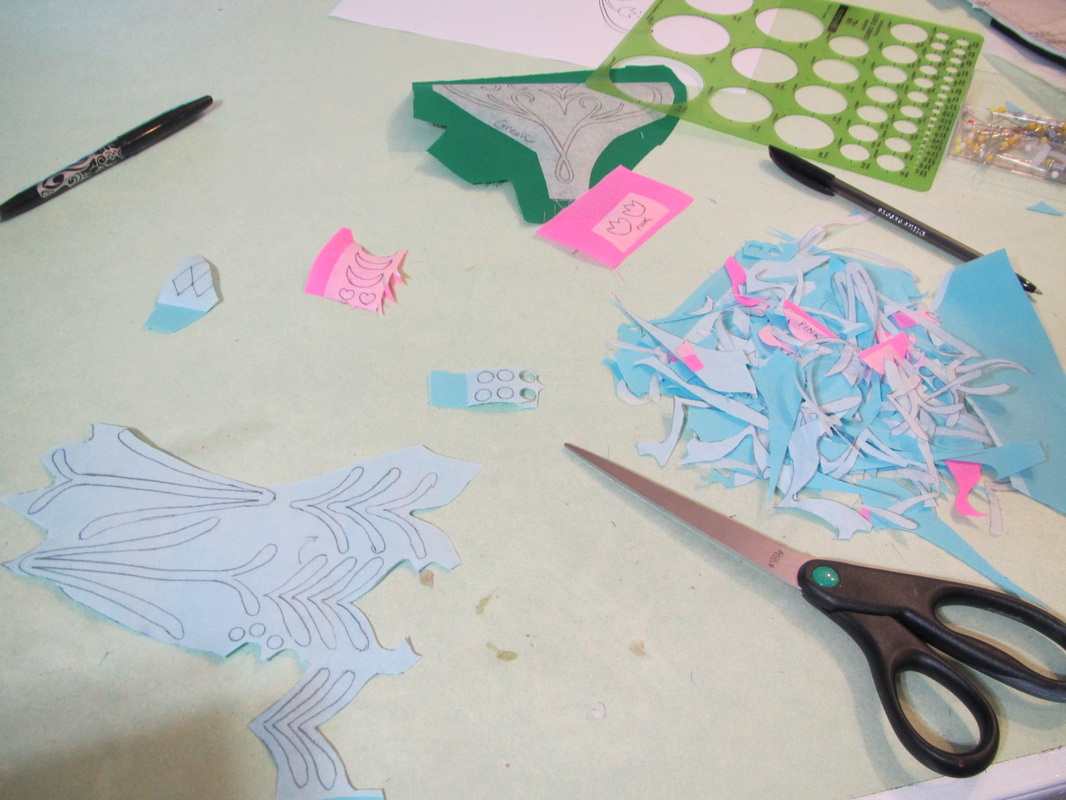
And, you can start cutting out the motifs. I like to only cut a few at a time. I find it less tedious and there is less of a chance tiny pieces will get lost.
And, you can start cutting out the motifs. I like to only cut a few at a time. I find it less tedious and there is less of a chance tiny pieces will get lost.
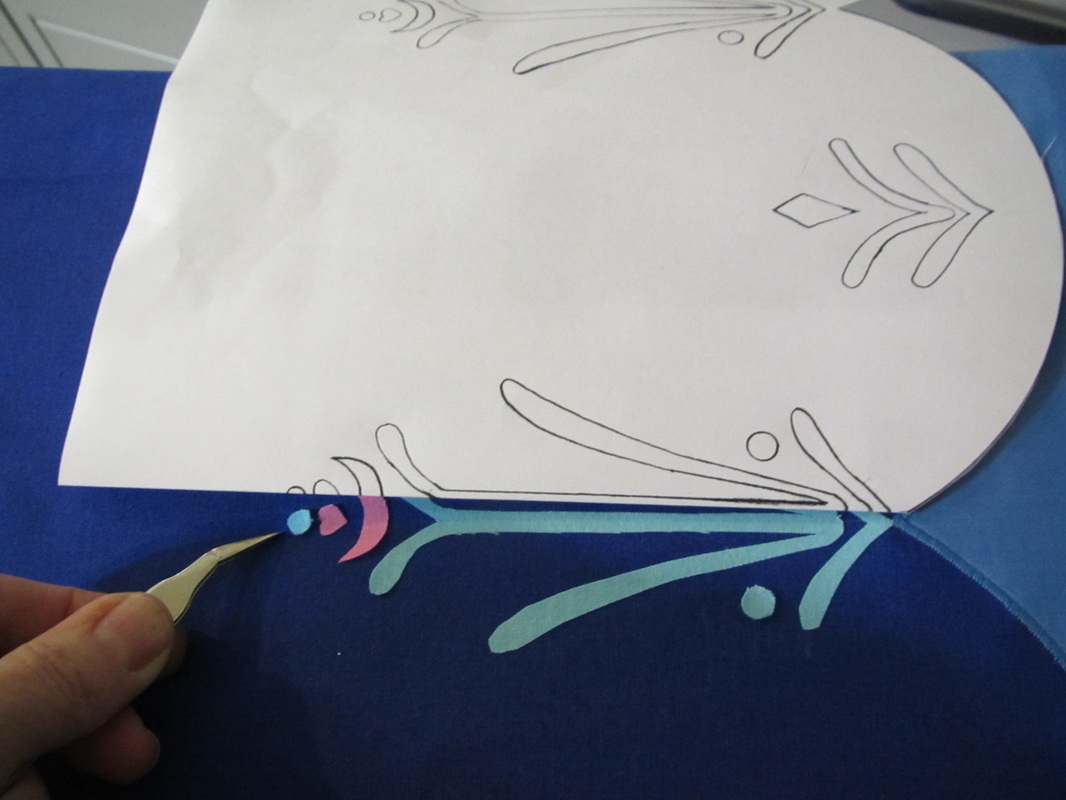
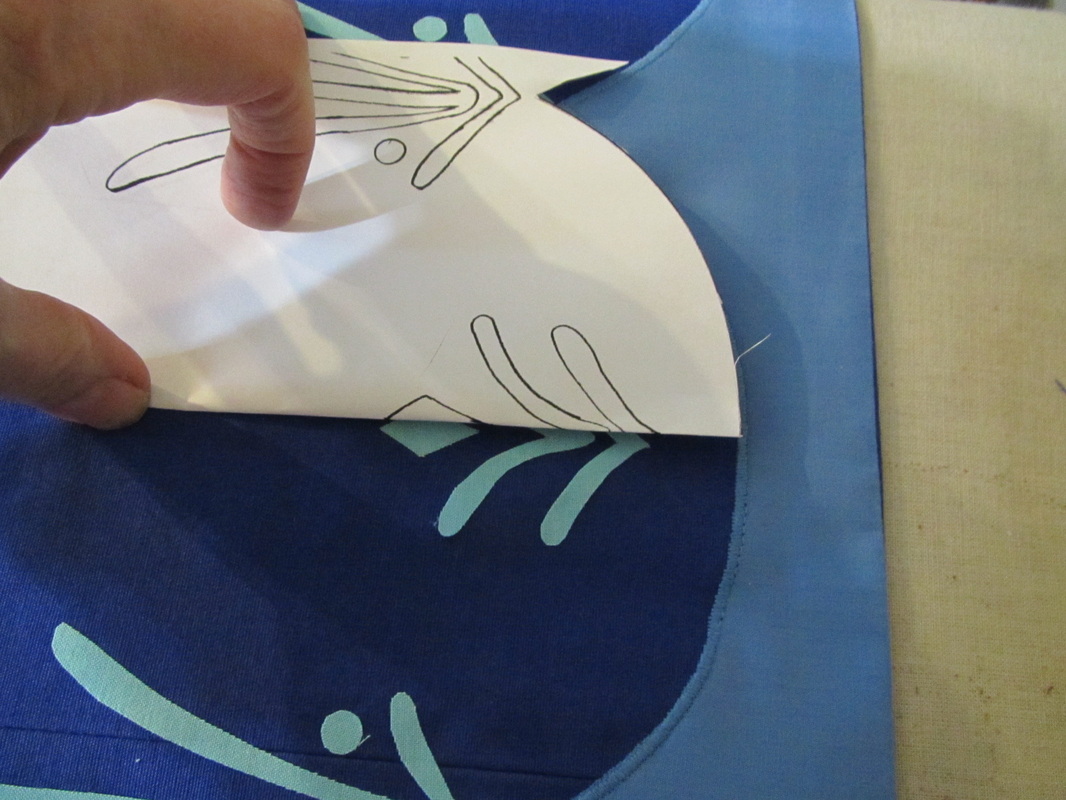
I like to fold the paper with the motif printed on it to use as a guide to correctly space all the little cut out pieces. I find tweezers help with small pieces. They tend to stick to my fingers otherwise.
Fuse the pieces on with your iron following the instructions for the fusible webbing you are using.
Fuse the pieces on with your iron following the instructions for the fusible webbing you are using.
My method is to do the motifs on two neighboring points and then go back and do the smaller motif in the dip of the scallop. Measuring to make sure it is placed exactly in-between the other two motifs.
Almost done ... phew. I will not do the very back motif until the dress is finished.
Time for the bodice.
Time for the bodice.
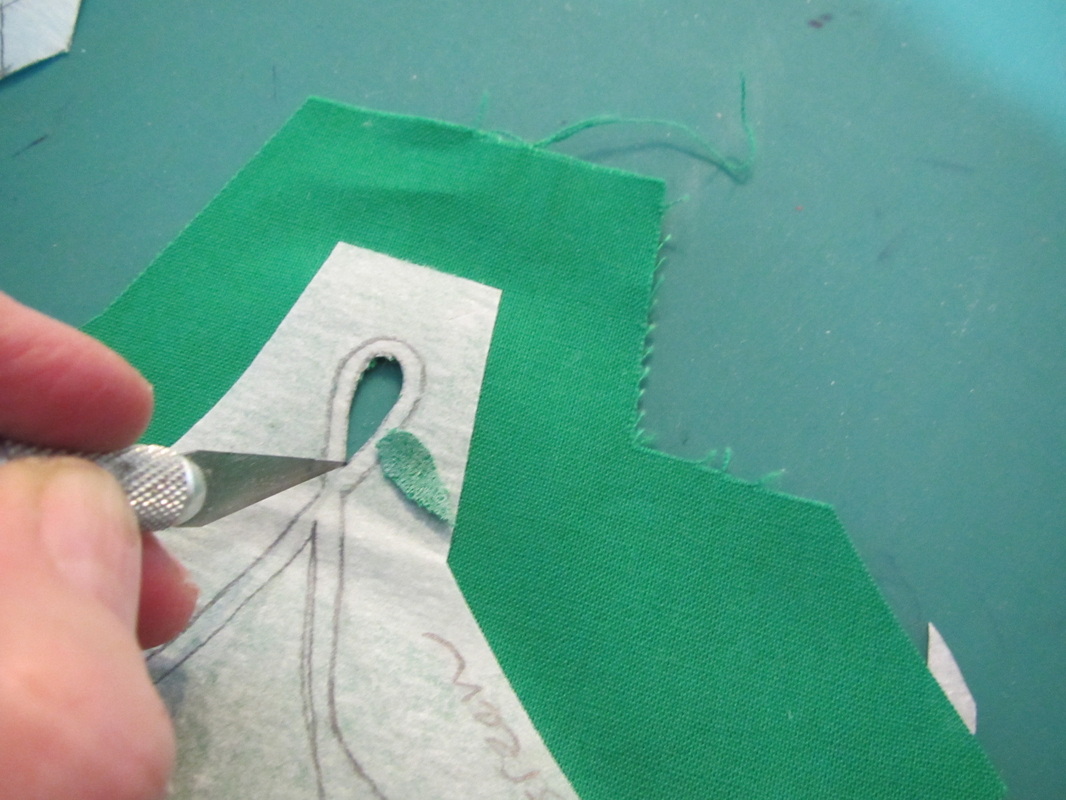
Even though exact knives are not my favorite way to cut, it's the best way to cut that little hole in the bottom of the bodice motif. The rest I will cut with scissors.
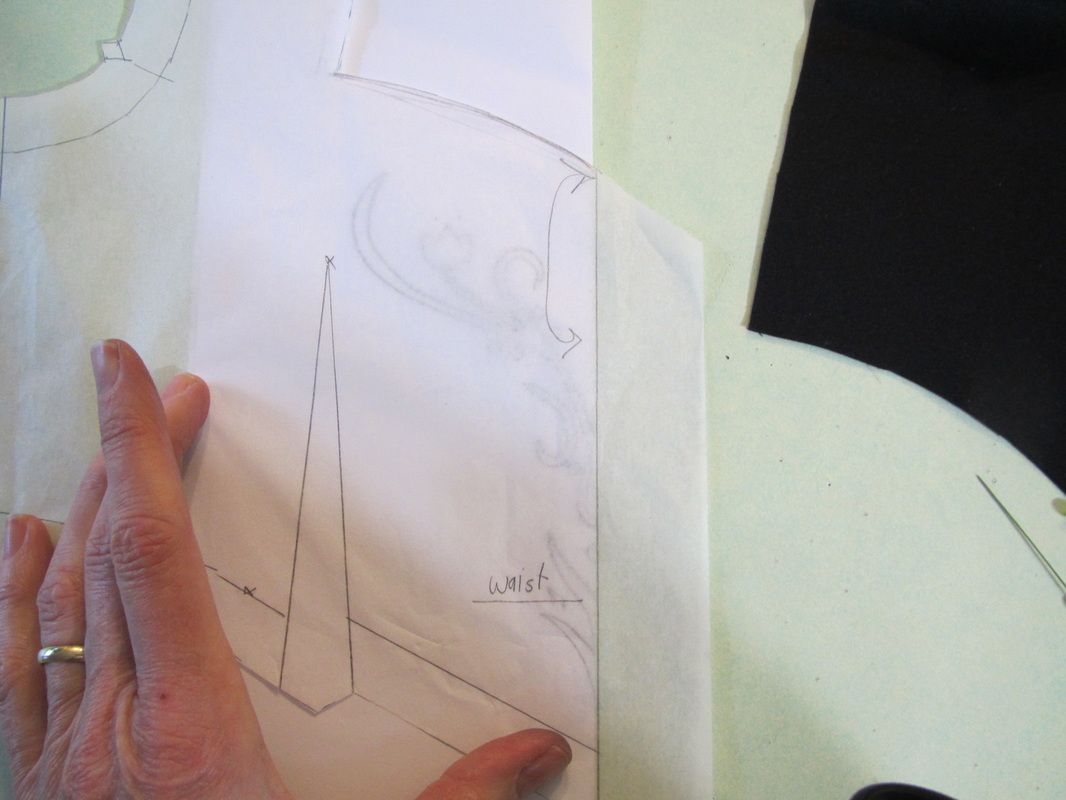
I lay the special pattern I made over the printout of the bodice motif, to make sure the motif will not end up inside a dart. If it looks like that will happen for you, sew the darts first.
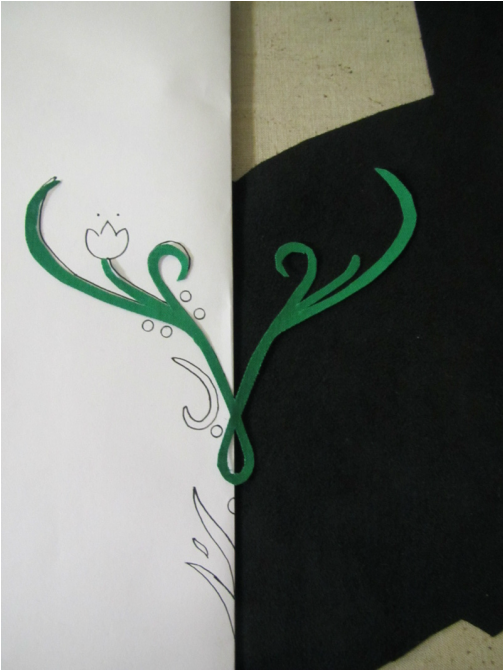
Again, using the folded print out of the motif is my favorite way to properly place the motif.
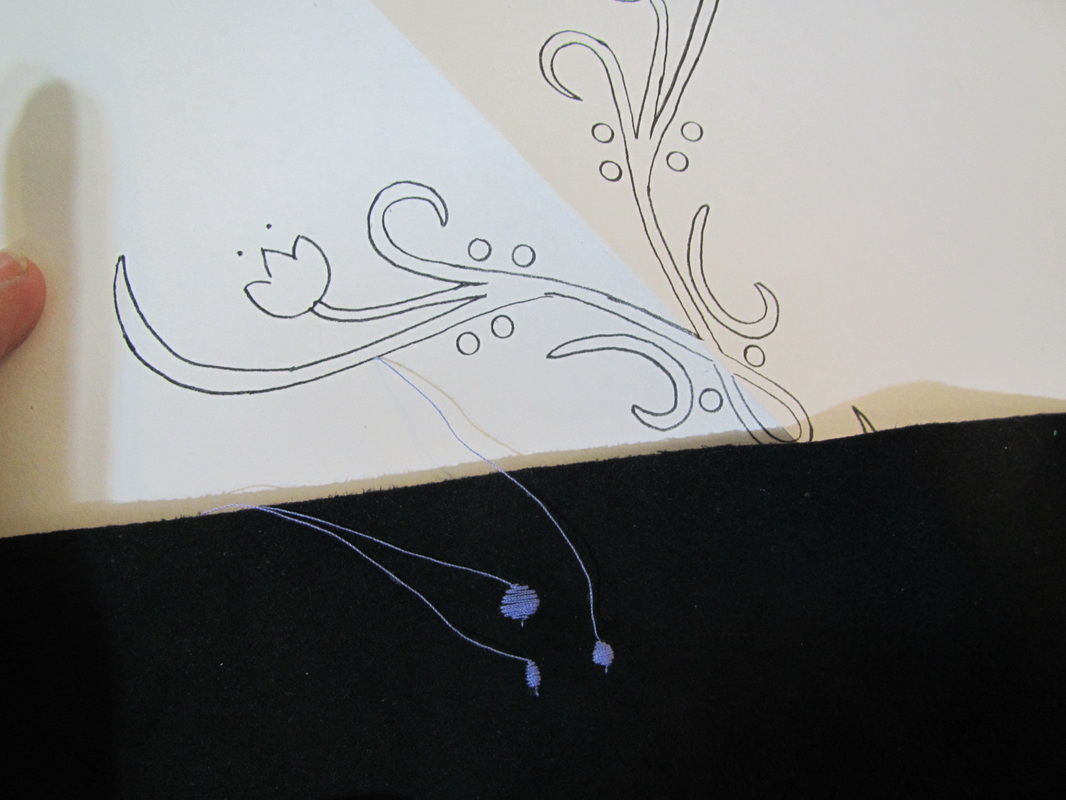
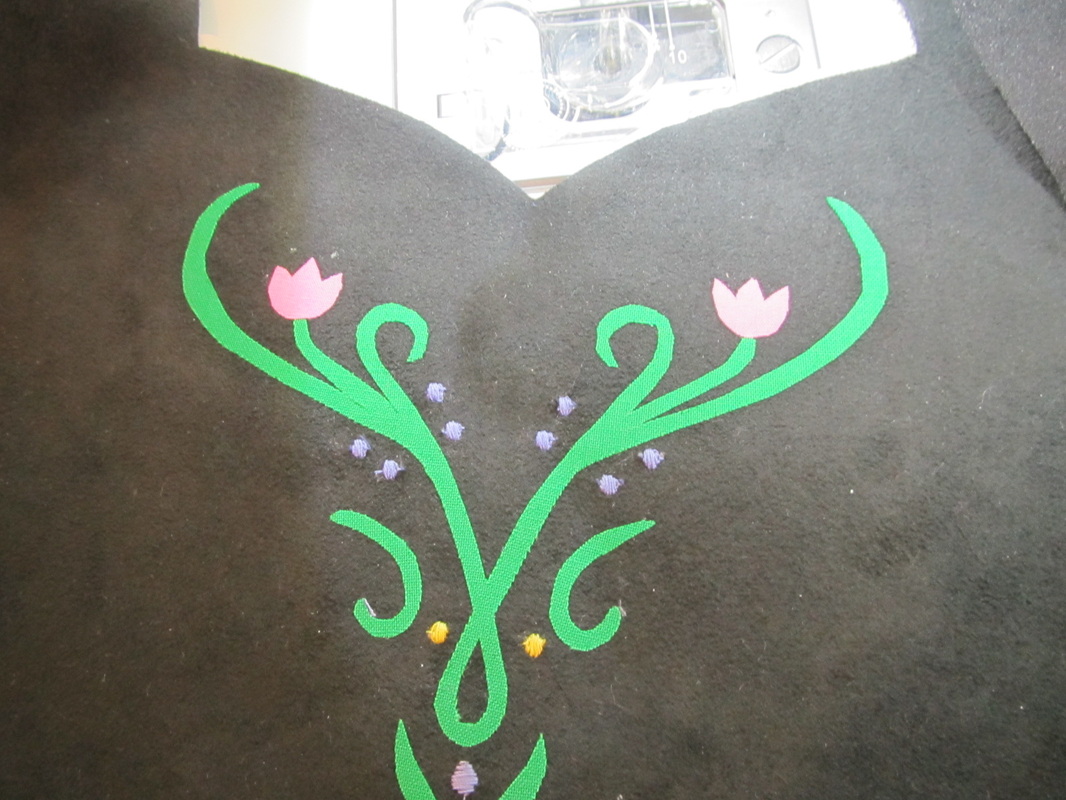
This bodice motif gets TINY dots. Too tiny to make with fabric and fusible webbing. I was going to do then with embroidery thread but then noticed my new Juki (that I LOVE!) makes perfect satin stitch dots!
So that is what I did. But, embroidering dots is also a good method.
So that is what I did. But, embroidering dots is also a good method.
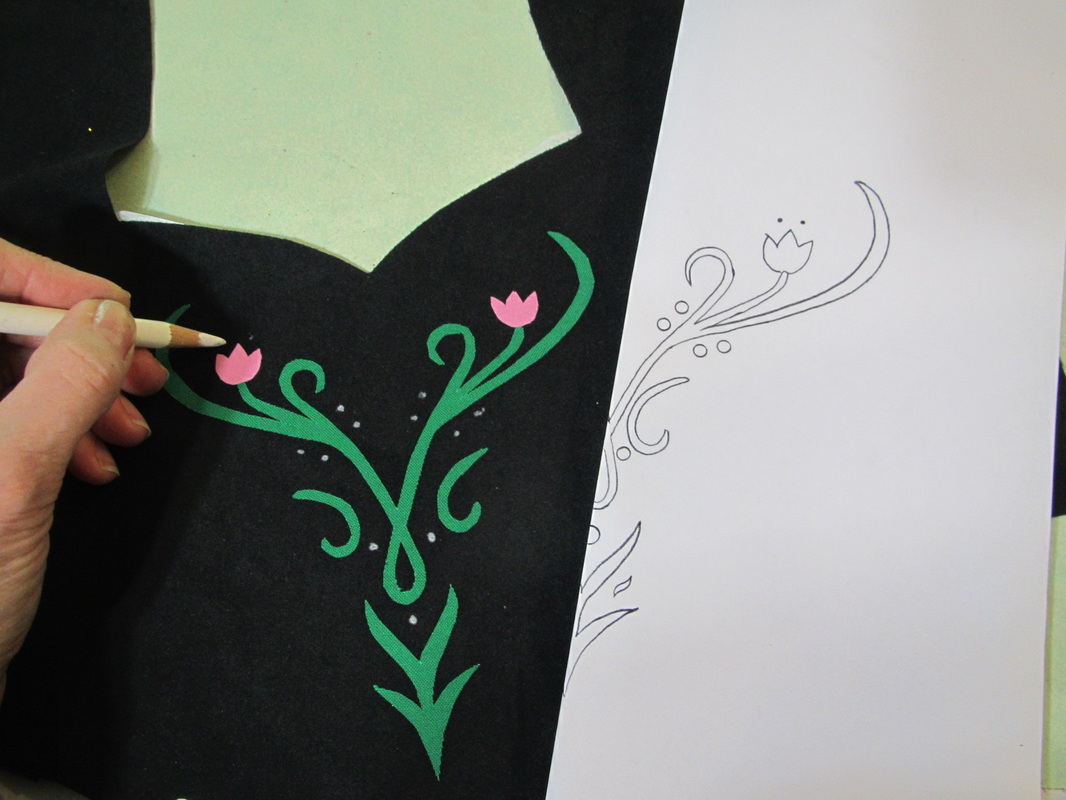
I marked them with a white pencil and sewed them with my machine.
Tomorrow, sewing the dress, which will include darting out the fullness at the top of the skirt to reduce the gathers at the waist.
 RSS Feed