Andrea Schewe Design
  • Home
  • Costumes
    • Reader's Gallery
    • Fantasy Costumes
    • Theatrical
    • Historic >
      • Easier to make
    • International
    • Costumes for Kid's and Babies
  • Crafts
    • Home Decor >
      • Pillows
    • Fashion Accessories
    • Doll Clothes
    • For Kids and Babies
  • Blog
    • Past Blogs by subject >
      • My patterns by number
      • Sewing basics
      • Personal sewing Projects
      • Fashion History
      • Fun and funny stuff
      • Guest Bloggers
      • Crafts and Home Dec
  • Links
  • Contact

Pattern #1347 - Fantasy Dresses - hardware

6/30/2014

2 Comments

 
Picture
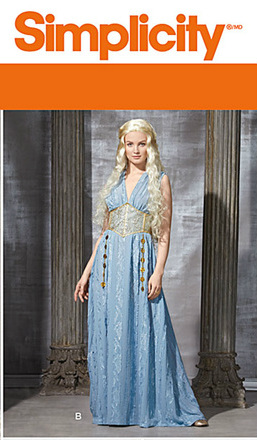
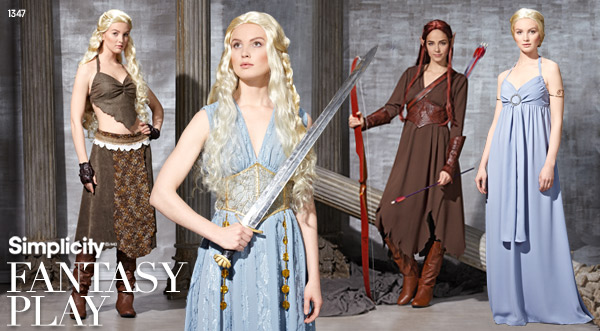
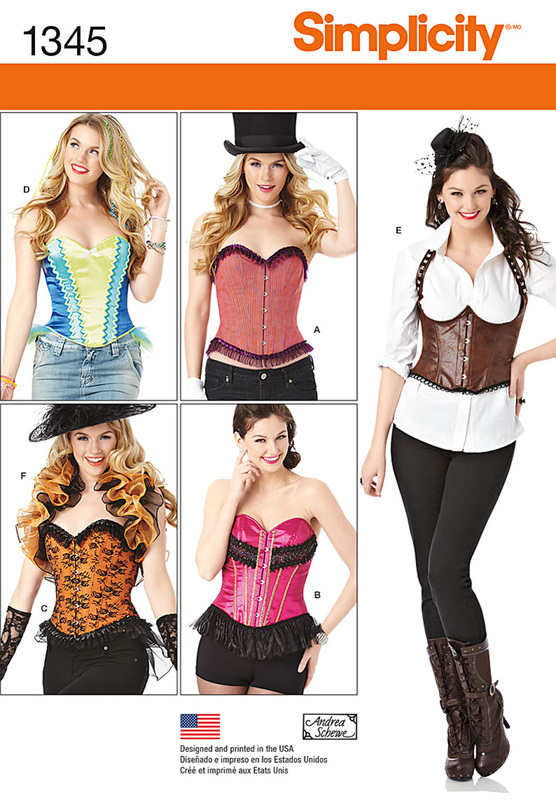
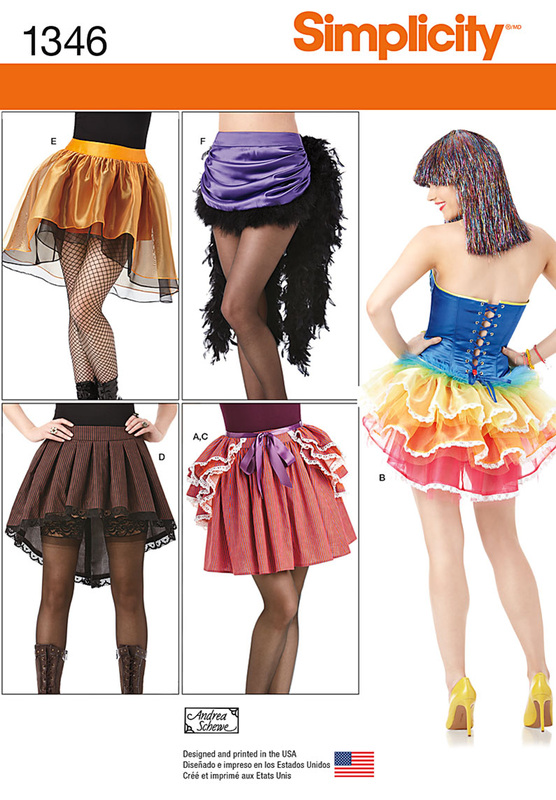
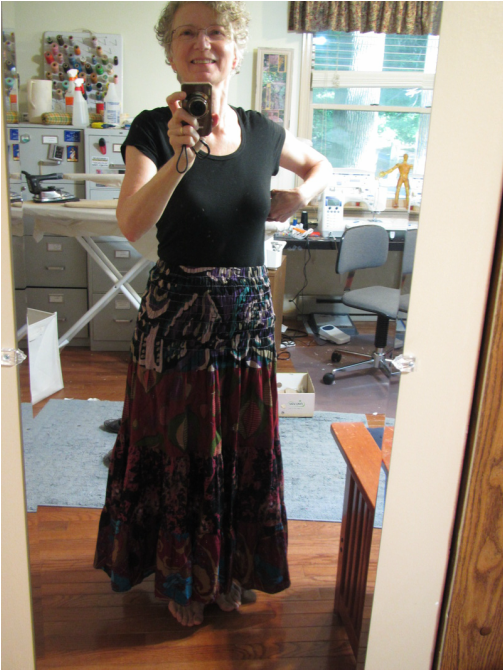
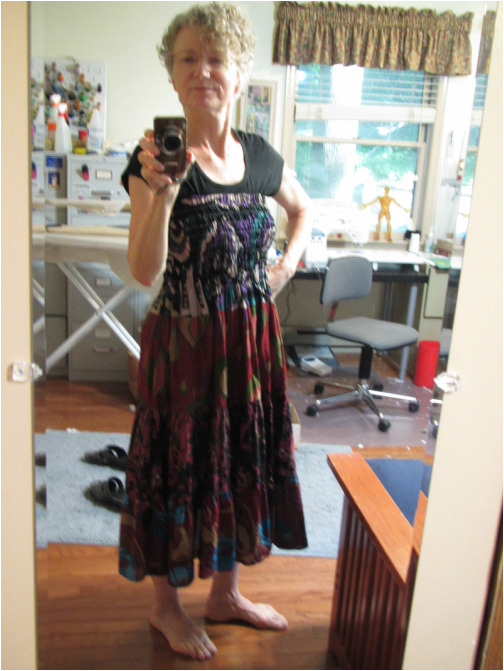
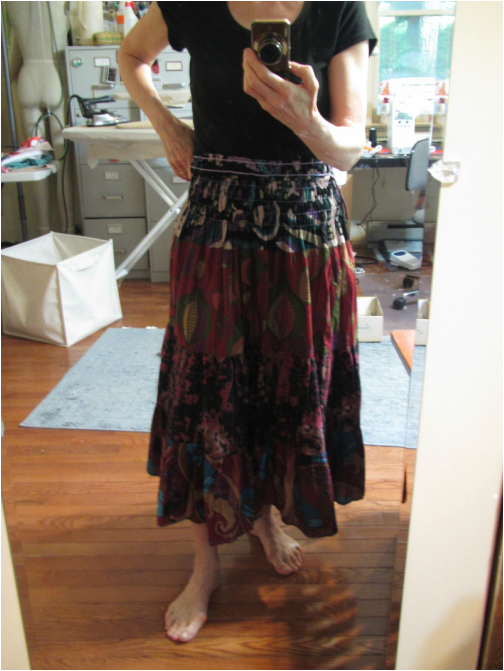
A couple of these dresses needed metal things ... buckles, beads and chains. And, as I always try to do, I look for stuff in places I think most people are able to shop. So, off I went to my local Joann's and this is what I brought home.
Picture
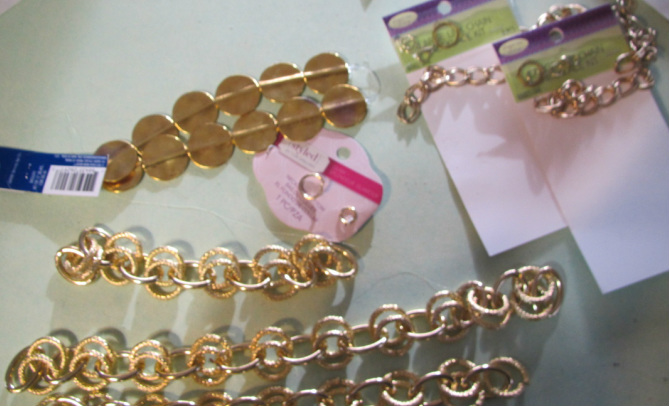
I thought the chain would be the easiest option ...
Picture
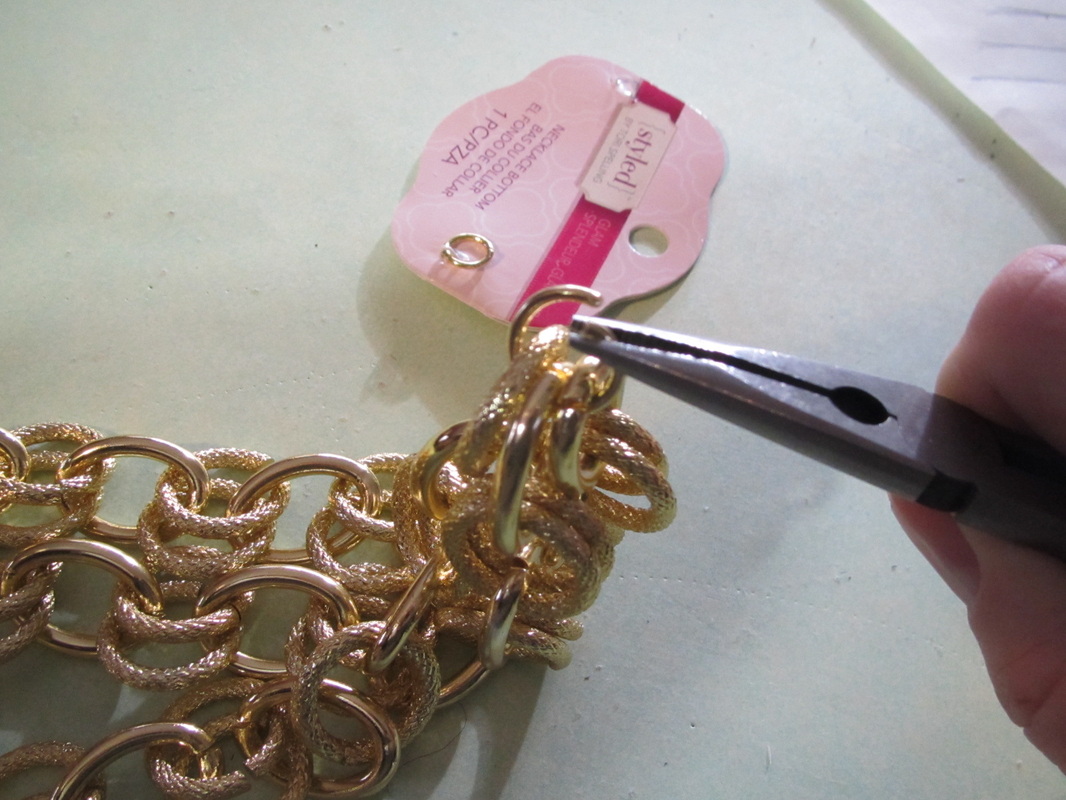
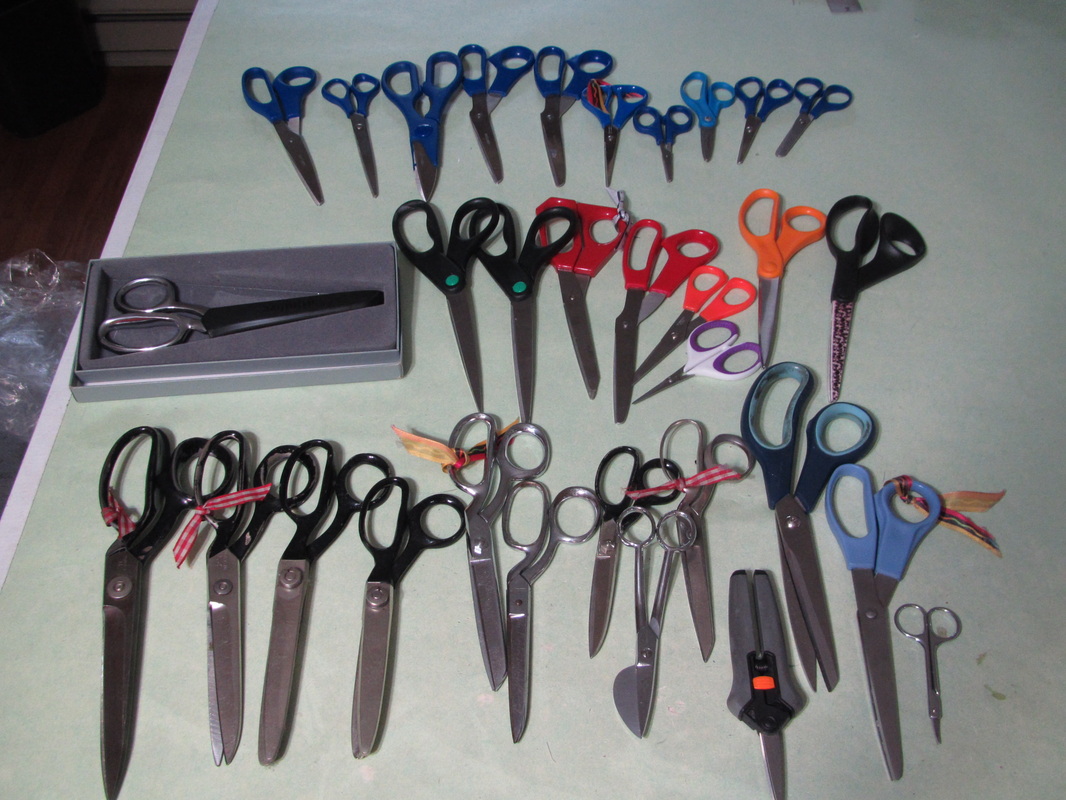
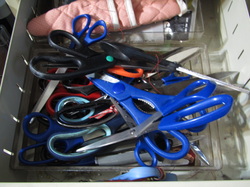
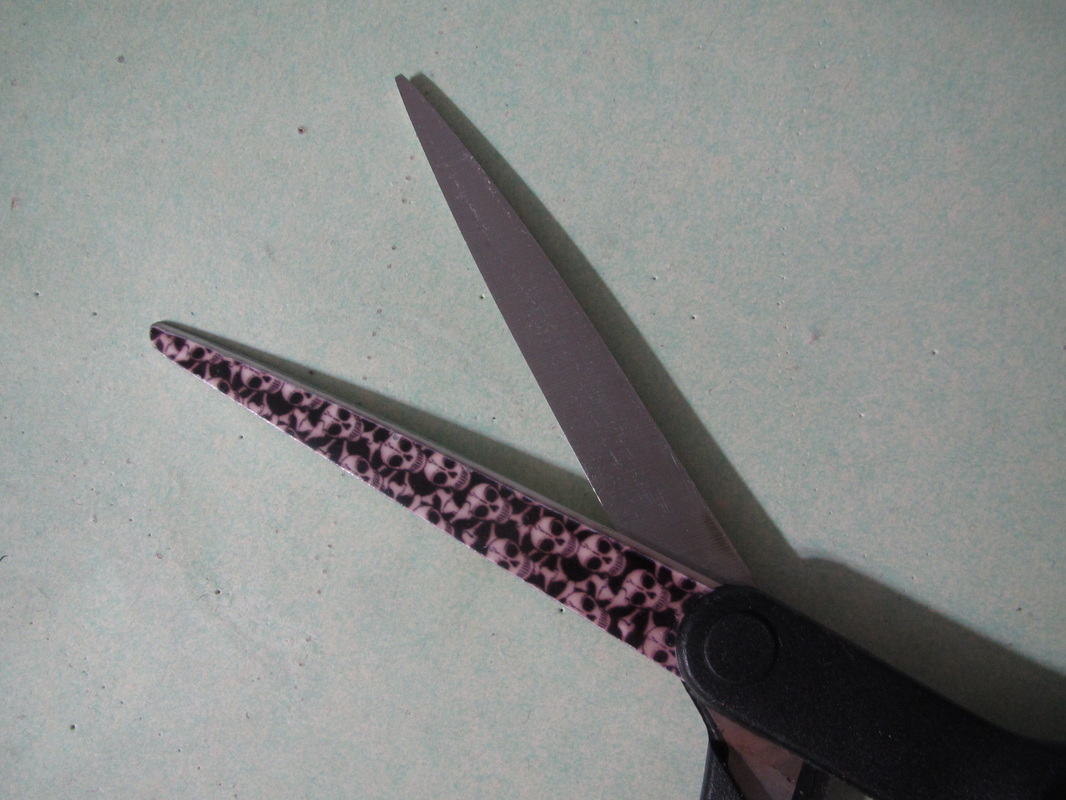
Needle nose pliers are a necessity for working with chains.  To separate links pull each end in opposite directions, front and back. Do not pull the ring open in a way that makes the circle bigger.  You will never get it completely closed again.
Picture
But, after making this I had many second thoughts.  The main one being that the chains were really expensive since 2 whole chain sets had to be purchased to get two lengths long enough AND I wanted to give a method that had a little more flexibility.
Picture
Picture
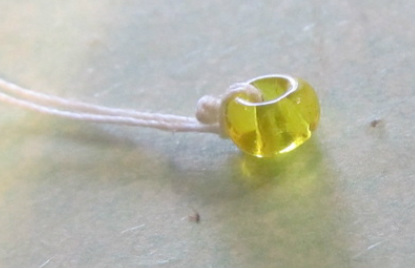
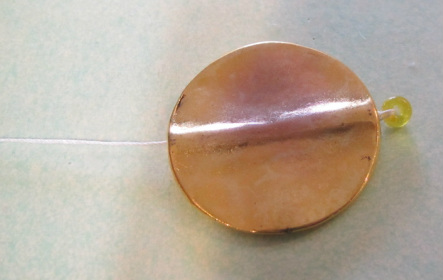
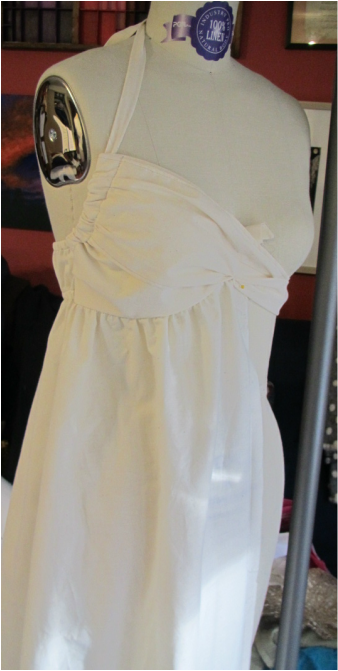
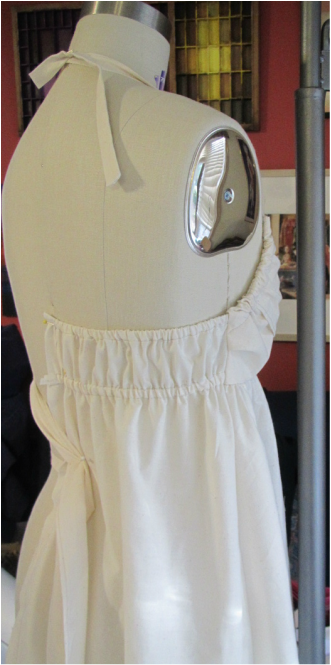
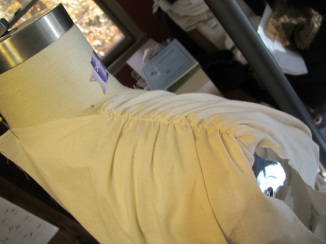
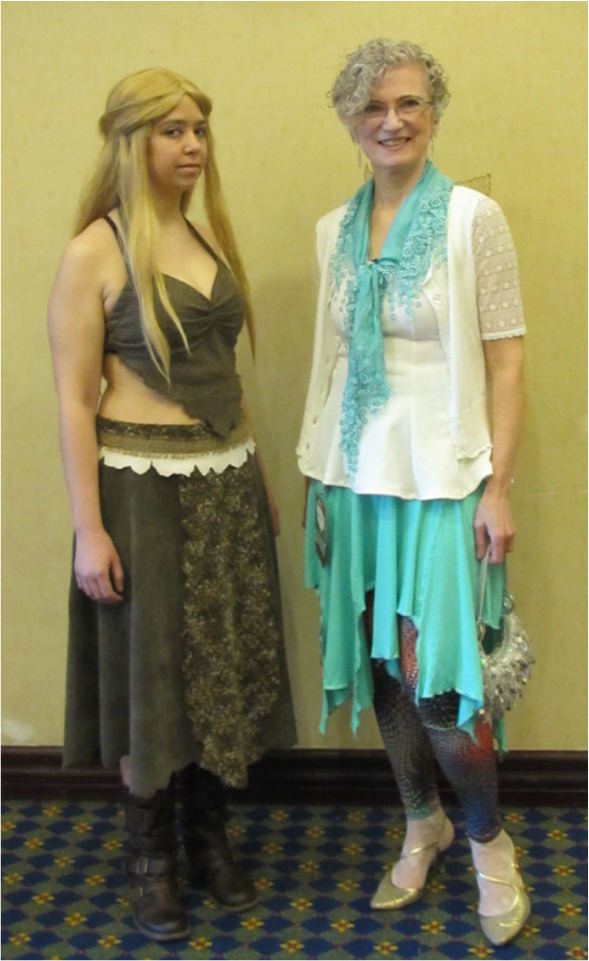
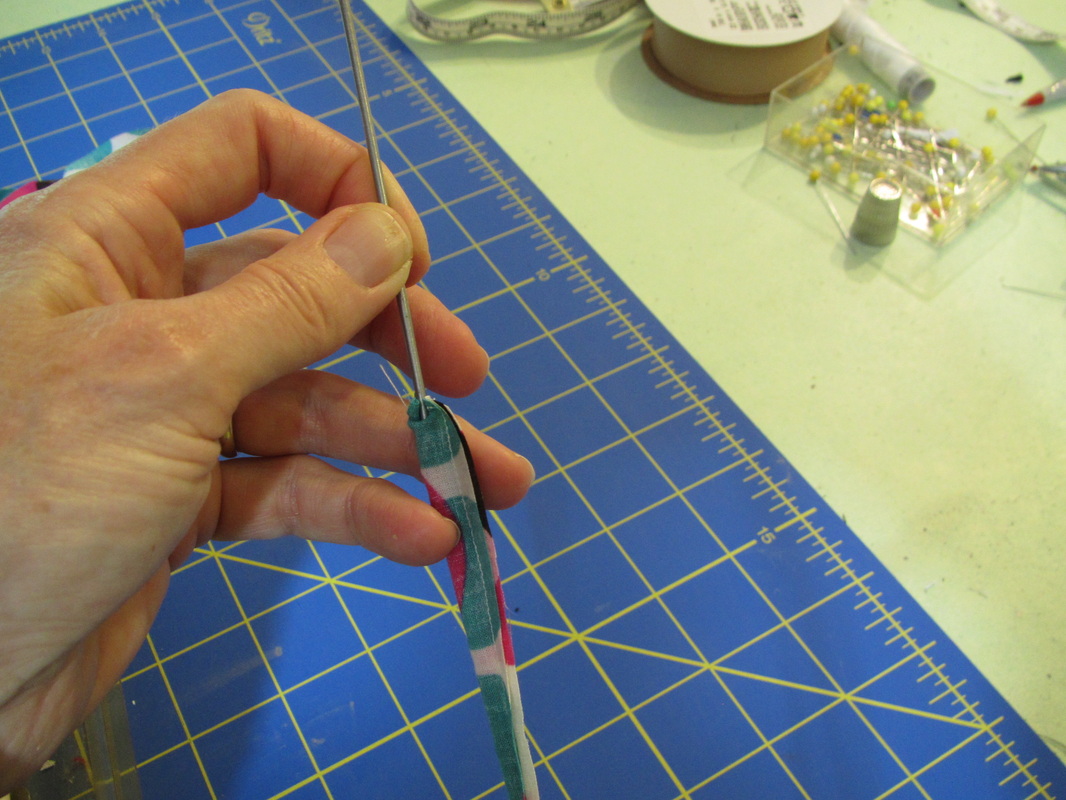
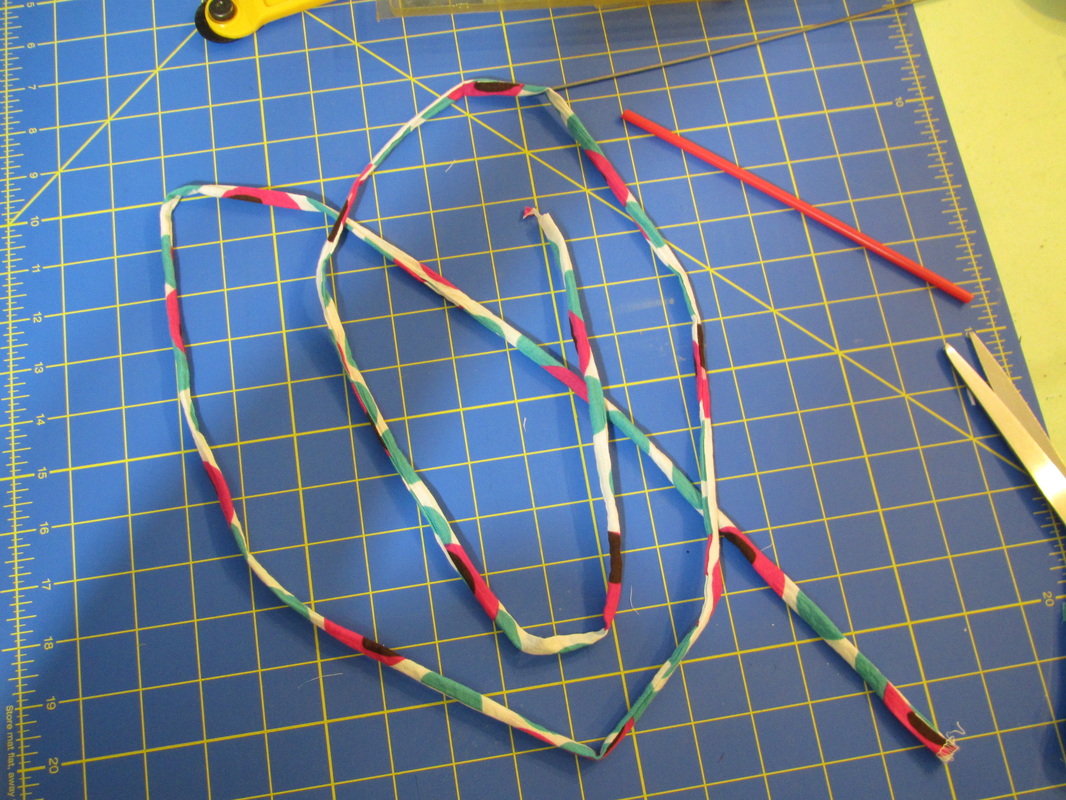
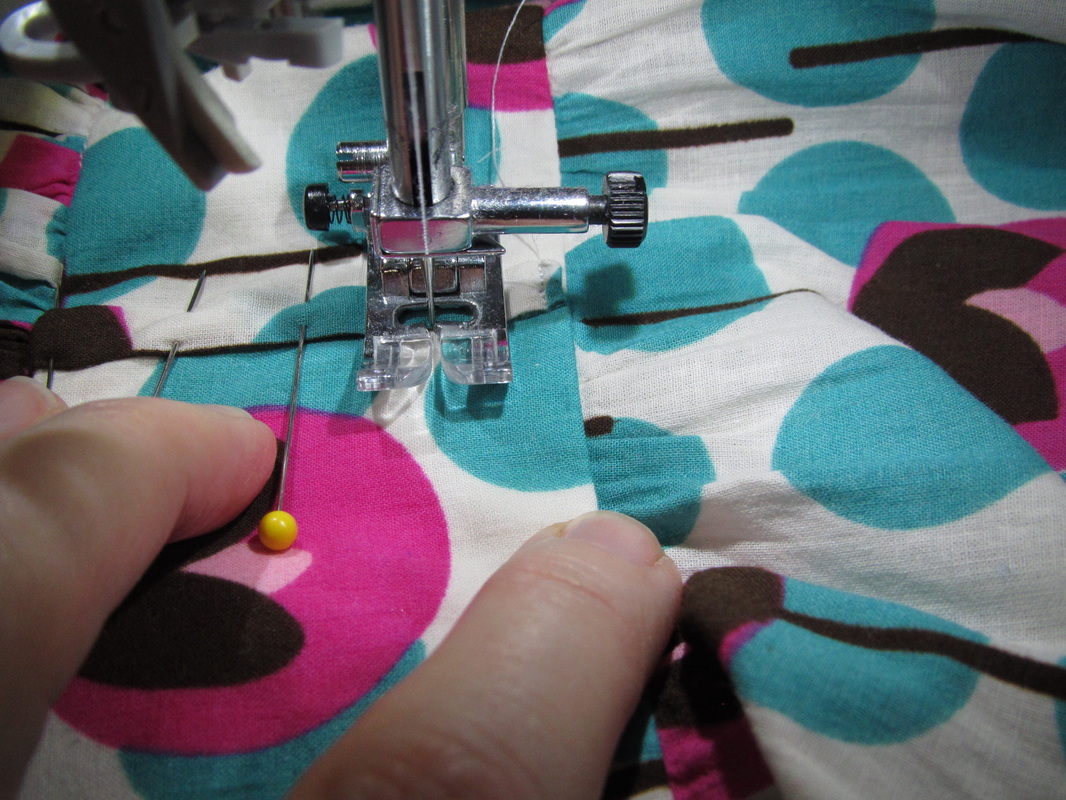
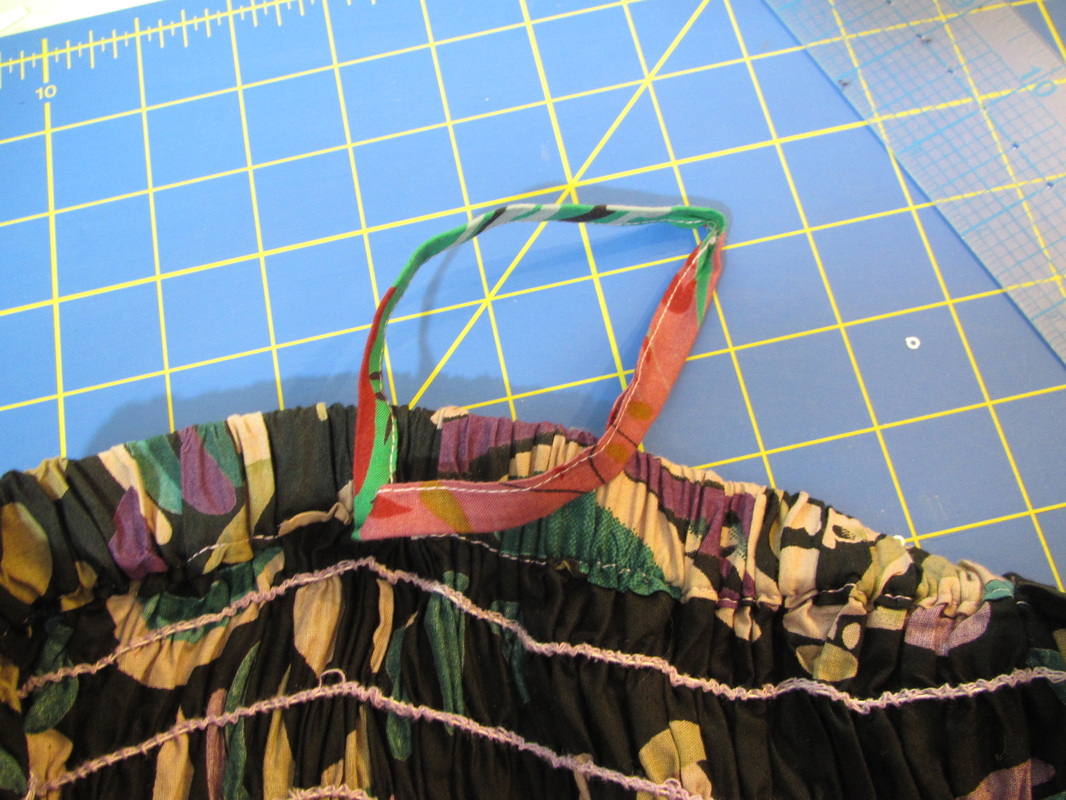
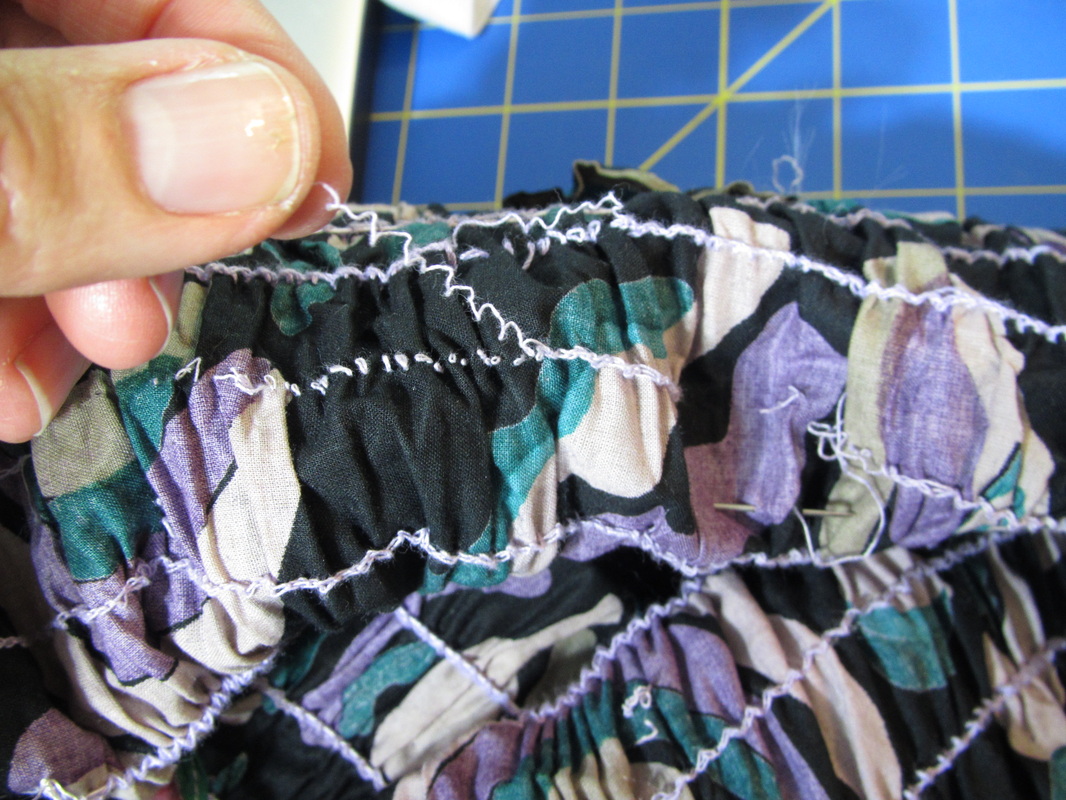
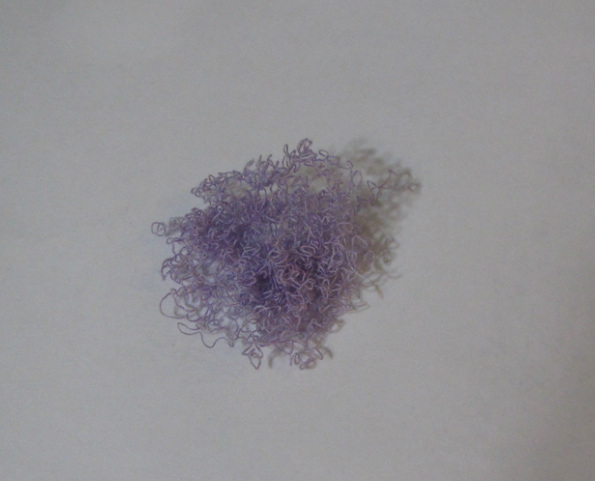
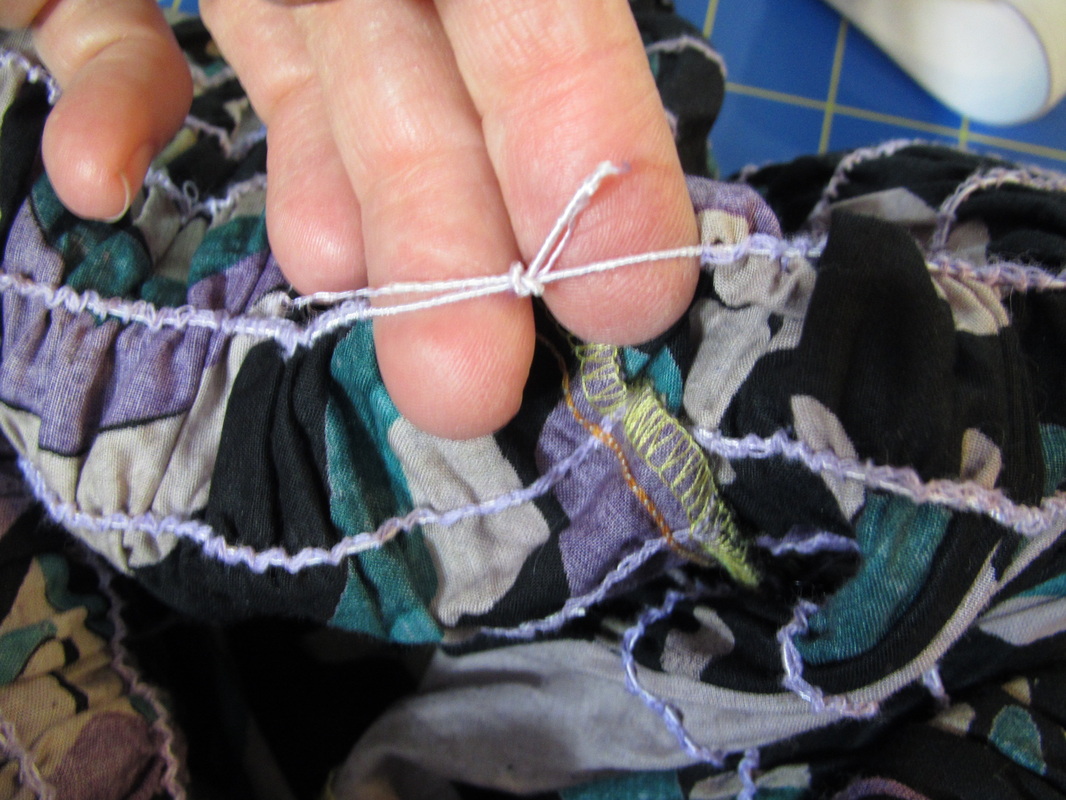
So, I opted to string together different beads. I figure everyone can find some kind of beads to make something in the same spirit.  First, I take a small bead and turn it into a stopper by knotting thread around it, then put the various beads on, in the order I want.
Picture
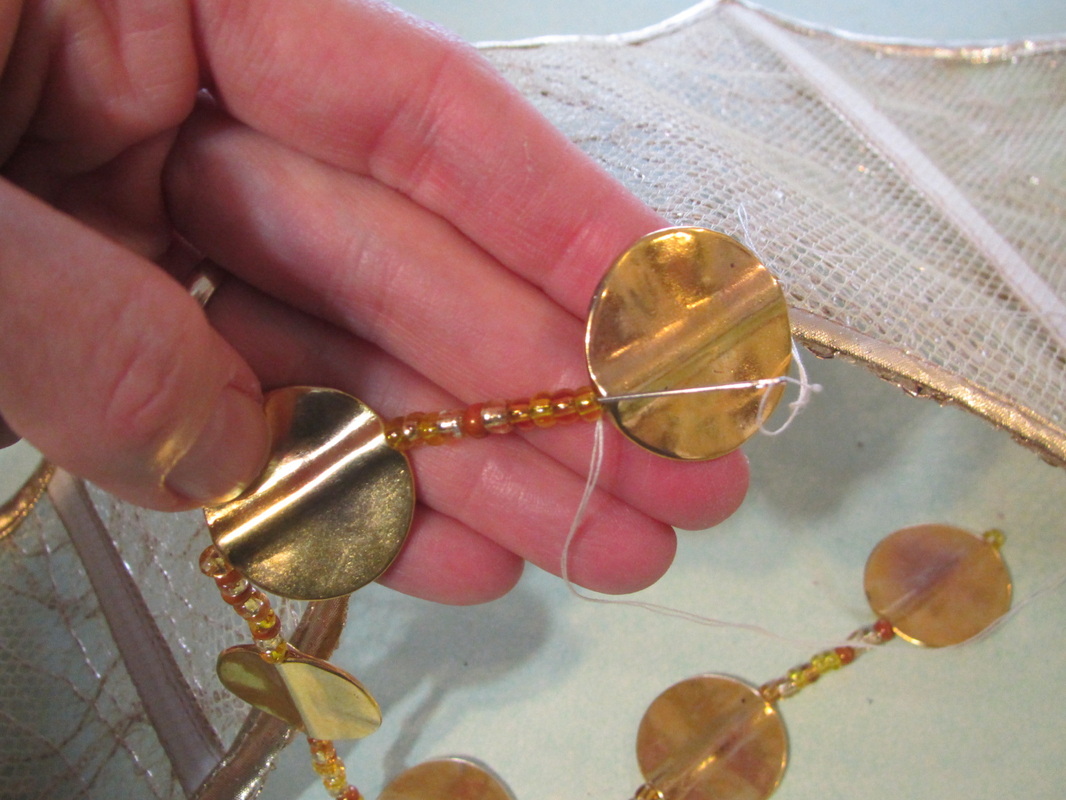
Then I go back through all the beads for strength and sew to the belt.
Picture
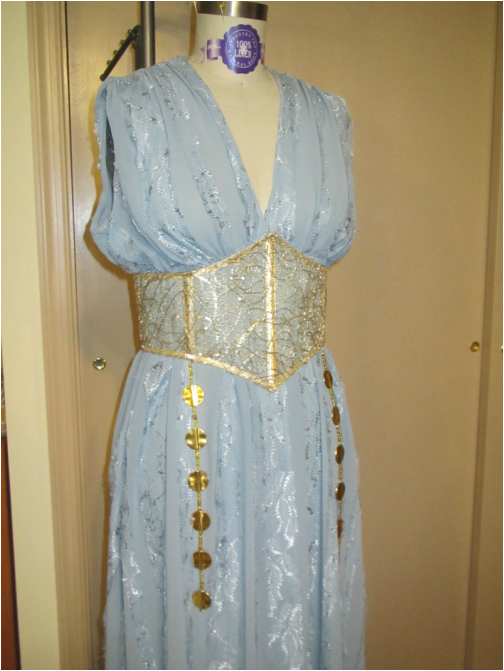
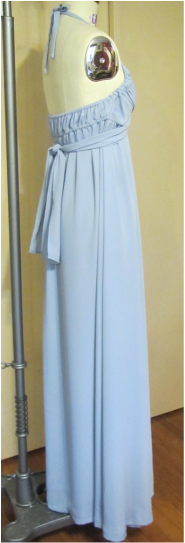
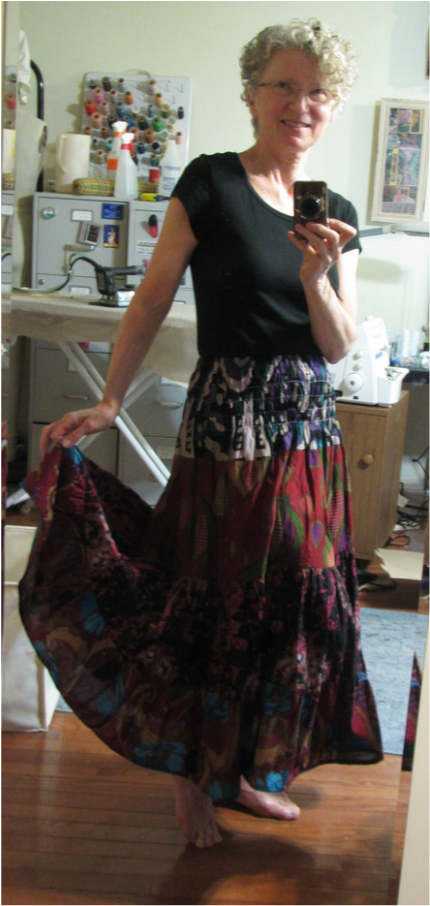
This is what I ended up with.
Picture
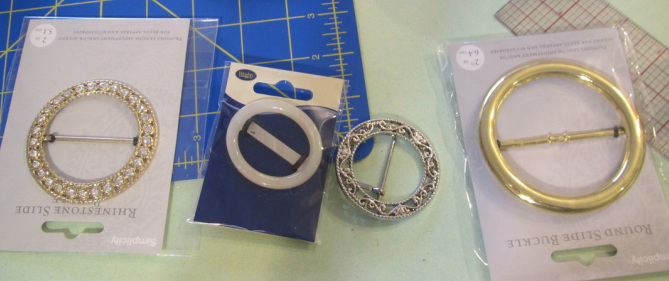
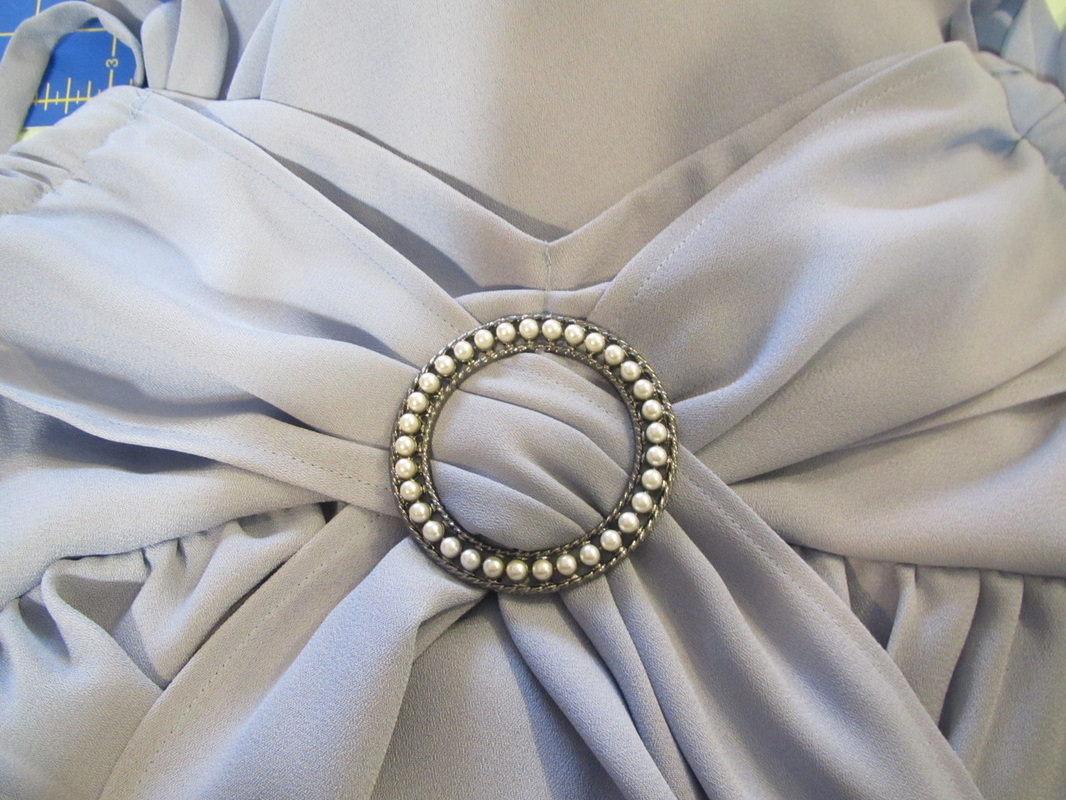
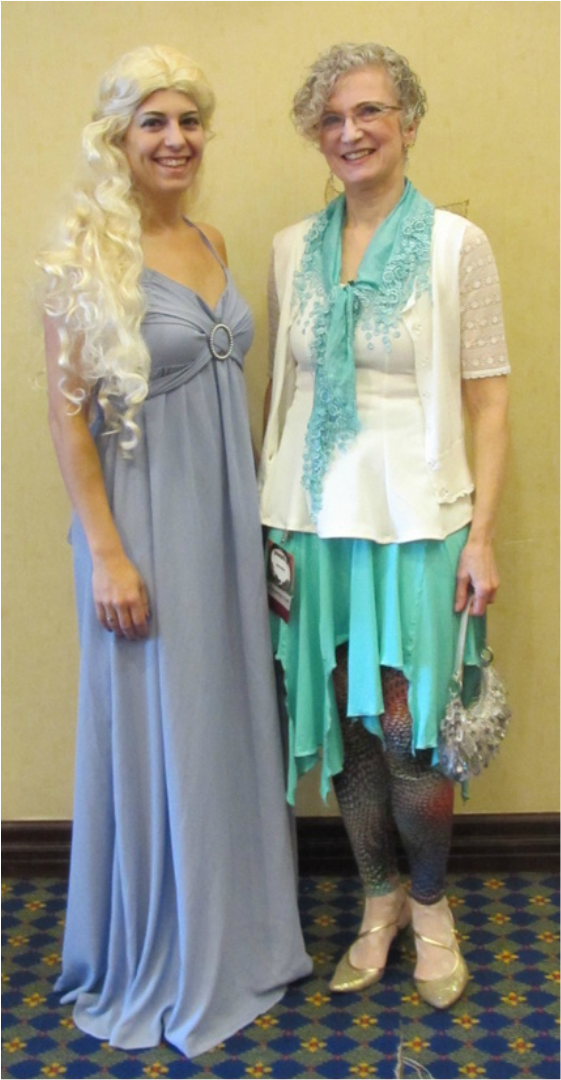
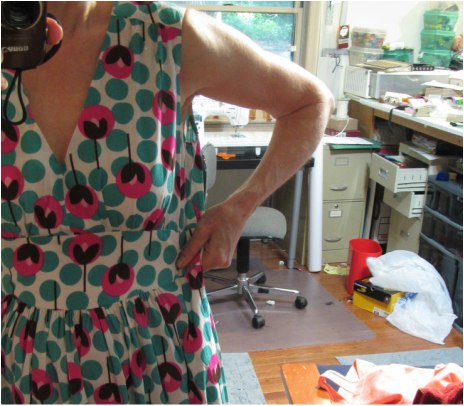
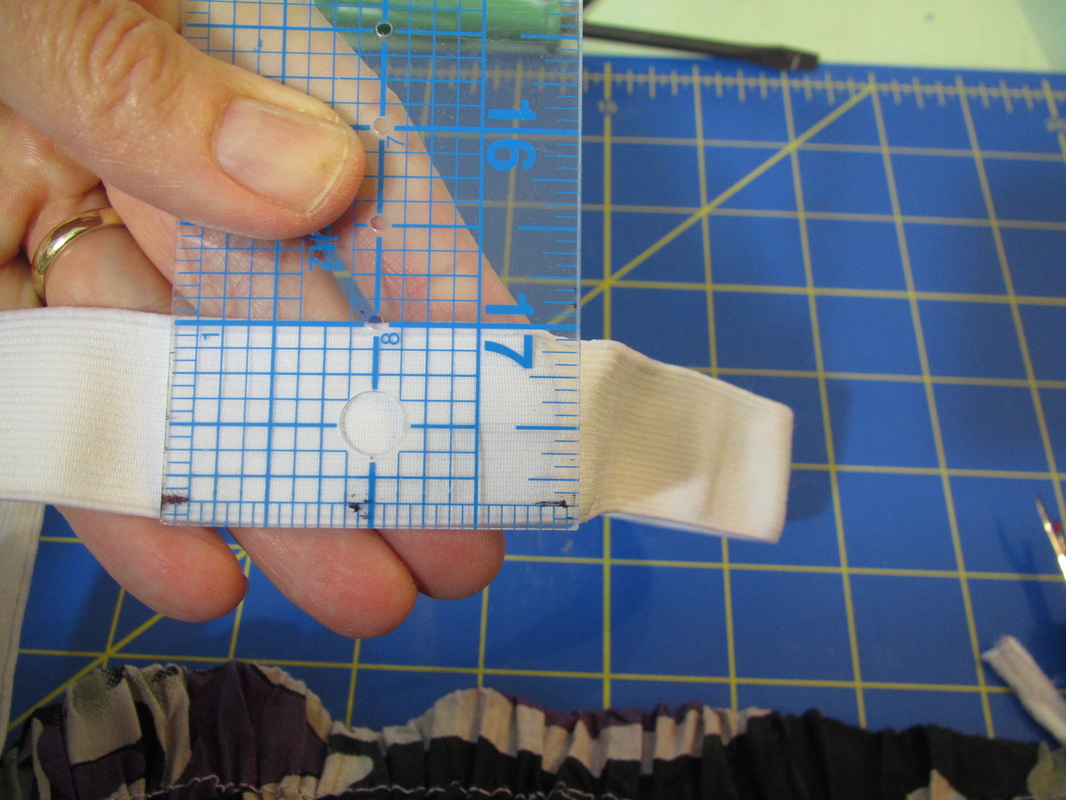
For the buckle on the other blue dress, not knowing exactly what size I wanted, I ordered 3 buckles on line from Simplicity (you know ... sometimes it's just quicker to order and pay for this stuff than try and get them to send it to me) and found a 4th from a local independent fabric store. A 5th one with pearls was the winner was the winner, for size mostly, but the pearls are nice, too. It is the same size as the one with rhinestones, but I liked the pearls better.


Alas ... the pearl one isn't on the website right now ... but the rhinestone one is and it is the correct size. Here's a link to it.


So sorry, I've just done a bit of looking and I can't find a buckle exactly like the one I used.
And please don't think you have to use what I used.  You might find something much better, or I bet some of you could make one!  AND, there is always nice stuff on Etsy and Ebay, so check them out.
Picture
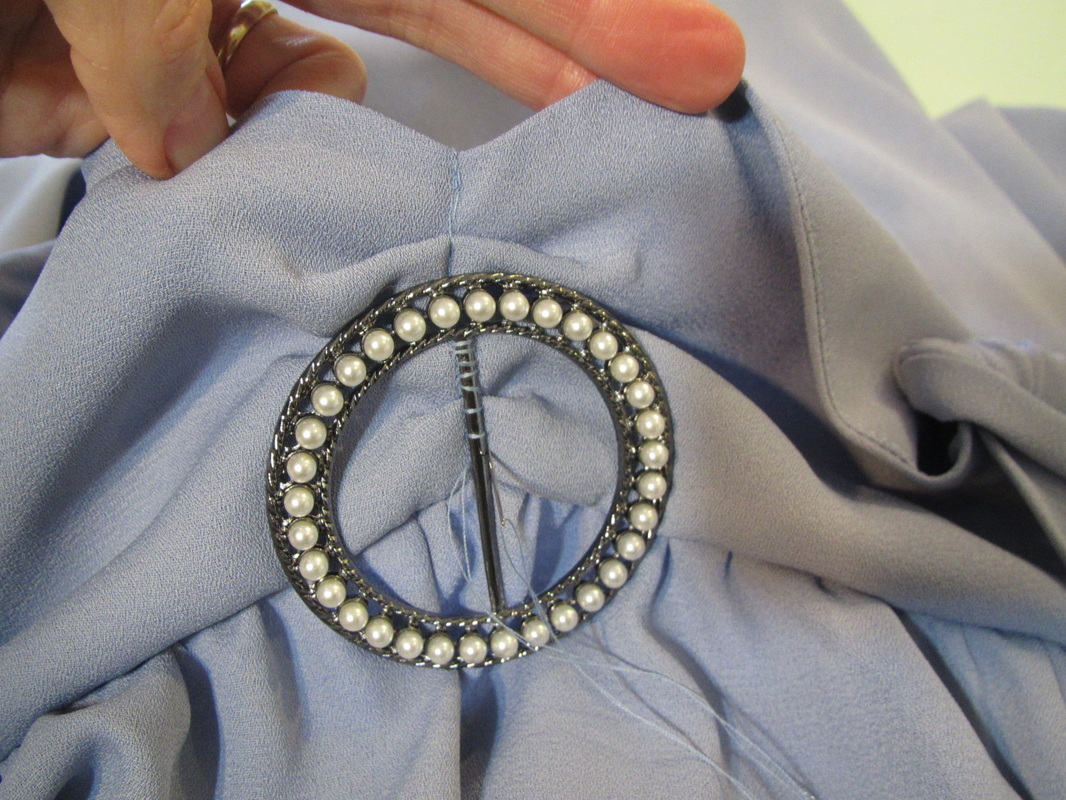
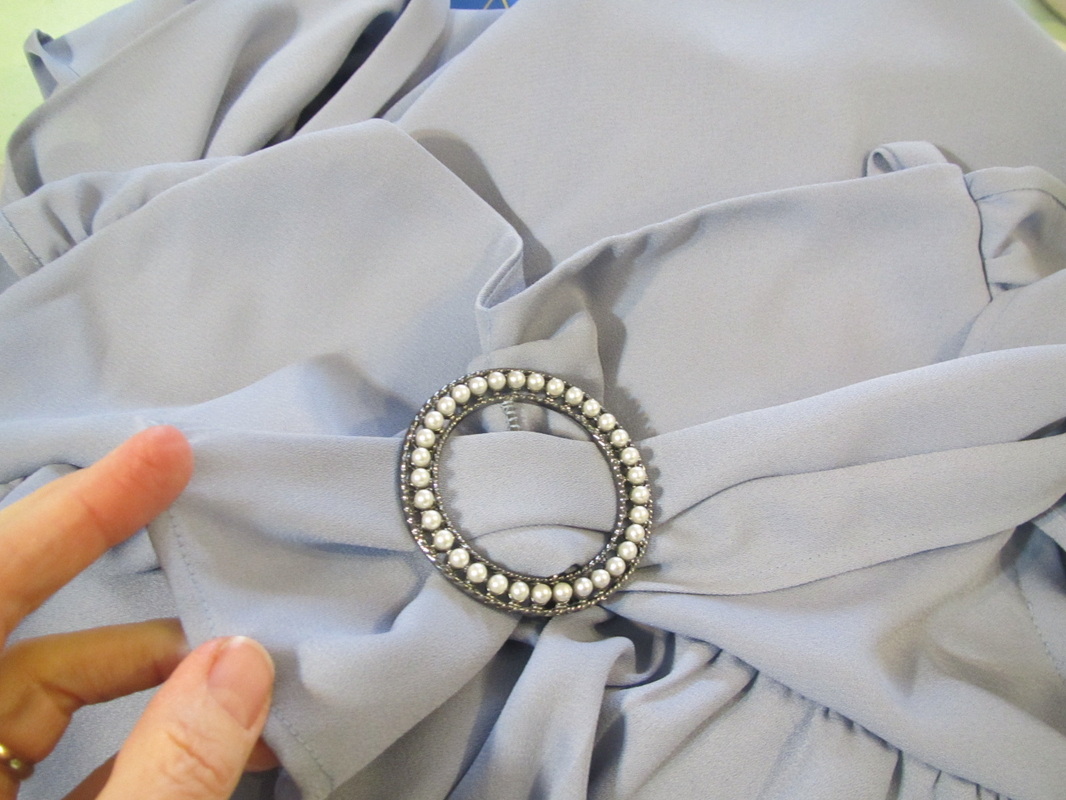
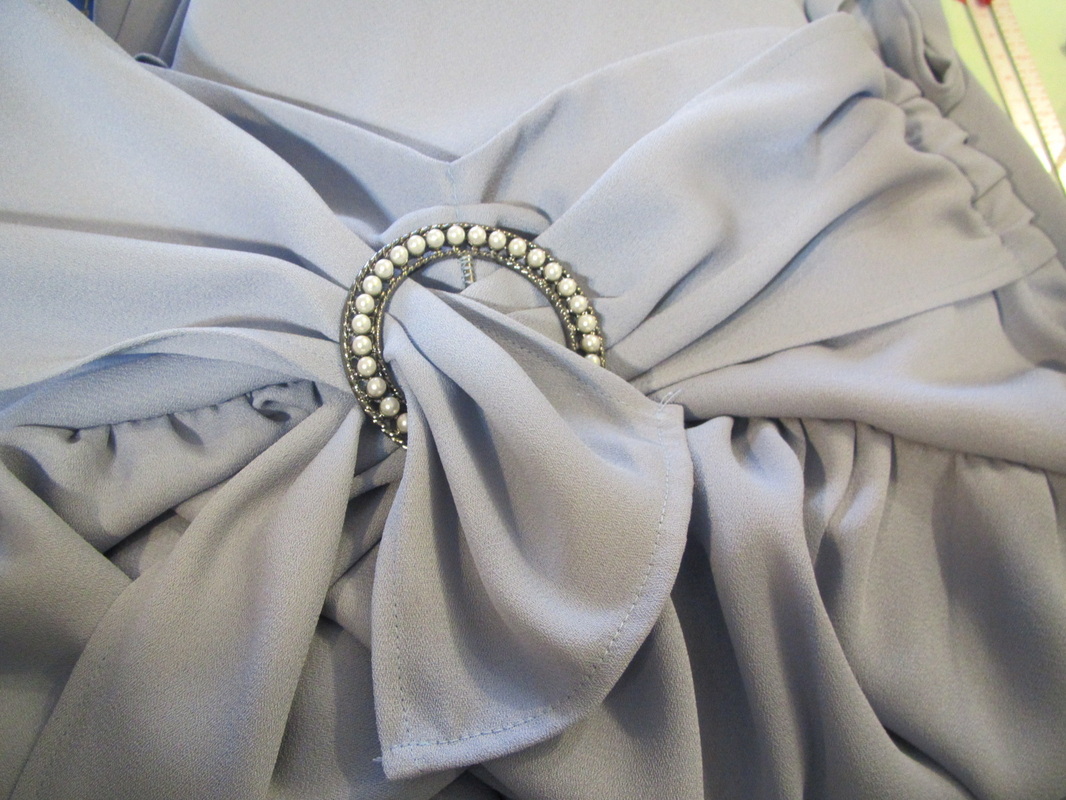
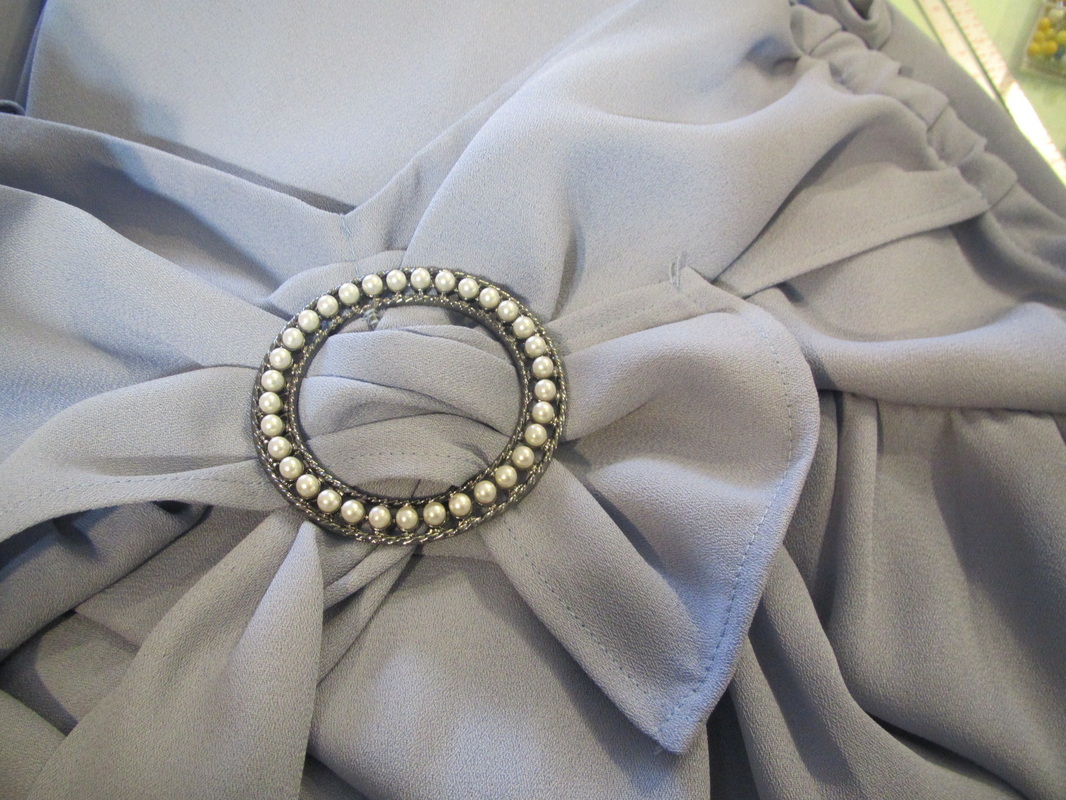
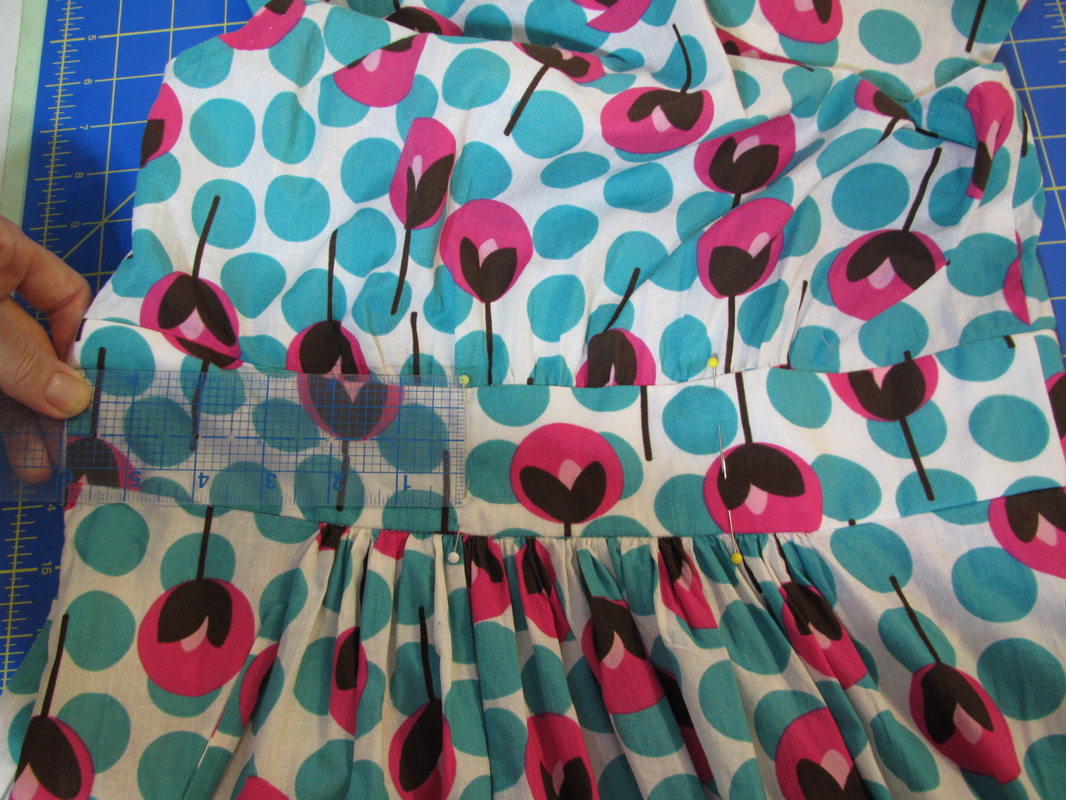
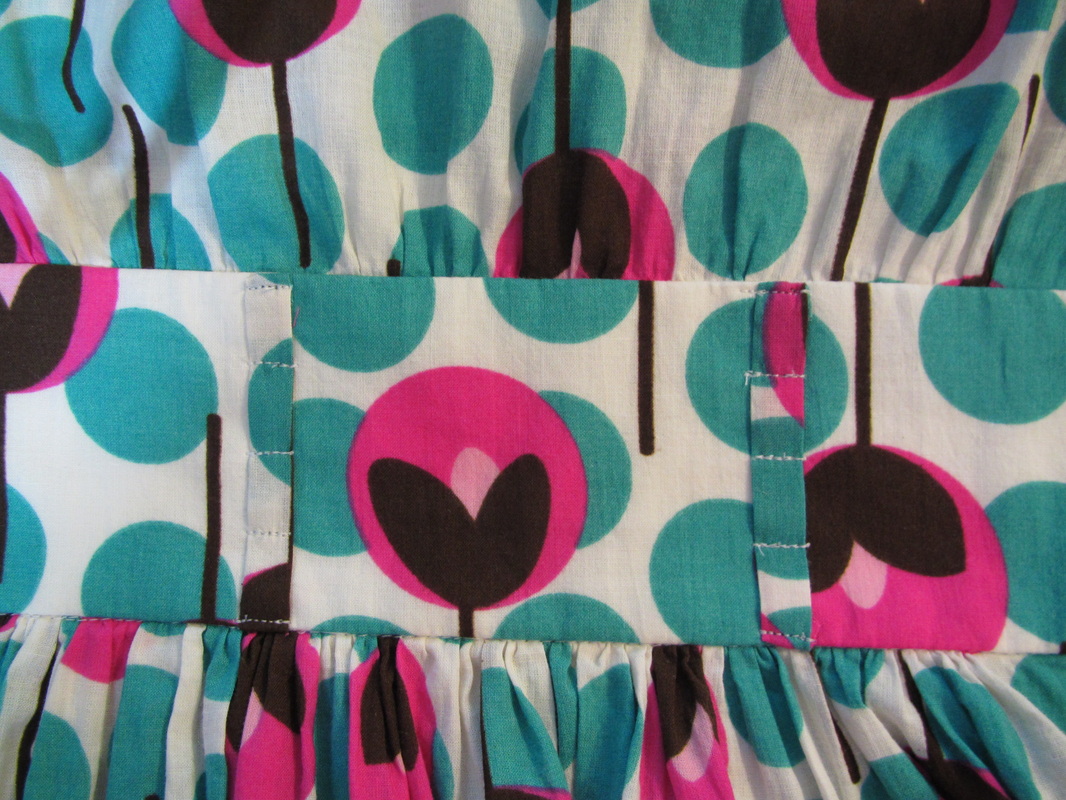
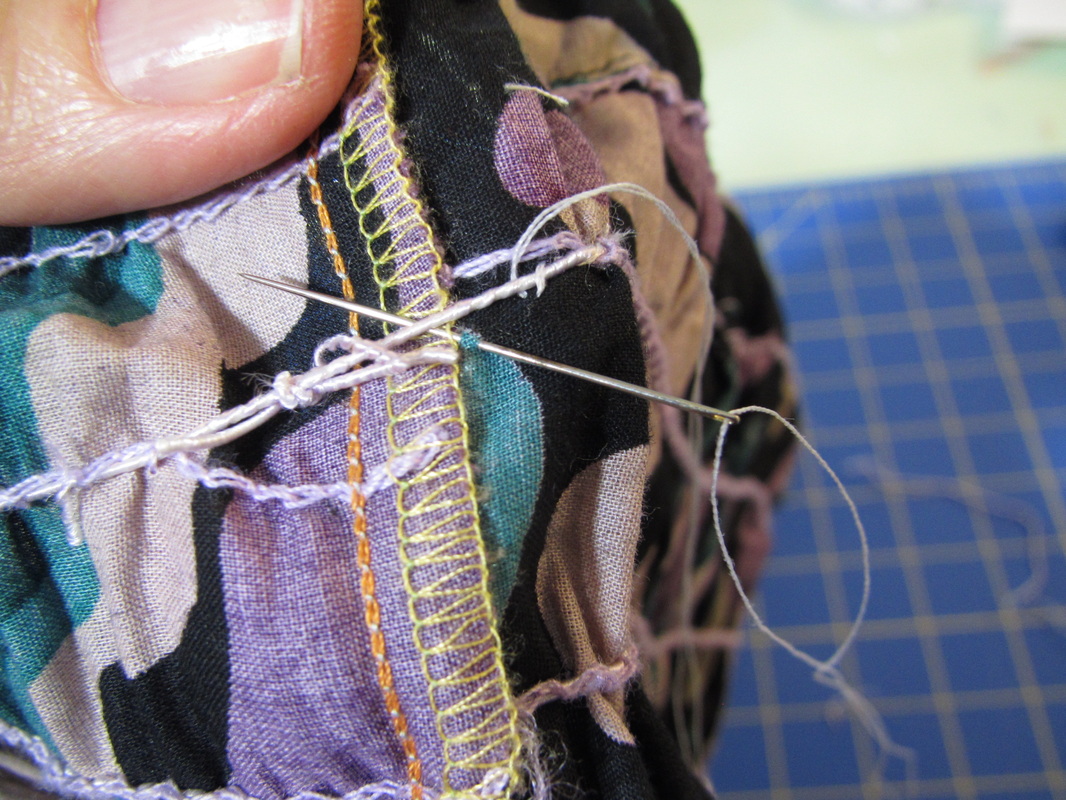
The application of this buckle is super straight forward. First stitch it to the center front of the bodice over the pleats.
Picture
Picture
Picture
Picture
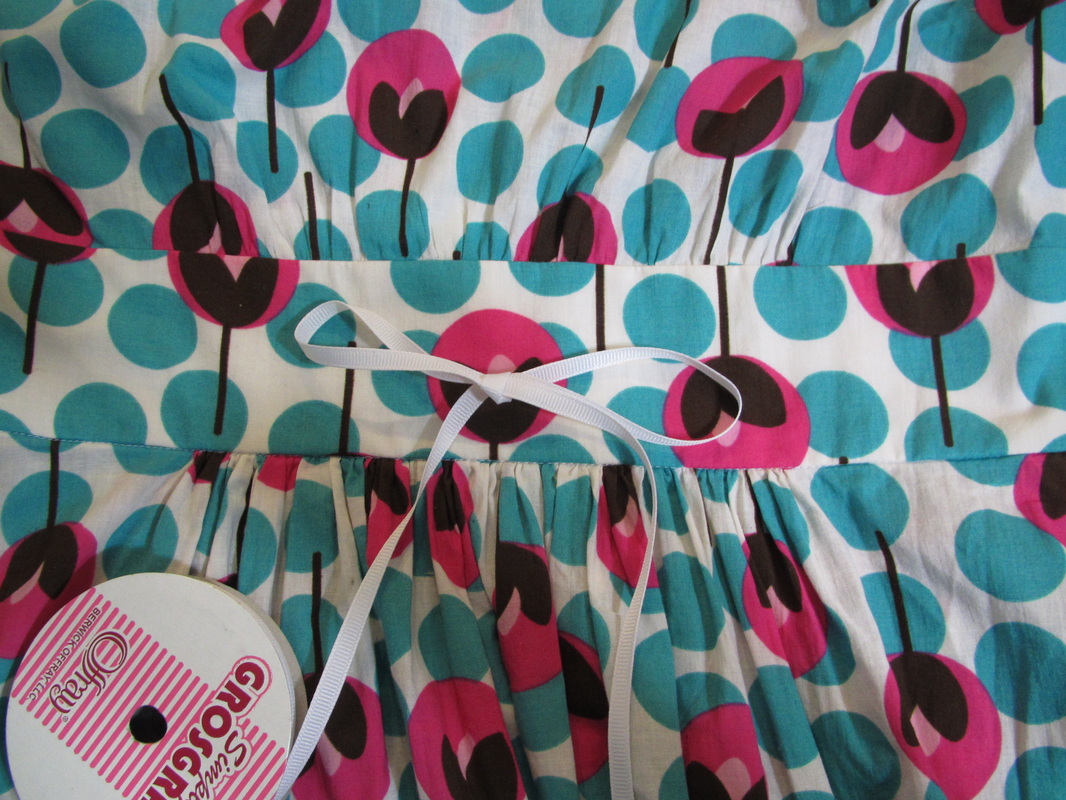
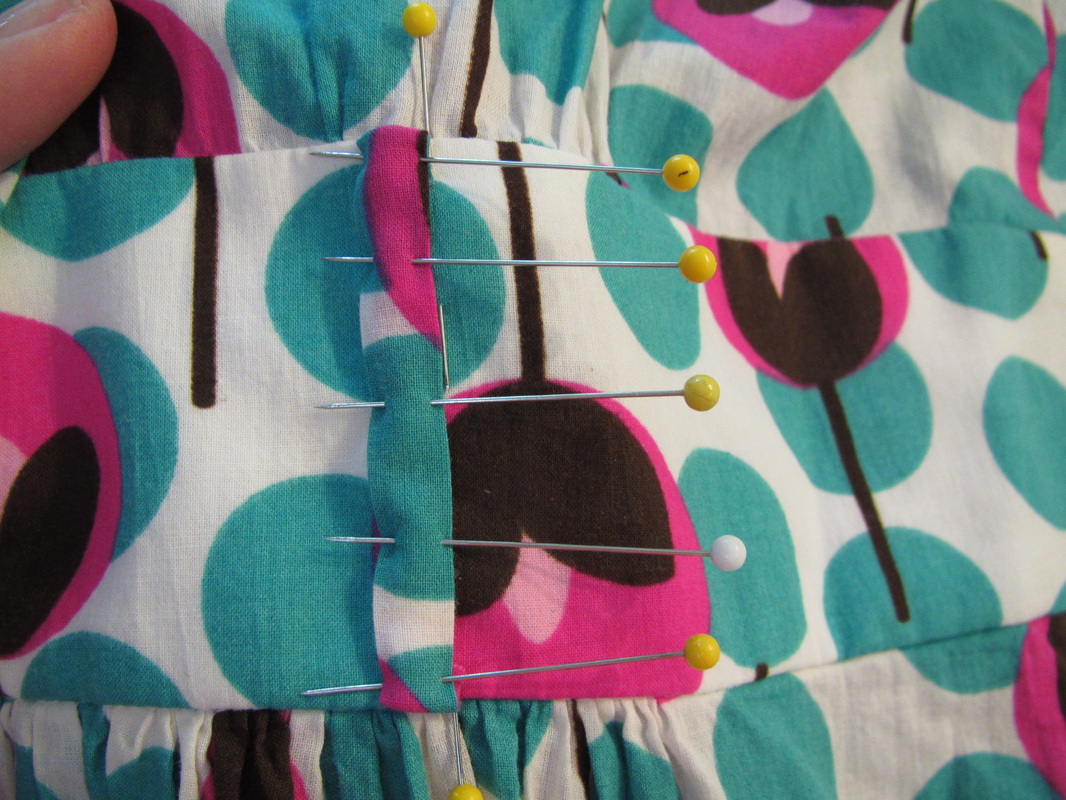
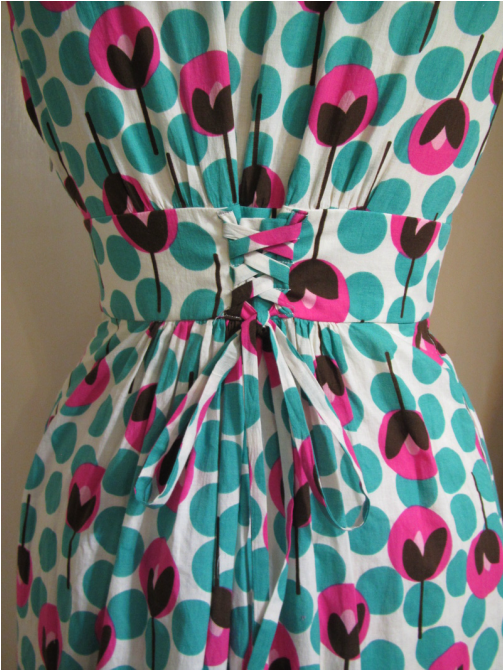
Then thread on one side tie, then the other through the buckle.
Picture
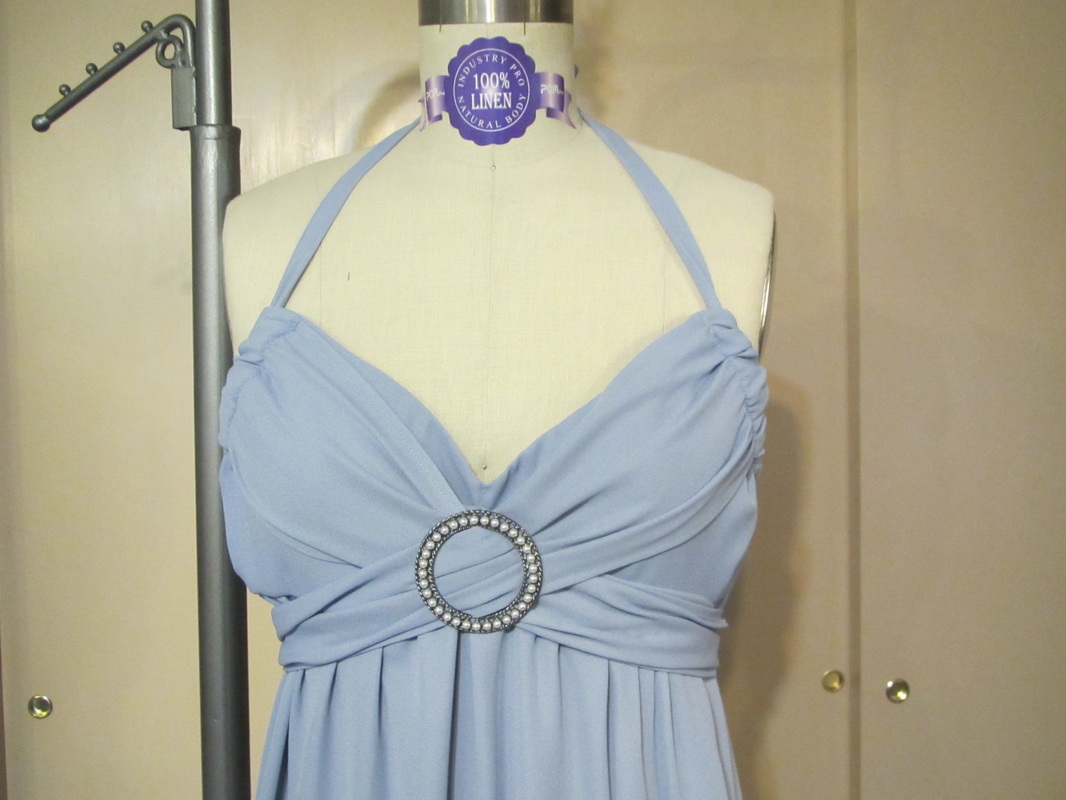
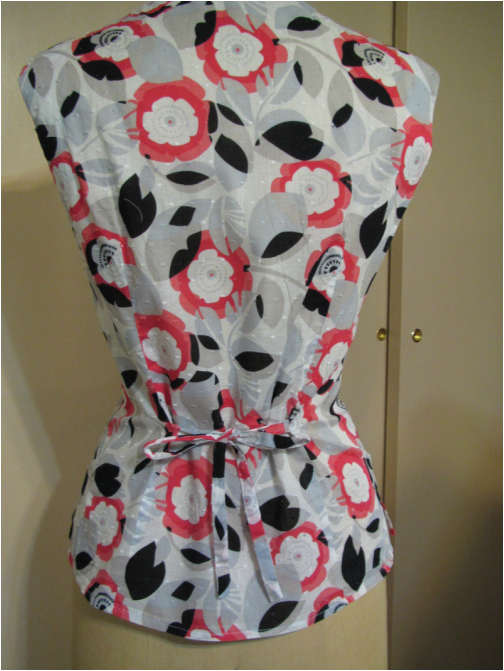
And tie in the back, or not ... read blog about problems with this "cross your heart" sash!


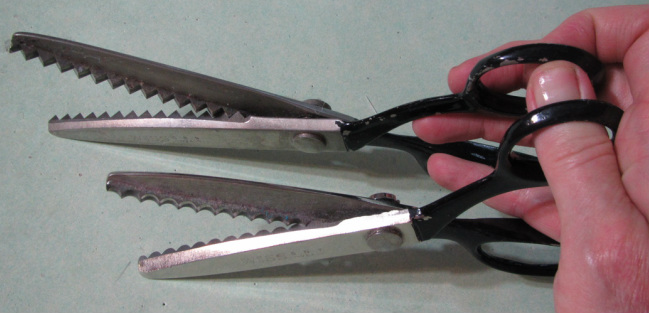
Next time, the sewing of the pleather belt and gauntlets, also I'll show you how I cut the rough jagged hems.
2 Comments

Pattern #1347 - New Fantasy Dresses - drafting

6/27/2014

6 Comments

 
Picture
Last time, I showed you my sketches for this set of costumes.  Today I want to show you my muslins and a couple other things.
Picture
Picture
The fit on these dresses is going to be easy because of the elastic waist. But, I'm keeping the elastic to the back in order to control the fullness at the front of the body. This should prevent unattractive gathers bunching up over the stomach.
Picture
Picture
The halter top bodice has the option of a sash originating at the armpit that wraps over the bust, crossing at the breast bone.
Picture
This is a photo I sent early on to the pattern making department.  Simplicity has a few rules about what can and can't be done construction wise. I know that they don't allow one piece to be gathered onto another piece and THEN both those pieces gathered to a third piece! I learned that when making the sleeves for my 1895 dress.


Here I want to gather the front and back shoulder seam together at the same time and sew it to a piece of seam binding or twill tape.  They said OK!

Picture
Picture
Picture
Above is the illegal construction ... ha ha.  Simplicity had to tinker with my patterns a bit so they could write the instructions within their guidelines.
Picture
AND, here is my lovely, former assistant, Deborah modeling said sleeves.


I have to say, the people in Simplicity's production department really changed very little on the pattern, but did make it easier to sew.


     AND, if you look in the corner of the first photo of one of the muslins, you will see the grey and white dotty fabric I made my fun jacket with.  That was back in November/December! So, you can see how long it takes for a pattern to make it to the stores.  

Read about my jacket here ... if you missed it. Cutting & 
Finishing
Picture
Picture
Picture
Picture
And the last thing I wanted show you was how the professional model wore the dress vs. the way I wanted it to be worn.  You can see the "cross-your-heart" sash should tie in the back.  BUT, I have to admit, when that's done it allows the elastic in the back to show in an unattractive manor.  And, you know, I could have fixed that with belt loops or even just tacked it to the side seams ... sigh!  I was in a hurry to make my deadline.


BUT, now you know what can be done and can decide for yourself how to wear the sash on this dress.
6 Comments

Pattern #1347 - New Fantasy Dresses - design

6/25/2014

13 Comments

 
Picture
Why did I choose these particular dresses to put together in this pattern package? Of course I am looking for costumes that people will want to dress up in. Costumes that are the current popular characters.  But, why this mix??

Well, look at the basic shapes.  In order to get more that one outfit in a pattern, I have to figure out how to re-use the same pattern pieces from garment to garment. 

Here are some of my planning sheets that I sent to Simplicity while we were working this out.


Picture
This is my basic concept sketch. You can see the original plan was to just have three outfits, but I realized a fourth could be squeezed in without one additional pattern piece, so why not!
Picture
You can see how each of the garments has the same high waisted silhouette.  The wide belt changes the shape for two of the dresses.
Picture
The next sketch explains this a little better.  I was trying to make this set of costumes particularly comfortable to wear by elasticizing much of it. But, I didn't want the skirt to have an elastic waist (the pattern department asked if I could) and actually the final skirt has no elastic.

Picture
I photograph all the fabrics I plan to use before getting started.  They are not always approved.  But, this time everything I purchased was OK ... lucky me, this time.
Picture

These are the fabrics for the skirt and midriff top outfit.

Picture
These are the fabrics for the brown dress with belt and gauntlets.  The dress is the smaller swatch in the middle and the pleather is for the belt and gauntlets.
Picture
These are are the fabrics for the two long blue dresses.  They look remarkably similar, but the Mother of Dragons does wear blue A LOT.


Next time I will show pictures of my muslins and explain some of the construction.
13 Comments

My #Patterns $2.99! #Sewing

6/24/2014

0 Comments

 
Picture
But, you have to be a member of PatternReview.com ... check it out!


0 Comments

Costume Con models wearing more new patterns - YAY!

6/23/2014

1 Comment

 
Picture
So ... the designer's always the last to know, I guess!

Thanks to reading my daily update from PatternReview.com I found out that Simplicity had just released a bunch of new patterns AND three are mine.  Woo! Hoo!
We did another set of fantasy dresses and decided to make a couple mix and match patterns this year. I hope this allows for everyone to create something unique.  There is a set of skirt and bustles and a assorted corset pattern.

I was able to bring these very photography samples to Costume Con where they were modeled by some wonderful and beautiful volunteers.
Picture
The corsets and skirts have been designed to be worn together, which Samantha so beautifully models here. What a fetching witch!
Picture
Thank-you to two more models, Pam above and Elaine to the right.
Picture
Picture
Here are the corsets and skirts ... let your imagination run wide.  What can you make out of these?
Picture
Later this week I will start telling you all about how I designed and made them, with lots of photos, of course.
1 Comment

Scissors! ... stalling for time ...

6/20/2014

4 Comments

 
Picture
The picture above brought back memories of my father using my mother's best fabric scissors to clean his finger nails and my mother yelling at him. Haven't we all, at some time, had to tell someone NOT to use a pair of scissors? Good scissors can be expensive and can make such a difference.  Trying to cut fabric with bad/dull scissors is hard and wastes a lot of time!

So, I am blogging about scissors today, because it is a great topic AND I haven't had time yet to fix that red dress my son brought me from India.  Hope to have it done by Monday. Read Wednesday's post to the bottom for explanation.
Picture
Picture
THIS is my scissors collection. I own 32 pairs of scissors and most of them come with  some kind of a story.

I keep them all in my "sharp" drawer, a term my older son made up when he cleaned and re-organized my kitchen drawer when he was 14. He thought it would be safer to have only one drawer you had to be careful putting your hand in.

I used most of these, too. As I work on a project and my table and workroom get messier and messier, instead of looking for a lost pair of scissors, I just dive into this drawer and pull yet another pair.  Then, when the project is finished, I usually have at least 10 or 12 pairs of scissors to put away.

Picture
Actually, taking all the scissors out of this sharp drawer is going to give me a chance to clean and edit! This group of scissors is going to get stored or given away, probably stored. You never know, right? I've taught kid sewing classes where I was required to bring all the tools for all the kids, including scissors. So, this is why I have all these cheap scissors. 

If I subtract these 13 from my total of 32, that makes 19 scissors I actually use and love.
Picture
Picture
Here are 4 unglamorous, but useful pairs.  My two pair of paper scissors (2 because I'm constantly misplacing one or the other) and my spring loaded Fiskar's clippers and my nail scissors that I use for my nails!
Picture
These are my work horses.  While I own multiple pairs of all metal Gingher's and Wiss scissors.  I find these lightweight scissors work so well, mostly because I can sharpen them anytime with the sharpener shown here. The best, most expensive scissors are useless if they are dull.
Picture
Plus ... how can you resist a pair of scissors with sculls on it?
Picture
These are Gingher appliqué scissors, very useful for trimming around appliqués safely without cutting into the fabric below.  And they have such a wonderful sharp point. I use them to finish cutting out a hole, if my grommet die cutting tool leaves a part uncut (kind of like a hanging chad!) and any other time I need to cut out something tiny and precise.
Picture
This pair of cushioned handled Wiss scissors I bought during my time in the New York costume shops.  We were making all the women's white wool tailored suits for the first Broadway production of "Working".  Being the first hand (asst. to the draper), after the patterns were made and adjusted, I was the one who had to cut them all out and my hand was getting VERY sore, so the padded handles saved me.
Picture
Later, when I had a little more money, I bought these extra large Wiss tailor's scissors.  I think they cost $25 in the late 70's.  Hmmm, I wonder what they cost now?  just a minute ... Google break ... OK, they list for $56 but at WAWAK you can buy a pair for $36.

They will cut through anything.  I use these often for upholstery fabric or when making a corset and I have to cut through 2 layers of coutil and 2 layers of satin and 2 layers of lace all at once. (trimming a seam back to apply the bone tape)
Picture
These three used to be my most used scissors, before I fell in love with the lightweight ones I can sharpen my self.  They are Ginghers at the top and two pair of Wiss. Once I moved out of New York, I found it much harder to find someone who could sharpen my scissors without ruining them.  And scissors can be ruined with a bad sharpening job.

You know ... next time I go to New York ... I should bring up all my dull heavy duty scissors and get them sharpened by an expert.
Picture
This pair is very, very special. 


I showed up for my very first day in a New York costume carrying no tools.  Up until then, I had always worked in a college shop that provided everything.  But, in the professional shops, everyone is expected to bring all their tools: scissors, needles, rulers, etc. Also, thimbles ... but that's a whole other story ... future blog.

Anyway, a kind lady loaned me some scissors for the day and when I got off the subway after work, I walked into the local fabric store, AND YES every neighborhood in New York had little shops for home sewers in the '70s, and bought these scissors.  They seemed so expensive at the time!
Picture
Now this pair is a new acquisition in my collection.  THESE are THE scissors my father used to clean his nails with! They were given to my mother as a gift from the cast of a community theater production of "The Doctor in Spite of Himself" in 1958.
Picture
See! It says so on the blades.  I was 5 at the time and remember how special these scissors were to her.
Picture
I own two pair of pinking shears, one zig-zag pair and a scallop pair given to me by a toy inventor I used to make lots of samples for.  She wanted the hems of doll dress and things to have cut scalloped edges and sent me these.  

When I was a kid, we used pinking shears to cut out our clothes.  Then the seams were instantly finished.  Pinking a seam is still a great way to finish cottons and other light weight fabrics.  We didn't have sergers then.  And sometimes a serged seam isn't necessarily the best choice.  The line of serging stitches can show through the fabric after it is pressed, not attractive.

Now both these pairs of scissors are REALLY dull and will barely cut.  No Way will I let an unknown scissor sharpened touch these.  I really am going to bring scissors to New York for sharpening!!
Picture
This pair, alas, is still new in it's box.  It was given to me as a thank-you gift for helping someone make a wedding dress.  She thought she was doing something so special by getting me a "TRUE LEFT HANDED" pair of scissors.  And I am left handed ... remember this blog?  BUT, when I learned to cut, there were only right handed scissors around and after years and years of cutting with my right hand, I don't have the strength or coordination to cut with my left hand!

But, I loved her thoughtfulness.


What are your favorite scissors?  Do any scissors you own have a story attached?  If I get enough responses I will do a whole second blog with your stories. If you have photos, write me on my Contact page and after I answer you back, you can send images into my email account.

And I hope to have that red dress all fixed to show you on Monday.  Have a great weekend!
4 Comments

Dress Doctor - quick waist adjustment

6/18/2014

3 Comments

 
Picture
This dress, I think, was the first project I blogged about.  Here are links to the first, second, and third installments.  I haven't worn it much because it doesn't fit quite right. The waist is just too big.  
Picture
About 4 inches too big and I think it looks dumpy.  I've lost weight in the last couple years and I'm always afraid I'm going to gain it back, so I tend to make things too roomy.  
Picture
I even have shoes that look good with it, so I want to fix it. AND, I have an idea how to make it fit and be adjustable.
Picture
Picture
Now, I could simply make a single tie in the back, like this blouse. But, this dress has a wide waistband so I need something a little more than that.
Also, I could simply use ribbon, but I have plenty of left overfabric which will look much better.
Picture
So, I will cut 1 1/4" wide STRAIGHT GRAIN strips from my leftover fabric.
Picture
A long one (about 70") for the ties and a short one (18") for the loops.
Picture
There are a few different ways to sew and turn skinny strips of fabric.  I will test one method on the short strip. If it works I will then do the same thing for the long strip.  If if doesn't work, I will try another way.
Picture
I fold and stitch the strip with a scant 1/4" seam allowance, and then bring out my well used, handy dandy tube turning tools. I can't even remember who makes this.  But, I couldn't live without it.
Picture
Picture
Picture
Picture
To use these tube turners, one end of the fabric tube needs to be stitched closed so the end of the appropriate sized plastic tube can be inserted into the UN-closed end and pushed all the way to the opposite closed end and stay there. To begin the turning process take the corresponding stick and push the fabric tube at the closed end into the inside of the plastic tube.  Then just work and work it until it comes out the end.

This method is working great, so I make the long strip the same way and press them out.
Picture
What I am going to do next really  COULD be done with ribbon.  You don't need to make fabric strips.

To make lacing loops, I am going to sew a length of my fabric strip (or ribbon) in two places along the back of the waistband, so I measure the back waist band into thirds and mark this with pins.
Picture
I pin on a piece at each of the two points along the back waistband and, since I want 4 loops to thread my lacing into, I divide this strip into 4.
Picture
Then each of these points needs to be stitched.  I used a machine, but this really could be done by hand.
Picture
This is what it now looks like.
Picture
Now I can run the lacing through these loops and cinch it up to fit.  AND if I gain weight (hope not), I can loosen it.

I think I might take this dress on my vacation this summer.  It is very thin so can fit into a small space in my suitcase.

BUT NOW ... HERE IS MY NEXT CHALLENGE!!!
Picture
A few years ago, my son and daughter-in-law brought me this dress/top from India. Firstly, it is a special gift from a far off place, so I want to keep it.  Secondly, the fabric is really nice cotton, BUT it is just an awkward style.  There are slits on both sides that go way too high to wear this as a dress.  It is probably meant to be worn with pants anyway, which I don't think looks good on me. Also, the neck is uninteresting and the overall shape is shapeless.

Hmmmm, do I want to turn it into a dress or a top??? I will stare at it on my form for a couple days and hope to have a solution to show you by the weekend.
3 Comments

Summer wardrobe - cheap skirt - quick fix

6/16/2014

2 Comments

 
Picture
Here I am in the Boho chic (aka Hippie) skirt I bought last week at Venice Beach, LA.  Read story here. Admittedly this was an impulse buy. And I always figure, if I like something, I can fix any sewing or fitting problems when I get it home. 

BUT! I must have been drunk with the California sunshine because the sewing and proportions on this skirt are much, much worse than I realized at the time. The saleslady was charming and the mirror in the store bad. But, I still really like the prints, so it is worth the time to fix.

You can see in my first picture, that the yoke (upper tier) is much too long and I think the over all length is simply too long for a day dress.  I would keep tripping on it.
Picture
And this charming saleslady with a lovely French accent convinced me it could be worn like this as well ... HA HA ... maybe if I were 24!

So, I am going to shorten the upper tier, fix some of the horizontal elastic stitching and re-hem this skirt AS QUICKLY AS I CAN. 

Simplicity has me on a very tight deadline this week. (not complaining, at all, just saying)
Picture
To figure home much to shorten the top, I roll down the elastic, until I like the proportions and put a pin where I want the bottom of the elastic to be.
Picture
This amuses me.  Look at the really nice self-fabric hanging loops they put in this skirt, while the rest of it is sewn like s--t!
Picture
See how the rows of elastic stitching don't match up, except at the bottom.  Good thing I will be taking out several rows of the un-matching stitching ... but I digress.
Picture
I intend to reuse the elastic. And when I pull it out I can see it is 1" wide.
Picture
So I will allow 2 1/2" above the pin I placed where I want the BOTTOM of the elastic to be. The upper pin is the cut off point for all around the top edge of the skirt.
Picture
Now I start pulling out the unwanted rows of elastic stitching.  The elastic come out fairly easily.
Picture
And once I find the exact spot to release the chain stitch, the rest of the stitching comes out pretty quickly, too.
Picture
And look at this ... I thought that elasticized stitching was white, but no, it's lavender.  

Surprise!
Picture
I have to digress back to the bad sewing again briefly.  Some of the elastic stitching I wanted to keep had come loose ... grrr.  So, I tied the ends with a square knot ... the most secure.
Picture
I then whip stitched over the elastic thread from the inside. Note that this is one of the rows of stitching that DIDN'T match up at the seam.
Picture
After trimming off the unwanted fabric all around the top, it's time to press the new waist elastic casing.  I fold down the top edge 1 1/2", press and pin.
Picture
Because I have VERY little time to deal with this, I insert the elastic while I'm sewing. This saves me the time and trouble of guiding the elastic into the casing with a safety pin.  That operation can take a long time!
Picture
When I get to the point where the elastic is shorter than the casing, I lift the presser foot, while leaving the needle down in the fabric and pull up the elastic out some, so I can continue to sew the casing. When finished I, of course, sew the ends of the elastic together, even out the fullness and close up the remaining opening in the casing.
Picture
I hate the white thread used to stitch the hem. And this IS white not lavender.  Usually I would take out this row of white stitching, press all the folds flat and re-hem it, but not today ... NO TIME.
Picture
This time I simply roll the existing hem twice around and re-stitch with black thread.
Picture
Works great and gives a little extra body to the hem.

Now I'm happy with this skirt.  It will be a good traveling skirt.  I can roll it up in the corner of my suitcase.

You know, I always swore I wouldn't be like the older ladies who wear their hair in the same style they did in high school.  For the most part, I try to keep up with modern fashions that I think look good on me. But, let's face it.  I went to high school during the Hippie days and I feel very at home in a Hippie skirt. So I'm happy I can now call it Boho and say I'm in fashion!
2 Comments
<<Previous

    From Andrea 

    I am a commercial pattern maker who is now "sewing over 50"!
    I love to sew and hope to encourage others to come back to sewing.
    The water is fine!!

    Archives

    May 2019
    April 2019
    March 2019
    August 2017
    July 2017
    June 2017
    May 2017
    April 2017
    March 2017
    February 2017
    July 2016
    June 2016
    May 2016
    April 2016
    March 2016
    February 2016
    January 2016
    December 2015
    November 2015
    October 2015
    September 2015
    August 2015
    July 2015
    June 2015
    May 2015
    April 2015
    March 2015
    February 2015
    January 2015
    December 2014
    November 2014
    October 2014
    September 2014
    August 2014
    July 2014
    June 2014
    May 2014
    April 2014
    March 2014
    February 2014
    January 2014
    December 2013
    November 2013
    October 2013
    September 2013
    August 2013
    July 2013
    June 2013
    May 2013

    Archives by Subject

    To search for blog posts in specific categories, use the drop down menu above by hovering over the word "Blog"

    Enter your email address:

    Delivered by FeedBurner

    RSS Feed

    Andrea Schewe participates in Amazon's associates program.