Andrea Schewe Design
  • Home
  • Costumes
    • Reader's Gallery
    • Fantasy Costumes
    • Theatrical
    • Historic >
      • Easier to make
    • International
    • Costumes for Kid's and Babies
  • Crafts
    • Home Decor >
      • Pillows
    • Fashion Accessories
    • Doll Clothes
    • For Kids and Babies
  • Blog
    • Past Blogs by subject >
      • My patterns by number
      • Sewing basics
      • Personal sewing Projects
      • Fashion History
      • Fun and funny stuff
      • Guest Bloggers
      • Crafts and Home Dec
  • Links
  • Contact

Experimental Jumpsuit - pattern combining

8/31/2015

2 Comments

 
Picture
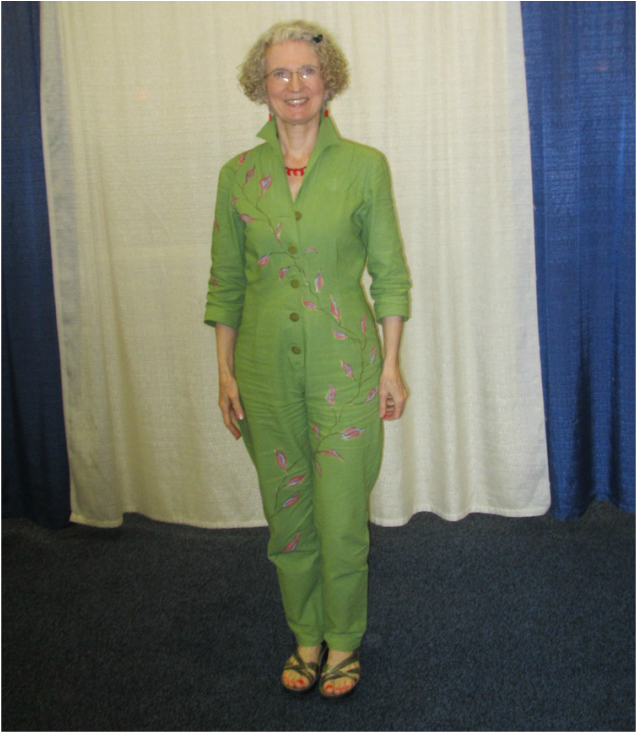
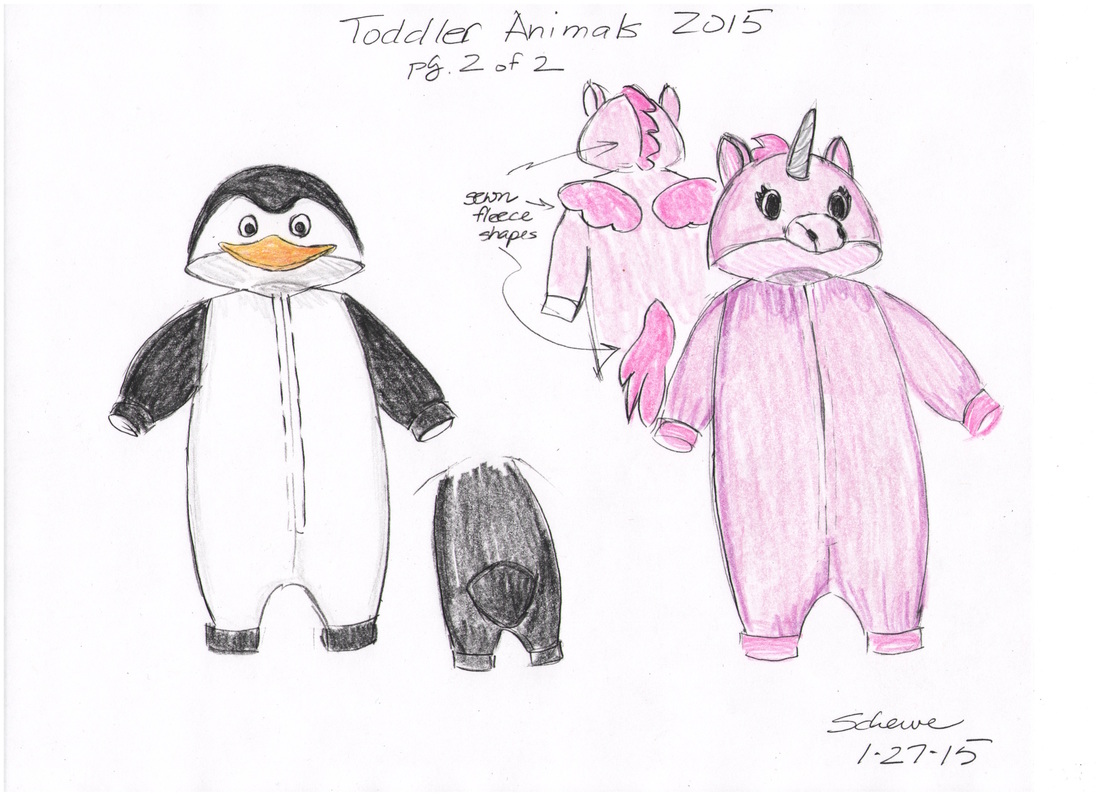
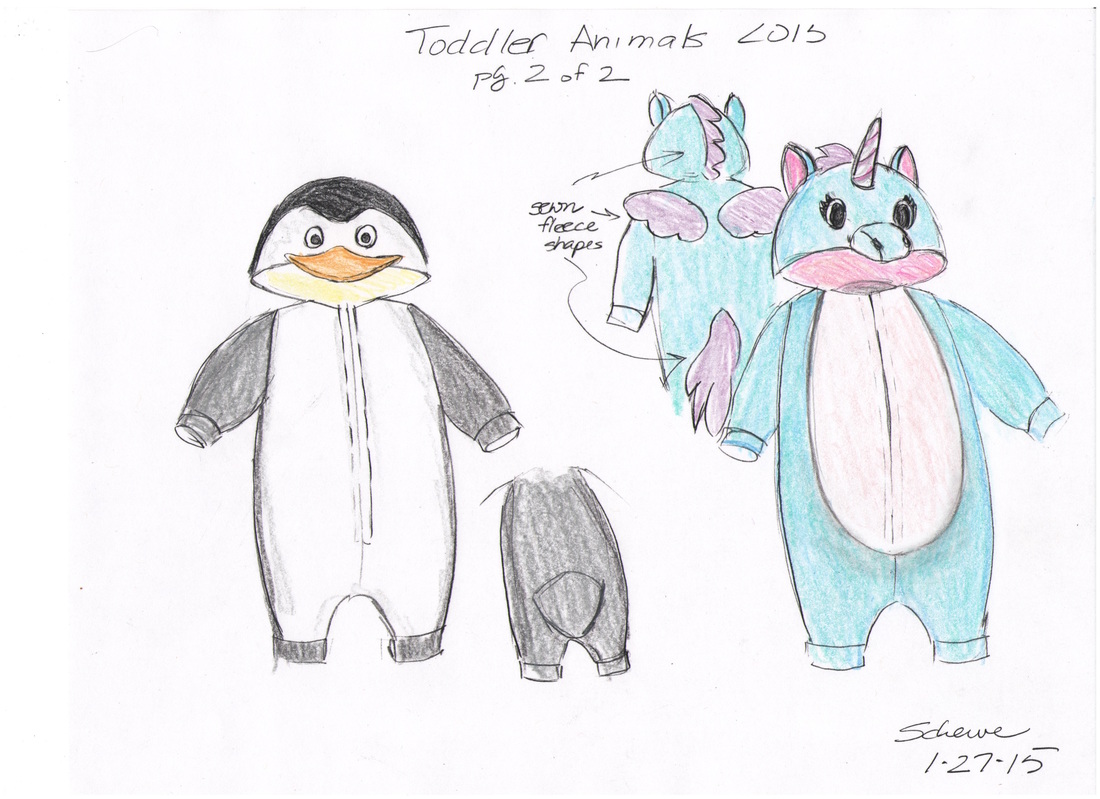
So, I'm still trying to make myself a thing per month this year. I wanted to try out a few things ... and did them all while making this jumpsuit.

I wanted to paint with the fabric inks I bought about a year ago and hadn't used yet.
I wanted to combine two patterns to make a jumpsuit. 
And I wanted to sew something with hemp fabric.
Picture
Today I will talk about the pattern, on Wednesday the hemp and dying and painting on Friday.

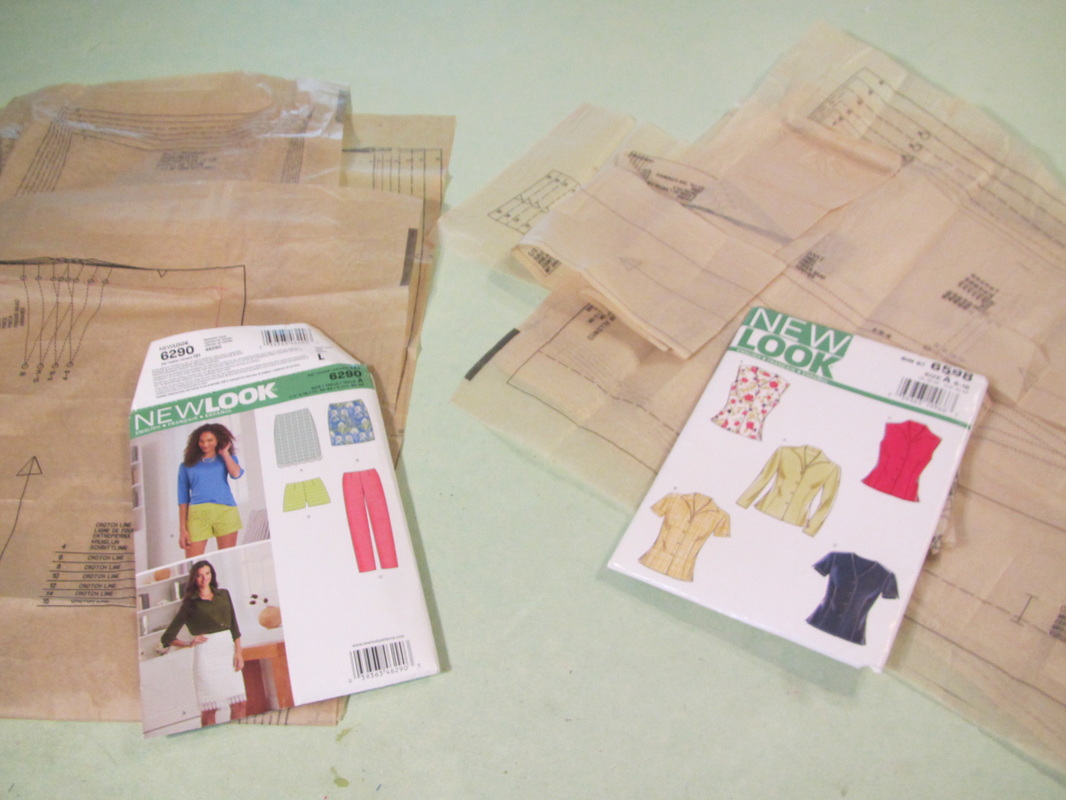
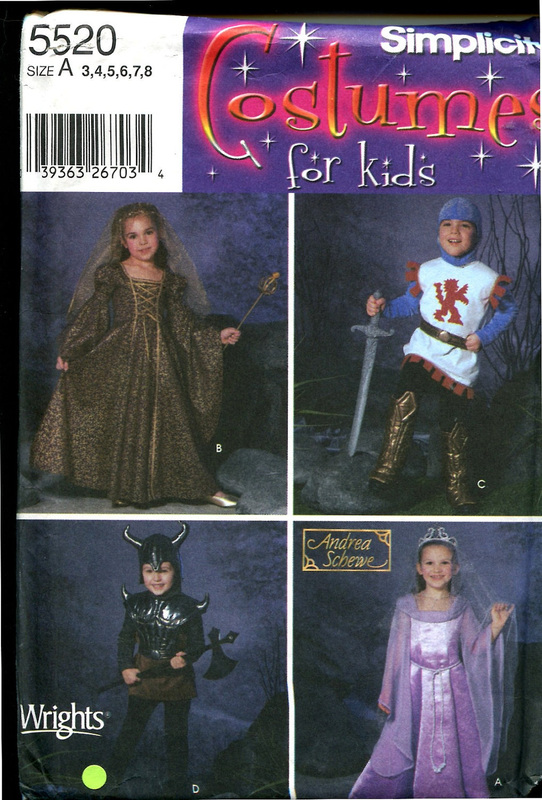
These are the two patterns I used. This is a favorite blouse pattern of mine. I've made it up a couple times already. And the pants are just a good basic pattern.
Picture
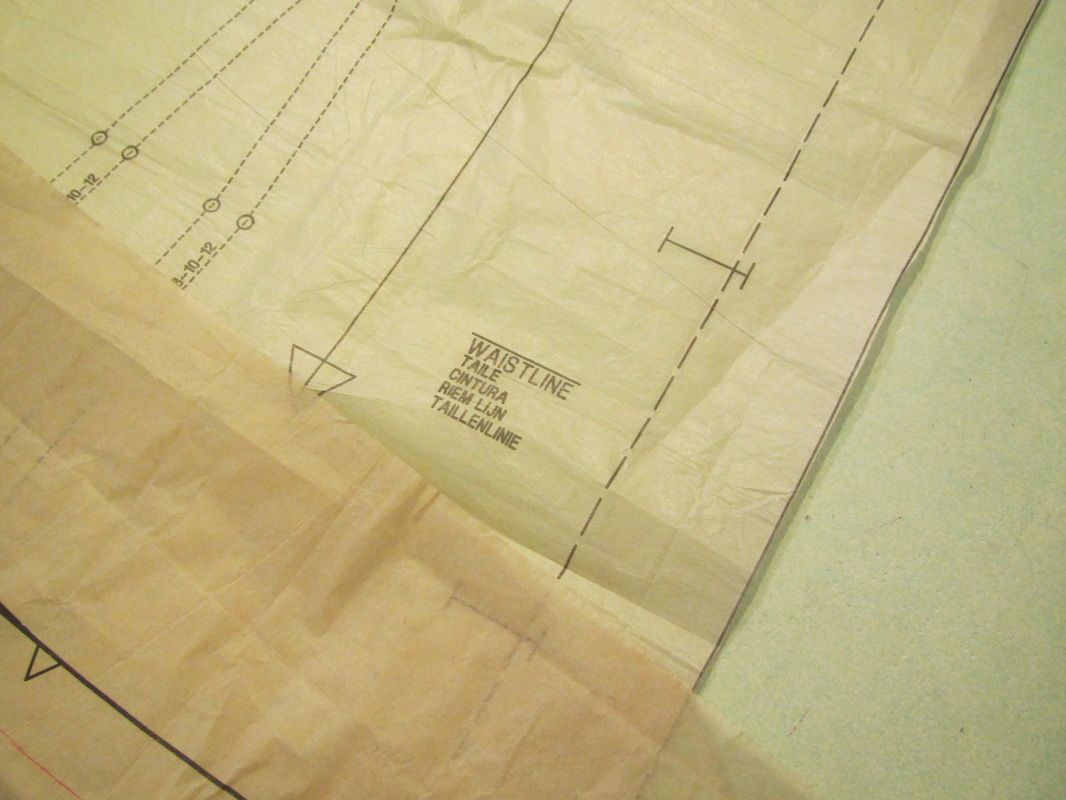
To make a jumpsuit out of separate blouse and pants patterns the waist marking is really important.
Picture
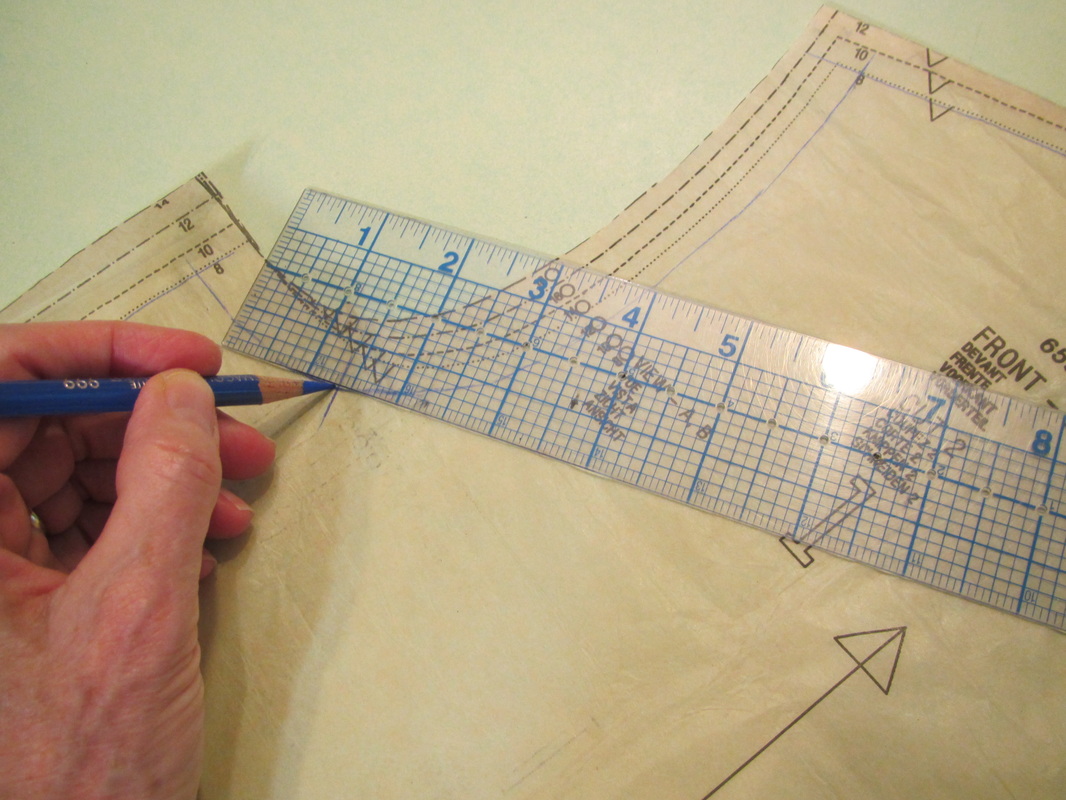
But, first I draw in all the stitching lines. When fiddling around with a pattern it is really important to work from the stitching line, not the cutting, line for best results.
Picture
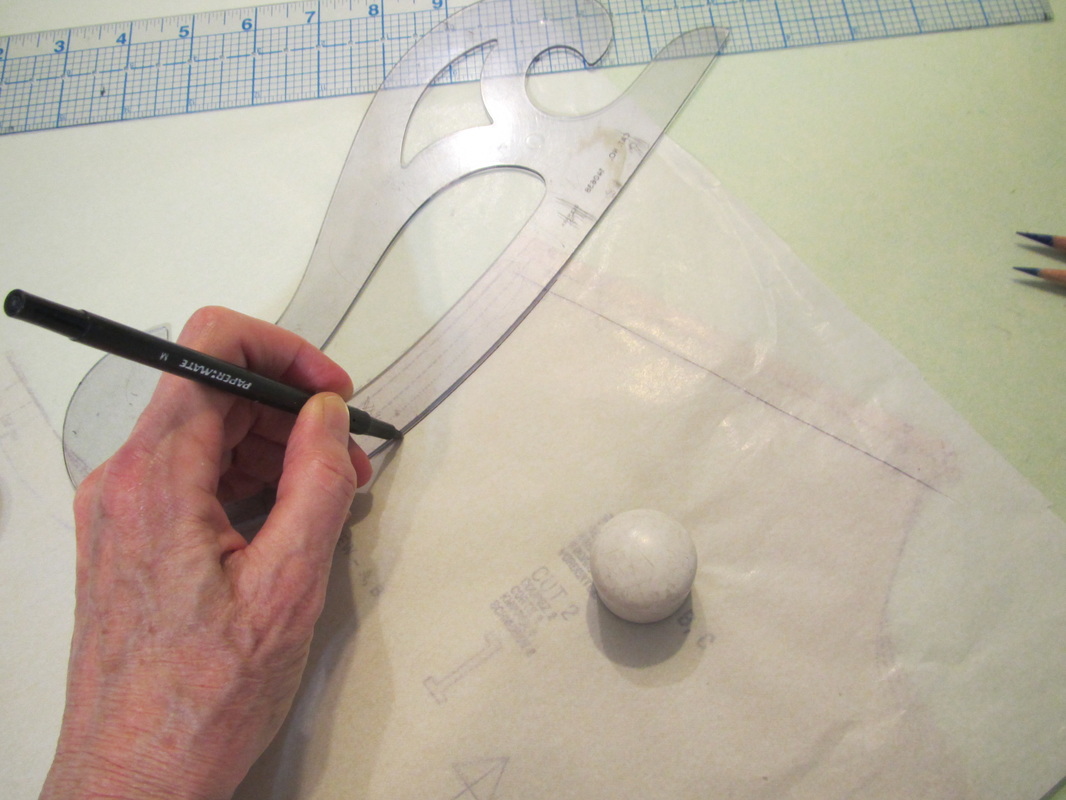
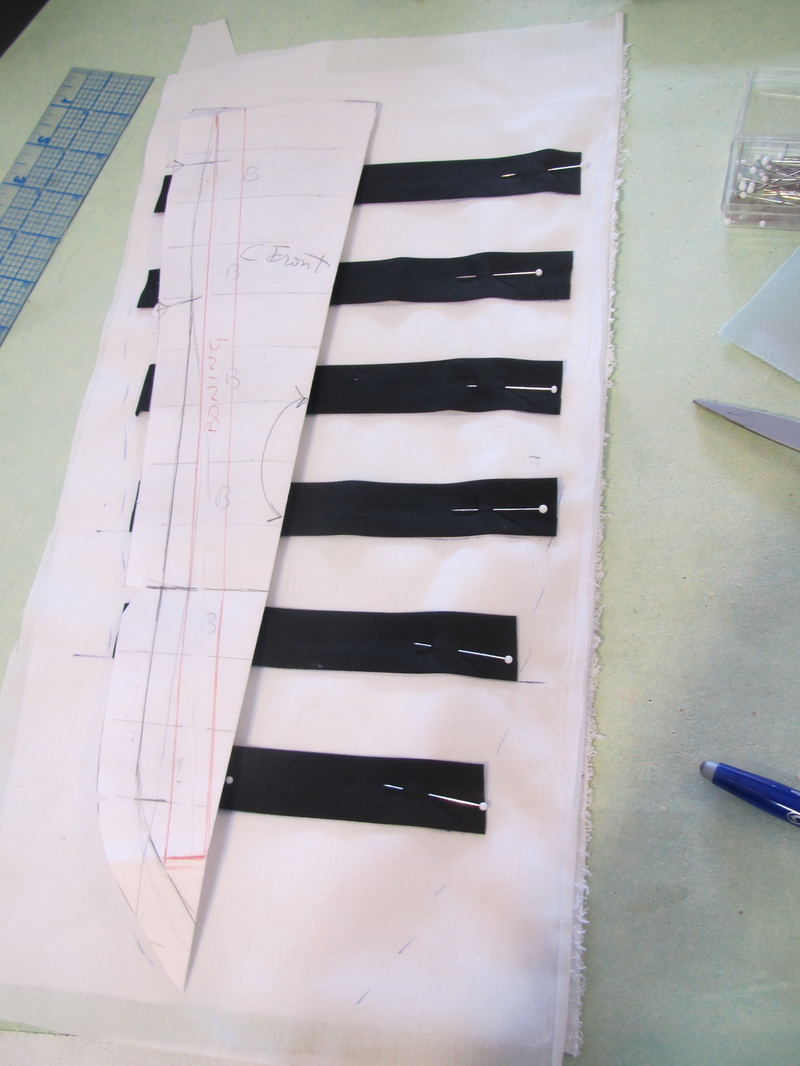
I plan to make a whole new pattern. I'm using doctor exam table paper. It's cheap, transparent and fairly strong. So, I now can start tracing the blouse.
Picture
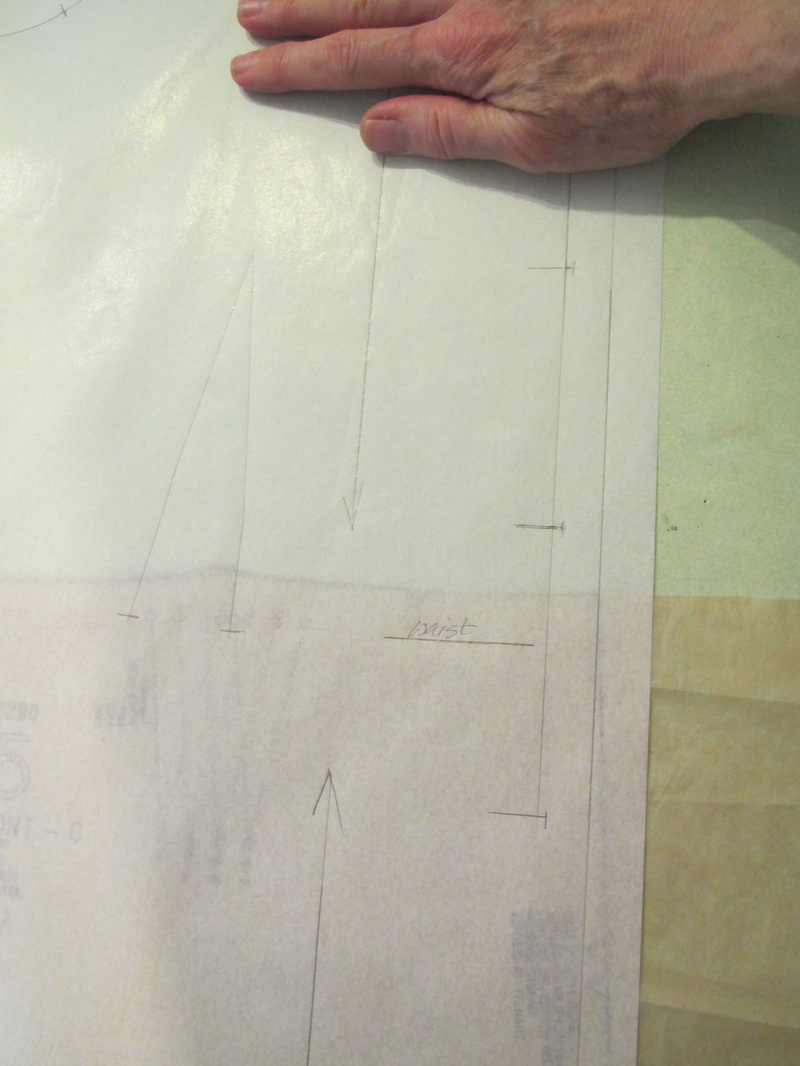
After I trace the blouse down to the waist, I lay the waist of the pant pattern so it lines up with the waist of the blouse along the center front line. You can see the dart of the blouse and the dart of the pants don't line up.  I reason that the placement of the blouse dart is more important because it lines up with he bust point the pants dart is for the hip which is not in a specific spot like the bust. So I slide the pattern over to make the hip dart from the pants line up with the bust dart from the blouse.
Picture
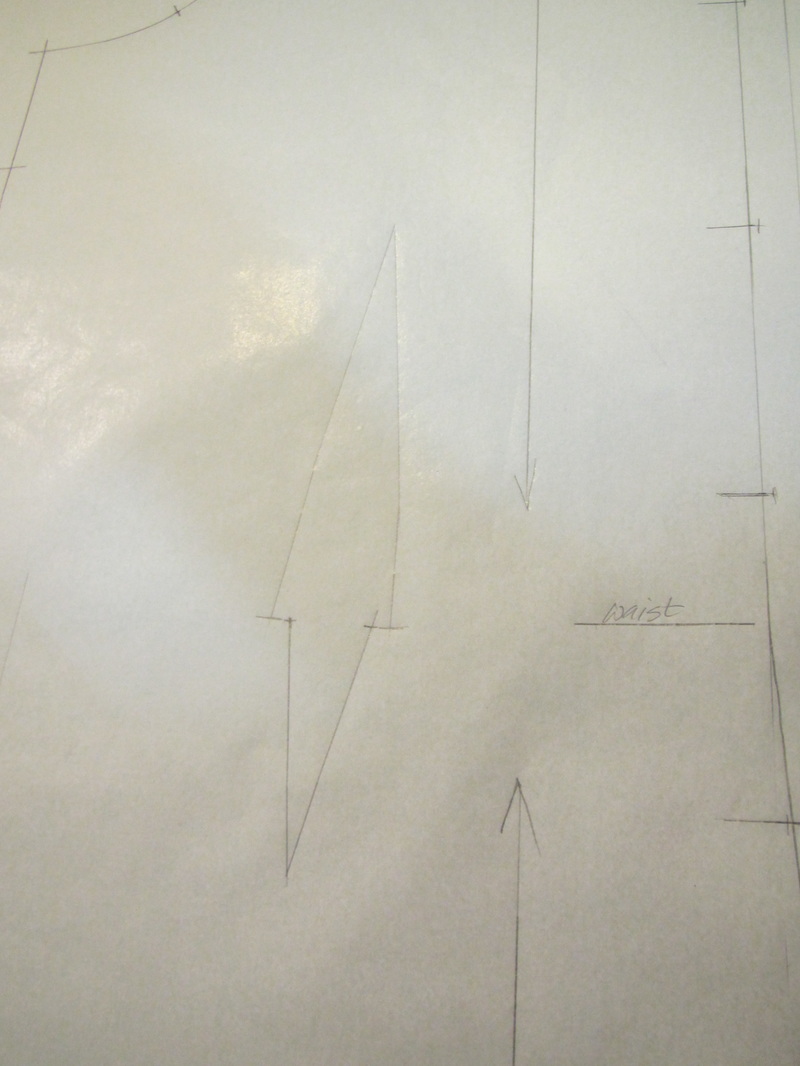
When both parts of the dart are traced I slide the pattern back so the center front lines match up again. BUT! the bust dart is larger than the hip dart.
Picture
Not a problem, it can just be smoothed out.  I ran into other problems, the worst being that the blouse had MUCH MORE wearing ease than the pants. So I decided to just use a larger size from the pants pattern so it matched up better with the blouse. I figured maybe a jumpsuit shouldn't fit too tight AND you can always trim fabric off ... harder to put more on.
Picture
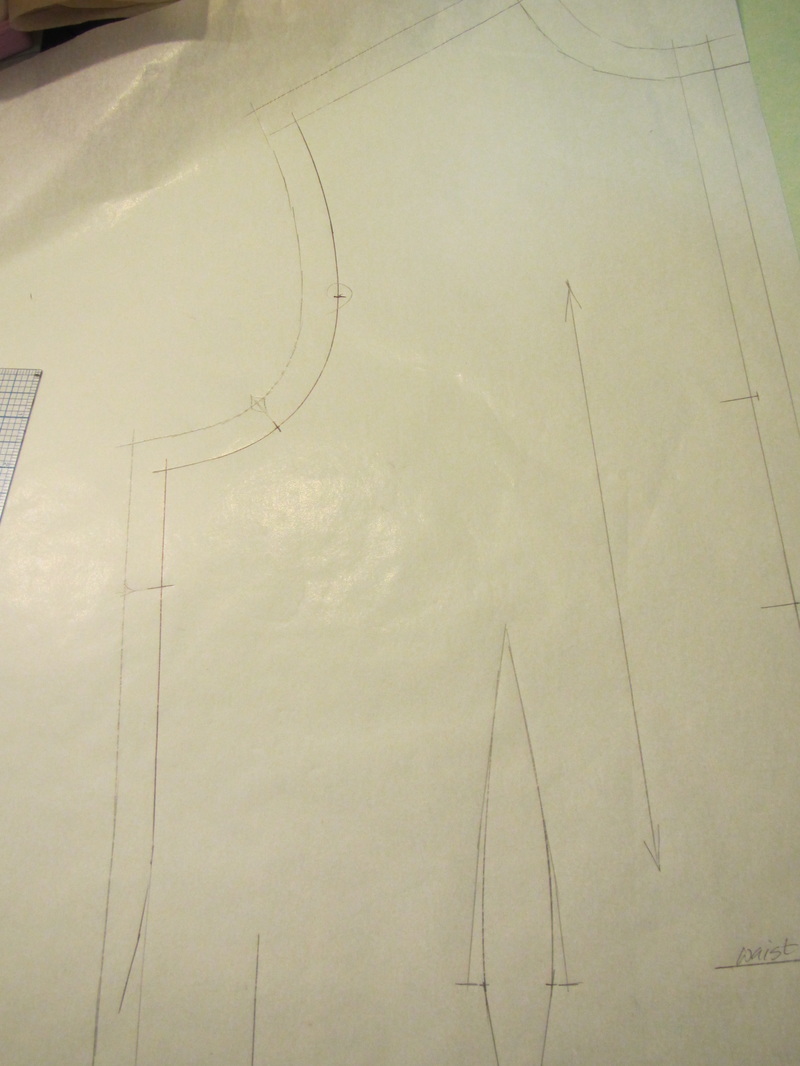
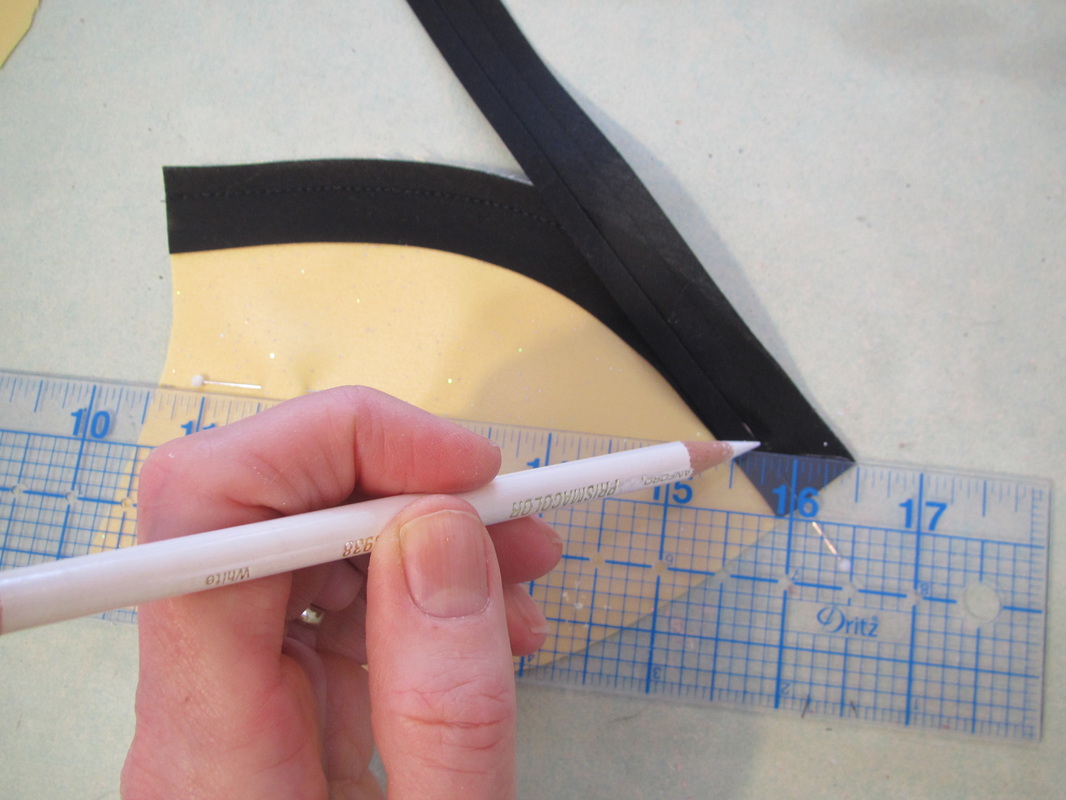
Here is my front pattern piece.
Picture
And OOPS! I guess I don't want that larger pants size.

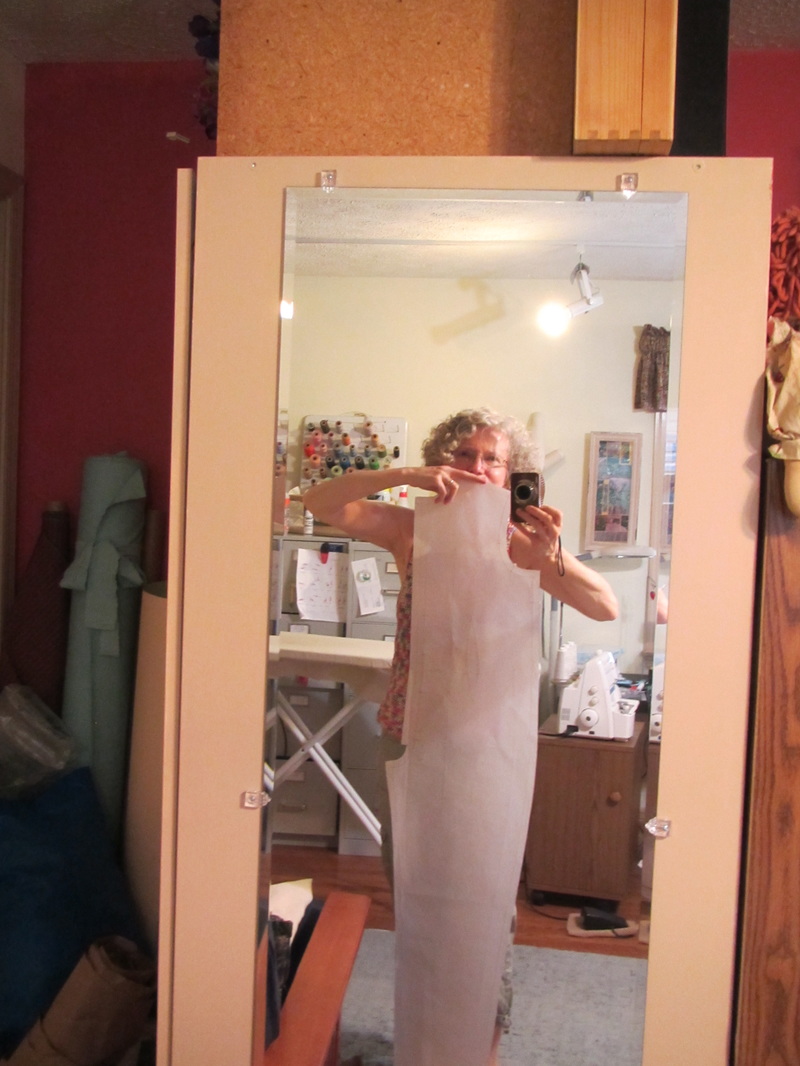
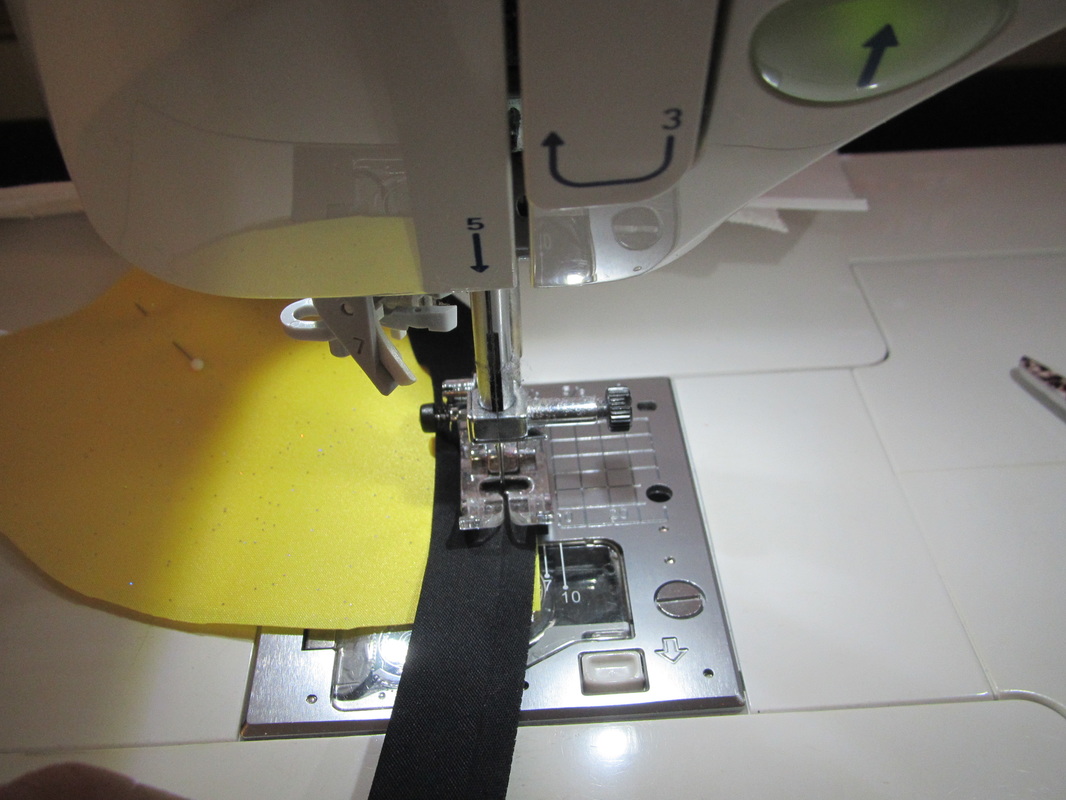
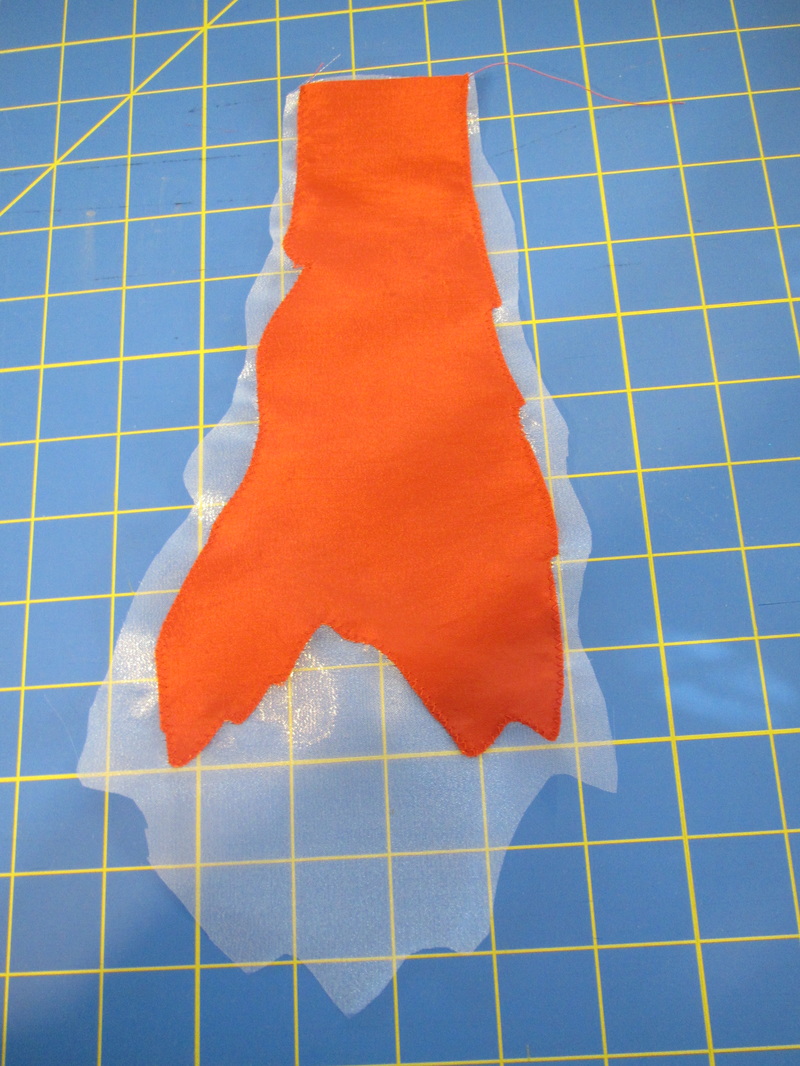
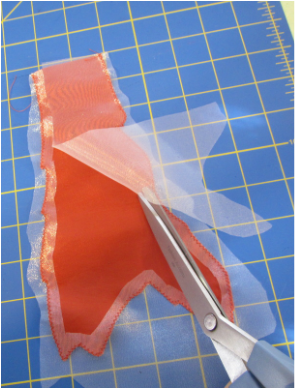
AND, I'm being reckless. This is not muslin, although it looks like it. This is my hemp, which I will be dying. When being reckless, cutting large is wise.
Picture
So, I needed to do LOTS of fitting.
Picture
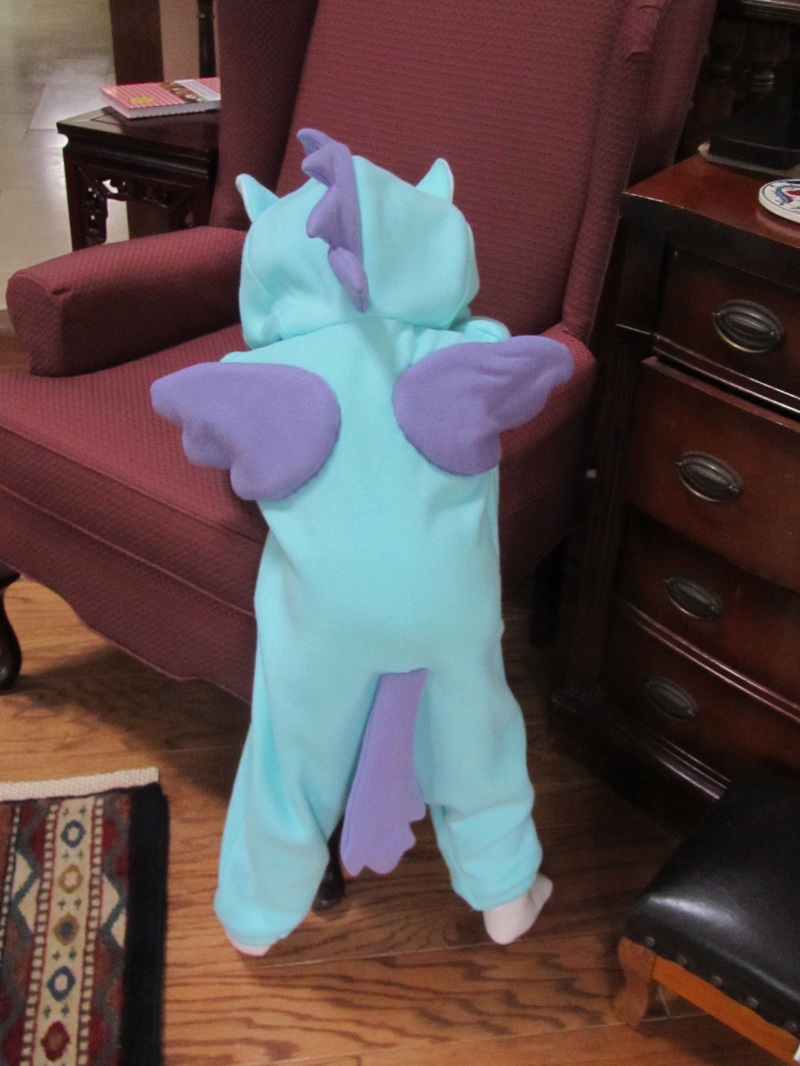
While fitting I check mobility!  Didn't want something I couldn't sit down in.
Picture
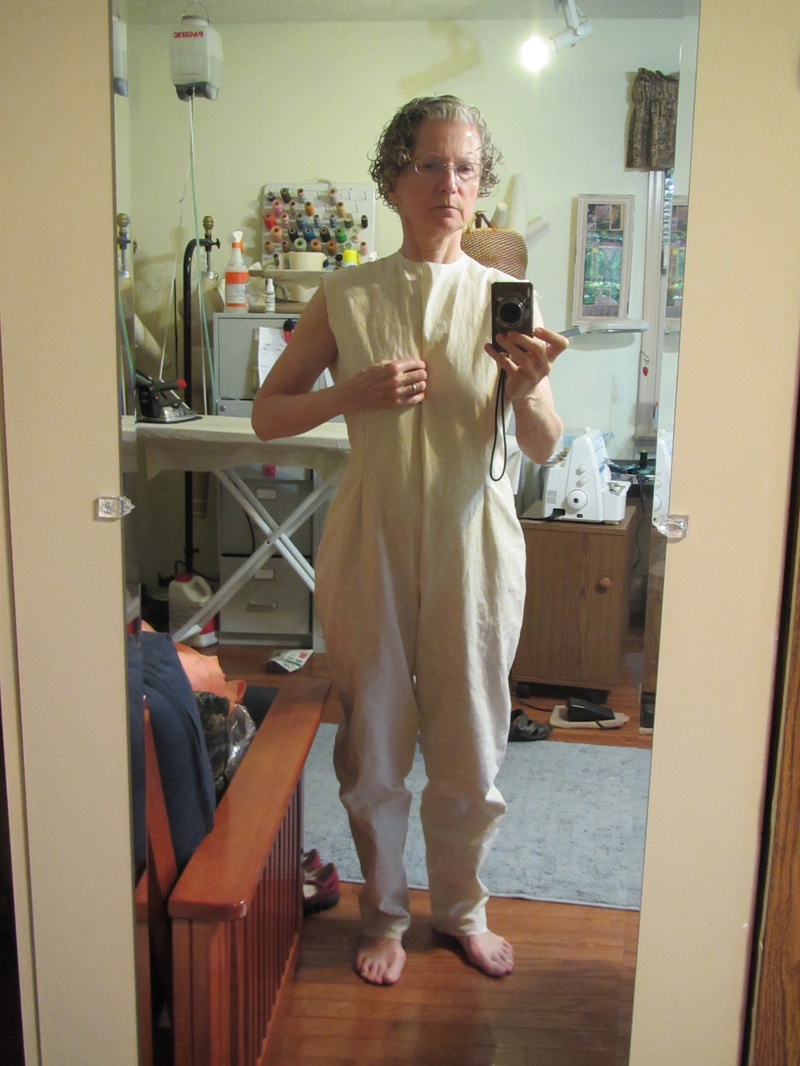
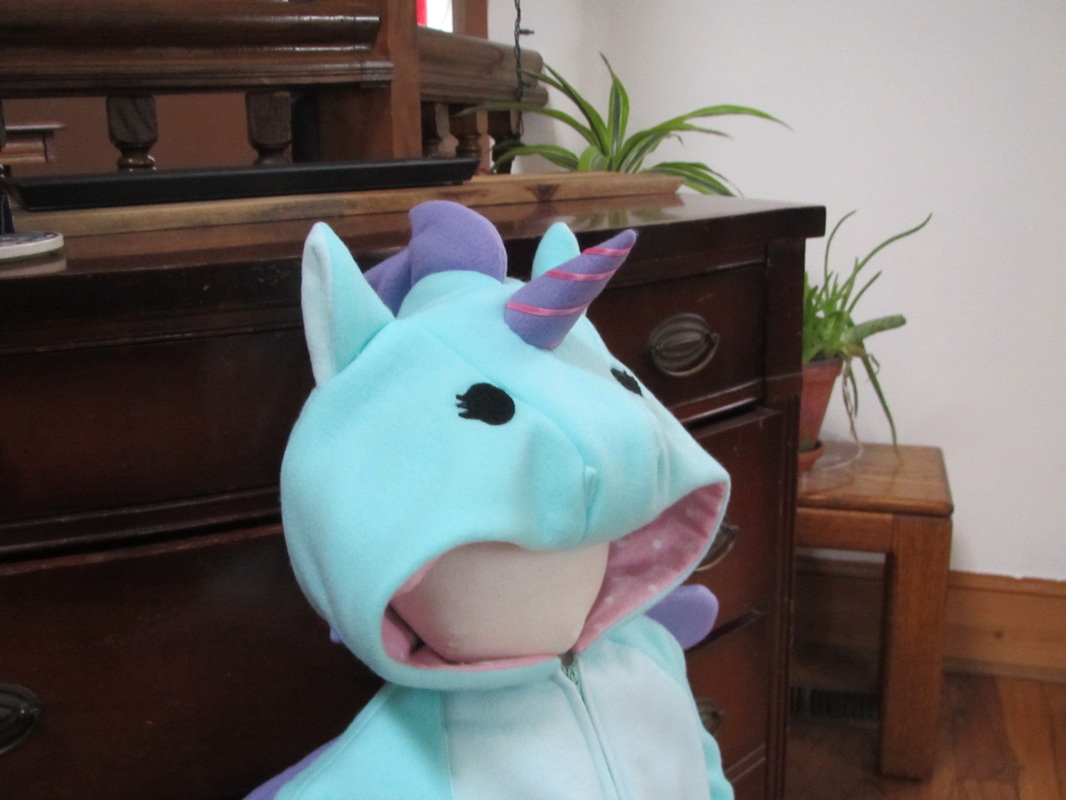
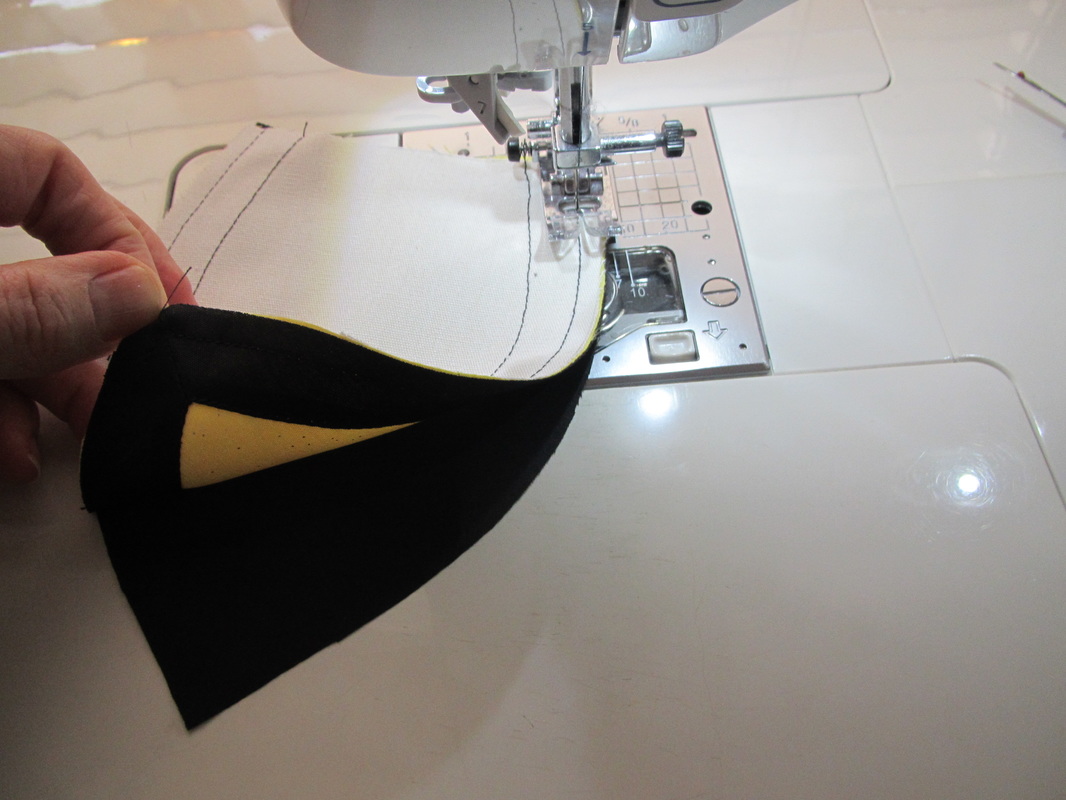
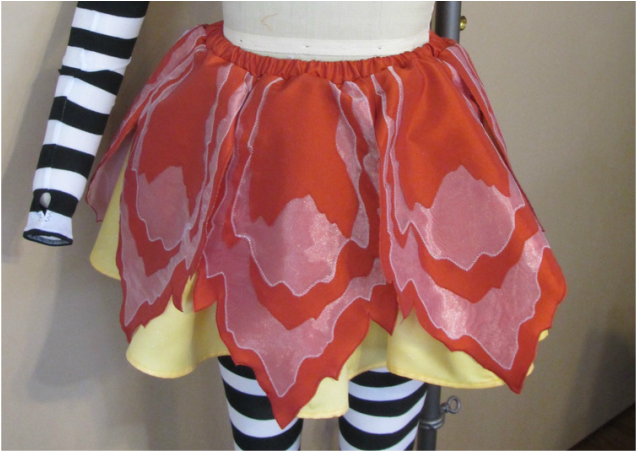
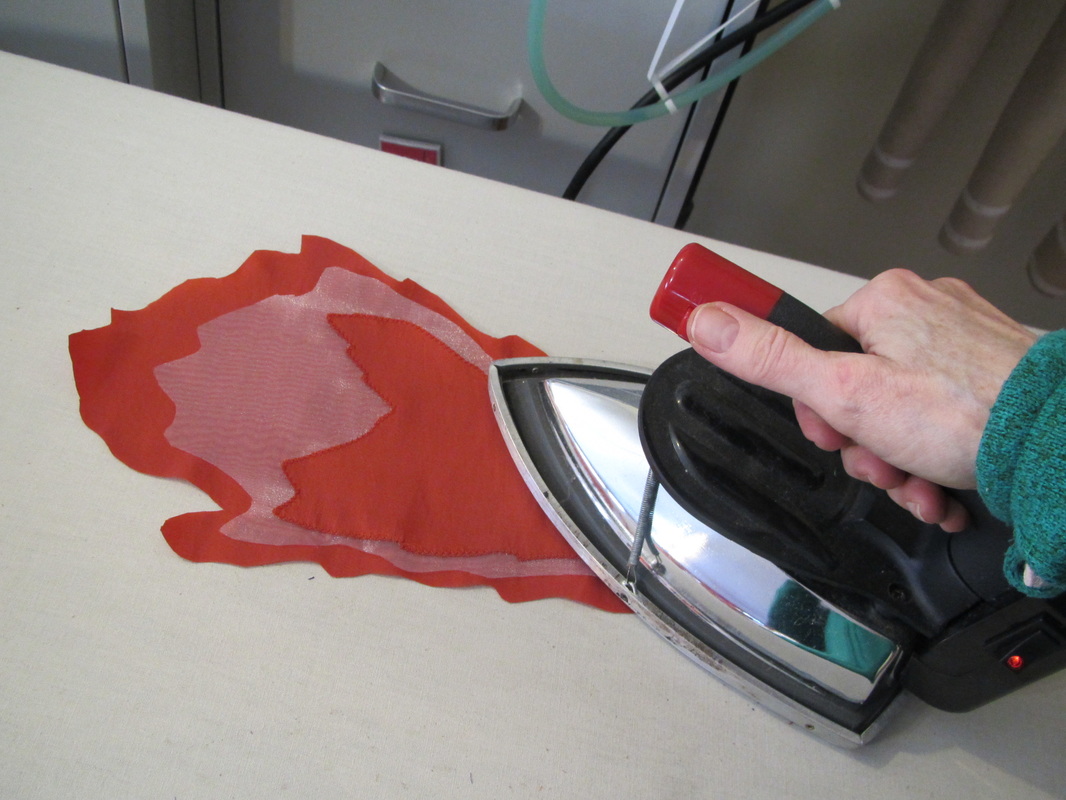
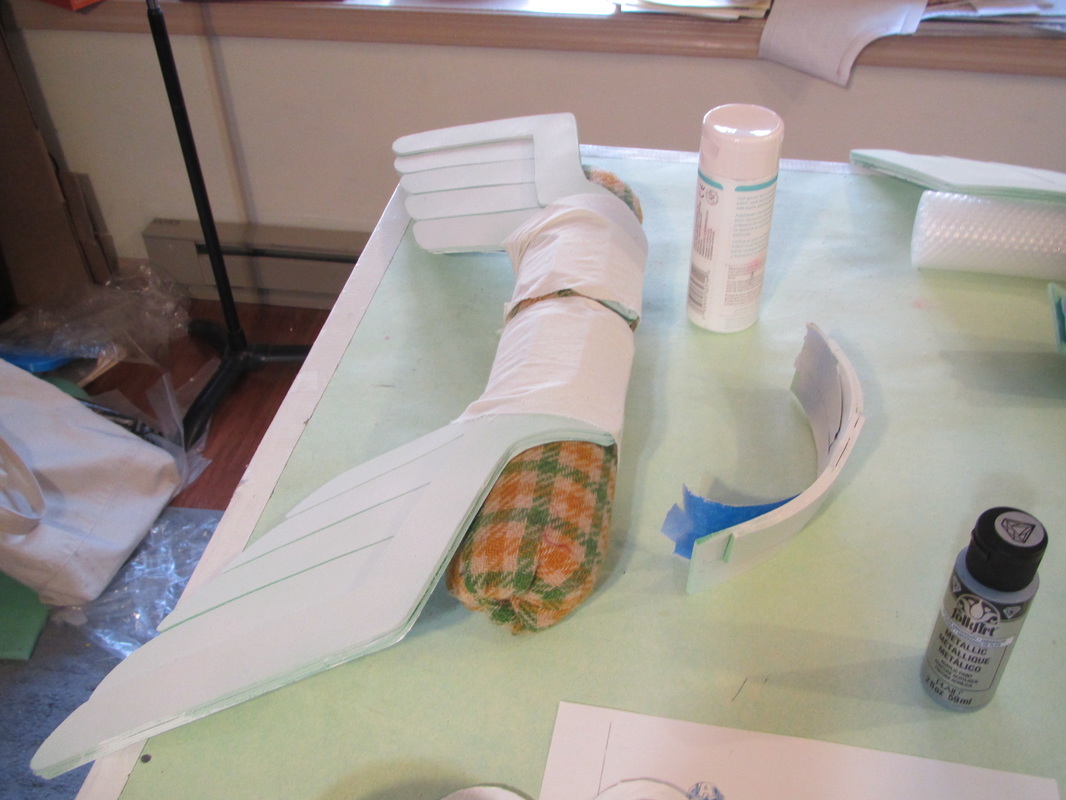
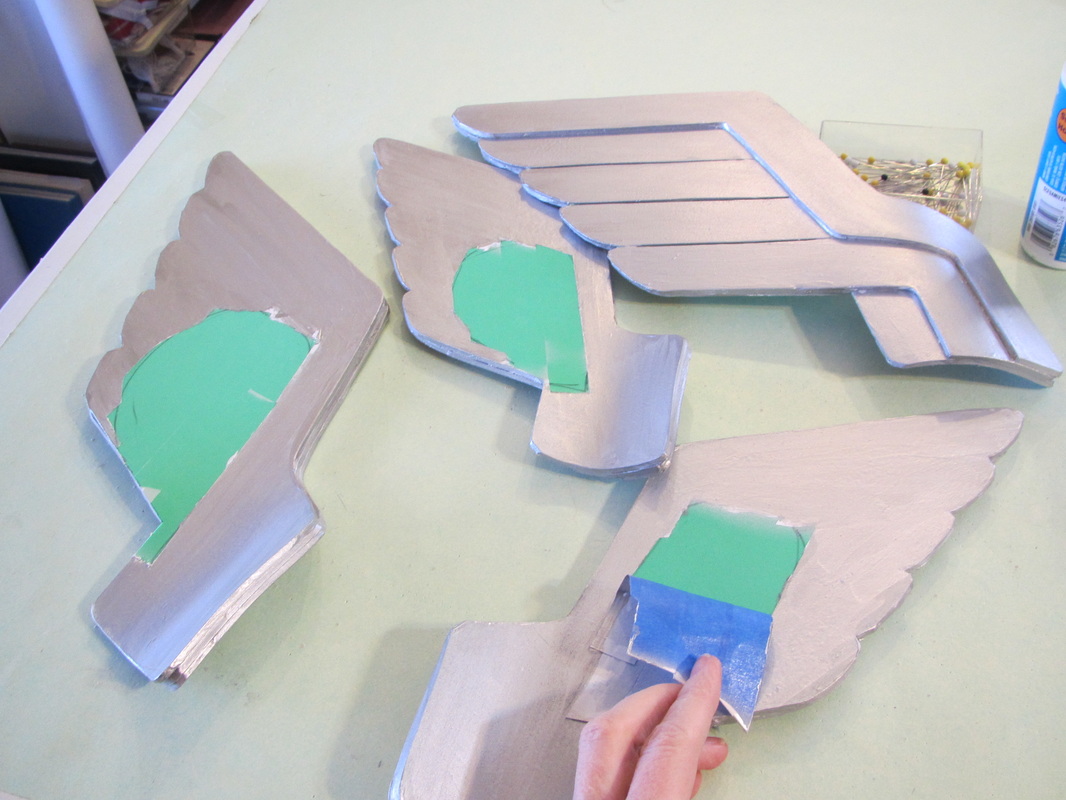
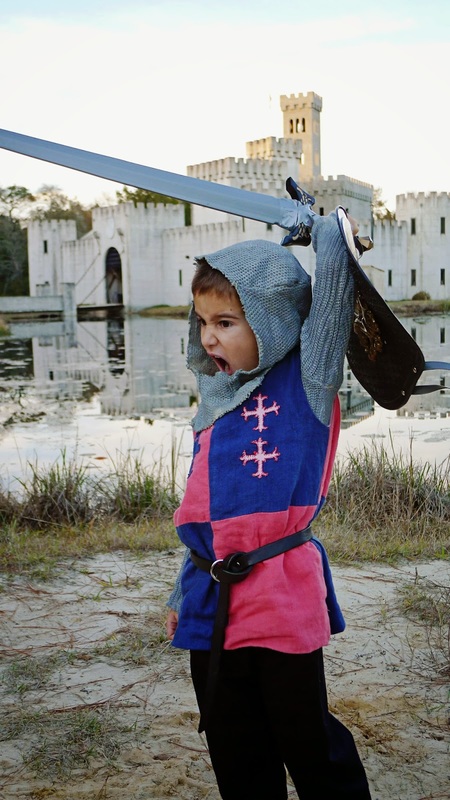
So, I got the fit eventually.  And you can see I had fun painting. More about that on Friday.

BUT ... sigh ... hemp is just like linen. Wrinkles like mad ... all part of my experiment.
2 Comments

Toddler Animal faces - pattern 1032

8/28/2015

4 Comments

 
Picture
Picture
These costumes have a great comfy body shape, but the fun is in the faces. Let me show you how I worked them out.


First I needed to get a workable versatile hood pattern.  This style of animal costume as a very loose hood, but it has to drape just right.


I like using felt as my "muslin" when working on something that will be sewn in fleece.

Picture
Picture
So, here is my first attempt with corrections and then my final version.
Picture
Next, I get out my oval template to see what size ovals I want to try for eyes.
Picture
Then I keep cutting out different sized eyes and noses and whiskers, until I'm happy with he results,
Picture
lay tracing paper over to make a final pattern.
Picture
I wanted the puppy face to have a three dimensional snoot. Here is one of my trial faces on the felt mock up hood.
Picture
You can see I went through multiple attempts on my way to the snoot that made me happy!
Picture
The snoot is a completely separate thing, sewn like a tiny pillow.
Picture
It is turned and stuffed through an opening on the back side,
Picture
hand sewn in place on the hood ...
Picture
with a little embroidery thread line added for definition.
Picture
Finished puppy face.
Picture
The penguin beak was done in a similar fashion. Here is my trial face on the felt hood.
Picture
And the final face while it is still lying flat.
Picture
Now, the unicorn face needed a whole new pattern to suggest a horse muzzle, although the hood lining pattern remained the same.

I created nostrils with double folded pieces of fleece.  I made an exact pattern for this. It is not just a square or rectangle.
Picture
This is what it looks like after the face seams are sewn.
Picture
The muzzle needed something to fill it out, but I couldn't just shove some stuffing in there, it is too large and loose a space. The whole face is backed with batting and I created a pattern piece for rectangles of batting that are tacked to the seam allowances of the face seams ...
Picture
to create a suggested baby horse face.
Picture
And, I know this isn't face related, but just wanted to show the fun back detail of the unicorn.


BTW ... Simplicity posted a 3 minute Youtube video of ME in my studio ...


Check it out ... CLICK HERE
4 Comments

Toddler Animals return! - pattern 1032

8/26/2015

0 Comments

 
Picture
Picture
It's always a great compliment to be asked to make a second version of something.  Last year this pattern of Toddler animals did well enough that I got to make MORE!


See the cute version Mandy Nader made for her son from last year's pattern.  If you want to see more of her work, go to her page Meow about Cosplay and Crafts.

Picture
Picture
So, what adorable animals should I make this time??? 
Picture
Kitties and puppies are good reliable choices.  And the other two ended up being these, a penguin and unicorn. But my first round of color didn't work so well. 
Picture
These colors are MUCH better. The penguin now has a grey body and black head, like actual baby peguins and a turquoise unicorn works much better in the group since the kitty is already pink ... actually that first unicorn was supposed to be purple, it just doesn't look like that on the scan, but the turquoise is better.
Picture
These are the fabric photos I send in to Simplicity for approval ... penguin ...
Picture
kitty ... 
I decided to put a printed flannel lining in the hood of all the animals this year. The hood fits very loose and I like the lining being part of the design.
Picture
And ... HA!!! ... these are not the final fabrics I used for the unicorn ... hmm. I must have changed my mind again. Sometimes it is SO hard to get just the right color.
Picture
This was my first set of fabrics for the puppy. I really wanted to use the paw print fabric inside the hood. But Betsy Burger, my design director, said the browns were too dark. And now that I look at it she was so right. She is a good design director!
Picture
The softer mottled brown works much better with the multi color dot for the hood lining.


I'll be taking about all the faces on Friday.
0 Comments

Fairy sewing explained - pattern #1034

8/18/2015

3 Comments

 
Picture
Picture
I'm always given two pieces of Amy Brown's art to work with. I have to figure out how to make as many pattern pieces as possible work for both designs. Sometimes it makes my brain hurt. 


For the Candy Corn costume I decided wide single fold bias tape would be the way to go. I couldn't ask everyone to find and then buy a tiny piece of black and white striped fabric just for that center front panel.  And wide bias was need to go around all the waist petals anyway.
Picture
So everyone of those stripes is a piece of bias tape topstitched down.
Picture
For the petals, first press one side of the bias tape out flat.

Stitch that pressed-out side to the outer edge of the petal. Stop just before reaching the point.

Picture
Then miter the point. First fold the bias back on itself and mark the center line for sewing.
Picture
Stitch that marked line.
Picture
Then cut along the fold so that tiny seam can be pressed open.
Picture
Finish stitching the petal along the outer edge and then stitch down the inner folded edge close to the fold.
Picture
Now the petal can be stitched to it's lining piece in the usual way.
Picture
One of the big challenges making one of Amy Brown's fairy drawings into an actual costume is keeping the blended look of artwork.

These skirt petals are made with 5 layers of alternating solid and sheer fabric. And this is what I wrote to the instruction writers at Simplicity.

I, on purpose, flipped all of the jagged skirt petal layers this way and that so the seven petals would not be identical. I don’t know how you can say that in the instructions, but I am going to write about this when I blog after the pattern comes out.

So ... I am writing about this now.  You can flip any and all of the layers to make each petal slightly different.  Up to you.
Picture
Picture
Zig zag the layers one by one, starting with the top layer. Cut away the excess fabric from the back after each layer.
Picture
Press well and often. I pressed the fabrics before layering. And after each layer was added to allow any shrinking to happen.
Picture
This is what they looked like from the back after the first three layers were put together.
Picture
Do not cut away anything from the largest bottom layer after stitching it on. Instead it should have  fusible interfacing pressed to it.
Picture
In this photo I'm doing a little repair work, but I want you to look to the right. Those pencil lines are the outer edge markings. I rough cut the largest main petal outside it's finished line, so I could get a nice zig zag on that line and then cut it away.
Picture
Like this! The first photo of the finished skirt above will show you how it looks.

Phew! enough fairy sewing for today.

Gotta get back on my current project you will see in 6 months or so.
3 Comments

Amy Brown Fairies - pattern 1034

8/14/2015

0 Comments

 
Picture
Amy Brown does such beautiful artwork. I wish I could draw like that! But, I get to turn her artwork into an actual thing. FUN.

This is the third pattern of Amy Brown fairies I've done for Simplicity and before I start describing some of the sewing challenges, I want to point out the really great job the art department did on the photographs for these two costumes. They got the models to look just like Amy's artwork.  And ... congrats to the models, too. I'm learning that modeling is harder than it looks!
Picture
The first thing I want to show you is what I do to get the motifs on printed fabric to line up like this.

I first cut the center front panel with the print motifs centered. That's the obvious part, so obvious, I didn't even take a photo.
Picture
Then as I work my way around the garment piece by piece, I fold back the seam allowance of the piece I've just cut so ....
Picture
I can make the motifs match up at the stitching line for the piece it will be sewn to.
Picture
Then that piece is cut out and I proceed to the next.
Picture
After all the pieces for one side of the body are cut, they are flipped upside down and used as the pattern pieces for the opposite side making sure the print is exactly like the first.
Picture
The print can never match up exactly when the garment has lots of curved seams like a corset, but pretty good results can be had.
Picture
The other thing I want to talk about today is the pointy purple hat. The first thing to know is no wire get inserted until the hat is completely machine sewn. The wire is put in with hand sewing. Fusible interfacing is used through out. Make sure to let the piece cool down completely after fusing the interfacing on. This helps make a much more secure bond.
Picture
The brim is assembled with the seams going outward.  Bias tape is used around the outer edge for a clean finish and as a casing for the wire.
Picture
The inner edge is stay stitched at 5/8" and then the seam allowance is clipped so it can open up and be sewn to the crown of the hat.
Picture
After these two pieces are sewn together. Wide bias tape is sewn over this seam to make an inner hat band.
Picture
Now the wire can be added.
Picture
Use the hat brim pattern to bend the wire into the correct shape.
Picture
Cut it and securely wrap the overlapped ends before slipping it under the bias tape at the edge of the brim and slip stitching in place.
Picture
Then the wire that goes up the back seam of the crown can be inserted and secured.
Picture
Now, I like to poke a little stuffing into the point of the hat so it will look better when curled up.
Picture
Glue down the inner hat band and ...
Picture
the point can be bent into a little coil. I, also, pull up the very end with some hand sewing to get the very tip curled, too.


Happy sewing.
0 Comments

Pattern 1038 - Thor's Helmet

8/12/2015

12 Comments

 
Picture
Picture
My first blog about all these new patterns is going to be working with the EVA foam, which is a material that was new to me. BUT, having made many prototypes for the toy industry new materials don't scare me.  My challenge was to figure out how to do it and do it in a way that would be easy for anyone to reproduce.

So, the kind of EVA foam I used is just craft foam, the kind you can get at Joann's or Michael's. You can get it much thicker, 1/2" or more (available at big hardware stores) and there are wonderful tutorials showing how to use it, but the thin kind was just what I needed for this project. And it's much easier to work with.

The photo above shows the wings for Thor's helmet before painting. Let me show you how I did this.

Picture
The pieces are constructed by gluing several layers on top of each other, curving them while glueing. So, there are quite a number of pieces to cut. I traced around all my piece with a fine point Sharpie then used regular scissors for cutting. But, not my fabric scissors.
Picture
The layers MUST be glued over a curved surface to  become head shaped. I was making a child and adult helmet, so I went to my kitchen and found two pots that were about the same measurement as a child's and adult's head.
Picture
You can see I taped the edges of the bottom most layer to the pot, to hold the shape.

I used the craft foam glue that is sold by the same company that makes the foam, but any contact cement works.
Picture
Don't move the pieces until they are dry. Because the layers were formed over a cylinder they will hold the curved shape.
Picture
I'm testing the look and the fit before starting to paint.
Picture
EVA foam is very porous and needs to be sealed before the final paint can be applied.

The areas that are going to be glued to the cloth part of the helmet need to be kept free of paint. Because my original plan was to use spray paint, I masked these areas off with painter's masking tape.  If you are a careful hand painter this tape isn't needed.

BUT, I found out spray paint doesn't work AT ALL. It's super messy and just kept soaking in and in and in, never really sealing off the surface.

The thing to use is GESSO or MODGE PODGE. 
Picture
I wanted to make sure the part that curves around the cheeks was going to stay nicely shaped, so I wrapped it with muslin around my seam roll after the Gesso was dry enough to handle and let it sit overnight. I don't know if this step is necessary, but ... 
Picture
Then I hand painted on a couple layers of silver craft paint ...
Picture
and glued the pieces to the cloth helmet.
Picture
Here is some glue waiting to get tacky enough.
Picture
And then I can press the fabric on.
Picture
TAH! DAH!
Picture
Meanwhile I was also making the silver discs that go on Thor's chest.
Picture
They are made the same way as the helmet pieces, but are much easier. Little squares of fabric with snaps sewn to them are glued to the backs so they can be removed for laundering. I imaging Thor gets rather sweaty going around being heroic and his outfit will need a washing now and then.
Picture
Thor and Thor Jr. ... awwww!
12 Comments

New Costume Patterns!

8/10/2015

8 Comments

 
Picture
It's that time again, folks! Six patterns of mine that are shipping today. Two are completely mine and 4 are my work for other designers.

AND, there are two additional ones shipping I was involved with a bit. The Marvel/DC costume were a collaboration with my sister Theresa LaQuey. She made the patterns for the adult women's costume while I worked on the men, boys and girls. 

We will be blogging together about Wonder Woman, Super Girl and Bat Girl.

It was so fun working with her! 

Picture
I will show you how I did Thor's helmet and other tricky parts on these costumes.
Picture
Picture
So much fun making the toddler costumes!
Picture
This Amy Brown pattern includes the candy corn pillow and you can go on the Simplicity Website for a free tutorial to make the candy corn headband.
Picture
Picture
Picture
Halloween should be fun this year ... it's on a Saturday!! Perfect for the whole family to get involved.
8 Comments

Reader's Gallery 5 - Pirates! (and knights)

8/7/2015

0 Comments

 
Picture
Now ... THIS is my kind of family.  Kami Latorre sent these photos of the pirate costume she made for her entire family.  

LOVE ... LOVE ... LOVE
Picture
Picture
Picture
Picture
How do you say "Aghrrrrrrrr!" in baby?

Here are the patterns she used, 4923, 4059, 2561, and 3644
Picture
Picture
Picture
Picture
BUT ... she didn't stop at that ... Look what else she made for her kids!
Picture
Picture
Picture
These boys are clearly method actors!
Picture
Thanks Kami.


I'm always interested to see what you've done with one of my patterns.


Send stuff in to [email protected]
0 Comments
<<Previous

    From Andrea 

    I am a commercial pattern maker who is now "sewing over 50"!
    I love to sew and hope to encourage others to come back to sewing.
    The water is fine!!

    Archives

    August 2019
    July 2019
    June 2019
    May 2019
    April 2019
    March 2019
    August 2017
    July 2017
    June 2017
    May 2017
    April 2017
    March 2017
    February 2017
    July 2016
    June 2016
    May 2016
    April 2016
    March 2016
    February 2016
    January 2016
    December 2015
    November 2015
    October 2015
    September 2015
    August 2015
    July 2015
    June 2015
    May 2015
    April 2015
    March 2015
    February 2015
    January 2015
    December 2014
    November 2014
    October 2014
    September 2014
    August 2014
    July 2014
    June 2014
    May 2014
    April 2014
    March 2014
    February 2014
    January 2014
    December 2013
    November 2013
    October 2013
    September 2013
    August 2013
    July 2013
    June 2013
    May 2013

    Archives by Subject

    To search for blog posts in specific categories, use the drop down menu above by hovering over the word "Blog"

    Enter your email address:

    Delivered by FeedBurner

    RSS Feed

    Andrea Schewe participates in Amazon's associates program.