Andrea Schewe Design
  • Home
  • Costumes
    • Reader's Gallery
    • Fantasy Costumes
    • Theatrical
    • Historic >
      • Easier to make
    • International
    • Costumes for Kid's and Babies
  • Crafts
    • Home Decor >
      • Pillows
    • Fashion Accessories
    • Doll Clothes
    • For Kids and Babies
  • Blog
    • Past Blogs by subject >
      • My patterns by number
      • Sewing basics
      • Personal sewing Projects
      • Fashion History
      • Fun and funny stuff
      • Guest Bloggers
      • Crafts and Home Dec
  • Links
  • Contact

Sorting through my rulers

1/30/2015

1 Comment

 
Picture
Welcome to Tidy Friday.  Now that I'm on this clean up and clear out jag, I think I will tackle a different category every Friday until it's done.  I'm am so grateful to have the pressure of keeping my blog going, because it would be very easy to procrastinate doing this kind of thing.

Well, you see, I have these two drawers that sit at the end of my cutting table. The one on the right has all my rulers, curves and templates. Again, I have many more than I need AND, seriously, I don't think I've cleaned this drawer out in over 20 years. About 7 or 8 years ago I moved my studio from one room to another in my home, but I just moved these drawers, as is. Didn't touch them. Now it's time!
Picture
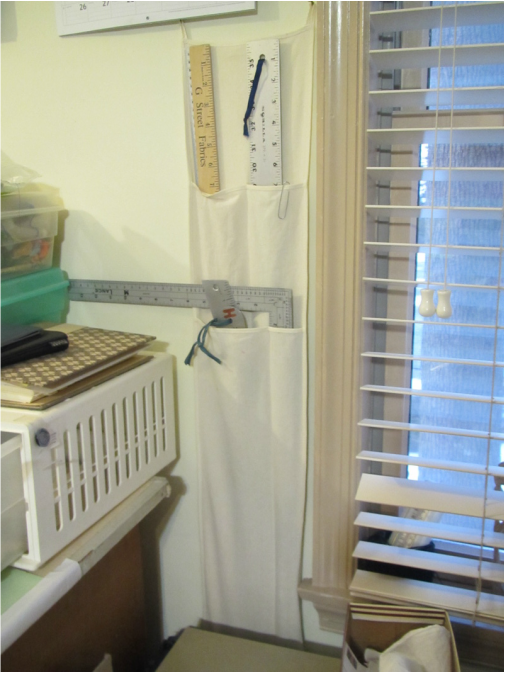
My large rulers are well taken care of. I made this nice hanging pouch for them a while back.
Picture
I have three yard sticks and I really need and use all three.
Picture
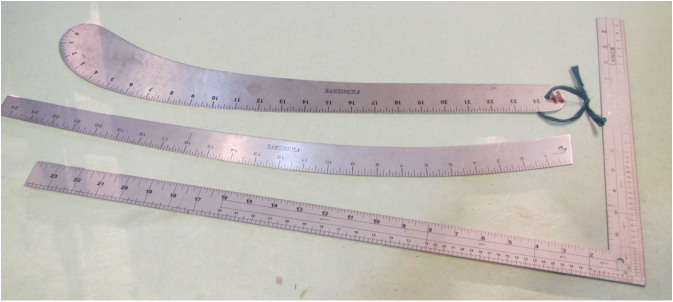
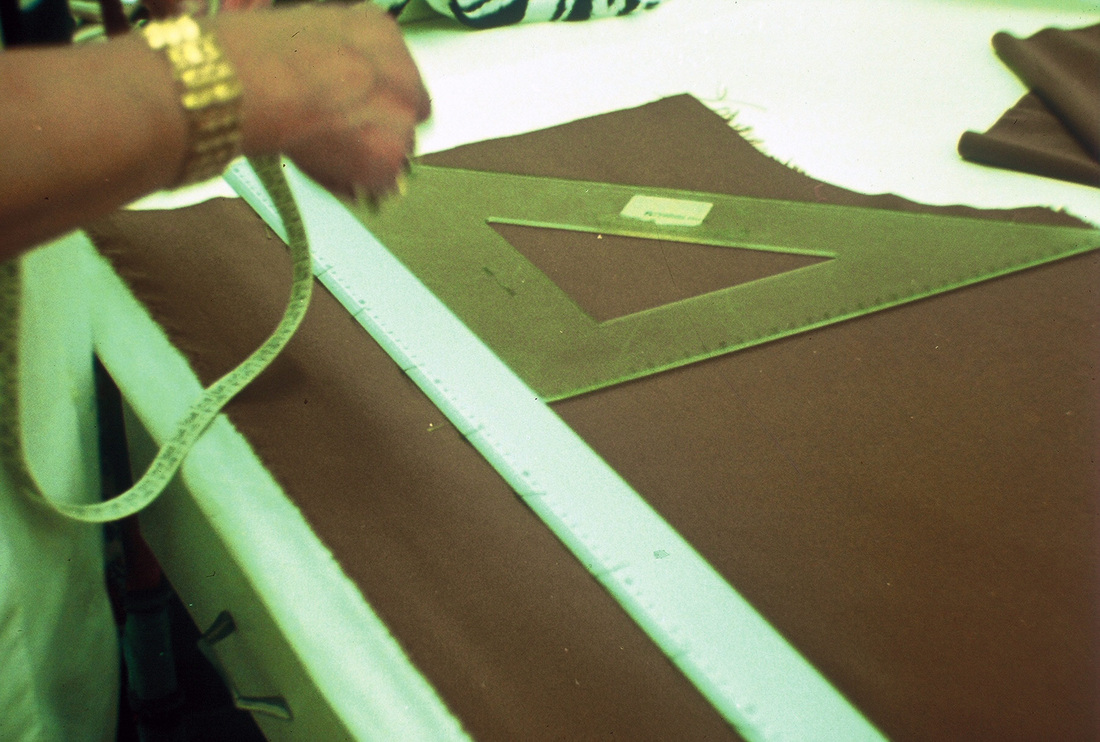
And these three specialty rulers, the top one is called a pants curve or, I think sometimes, a large french curve.  For years it was the only large specialty ruler I had. But owning the other ones have made my life much easier.  The middle one is called a hip curve. It is really good for curves along hip lines and for the gentle curves at the bottom of skirts.  The "L" square is so great to have, but you can really manage without it. A 90 degree corner can be found on all sorts of things like the corner of a book or the cardboard back of a legal pad.
Picture
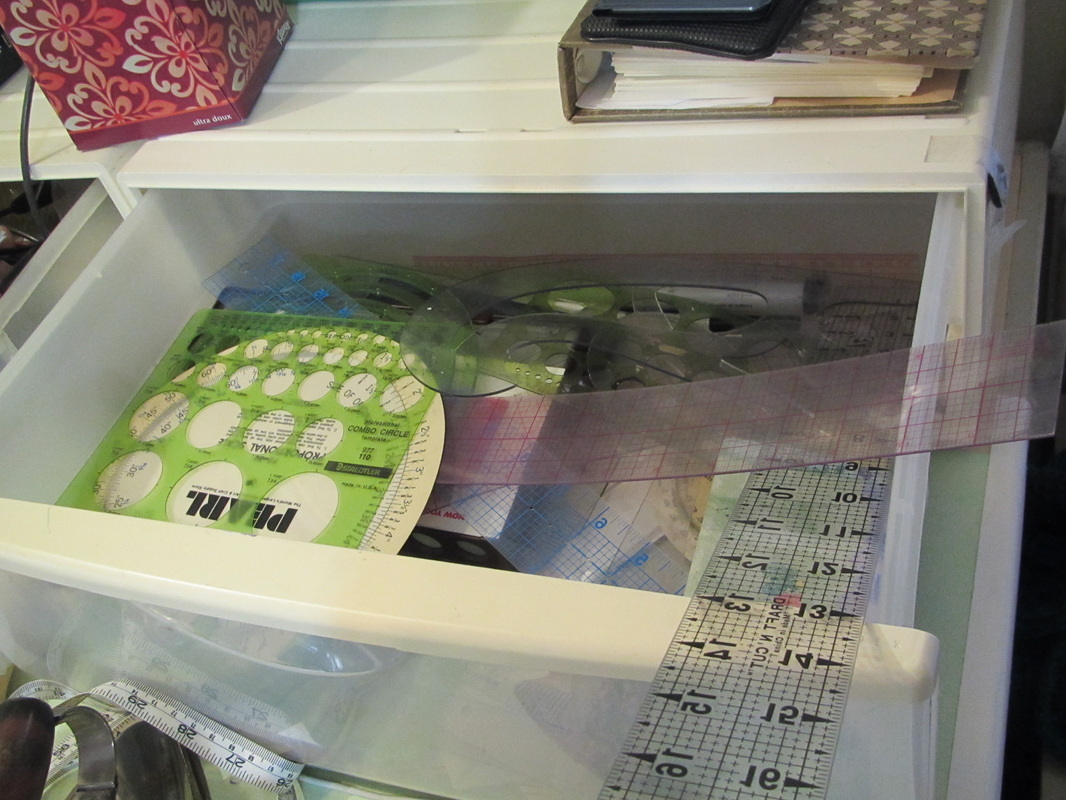
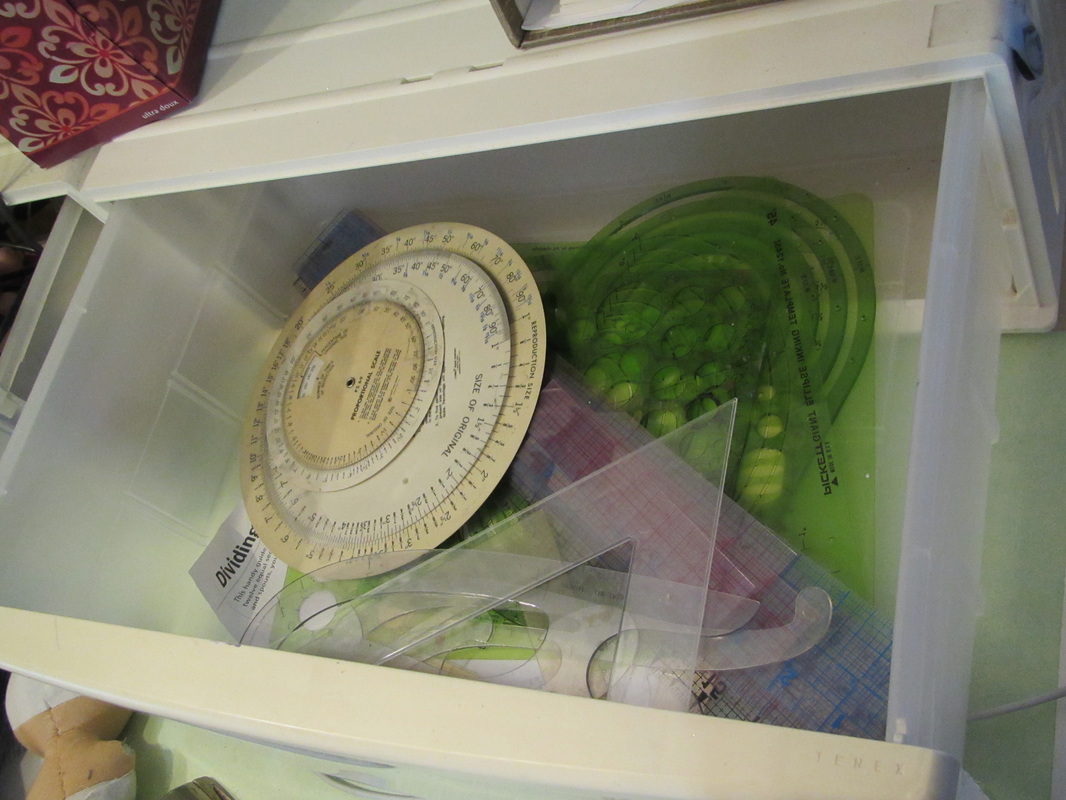
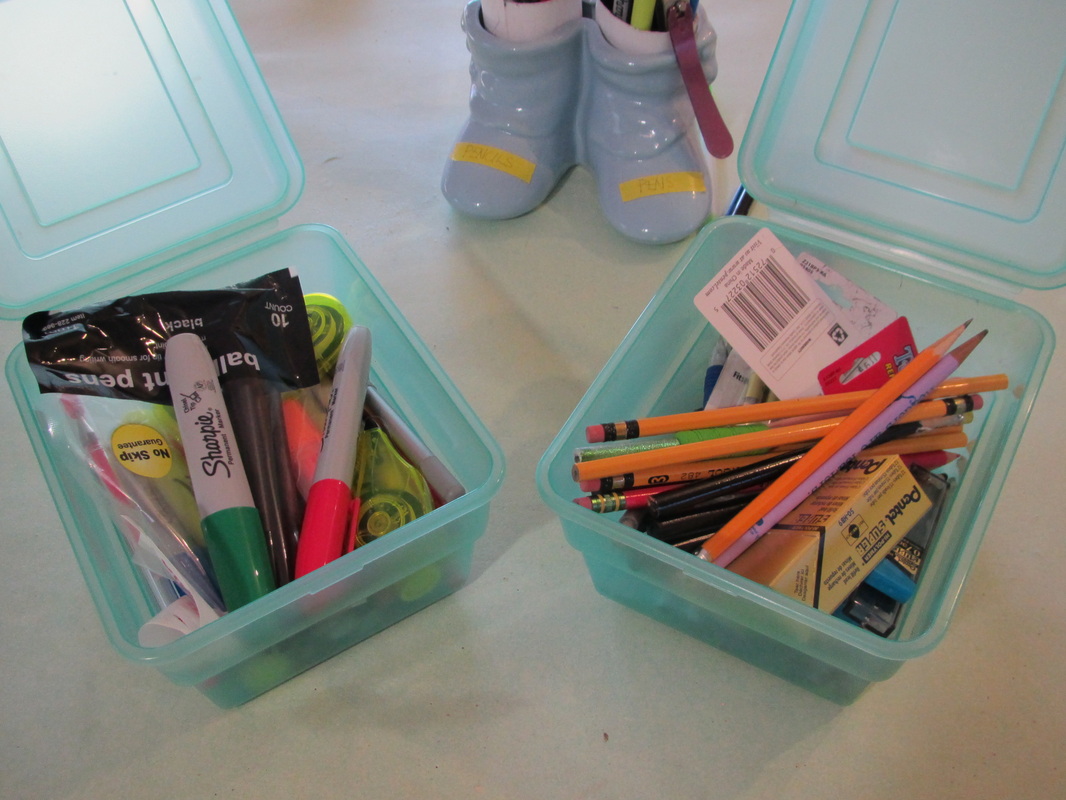
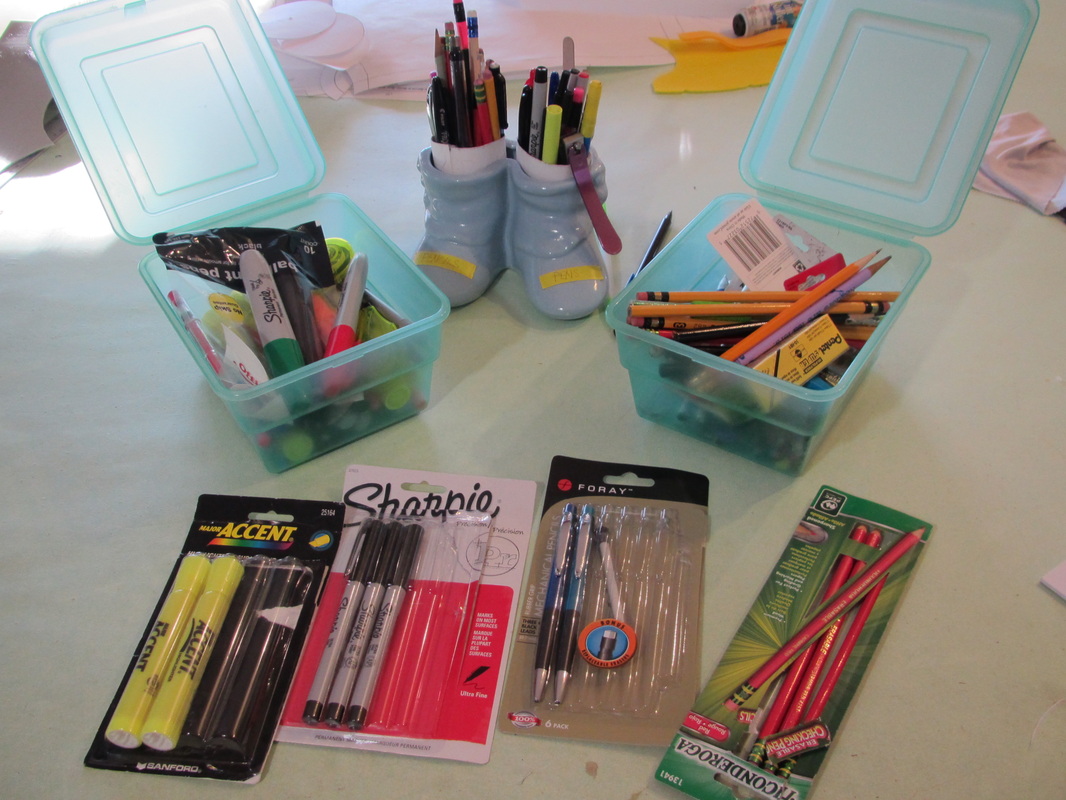
BUT!!! this drawer is the problem.
Picture
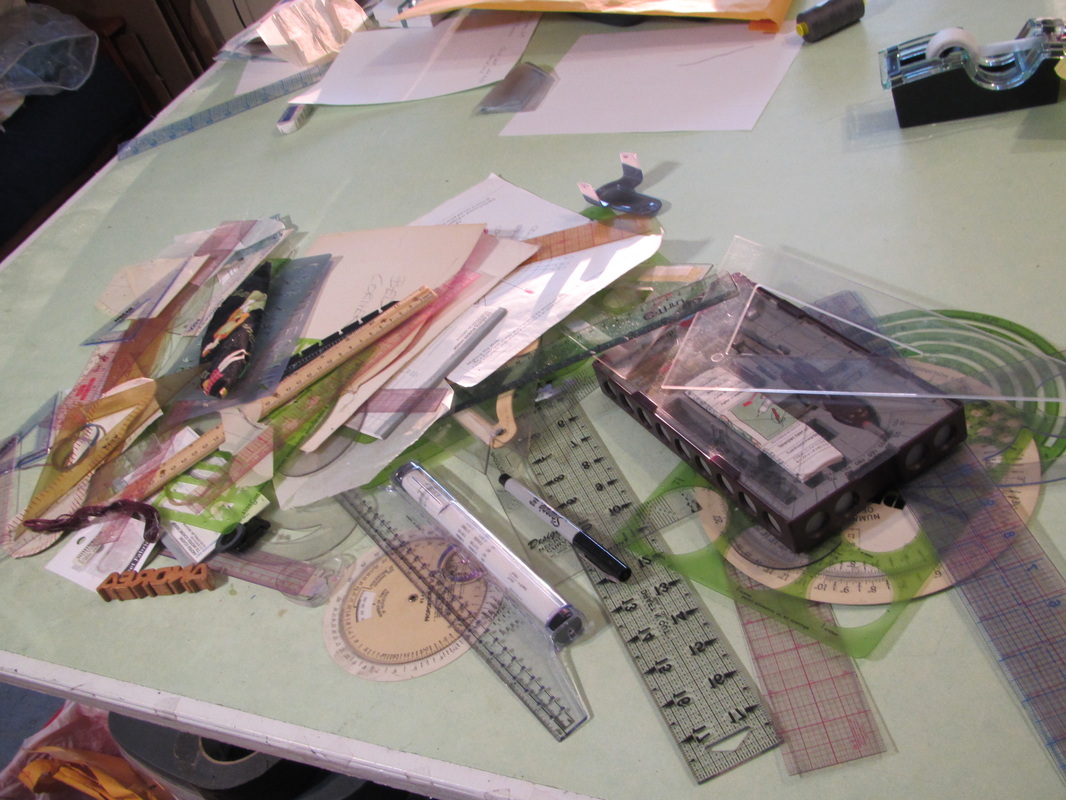
Here are the contents dumped out. There are a lot of rulers I don't use and just a lot of garbage.
Picture
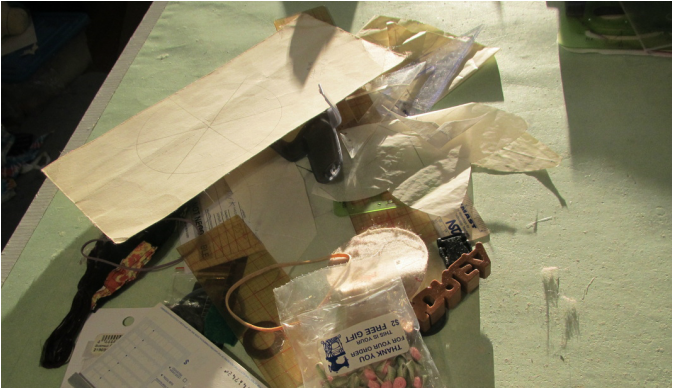
First, the garbage. Over time, stuff has just kind of fallen into this drawer and sifted to the bottom. It's so easy to ignore.
Picture
These are all excess rulers and templates, I never use, that are still good. I will bag these up and take them to the thrift store.
Picture
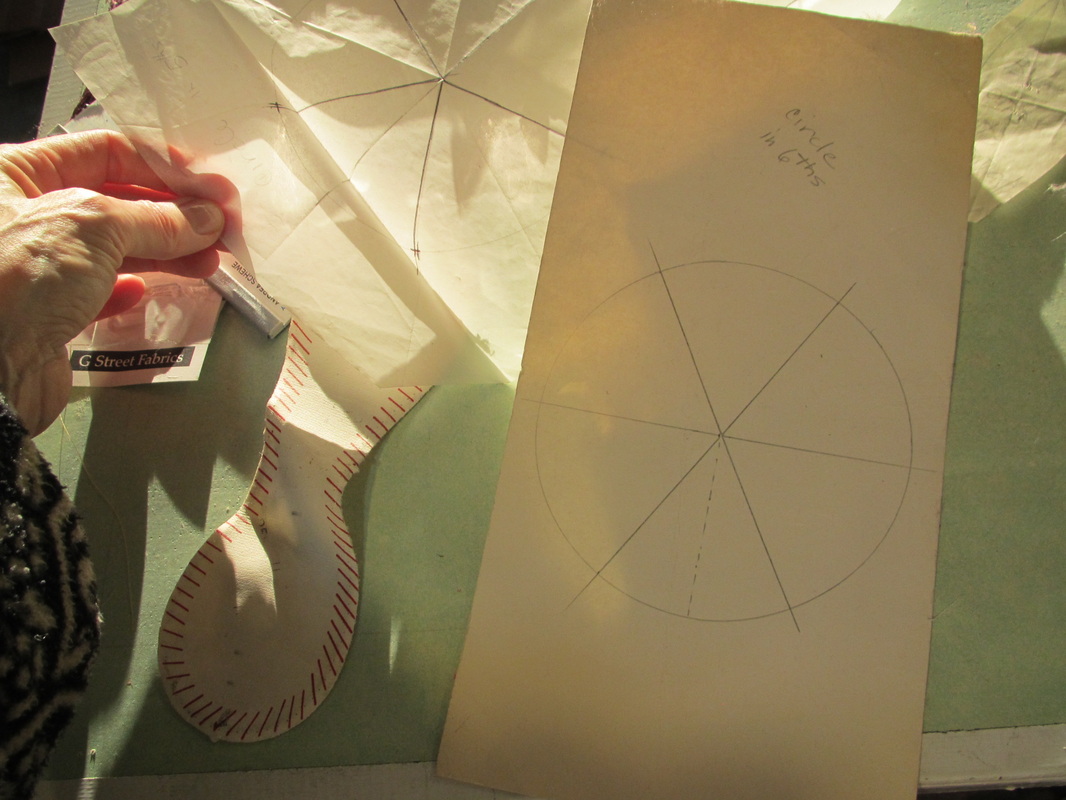
I have a pile of personal templates I've made and collected over the years for things that were useful when I was making a lot of toy samples. I really don't need them anymore.
Picture
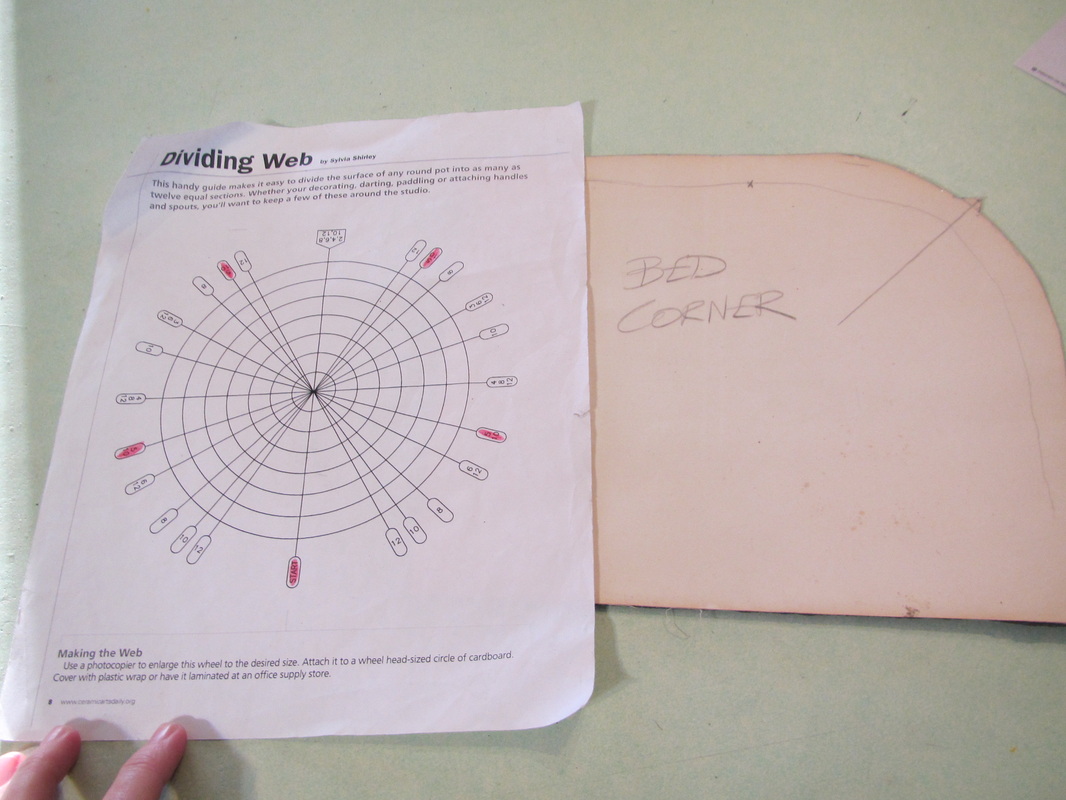
And you can find all those things on the internet now a days, anyway. I will keep the pattern for a mattress corner though. Simplicity has me do bedding from time to time.
Picture
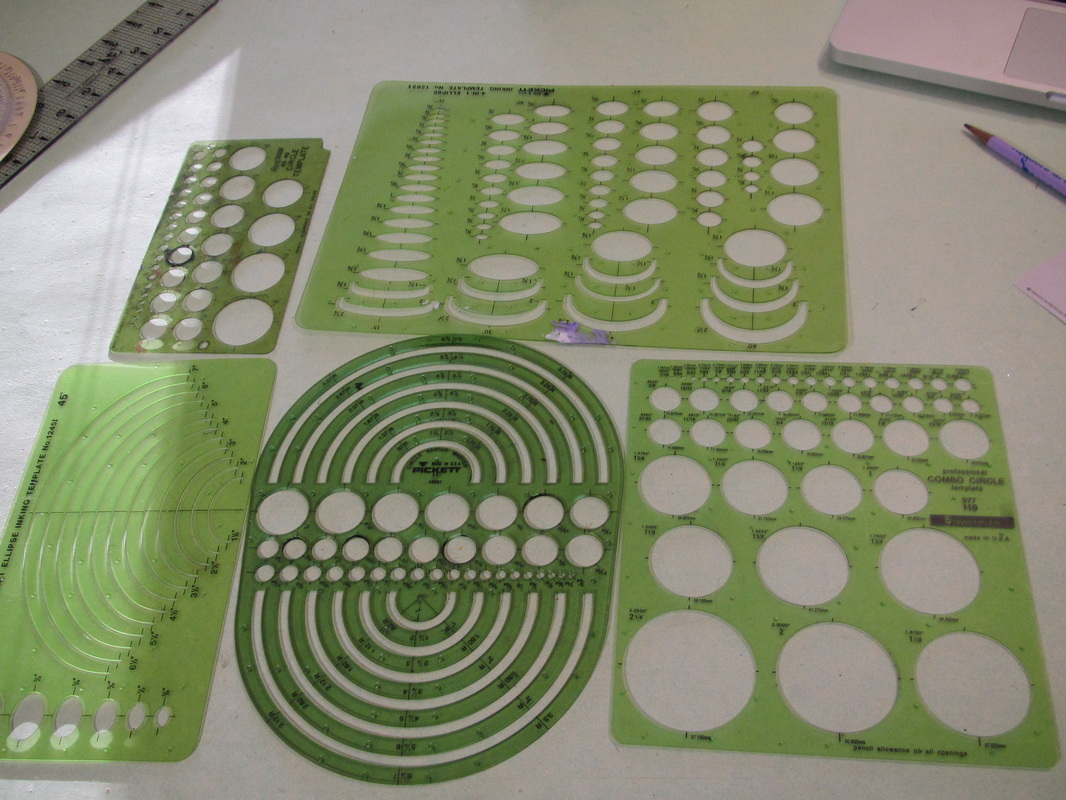
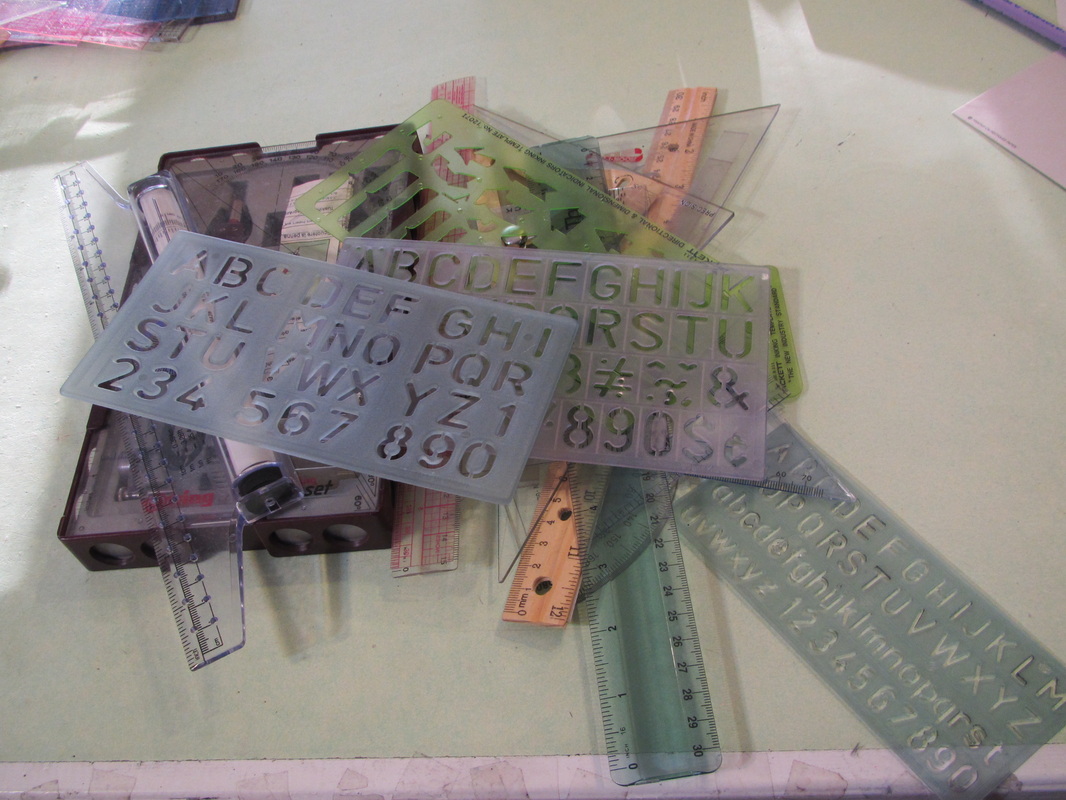
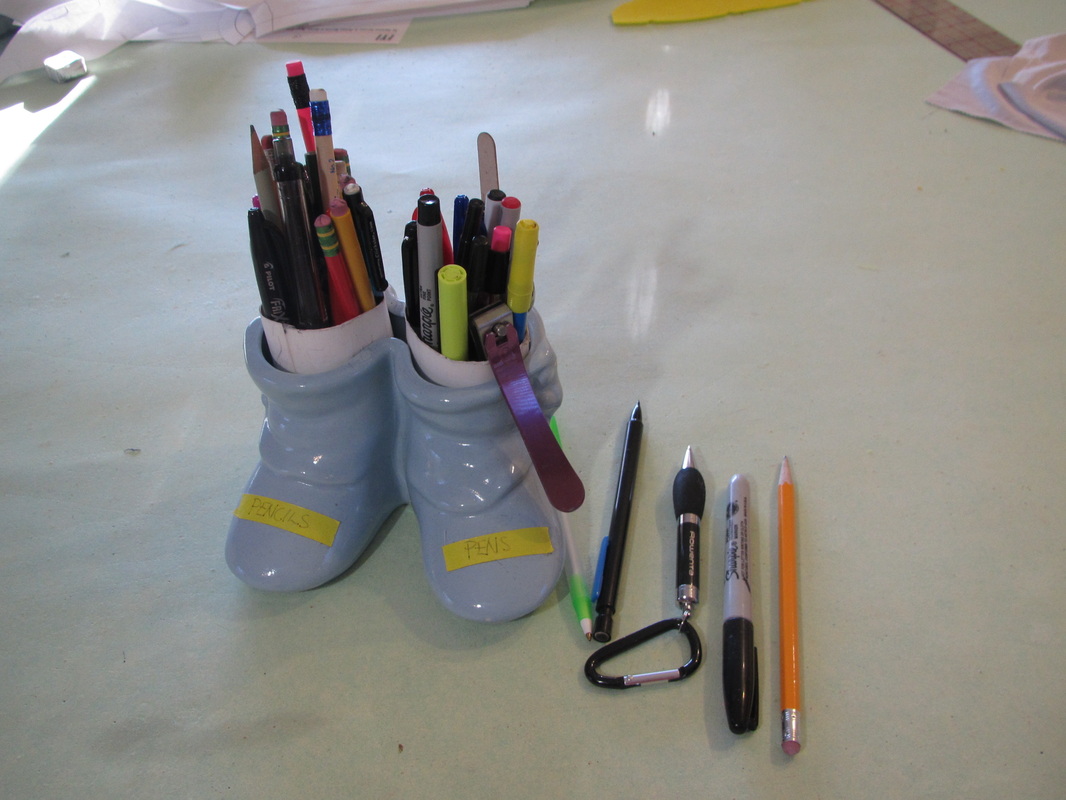
These templates get used constantly. They seemed so expensive when I bought them, but they last forever and I have certainly gotten my money's worth.
Picture
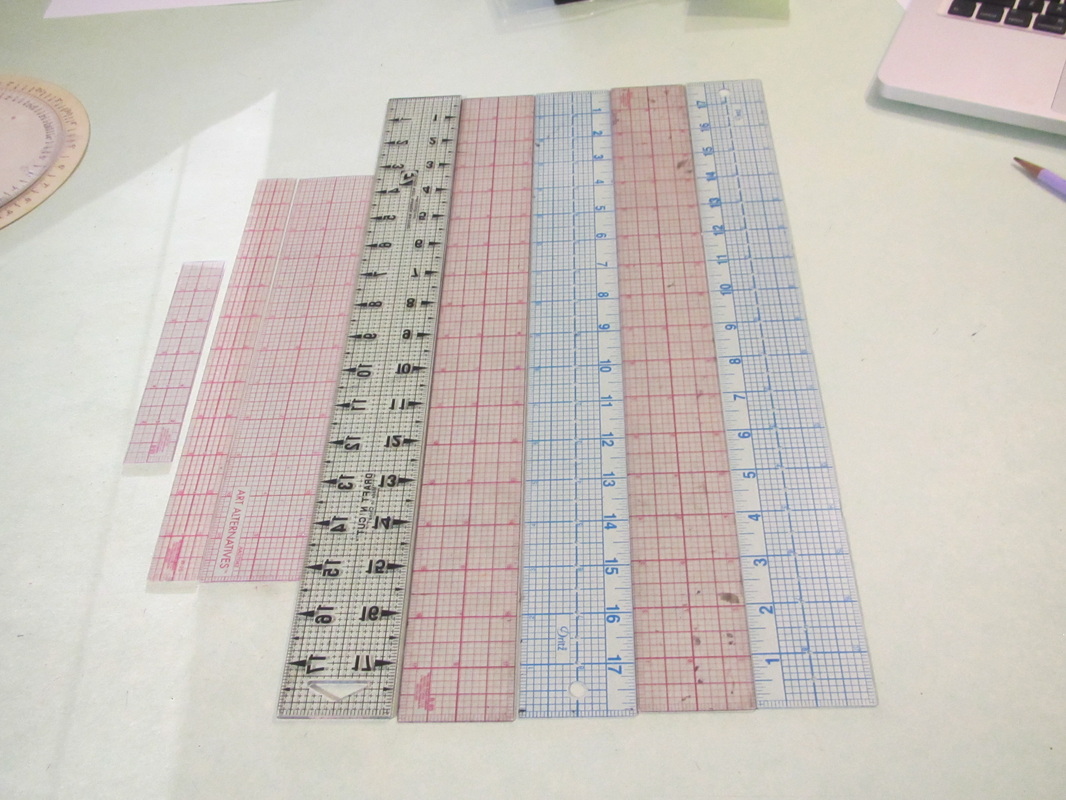
This probably seems like more rulers than any one person could need, but as I work on a project my rulers are always getting buried under and in between things. So, I am going to keep all these. And they do break and get nicked and after a time the numbers and lines wear off.
Picture
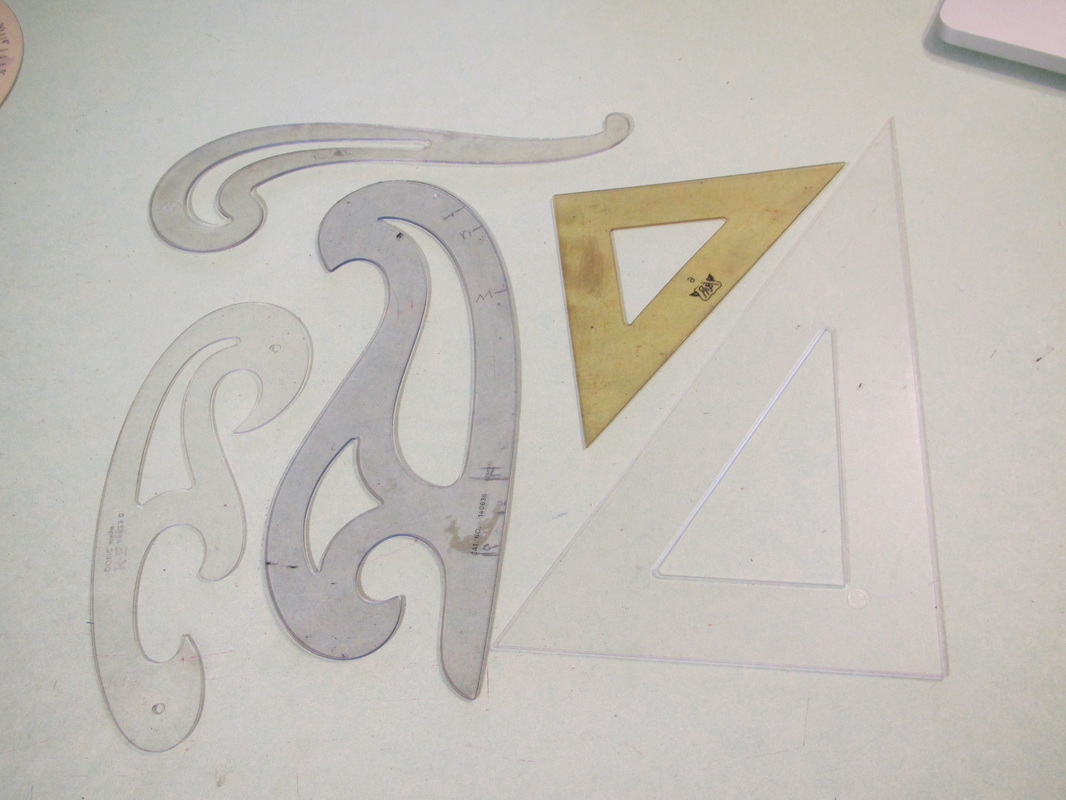
I will keep these curves and triangles.
Picture
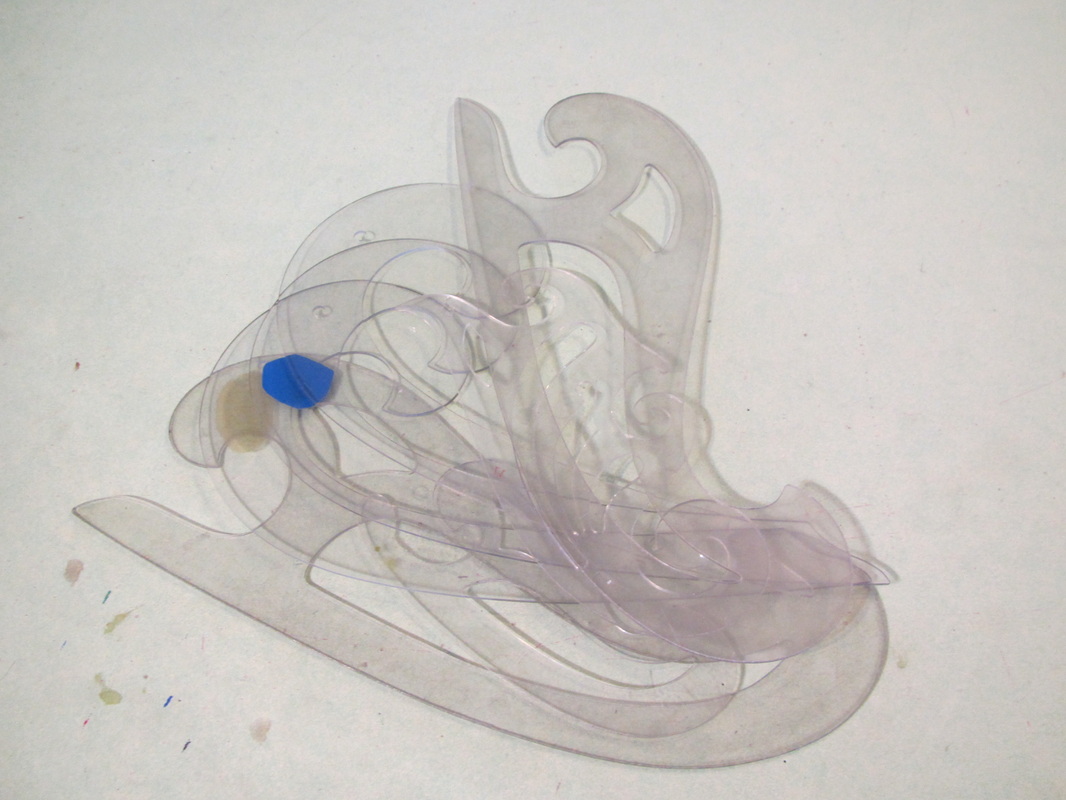
These extra curves I'm going to put in my box of things I use when teaching. Which I hope to be doing more of.
Picture
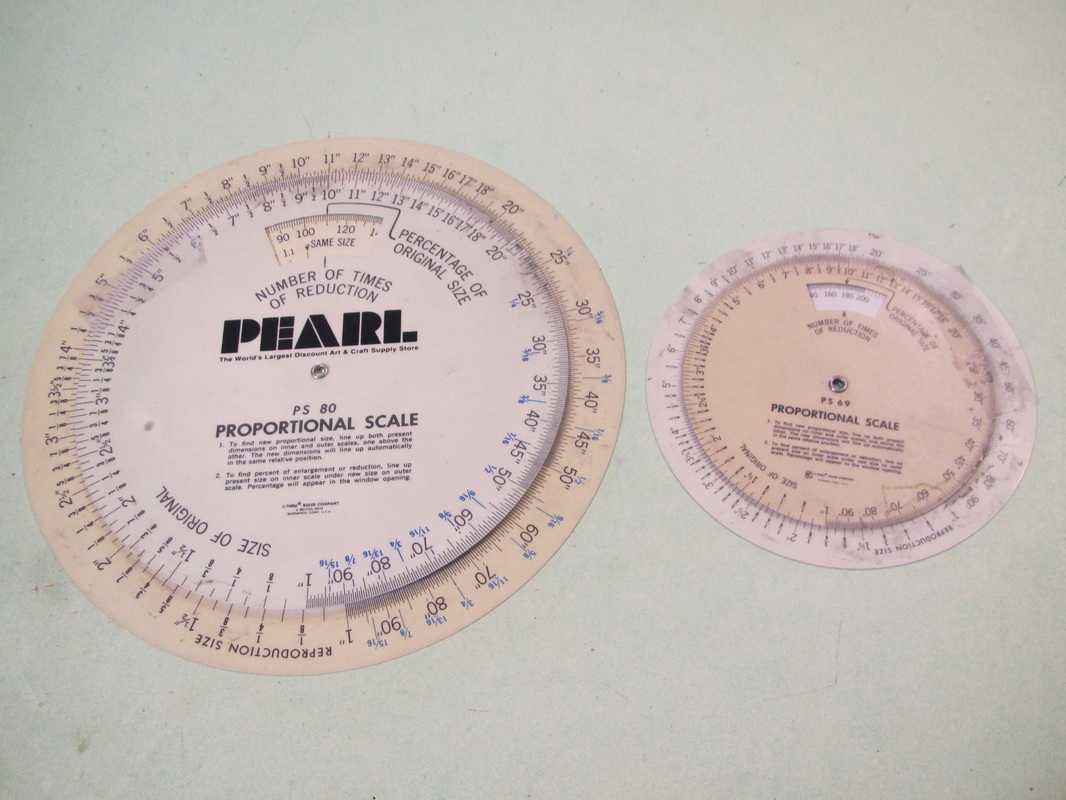
The proportional scales I can't live without.  They save me doing a lot of math.  They are very useful for making an accurate sample and pattern from licensed artwork, like when I make Disney costumes.  If the proportions are off, Disney won't approve them and I have to re-do my sample.
Picture
So, now I only have what I need and will use. BUT!!
Picture
I think I need to address the drawer next door.  That will be fun.
1 Comment

Hemming Scarves

1/28/2015

0 Comments

 
Picture
Scarves have been very fashionable for the last ten years or so, and in the winter they also keep my very cold neck warm.  I have a lot of them BUT I seem to wear the same 3 or 4 over and over ... why is that, I've wondered?
Picture
Then it occurred to me that I gravitate to the smaller ones for everyday inside wearing.
So, now that I've read more of the Japanese tidying up book and I was ready to start tossing the scarves that don't spark joy for me, when I realized ... wait a minute! ... I sew!  I can fix some of these.  There are scarves that would spark joy for me, if they were just smaller.
Picture
This is a great everyday scarf, but way to huge.  I love it, too, because my sister gave it to me this summer when we were finding our family roots in Scandinavia.
Picture
Another pretty, but way to big scarf.  These giant scarves just get in the way all the time and keep unwrapping from my neck and getting into everything.  grrrrr
Picture
This is a favorite scarf of mine. I will use it to gauge how much to cut off the big ones.
Picture
Look at the size difference.  And these scarves are not lying side by side, but I put the small one on top of the large one!!
Picture
I've decided to compromise and cut the large one exactly in half. Which is easy to do with my rotary cutter, since I can see the yellow lines of my cutting mat easily though the fabric.

I should hem both halves and send the other half to my sister. BUT, the tidying up book says we shouldn't give things to people just to get rid of them.  But, I think this might have sentimental value to her.  Well, my sister often reads this blog.  So, sister, let me know if you want the other half of this scarf.
Picture
I trim away about a third of this other scarf.
Picture
Since both scarves were hemmed with a straight stitched tiny rolled hem, that is what I will do for the newly cut sides.  

The hardest part of using one of these baby hemmers is getting it started.  I recommend pulling up the bobbin thread so both threads can be used to gently pull when starting the hem.
Picture
I then slide the cut edge into the coil part of the hemming foot and pull it as close to the end as possible. In this case it is difficult because the starting end has it's hem in place already. I will have to do a little bit of hand work after I'm done machine stitching to finished that bit off.
Picture
I gently guide the fabric using those threads to get it going and to keep it from getting sucked into the needle hole.
Picture
Then this part just takes practice. These rolled hemming feet aren't magic. They don't automatically roll the perfect amount of fabric. You have to, with steady tension, guide just the right amount of fabric so it will fold twice and no more. It's a two hand operation for me, even though you are only seeing one hand now.  (the other hand is holding the cameral) I've fed too much fabric in and then raw edges are sticking out and with too little it only does a single fold leaving raw edges exposed.


BUT, these are great feet to have and know how to use.  Totally worth the time spent practicing.
Picture
Picture
NOW ... these scarves are ones I like and will wear!


I really must go through the ret of my scarves, not to mention the rest of my fabric stash. Stay tuned!
0 Comments

Sewing Myths ... BUSTED!

1/26/2015

4 Comments

 
Picture
I just discovered there are many, many sewing blogs and websites debunking sewing myths! And, I've learned quite a bit reading these lists of myths. Many of these myths I've never believed in anyway, so it is reassuring to have them poo poo-ed by others.

I want to share a few of my favorite lists. 

First is the list attached to the "Life is hard, sewing is easy" photo. It debunks 5 basic myths that will make you feel better about sewing in general.

Next, this list from 
Threads Magazine - is more couture oriented.
Threads shows a better way to cut bias and ...
Picture
debunks the idea that a Hong Kong finish is the best for couture clothing and MORE!
Picture
The last set of Busted Myths is by my friend Janet Pray. Not only does she run the American Sewing Expo in Novi, Michigan every year, she also is a super sewing expert and has done many Craftsy tutorial. She owns and operates Islander Sewing which teaches home sewers industrial sewing technics. Her list is very practical. It includes the idea that directional sewing is not necessary, in fact it bad in some cases!  I never sew directionally. It takes too long, I think.

Janet Pray's myth busters
Picture
There are many more lists like this out there. If you are interested ... just search "sewing myths" and LOTS will pop up.
4 Comments

Needles and Pincushion SURPRISE!!!

1/23/2015

3 Comments

 
Picture
Last week I sorted through my pens and pencils. Today, it's my pincushion that's driving me nuts, along with my jumble of needles, so many of them never used and so many of the same kind, that I'll never use anyway. So ... here we go!
Picture
Picture
I bet most of you have a tomato pincushion, although there are plenty of cool novelty shaped one now a days.  Do you know why the traditional pincushion is a tomato?  Well, I heard that long ago (colonial or pioneer times) it was considered good luck to bring a tomato for a house warming gift, but those fresh tomatoes didn't last too long, so people started bringing fabric tomatoes which, I guess, became a good place to keep loose pins and needles.
Picture
Picture
Anyway, every 5 or 10 years I get a new one and cut open the old one.  They are filled with sawdust and it is really easy for needles to slide to the inside. I found about 20 needles inside this one, not very many actually.  One time I did this, I must have found at least 60!

Do you know what the different parts of a pincushion are supposed to be used for? The green part at the top is for needles. It is stiffer and it is much more difficult for a needle to go all the way to the inside if stuck in that part. The main red part is for straight pins and any other kind of pin (hat pin, T-pin, safety pin). AND the little strawberry dangling from the top is filled with emory. Use this to sharpen and smooth out your needles.  You can sometimes save a sewing machine needle if it has gotten a burr in it ... sometimes ...
Picture
Here are the rest of my needles.  Over the years, I've just accumulated all these, buying them myself, or being given old packages from time to time. I have so many now, I don't know what I have. Time to purge.
Picture
I have some specialty needles that I need to keep, even though they are rarely used now. These are doll needles that are used when doing soft sculpture. That's when you sew all the way through a doll or toy to make dimples and knees and toes. Think about a Cabbage Patch Doll's knees and toes.  You can see the one on the left is slightly bent. I've used these a lot back in the day.
Picture
Here is another set of specialty needles. They can sit for years, but when you need one, you need one, so good to have on hand.
Picture
Now, these are the needles I will toss. First, I've never had luck with self threading needles. For me they are self UN-threading needles. Fortunately I don't have any trouble threading needles.
Picture
Teeny tiny needles I will never use ... so out they go. 
Picture
I have some very interesting old needle packs, but mostly they are a mishmash of needles I won't use, many very small ones.  These I will bundle up and give to my thrift store. I guess I don't do much fine, fine needle work.
Picture
Here's a pack of needles ... looking brand new, that I think I will use. I like needle with long eyes, so easy to thread especially if you are using thick thread or doubled thread.


I have multiple packs of Tapestry needles I will be giving away. They are like a crewel needle but larger and I don't need 8 packages of them.
Picture
So I have sorted through all my needles and this is what I'm keeping. I though I was going to have to buy some "sharps",  but I found a pack of those that look in pretty good shape.  These should keep me for a while.  And now I know what I have.


I am going to try and only keep 4 or 5 needle, maximum in my pincushion at any time. They rest I will pin to some felt and keep them in this box AND I will clip the thread short once I am finished with a project, so I don't end up with a mess like the first picture above.
Picture
Here's to new beginnings!
3 Comments

Sewing health - fingers, fingernails and thimbles

1/21/2015

7 Comments

 
Picture
My left thumb nail is looking pretty good this morning. This hasn't always been the case.
Picture
I take lots of photographs of my hands, especially my left hand doing things.  I'm left handed, so when I'm doing something I think I'll want to show people later, 
Picture
I grab my little point and shoot camera, with my right hand, and snap away.
Picture
And because I am left handed, my left hand get the roughest work, pushing things like buckle tangs and corset grommets through fabric,
Picture
or pulling and scraping away fabric shreds to distress the edges of things.
Picture
I'm vain, so when my thumbnail started looking really bad I made a point of taking photos with my thumb tucked away like this.
Picture
But, sometimes I just had to leave my thumb where it was ... actually I don't think I used this photo in the blog about this kid fairy costume. I was using a bandaid to keep my thumbnail from getting anymore damaged.
Picture
I, also, used a rubber finger cover thing for a while to protect the nail, but I hate wearing those things. I feel clumsy, like my manual dexterity is impaired.
Picture
AND my nail wasn't getting any better. See ... it was split AND peeling away in layers!

What to do???
Picture
So this is the regime I'm on to keep my nails and very dry hands as healthy as possible.

First I keep emergency nail care tools will my pencils. This way I take care of any chip or tear before it gets big. It is very easy to just keep working and not fix a chipped nail, if you have to go somewhere to find these things.
Picture
This is my new miracle hand cream.  I keep it right next to my bed and put some on every night before I go to sleep.
Picture
Now, my other trouble nail is the middle finger of my right hand (even though I'm left handed, I do all my hand sewing with my right - we lefties are complicated!)

I think most people push the back of a hand sewing needle with their middle finger and that can destroy that nail. Learning to sew with a thimble can be so frustrating and discouraging at first, but if you sew a lot, tough it out. It will make hand sewing so much more pleasant and faster!

I didn't know how to use a thimble until I had been working has a hand stitcher in my first professional costume shop when I was 21. After one week my right middle finger was SO sore and the nail was SO badly damaged, I got a thimble (the metal one on the left actually, a good old friend) and had a couple days of awkwardness, but then it started to just feel like a part of my hand.

So ... you, too, can learn to do this. Here is a link to a really good Youtube video showing how to use a thimble.
Picture
Also, I started take a biotin supplement every morning a few years ago.  I've read, when we get older our nails dry out and biotin helps with that. But, read this to decide for yourself ... a well balanced article about taking Biotin.

And when things are really bad I use this special nail polish. It helps, too. No one of these things solves the problem. But, the combination of them does.

Actually the best thing for my nails is going on a long vacation.  Sewing is hard on your hands, but I love to sew and this is how I manage. 
7 Comments

Tulle skirt #S0618 - fabric choices

1/19/2015

3 Comments

 
Picture
Much to my pleasure and surprise, the pattern I made for tulle skirts (my first ever pattern in the fashion section of the Simplicity catalog) still is of much interest to people!

As a blog writer, I am able to see exactly how many times each of my blog posts are viewed month by month. Of course, all the blogs about making the dresses from the movie FROZEN are the overall favorites, but the couple blogs I wrote about this tulle skirt pattern have stayed in the top 3 or 4 since February (11 months ago).
Picture
The official number for this pattern is 1427 and this is the usual envelope cover it come in with my name at the bottom. BUT, I was walking through JoAnn's the other day and I saw the same pattern with a different envelope and a different number! S0618!

At first I thought they had published a new pattern with only the calf length version, but I looked on the back and saw that it is the exact same pattern just in a special envelope. Simplicity sometimes designs special envelopes to be displayed in box-outs or in racks around the store, which is where I saw this one. That is the photo I took at the top of this blog.

INTERESTING QUESTION ....

And today I received an interesting question from a new blog reader I want to share with you.

"Can I use different fabric for underlining besides expensive kind recommended on pattern?"

This skirt is made of tulle, but it has a lining skirt underneath made of a solid fabric and the waistband is made of a solid fabric.  I used different fabrics for this lining-underskirt for my four different samples pictured on the envelope above.  

For the white, pink and black skirts I used a taffeta for the lining and it was a nice enough taffeta that I could also use it for the waistband as well. BUT for the brown skirt, the only brown fabric I could find that was the right color was a much, much too heavy taffeta to use for the underskirt, so I used a polyester lining fabric for the underskirt, but looked too cheap and was too thin to use for the waistband. So, for the brown skirt I used two different solid fabrics, one for the waistband and one for the underskirt.  BUT, Simplicity, wanting to keep things simple, says on the envelope to buy either Dupinoni, Shantung, or Taffeta for the underskirt/waistband. They don't give the option of using cheap lining fabric and then a different fabric for the waistband.

Dupioni is expensive, as is Shantung.  To save money, you can use cheap lining fabric for the underskirt and just buy an eighth of a yard of something nicer for the waistband.

This reader also asked about giving the skirt a layered look. I suggested that she could use a different color tulle for the outer layer.  I actually did that for some of my test samples while working on this pattern.  Here is a photo of one of those samples.
Picture
Simplicity chose to keep all the samples one color, but I like the look of the dark tulle over the lighter color.

Maybe that will give some of you some ideas??!

I would love to see photos of any skirt made using this pattern.  Send them to scheweandrea@yahoo.com
3 Comments

Tidying up my Pens and Pencils

1/16/2015

7 Comments

 
Picture
I have too many pens and pencils. I never thought about this much, but now that I'm reading 
The Life Changing Magic of Tidying Up, I've decided to start decluttering the way this book suggests. The first thing I've learned is to only keep things that give you joy and the second thing I've learned is to tidy by categories. So, pens and pencils seemed an easy category to do today.

Picture
This is what sits on my work table.  I did a doll sample for a toy designer friend of mine a while back that included making tiny high top shoes and she sent this to me as a thank you gift and I have used it ever since. It doesn't looks so cluttered but really, I don't use 2/3's of the things in there.
Picture
I, also, have a couple back up boxes of more pens and pencils ...
Picture
and a few packages, partially used.
Picture
This does not include my colored pencils, which probably should be looked through, too, at some point.
Picture
First I need to group everything into subcategories. These are the pens that can be used to mark fabric and the marks disappear with heat from an iron.  But, I still am careful not to make LOTS of marks with these. 


These give me joy! These I keep.
Picture
Here is a group of charcoal drawing pencils I NEVER use, no joy here.

These I get rid of.
Picture
WHOA! how did I get SO many highlighters? And I don't ever use them! 

Joyless! 
Picture
OK, Sharpies are useful, but should be checked over. These give me modest joy.
Picture
How did these fabric pencils get in with all these other ones ... I will put those in my small notions draw.
Picture
Here is a mishmash of pens that need going through,
Picture
and a mishmash of mechanical pencils that also need going through. 

These two groups give me confusion.
Picture
These wooden pencils I will give away, I never use them.

No joy from these.
Picture
Red pencils I keep. These I use to make the large pattern sheets I send into Simplicity clearer by writing somethings in red. These make me joyful.
Picture
But, these small ones that just get lost at the bottom of my little pair of ceramic shoes I will toss.
Picture
I will also toss these difficult to use rolling highlighters.
Picture
I test all my Sharpies and only keep the ones that write well. I do this to my regular pens also.
Picture
And here is the best reason to be cleaning out my pens and pencils.  This is my mess of mechanical pencils. I keep buying new ones because it is so confusing to find ones that work and are the size lead I want.  Here are pencils, leads and erasers for 3 different sized leads, .5 mm, .7 mm and .9 mm.  I don't use the .5 or .9 anymore, for a long time now, so any of that stuff gets eliminated. Then any extra erasers that don't fit the pencils I have get eliminated, too.  Now I will only have pencils I will actually use and I don't have to sift through ones I don't use!

Now I am joyful about my mechanical pencils.  I use them a lot, all the time, everyday and now they will be easy to deal with.
Picture
So, after throwing away all the things that don't work this is what I will be donating to my local thrift store.  I hope they find someone who needs them.
Picture
This is what I'm keeping, a box of .7 mm mechanical pencils and red pencils, a box of pens I know I will use and ...
Picture
This is all that will sit on my table.


Now I have to remember not to buy any more until these are used up!
7 Comments

Finishing my Long Sleeve Tee

1/14/2015

2 Comments

 
Picture
Today I'm showing the cutting and sewing of my January project. See Monday's blog to see how I made the pattern.

The fabric I have chosen is a very thin knit without too much stretch. I think the stretch is fairly close to the knit of the white shirt I copied. The stretch of a knit can really change things. This brings up an interesting point.  When a garment is made in a factory for ready to wear, the pattern has been engineered to work with one specific fabric. It has been tested and once everything is worked out, thousands of copies are made. Where as when a home sewing pattern is made, the pattern designer has no clue what fabric will be chosen by the person using the pattern. Those stretch guides on the sides of pattern envelopes are very helpful but this is why, I think, so much ease is worked into most patterns.
Picture
It is a good idea to straighten out your fabric before folding it to cut. Since this is a stripe it's an easy job. I simply trim away along one of the stripes to get my straight edge, so I can fold my fabric and ...
Picture
lay my patterns pieces down. And WHOA! I can fit both pieces on one width! cool. 

Remember the front and back body pieces are exactly the same except for the neckline. I will deal with that later. For now, I can cut them together.

I have checked several times to be sure the stripes of the under half of the folded fabric match up with the upper half, and so I cut.
Picture
You know, I kind of like the back side of this fabric ... hmmm. Back side is on the left, right fabric is the front of the fabric. But, after looking at it for a while, I decide to use the side most people would consider the right side.
Picture
Now it's time to trim the front neck line lower, so I take one of the body pieces and fold it in half down the center and trim away.
Picture
I have to confess, I just eyeballed the front neckline curve, using the line on the pattern as a guide.
Picture
The first seams I sew are the shoulder seams. They need stabilizing.  I sew a narrow strip of some of my fabric cut on the lengthwise grain (the non-stretchy way) right on top of my shoulder seam.
Picture
Then I sew the sleeves on and sew up the side seams of the sleeves and shirt together.

I just had to show off my matched stripes at the side seam!
Picture
I'm feeling pretty happy about this ... it's looking right to me.
Picture
I need to try it on now. But first I staystitch all around the neck to keep it from stretching!

So ... it JUST fits. I probably should have added a little to the sides of the body and sleeve when I cut it (it can always be trimmed off), but I was so happy both pieces fit side by side on the fabric.  Well I can let the seams out a tiny bit. And I do.  

See, I guess this fabric does not stretch as much as the fabric of the white shirt ... Well it's not so bad and it is fitting me much better after I let out each seam about 3/16". That doesn't sound like a lot, but those little bits add up.
Picture
Hemming knits can be disastrous. I've made every mistake in the book. Either they stretch out and look horrible or are too tight and look horrible. A good garment can be ruined with a bad hem.  So, since I don't have a cover stitch machine I find the fool proof way for a professional looking hem is to use a wide folded band. 

This is how I hemmed bottom and the sleeve. After deciding on the length I wanted and the width I wanted the band to be, I trimmed away the bottom and sleeve to allow for the width of the band. Then cut the bands as long as the bottom and sleeve measurements and twice as wide as I wanted it to be finished, plus a seam allowance.


I like to press folded bands neatly in half before I sew them to my garment.
Picture
This knit is SO thin it keeps rolling up on itself, so I have to pin and pin. Something I try to avoid usually.
Picture
Here are the finished hems from the outside and ...
Picture
the inside.
Picture
I want to copy the finish of the neckline on the white shirt, but I don't think I can topstitch this neatly.  I think I will slipstitch the backside of the binding instead.
Picture
I measure the width of the neck and cut a 1" strip of knit that length. Again the stripe helps me with my cutting.
Picture
Here it is ready to go on.
Picture
I sew it on first with a machine straight stitch, then I serge over that.  It will be easier to hand sew the binding in place with this overlock stitch in place because it stabilizes this very thin fabric.
Picture
Then I press the seam for the binding smooth and ...
Picture
pin and slipstitch the back side.
Picture
And the finished neck!

I now have an easy, tested, workable pattern for a long sleeve tee-shirt. I bet I could make it with short sleeves or even add a skirt to make a dress.  

Maybe I will later this year.
2 Comments
<<Previous

    From Andrea 

    I am a commercial pattern maker who is now "sewing over 50"!
    I love to sew and hope to encourage others to come back to sewing.
    The water is fine!!

    Archives

    May 2019
    April 2019
    March 2019
    August 2017
    July 2017
    June 2017
    May 2017
    April 2017
    March 2017
    February 2017
    July 2016
    June 2016
    May 2016
    April 2016
    March 2016
    February 2016
    January 2016
    December 2015
    November 2015
    October 2015
    September 2015
    August 2015
    July 2015
    June 2015
    May 2015
    April 2015
    March 2015
    February 2015
    January 2015
    December 2014
    November 2014
    October 2014
    September 2014
    August 2014
    July 2014
    June 2014
    May 2014
    April 2014
    March 2014
    February 2014
    January 2014
    December 2013
    November 2013
    October 2013
    September 2013
    August 2013
    July 2013
    June 2013
    May 2013

    Archives by Subject

    To search for blog posts in specific categories, use the drop down menu above by hovering over the word "Blog"

    Enter your email address:

    Delivered by FeedBurner

    RSS Feed

    Andrea Schewe participates in Amazon's associates program.