
Today I'm showing the cutting and sewing of my January project. See Monday's blog to see how I made the pattern.
The fabric I have chosen is a very thin knit without too much stretch. I think the stretch is fairly close to the knit of the white shirt I copied. The stretch of a knit can really change things. This brings up an interesting point. When a garment is made in a factory for ready to wear, the pattern has been engineered to work with one specific fabric. It has been tested and once everything is worked out, thousands of copies are made. Where as when a home sewing pattern is made, the pattern designer has no clue what fabric will be chosen by the person using the pattern. Those stretch guides on the sides of pattern envelopes are very helpful but this is why, I think, so much ease is worked into most patterns.
The fabric I have chosen is a very thin knit without too much stretch. I think the stretch is fairly close to the knit of the white shirt I copied. The stretch of a knit can really change things. This brings up an interesting point. When a garment is made in a factory for ready to wear, the pattern has been engineered to work with one specific fabric. It has been tested and once everything is worked out, thousands of copies are made. Where as when a home sewing pattern is made, the pattern designer has no clue what fabric will be chosen by the person using the pattern. Those stretch guides on the sides of pattern envelopes are very helpful but this is why, I think, so much ease is worked into most patterns.
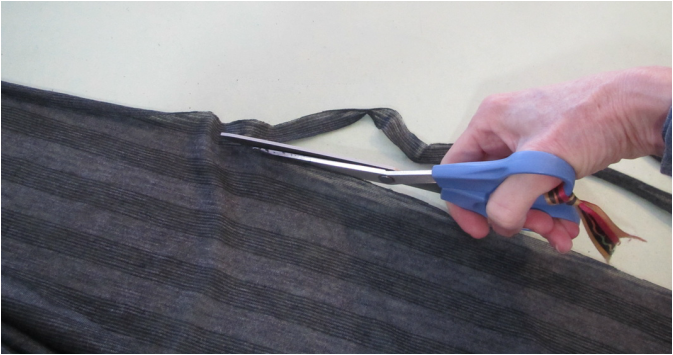
It is a good idea to straighten out your fabric before folding it to cut. Since this is a stripe it's an easy job. I simply trim away along one of the stripes to get my straight edge, so I can fold my fabric and ...
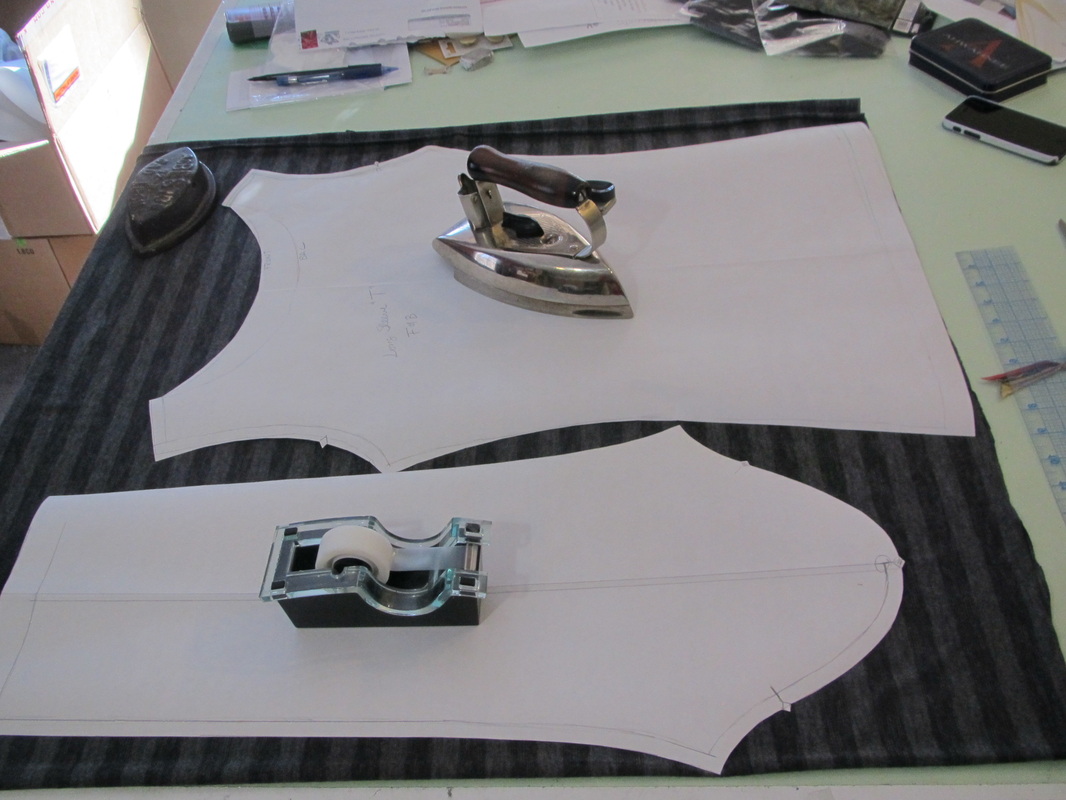
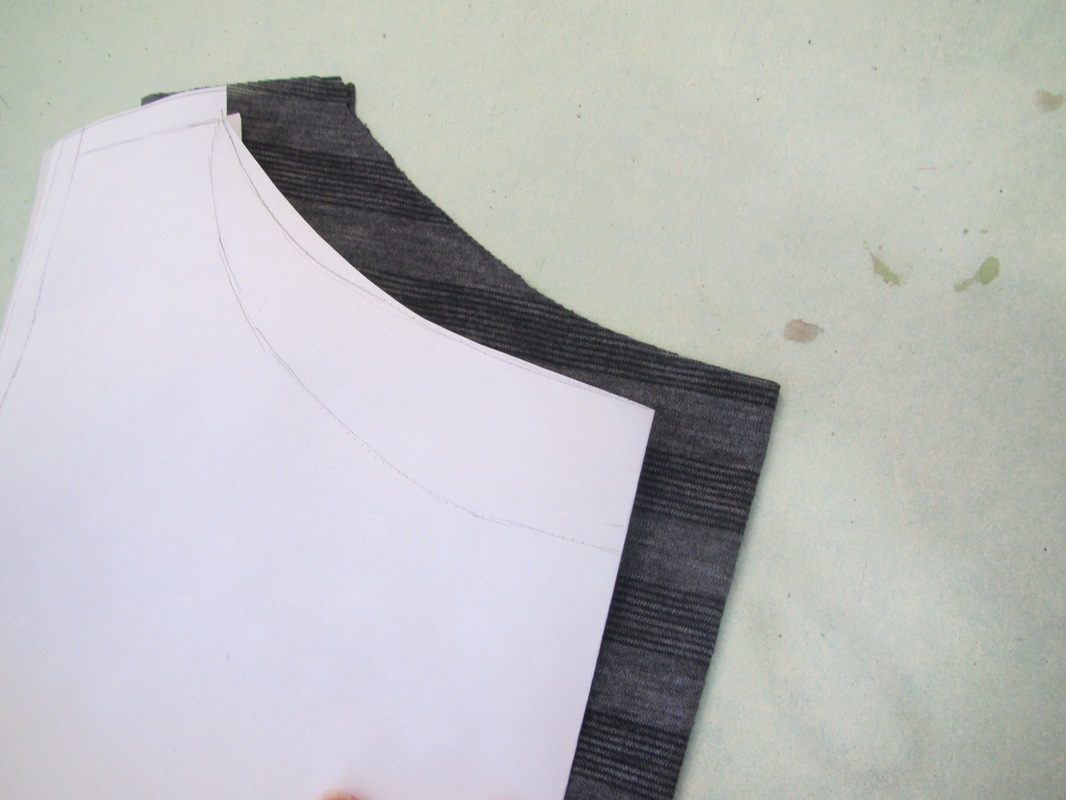
lay my patterns pieces down. And WHOA! I can fit both pieces on one width! cool.
Remember the front and back body pieces are exactly the same except for the neckline. I will deal with that later. For now, I can cut them together.
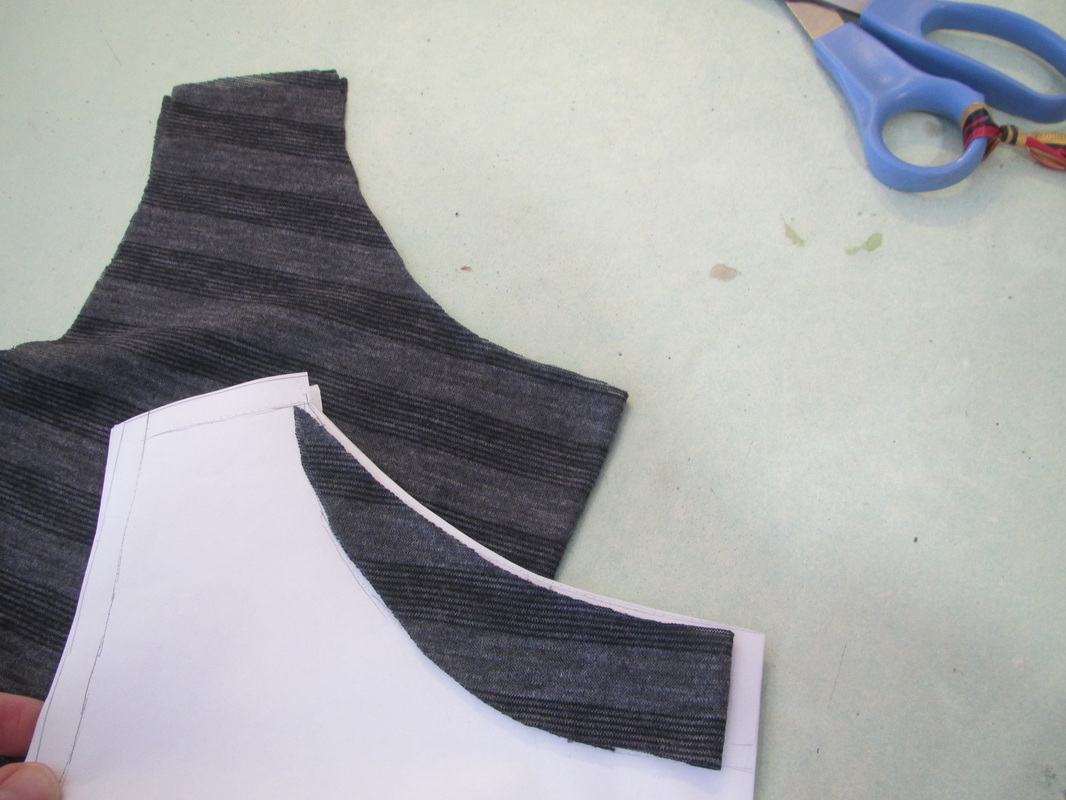
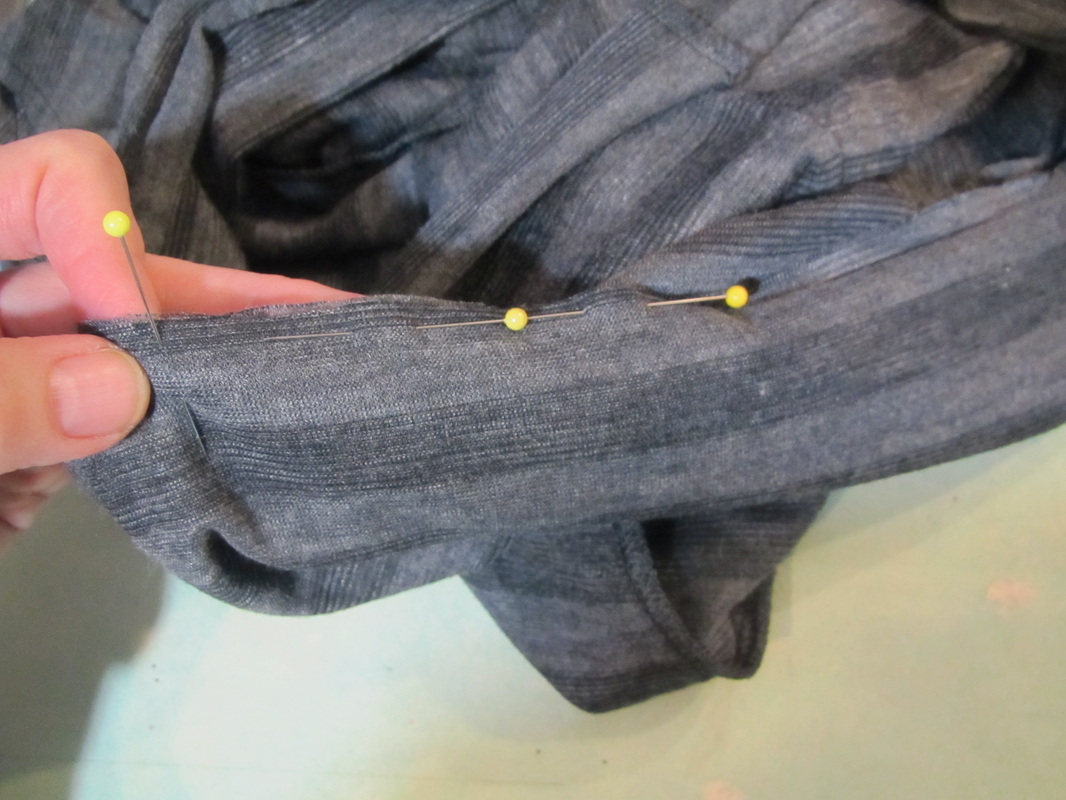
I have checked several times to be sure the stripes of the under half of the folded fabric match up with the upper half, and so I cut.
Remember the front and back body pieces are exactly the same except for the neckline. I will deal with that later. For now, I can cut them together.
I have checked several times to be sure the stripes of the under half of the folded fabric match up with the upper half, and so I cut.
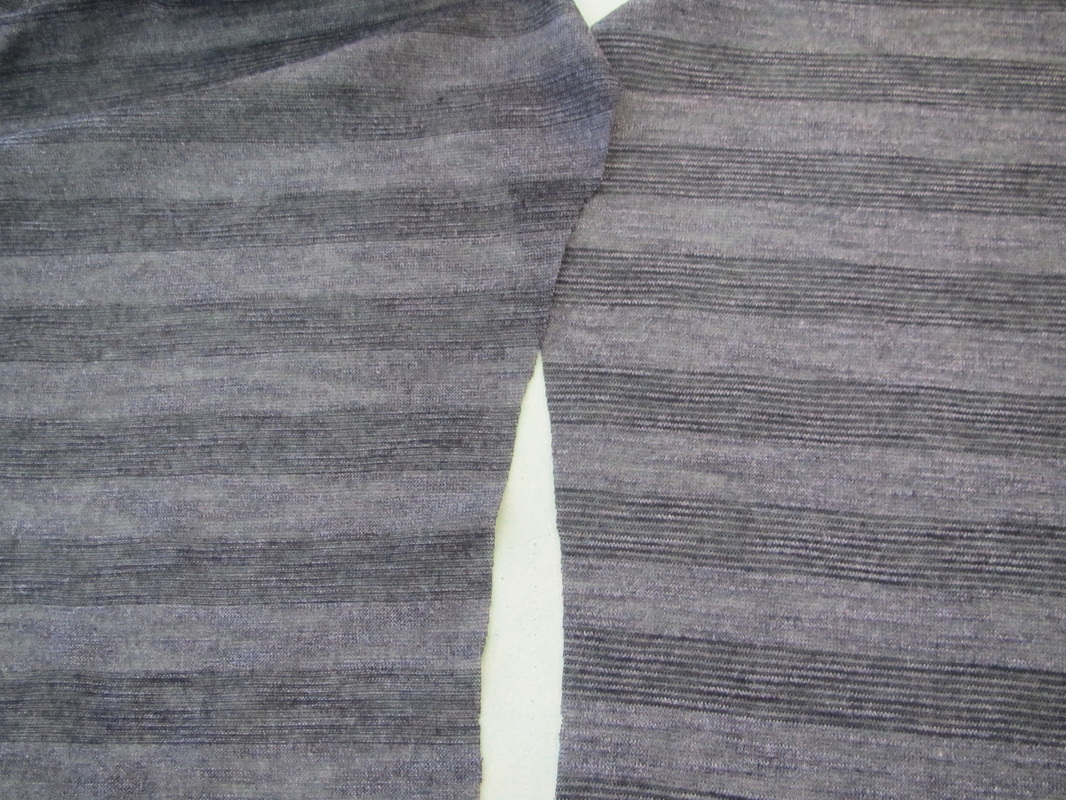
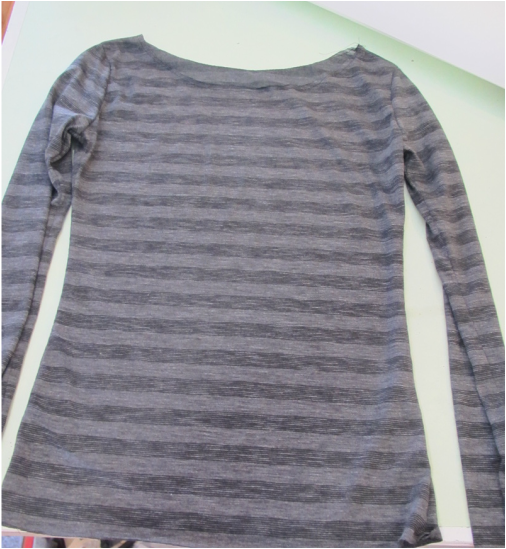
You know, I kind of like the back side of this fabric ... hmmm. Back side is on the left, right fabric is the front of the fabric. But, after looking at it for a while, I decide to use the side most people would consider the right side.
Now it's time to trim the front neck line lower, so I take one of the body pieces and fold it in half down the center and trim away.
I have to confess, I just eyeballed the front neckline curve, using the line on the pattern as a guide.
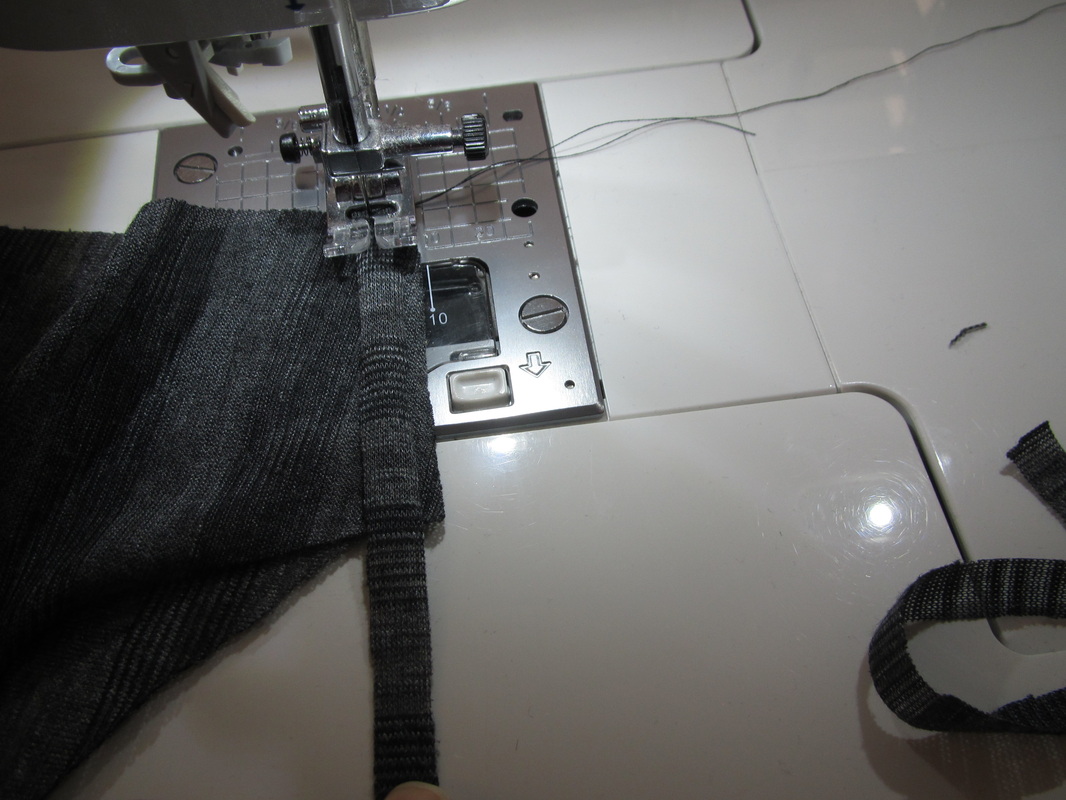
The first seams I sew are the shoulder seams. They need stabilizing. I sew a narrow strip of some of my fabric cut on the lengthwise grain (the non-stretchy way) right on top of my shoulder seam.
Then I sew the sleeves on and sew up the side seams of the sleeves and shirt together.
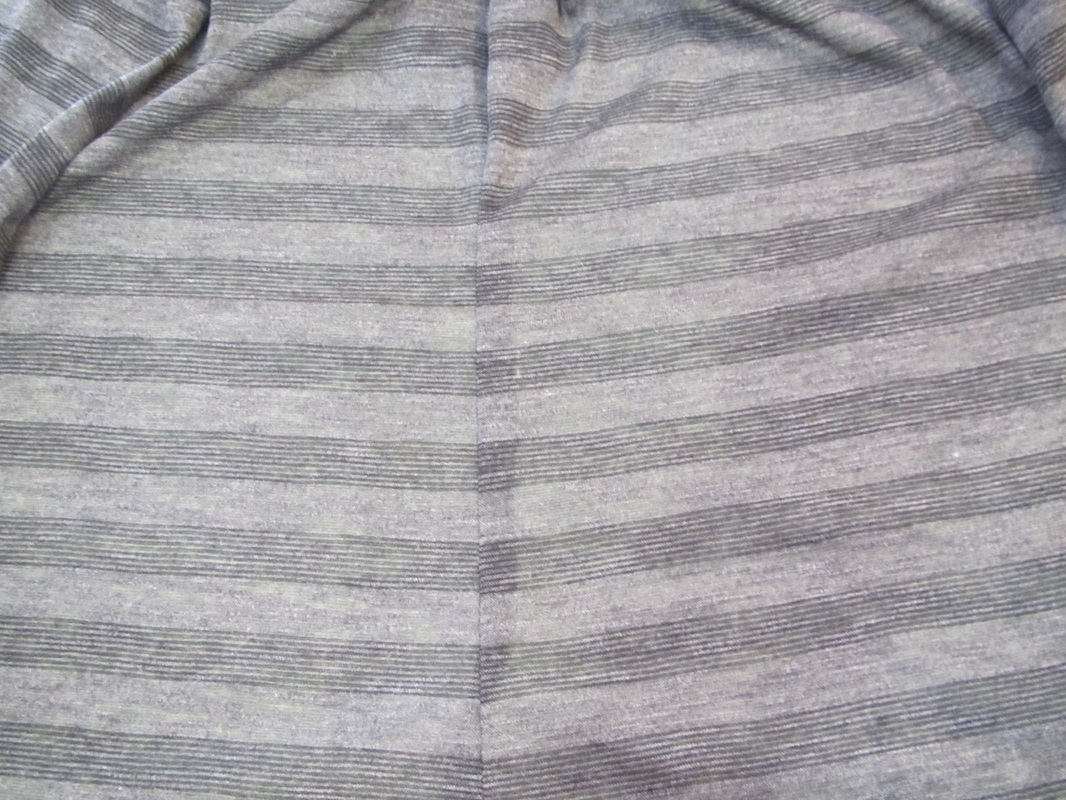
I just had to show off my matched stripes at the side seam!
I just had to show off my matched stripes at the side seam!
I'm feeling pretty happy about this ... it's looking right to me.
I need to try it on now. But first I staystitch all around the neck to keep it from stretching!
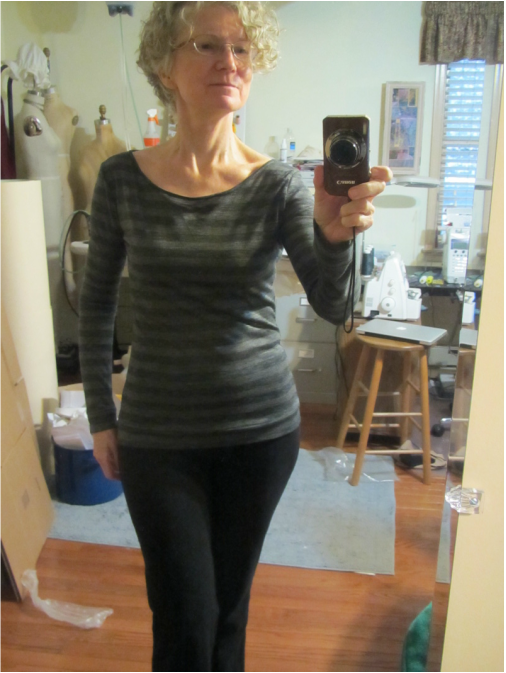
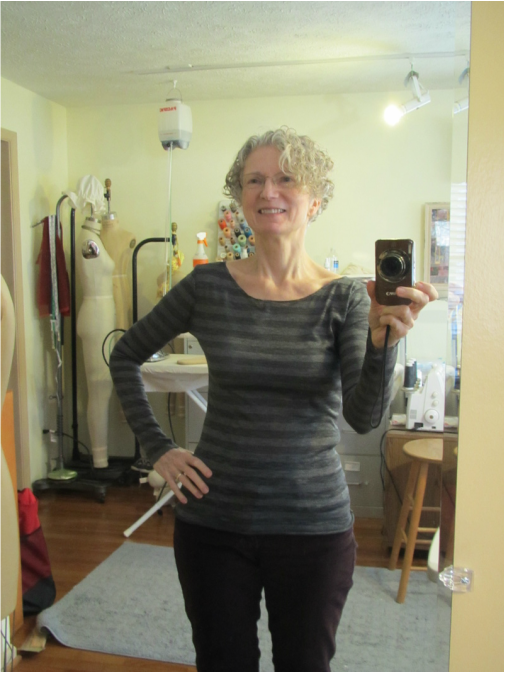
So ... it JUST fits. I probably should have added a little to the sides of the body and sleeve when I cut it (it can always be trimmed off), but I was so happy both pieces fit side by side on the fabric. Well I can let the seams out a tiny bit. And I do.
See, I guess this fabric does not stretch as much as the fabric of the white shirt ... Well it's not so bad and it is fitting me much better after I let out each seam about 3/16". That doesn't sound like a lot, but those little bits add up.
Hemming knits can be disastrous. I've made every mistake in the book. Either they stretch out and look horrible or are too tight and look horrible. A good garment can be ruined with a bad hem. So, since I don't have a cover stitch machine I find the fool proof way for a professional looking hem is to use a wide folded band.
This is how I hemmed bottom and the sleeve. After deciding on the length I wanted and the width I wanted the band to be, I trimmed away the bottom and sleeve to allow for the width of the band. Then cut the bands as long as the bottom and sleeve measurements and twice as wide as I wanted it to be finished, plus a seam allowance.
I like to press folded bands neatly in half before I sew them to my garment.
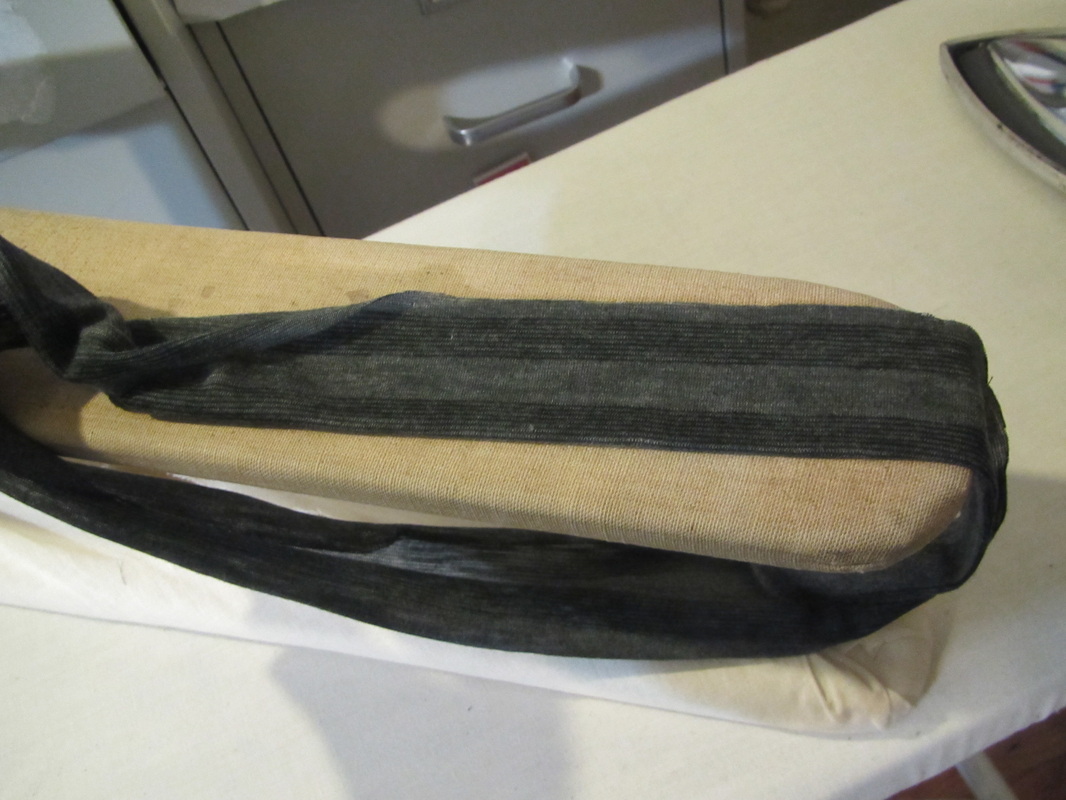
This knit is SO thin it keeps rolling up on itself, so I have to pin and pin. Something I try to avoid usually.
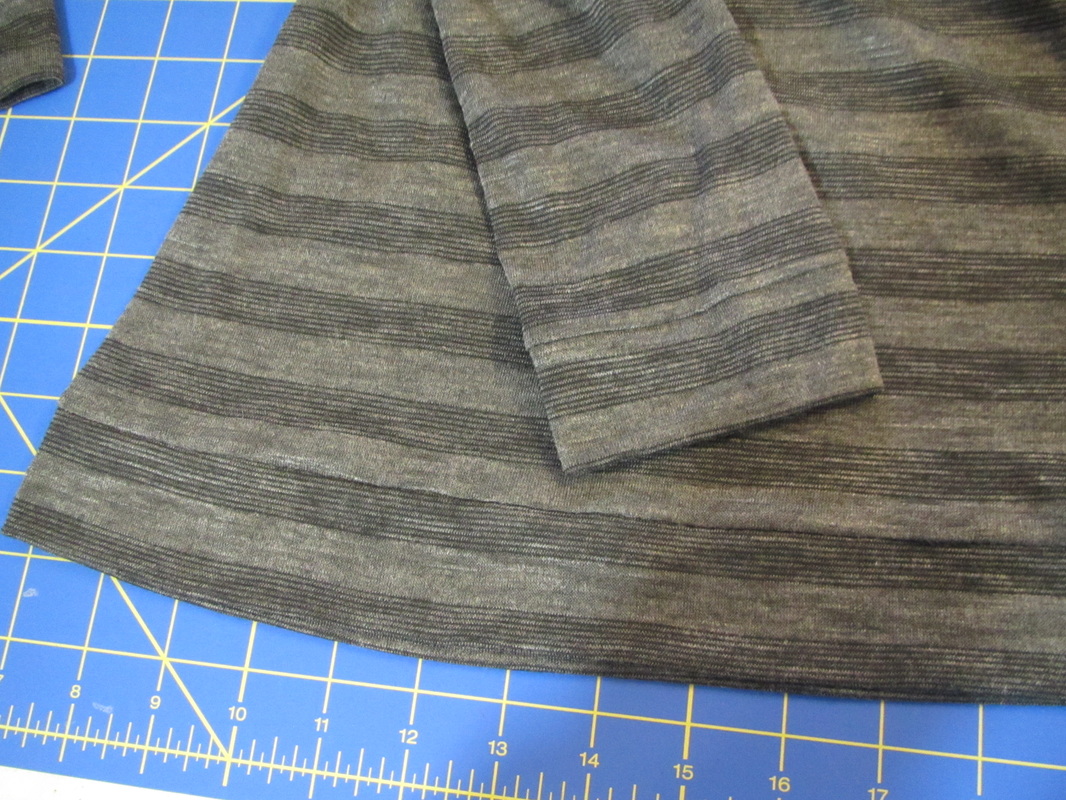
Here are the finished hems from the outside and ...
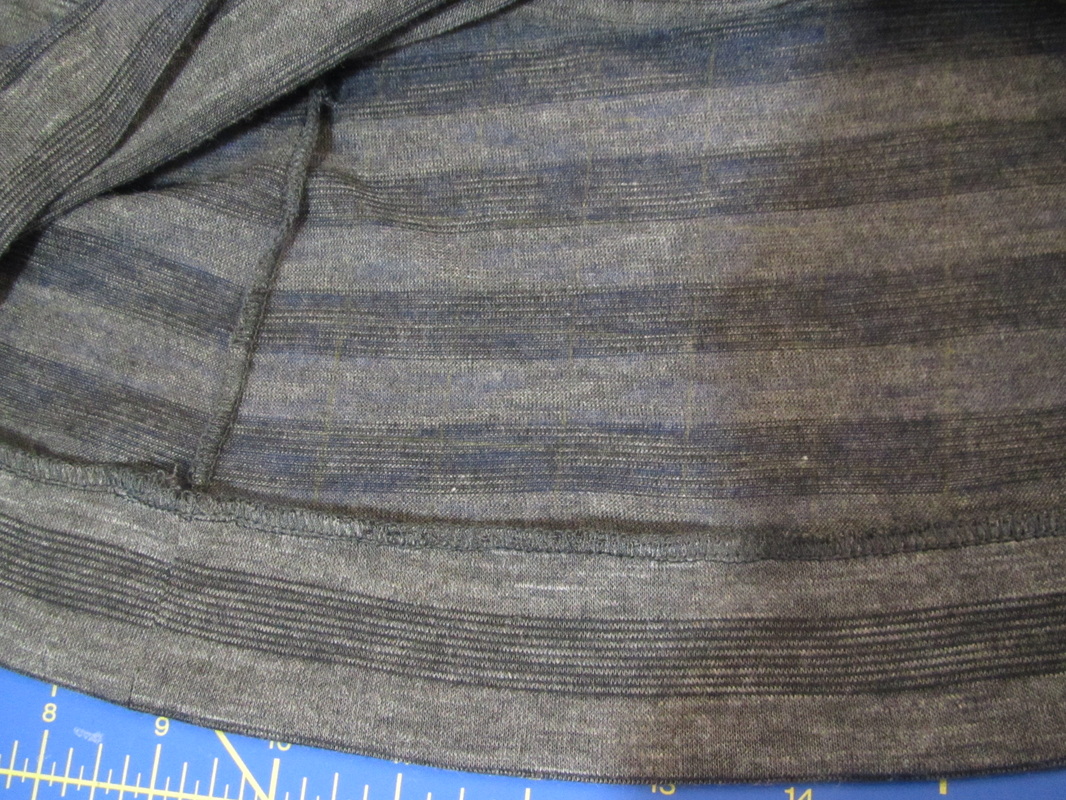
the inside.
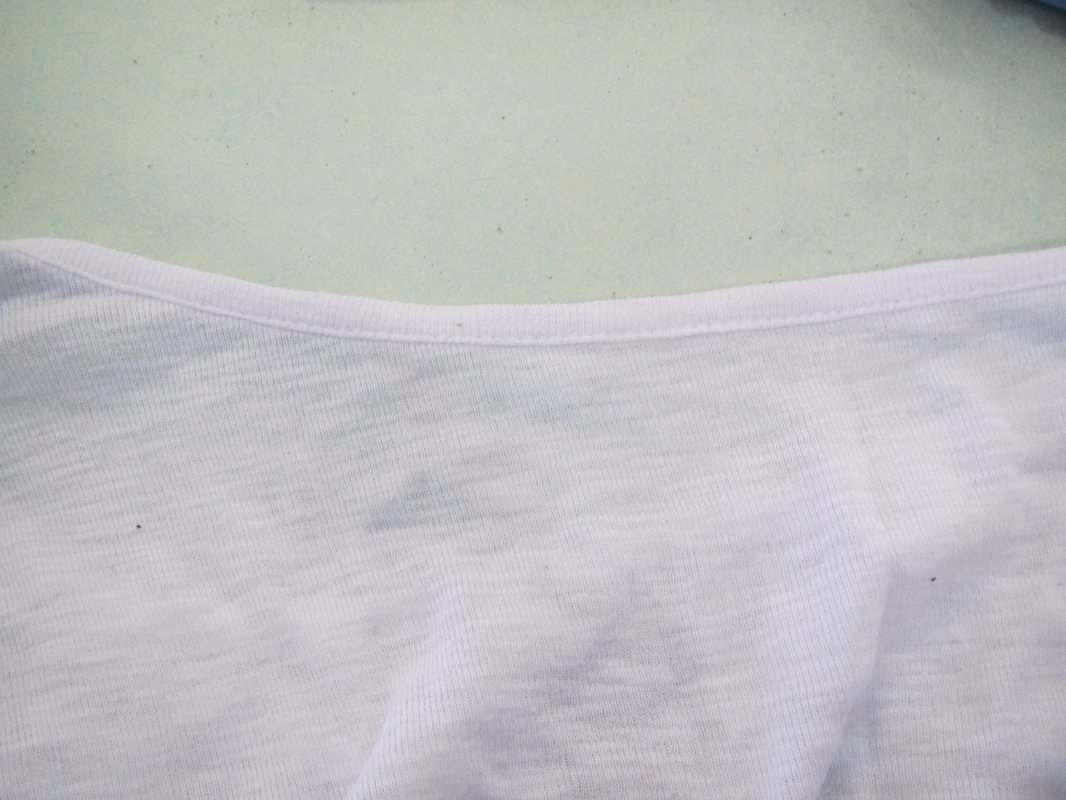
I want to copy the finish of the neckline on the white shirt, but I don't think I can topstitch this neatly. I think I will slipstitch the backside of the binding instead.
I measure the width of the neck and cut a 1" strip of knit that length. Again the stripe helps me with my cutting.
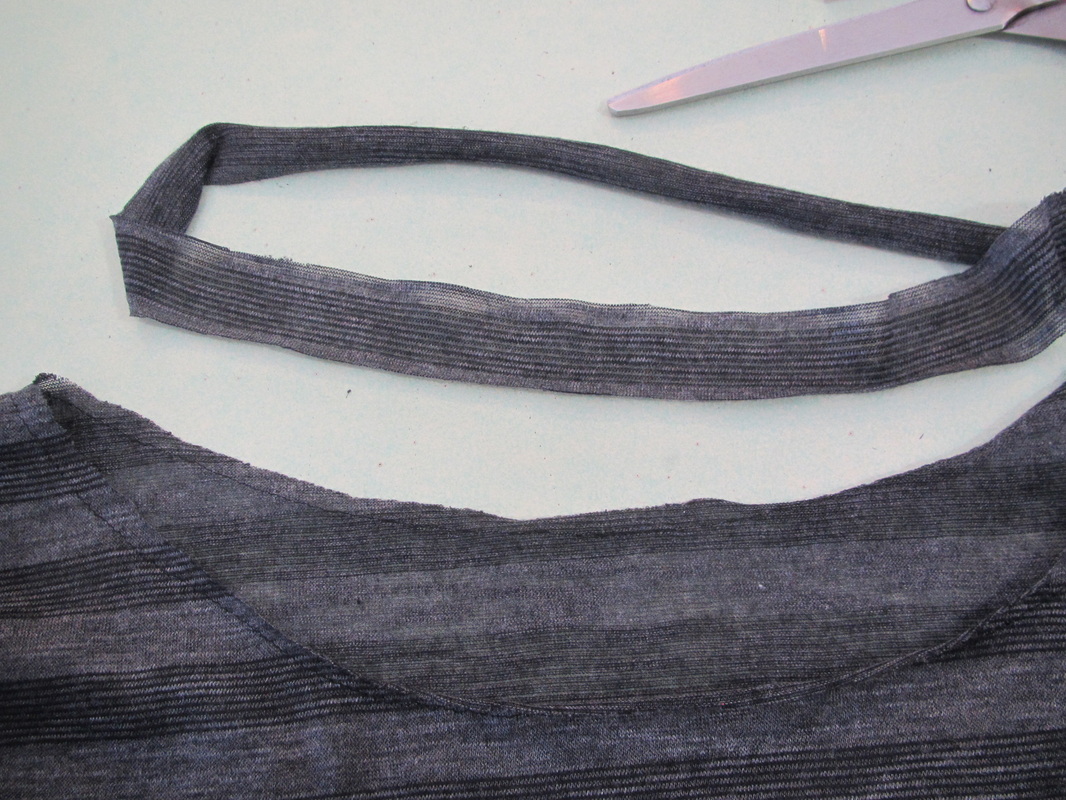
Here it is ready to go on.
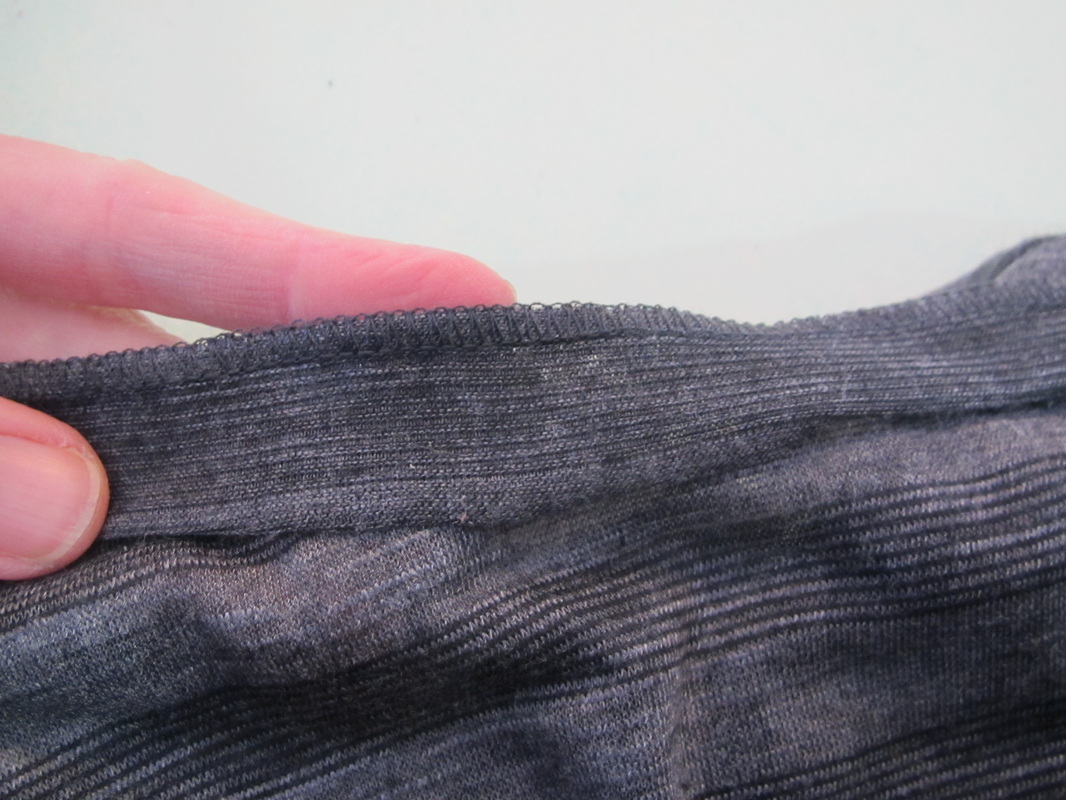
I sew it on first with a machine straight stitch, then I serge over that. It will be easier to hand sew the binding in place with this overlock stitch in place because it stabilizes this very thin fabric.
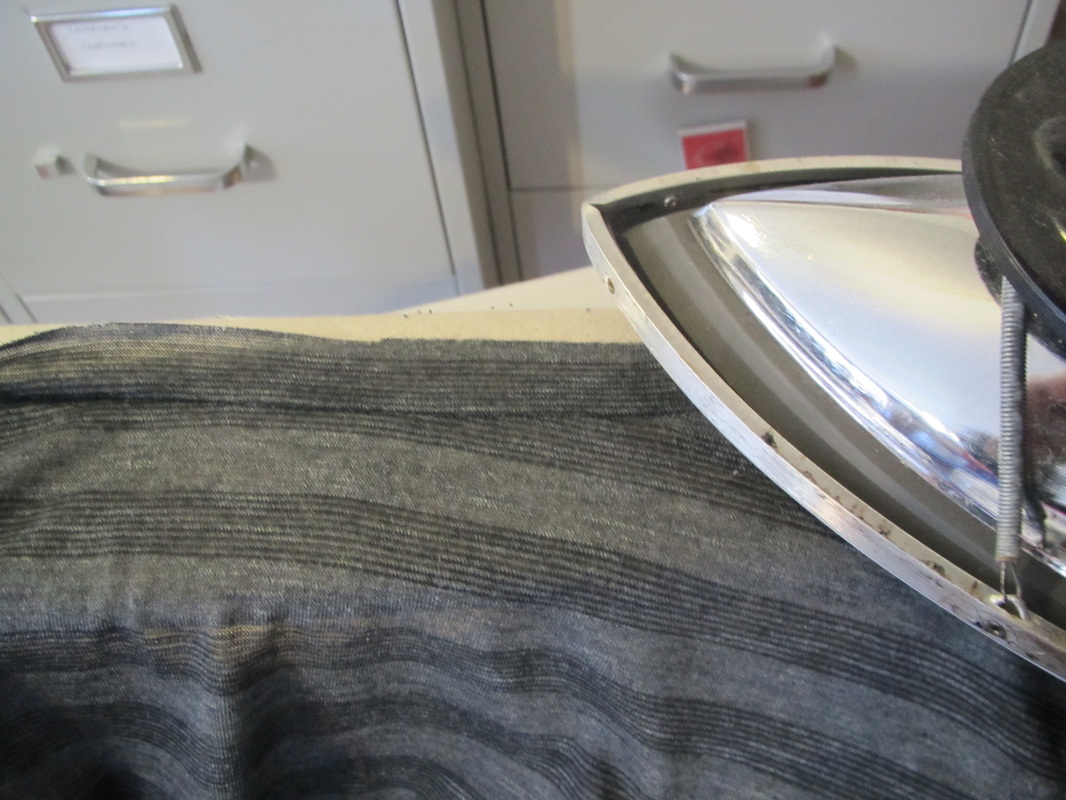
Then I press the seam for the binding smooth and ...
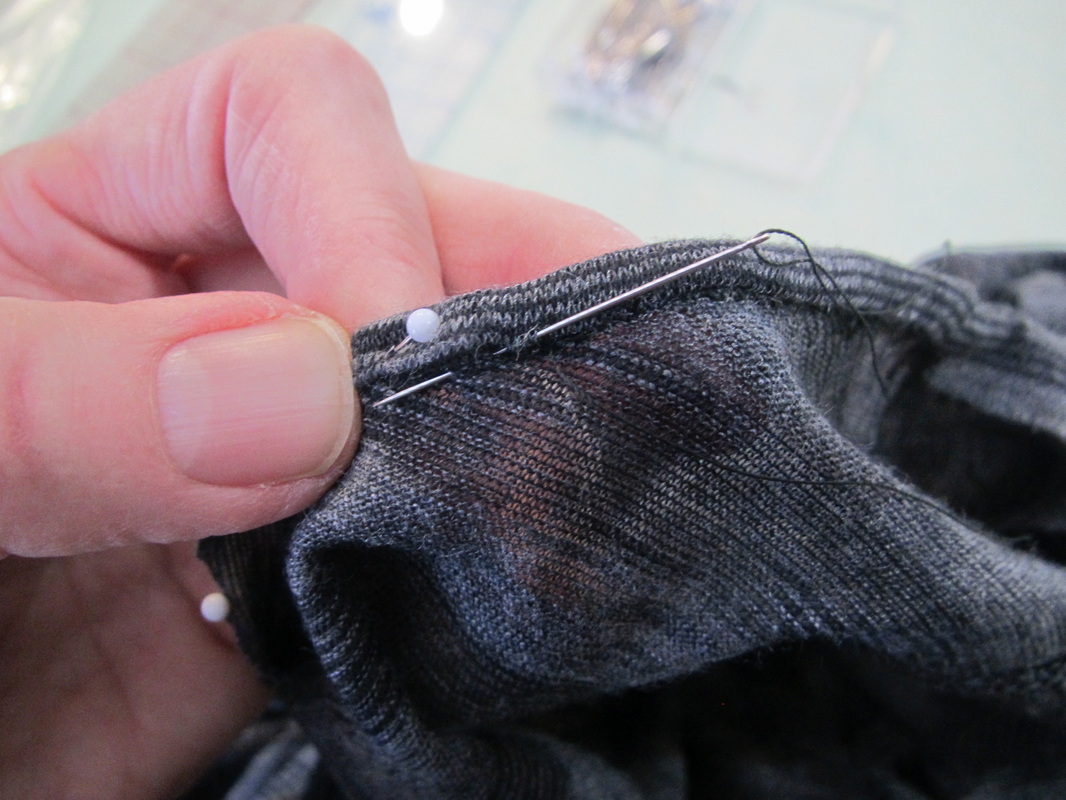
pin and slipstitch the back side.
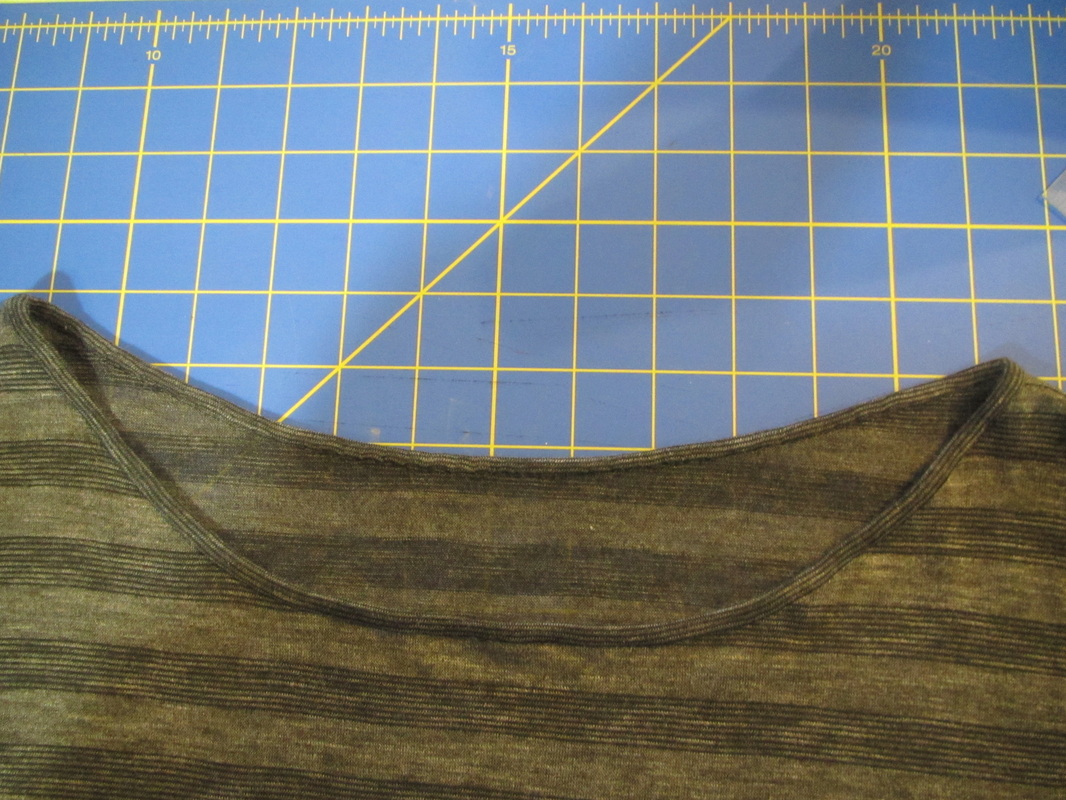
And the finished neck!
I now have an easy, tested, workable pattern for a long sleeve tee-shirt. I bet I could make it with short sleeves or even add a skirt to make a dress.
Maybe I will later this year.
I now have an easy, tested, workable pattern for a long sleeve tee-shirt. I bet I could make it with short sleeves or even add a skirt to make a dress.
Maybe I will later this year.
 RSS Feed