Andrea Schewe Design
  • Home
  • Costumes
    • Reader's Gallery
    • Fantasy Costumes
    • Theatrical
    • Historic >
      • Easier to make
    • International
    • Costumes for Kid's and Babies
  • Crafts
    • Home Decor >
      • Pillows
    • Fashion Accessories
    • Doll Clothes
    • For Kids and Babies
  • Blog
    • Past Blogs by subject >
      • My patterns by number
      • Sewing basics
      • Personal sewing Projects
      • Fashion History
      • Fun and funny stuff
      • Guest Bloggers
      • Crafts and Home Dec
  • Links
  • Contact

Blog - one month old

6/29/2013

3 Comments

 
Picture
Thank you everyone for reading and supporting me as I learn how to blog.  I hope I am writing about things that interest you and make you smile.

Things I plan to write about in the next month or so are - 

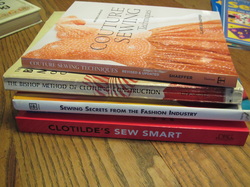
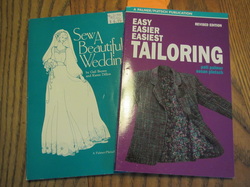
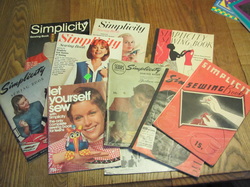
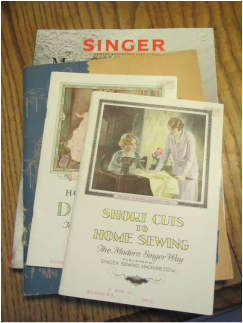
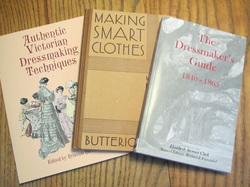
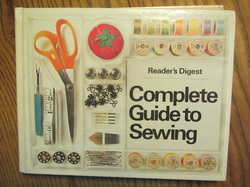
* more books from my Library
* more Renaissance Faire dress up

* any interesting museum show or anything sewing/costume related in the news
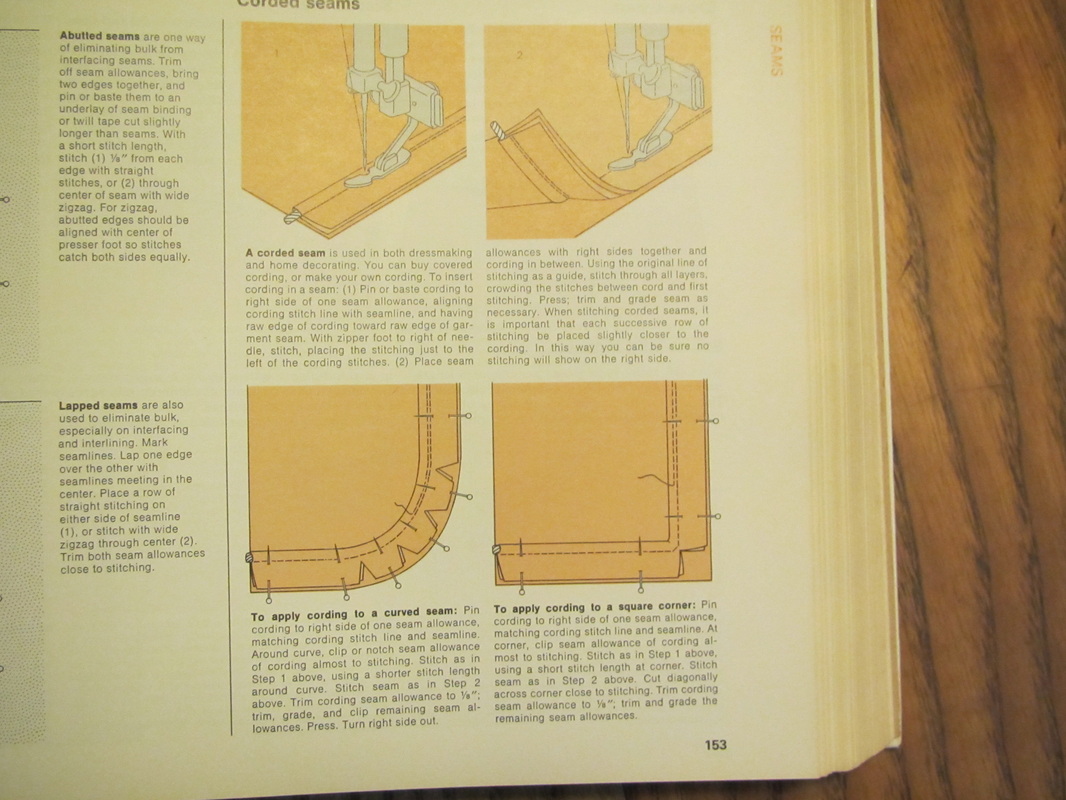
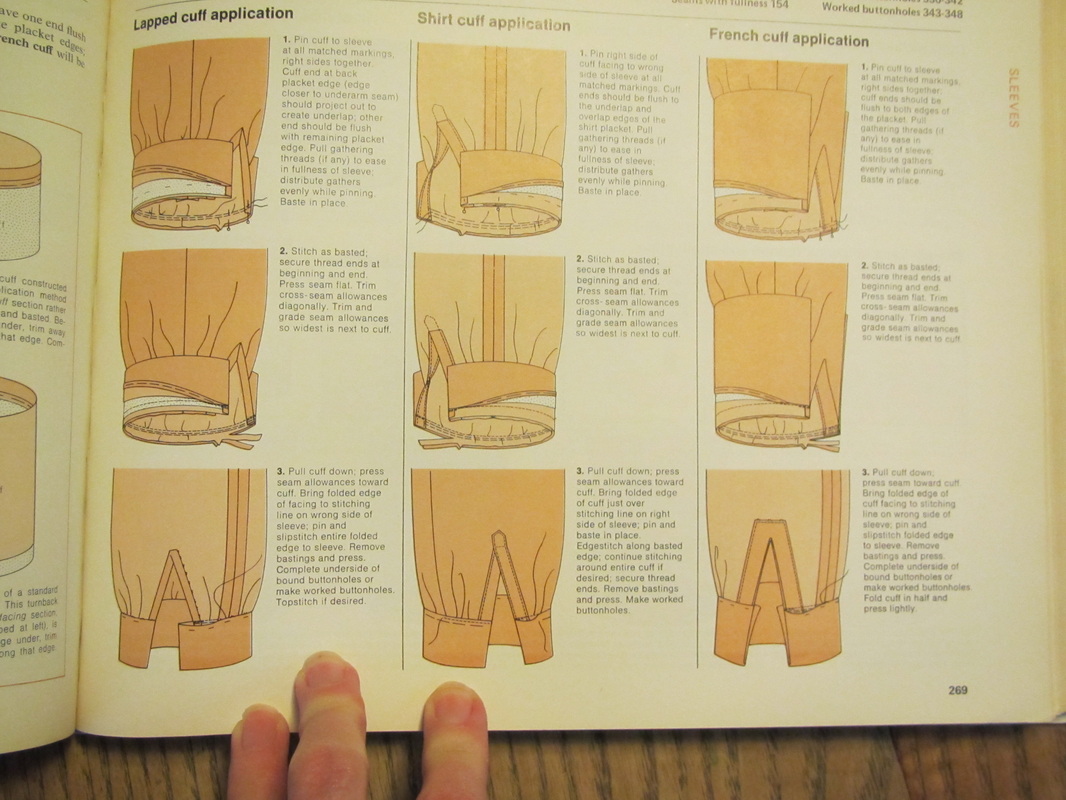
* some basic sewing topics such as interfacing, seam finishes, boning, etc
* Tutorials about some new costume patterns being released soon

* and explanations of patterns that have been around for a while
* costuming for amateur theater

* thrift store shopping
* and more things I'm sewing for myself


Please let me know if there is anything you would like to hear about.
Cheers! Andrea
3 Comments

My designs in PARIS!!!

6/28/2013

0 Comments

 
I think some of you know this.  But, Martha McCain and I are very good friends for a very long time. We met each other working in the professional costume shops in New York.  When I started I was her assistant.  How lucky is that?  

Anyway she recently got back from a trip to Paris and like anyone who loves design and fabrics had to visit at least one fabric store there.  And look what she found!
Picture
AND!
Picture
What else can I say except ... COOL.

But, I bet many of you are thinking ... Martha McCain??? What's she been up to recently?

Well, she has agreed to be a guest blogger and next week will tell you herself ... 
stay tuned.


0 Comments

RenFaire Wear part 3 - thrift store PIRATE

6/27/2013

1 Comment

 
Picture
In the last RenFaire blog post I showed you how to turn some old clothes from the thrift store into a lovely wench outfit for a lady to wear to the Renaissance Faire. (blog June 14) Today I will show you how to dress the lucky guy who will accompany this wench.
Picture
For the guy's outfit I started with a slightly over sized shirt ($3.50).  I found an off white one with loosely woven fabric so it doesn't look too modern, a slightly over sized pair of brown pants ( $3) and a tan cotton unlined sport's coat ($5.25).  Earth tones are a safe choice for most Renaissance costumes. I, also, picked up a woman's knit striped top ($3), a woman's floppy black hat ($1.50) and how could I pass up the black scarf with the the scull and cross bones on it ($2.25).
Cost $18.50 ... purchased on the 25% off day, of course.

And as with the lady's clothing ... into the washer these things go, because thrift store stuff smells funny. But, before washing I carefully pick off the chest pocket on the shirt.

Picture
First, I removed all the buttons from the shirt and sewed up the front a little more than half way.
Picture
I pressed back the remaining front edge up to the collar, stitched it down, sewed on some 1/2" gold rings and "laced" up the front with some rayon string.
I am so sorry I forgot to take a photo before I went at the cotton sports coat with my scissors, but trust me, it was a standard men's sport's coat with a lapeled collar. There really is no way to turn in into a pirate coat, but a vest ... yes.
Picture
I cut off the collar and lapel, then trimmed away the front edge 1 3/4" all the way down.
Picture
To finish the raw edge of the neck and front I did a blanket stitch the same as the thrift store wench's outer bodice. (blog June 14)
Picture
I decided to keep the pockets, because guys need pockets, but it was too long so I trimmed off about 1 1/2" and plan to hem it.
Picture
I used a catch stitch for the hem, because it is the fasted way to hold up that raggy hem.
Picture
This is where things stand.

I made jagged cuts on the sleeve caps which make them curl up ... RATS.

And he just looks too tidy ... I need to dirty him up.

Picture
I did some tests first on the collar that was cut off with burnt umber acrylic craft paint, water and a sponge brush to try out some effects.
Picture
I lightly smear paint around the edges of the hem and front, fading it out. Water can be used when the paint is still wet to blend and lighten it.
Picture
The paint helps stiffen those jagged sleeve caps, so I hope they will stay straight.
Picture
I try to think where a coat would naturally get dirty. Where someone's hand goes in and out of a pocket seems like one of those places.
Next the pants ....
Picture
First, I've got to get rid of the creases down each leg. Spraying with vinegar before ironing will get rid of most hard creases, even those annoying ones left in fabric after being on a bolt for a long time.
Picture
Next, I ask my pirate to try on the pants and sit down. I pin pieces of 3/4" elastic around his leg just under the knee.
Picture
I draw a line across the pant leg 1 1/4" below the marker pins. Be sure both legs are the same, unless your pirate actually has legs of differing lengths.
Picture
You can see the before and after here.
Picture
I place a few small pins just along the bottom edge of the elastic. This is also a good time to mark a waist alteration, if needed.
Picture
Finish the raw edge with serging or zig-zag. Fold up 1 1/4" and stitch a casing that is 1" wide. Pull the elastic through this casing. Pin or sew to fit.
A pirate needs some kind of a hat ...
Picture
Here is the woman's floppy black straw hat I bought.
Picture
I bought this striped shirt for added color, not really sure what it would be used for, and now I know. I cut it off right below the sleeves.
Picture
Tack up 3 sides and it's a tricorn, but this pirate is not turning out to be a tricorn wearing pirate.
Picture
It makes a great head wrap. I cut it in the middle of the back panel, not along one of the seams to avoid having a seam showing in the front when being worn.
Picture
The shirt should be tucked into the pants.  Pirates or other men in the 18th Century and earlier didn't wear under pants like we do.  The shirts were long and kind of served the job of underwear.  They were, at least, easier to wash than the pants would have been.

And, you know ... this craze to be a pirate has been around a long time. Take a look at this photo from a 1920's masquerade party!
Picture
1 Comment

Tulle and Tutus

6/26/2013

1 Comment

 
I've been spending some time looking at the exhibition book I bought at the Diaghilev Show at the National Gallery in Washington DC (blog June 12).  Most of the costumes are bold, almost cartoon like, but he did some more traditional ballets as well.  In the exhibit was one tutu from a production of Les Sylphides in 1917. 
Picture
Costume rendering for Les Sylphides by Vera Welloughby for the Ballet Russes in 1917.
Picture
Photograph from the book of the tutu that I saw at the exhibition.
So what?  Well, I have to confess, I was surprised to see the skirt wasn't made of tulle, but a stiff, lightweight woven fabric called tarlatan left raw at the hem. I just never thought about what was used before tulle.


I have an old Simplicity tutu pattern that calls for tarlatan for the skirt.

Why was this fabric chosen and when did tutus start to be made with tulle?

The internet to the rescue!

I learned the word "tutu" is french baby talk for bottom at Class Act Tutu and Dancewear. 

But, I found a website with almost to much information.  It looks like many people contributed to it, but no one organized it.  The website is called Dance Photo.  It's worth a visit, but I cut and pasted the stuff I was interested in below. I wonder who wrote this ... I corrected some of the spelling, I'm not even sure what some of the words mean, but it's still informative.

  • THE TARLATAN
    Tarlatan is imported from Indias. Its french making stands in Tarare, near Lyon. It is a cotton pack, featuring a much wide weaving, much appreciated. Tarlatan is mainly used for making evening dresses, hair dresses and underwear. Also used for patterns, furnishing, health, ... Some say that tarlatan is the young women's preferred pach. It is as nice as tulle, more solid and cheaper After WW II, tutu's underskirts are made of tarlatan. It is a rigid fabric which makes the round basis. Hard to care, tutus are never washed, and are used until death. Now, Tarlatan is only used for making basis and hats.


  • TULLE
    This fabric comes from the city of Tulle, in France. Tulle is a kind of lace Tulle Lace is made of very regular meshes. From 17th to 18th century, it is used to decorate clothes. In 1827, The only production is a flat tulle. Near 1830, jacquard weaving loom are in use for making tulle. Then, it is possible to make several varieties of tulle. Tulle is a openwork, thin, light and transparent fabric. Use of Tulle is greatly appreciated in furnishing, clothes, due to its "magic" appearance. There are several varieties of tulle:
    • basic : hexagonal and round meshs
    • tulle malines: hexagonal and lengthened meshs
    • tulle Bruxelles: square meshs
    • tulle Valenciennes, Alençon, Chantilly, Calais: meshs reproducing the drawings of laces
    • tulle illusion: Very smooth tulle
    • tulle grec: Big nets
    • tulle point d'esprit: with feathers

But the best article is at the Dance Magazine site.  It's well written and gives a really good history of the tutu.

So, basically until nylon was invented in 1939 and started being used for making tulle after WWII this starched cotton gauze like fabric call tarlatan was used for tutu skirts. Silk tulle was too limp and I'm sure too delicate and expensive for all the layers necessary for a tutu.

Tulle has been pretty popular in the last few years for little girls and big girls, too.
It does look magical.
Picture
Picture
And, I'm headed back to see that Diaghilev show again soon.  I didn't have nearly enough time to see all of it on the first visit.
1 Comment

From my library - sewing books

6/25/2013

2 Comments

 
Back on June 5th when I was making my Cynthia Rowley dress I estimated that I owned 20 sewing books.  So, today I thought I'd actually count them and tell you a little about my favorite ones.
Picture
Well, here are my sewing books and there are 30!
Picture
In this pile:
Couture Sewing Techniques, by Claire B. Shaeffer - Really good book for fine sewing, I look at it often.
The Bishop Method, by Bishop Arch - This was the method I learned in 7th grade.
Sewing Secrets from the Fashion Industry, by Susan Huxley: Sewing with Nancy's Favorite Hints, by Nancy Zieman: and Clotilde's Sew Smart - These 3 books have really good sewing tricks and tips.  After having read through them once I don't really use them.

Picture
These two specialty books I have found very useful, particularly the tailoring one.  It gives options for quick tailoring, great for theater rush jobs and tells how to do hard core tailoring for garments you want to last a while.
 
Sew a Beautiful Wedding, by Gail Brown and Karen Dillon
Easy, Easier, Easiest Tailoring, by Pati Palmer and Susan Pletsch.

Picture
I've got a neat collection of Simplicity Sewing books from the 30s through to the 70s.  I should probably get a current one to round out my collection.
The earliest one from 1937 is really good, I have to say. There are pages that discuss different body types and the most flattering silhouettes, also what colors looks best on different people.

Picture
Here is a very small collection of Singer Sewing books, two from the 20s, one from the 30s and a modern one. The 20's one titled "How to make dresses the modern Singer Way" starts off with the sentence, " The first essential to sewing is a good sewing machine."  Ha Ha ...The one from the 30s recommends you get your measurements properly recorded by your Singer instructor every year.  WOW! 
But then I just read the intro to the 30s Simplicity book and it says that the first step in sewing success is selecting a pattern ... and then they say "It is always well to be frank with yourself.  Once you admit the existence of any figure defect, you are halfway on the road to remedying it."


I wonder if we are all being frank enough with ourselves?

Picture
These three books I refer to often for period sewing techniques.
Authentic Victorian Dressmaking Techniques, edited by Kristina Harris - available from Dover books, it is a reprint of a book from 1905 by Butterick.
Making Smart Clothes, from 1930 by Butterick - I'm told this book is fairly easy to find used because so many were printed.
The Dressmaker's Guide 1840-1865 by Elizabeth Stewart Clark - a modern book that demystifies 19th century sewing.  Great for re-enactors and to supplement the instruction from a commercial pattern. You can buy it HERE.

You can find digital editions of old sewing books for free on line.  Google books has so many. Here is a link to a good one.  Once you are there you can search for many more.
Picture
But this has been my "go to" book for ages.  I buy copies at used book stores to give to the people who sew for me sometimes.

I think the illustrations and instructions are very clear.  Several options are given for most operations.  There are some nice projects included.  I'm sure there is an updated version which would include things like serging.  The copyright on this one is 1976.


I just found the new version HERE. You can also find this old one starting at $4.
Picture
Picture
Picture
I think of the sewing instructions given in a pattern as more of an assembly guide.  Pattern companies don't know what fabric you are going to choose to make any one garment.  So, the sewing instructions given for any one operation might not be the best choice for your fabric.  It is good to become familiar with a variety of sewing options and that is what a good sewing book will give you.
2 Comments

My last minute beach cover up

6/24/2013

2 Comments

 
It looks like I'm going to be visiting a bunch of beaches this summer and for several reasons ... ;<) ... I want something nice to cover myself up while wearing my bathing suit.

Our first beach trip is happening in two days, so I better get cracking.
Picture
This is my final result ... but it didn't happen quite as fast as I was hoping.
Picture
And, here is my inspiration ... I bought this cool old Polynesian Pattern several years ago and have been wanting to make it up for some time.  And, I have this lovely very light weight cotton lawn in my stash.  My bathing suit is solid black, so this should look good with it.  I pre-washed it at the same time I pre-washed the fabric for the dress I made in May.  Remember my blogs from May 30th and June 5th?

I read this fun blog recently The Slapdash Sewist.  I like the way she dives into projects and works out the problems as she goes.  So, that is the spirit in which I approached this project.

Now, here is how I thought things would go as I whipped this thing up.  First it is a size Large and I should probably wear a Medium, but I figured ... it's a beach cover up, if it's big, no problem, I'll do some clever things with the stripes  AND, I'll just dive in and sew!!!! 
Picture
First, here's a small tip.  It was very difficult to tell the right side from the wrong, but when you looked closely there was a difference.  So, once I was sure which side was which, I pinned little safely pins on the right side of all the pieces.


Anyway, I'm madly sewing along.  Spent a fair amount of time putting some bias in the yoke seam (probably a stupid thing to do) and thought to myself "self ... you should try this on before serging those seams inside."

I tried it on and HATED it.  I won't even show a photo of me in it, it made me look super dowdy.  But, here it is on my form.
Picture
It's the yoke ... It's too, too big and I hate the horizontal stripes.
Picture
First ... I've got to get that ugly yoke off my garment!


But now ... what to do? What to do?  I have very little fabric left.  I considered a solid black yoke, but don't like that.  I'm going to see what I can do with the scraps left.

Picture
I like this yoke much better.
Picture
I made the back neck "Vee" to follow the striped of the fabric.
Picture
But, I do think it needs a little black trim around it. The same effect as the hand cut bias in the seam with a lot less work. This is a 3/8" scrolly gimp trim.


Now, zig zag on the trim, serge seams, sew up hem and it's ready for the beach.

Picture
Another nice thing about this cover up.  It folds down to nearly nothing.  It will tuck into my suitcase when I travel this summer and can double for a bathrobe.

I just read an article by Cynthia Rowley about how she travels all over the world with her husband and two daughters and never checks any luggage.  I'm seriously thinking about how I can do that this summer.  I will keep you posted.

Picture
And, I finally wore that dress I made 3 weeks ago (blogs of May 30 and June 5). Which will also travel with me this summer.
2 Comments

Fifth flower tutorial for pattern # 1601

6/21/2013

2 Comments

 
Picture
This photo was taken at my sister's wedding.  I was the maid of honor (in the back next to my mother) and my 2 younger sisters were junior bride's maids. The reason I'm sharing this photo with you, is because we all have the next flower I'm going to show you on our heads.

I was 19 years old at the time and my grandmother taught me how to make this flower (view A). She and I made all the head pieces.  It's called the Diablo Rose because it was created by one of the teachers who taught in the Apparel Design Program at Diablo Valley College that my mother attended.
Picture
As you can see the flowers for my sister's wedding were made from satin and organdy and the sample I made for this pattern is made of quilting prints. So ... it works well with many fabrics. I wonder what it would look like in wool?
Picture
This is another flower that I recommend hand gathering.
Picture
The stamen are made from a cluster of pieces of 1/8" ribbon with knots.
Picture
The bottom gets pulled in really tight.
Picture
This is how I tacked the leaves on the bottom.
Picture
I think this poinsettia (view F) is going to be part of my Christmas decorations this year. It's easy and will brighten up my holiday decorations, won't wilt and can be used for many years.
Picture
The burlap needs to have the edges zig zagged first.
Picture
This is how I prepare the ribbon for the center of the flower.
Picture
Hand gather the petals carefully, because the burlap wants to fall apart.
Picture
And this is how I positioned the leaves on the bottom.
Picture
So, I have shown you how I made all the flowers in this new pattern.


Over the summer there will be a couple guest bloggers who will show what they've done with this pattern.


Next week back to my assorted projects and a thrift store pirate!

2 Comments

Fourth flower tutorial for pattern # 1601

6/20/2013

0 Comments

 
I have two flowers for you today that work well with quilting cottons.  As I said yesterday,  I love to mix prints.
Picture
These flowers (views C and D) are made with gathered strips with soft torn edges. And the way to get a strip with a torn edge that is just the width needed is to tear the fabric first, press out any pulls or crinkles.  THEN pin on the pattern and cut it out ... like this.
Picture
Picture
The gathering can be done by machine or by hand for these flowers.
Picture
And the center is just a fabric covered button like the flower from yesterday's blog.
Picture
The upper layer of these flowers (views J and K) is also a gathered strip with a torn edge.
Picture
The bottoms are pieces of folded burlap.
Picture
But the burlap will fall apart if you don't zig-zag around it first.
Picture
I had the hardest time figuring out which prints to put with the different colors of burlap. The brown burlap was way, way too dark. I wanted to keep this set with neutral tones, but it was a struggle.
Picture
Here's one I used a bit of blue on.  I forget why I didn't like it .... oh well.


Tomorrow will be the last of these flower tutorials and I'm saving a very special flower to share with you.

0 Comments
<<Previous

    From Andrea 

    I am a commercial pattern maker who is now "sewing over 50"!
    I love to sew and hope to encourage others to come back to sewing.
    The water is fine!!

    Archives

    August 2019
    July 2019
    June 2019
    May 2019
    April 2019
    March 2019
    August 2017
    July 2017
    June 2017
    May 2017
    April 2017
    March 2017
    February 2017
    July 2016
    June 2016
    May 2016
    April 2016
    March 2016
    February 2016
    January 2016
    December 2015
    November 2015
    October 2015
    September 2015
    August 2015
    July 2015
    June 2015
    May 2015
    April 2015
    March 2015
    February 2015
    January 2015
    December 2014
    November 2014
    October 2014
    September 2014
    August 2014
    July 2014
    June 2014
    May 2014
    April 2014
    March 2014
    February 2014
    January 2014
    December 2013
    November 2013
    October 2013
    September 2013
    August 2013
    July 2013
    June 2013
    May 2013

    Archives by Subject

    To search for blog posts in specific categories, use the drop down menu above by hovering over the word "Blog"

    Enter your email address:

    Delivered by FeedBurner

    RSS Feed

    Andrea Schewe participates in Amazon's associates program.