Andrea Schewe Design
  • Home
  • Costumes
    • Reader's Gallery
    • Fantasy Costumes
    • Theatrical
    • Historic >
      • Easier to make
    • International
    • Costumes for Kid's and Babies
  • Crafts
    • Home Decor >
      • Pillows
    • Fashion Accessories
    • Doll Clothes
    • For Kids and Babies
  • Blog
    • Past Blogs by subject >
      • My patterns by number
      • Sewing basics
      • Personal sewing Projects
      • Fashion History
      • Fun and funny stuff
      • Guest Bloggers
      • Crafts and Home Dec
  • Links
  • Contact

Third flower tutorial for pattern #1601

6/19/2013

1 Comment

 
Picture
Picture
Picture
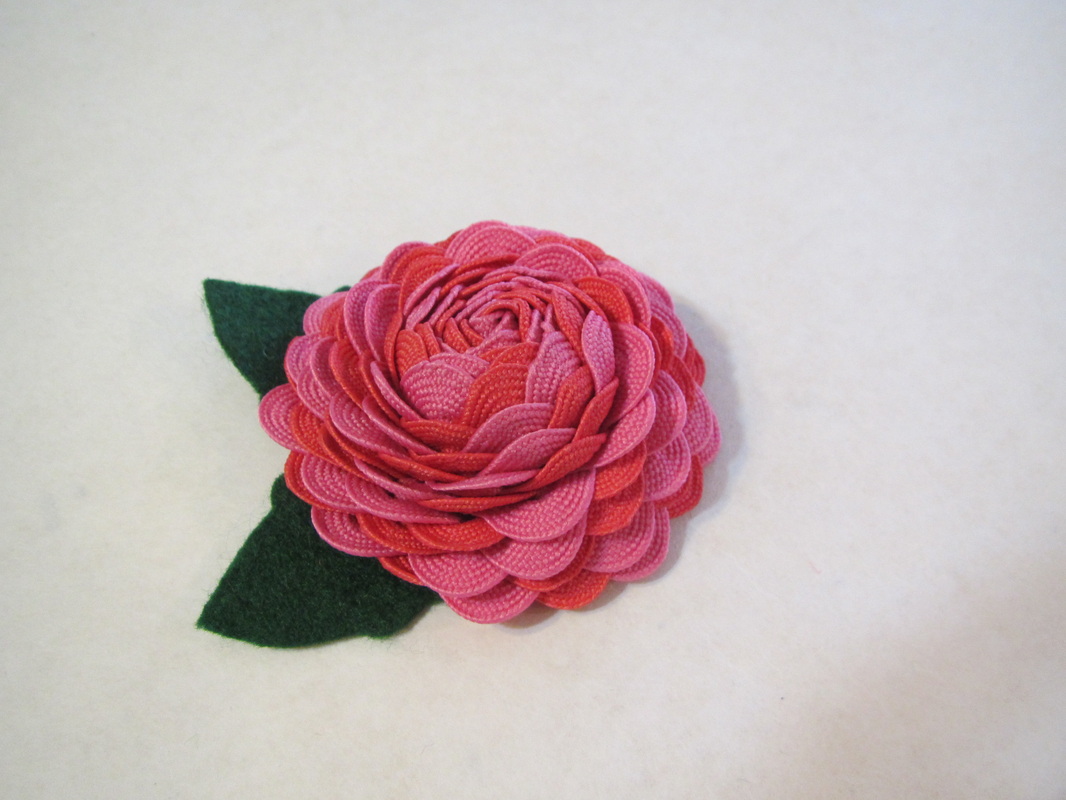
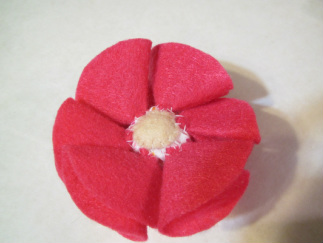
Another day ... another flower or two.

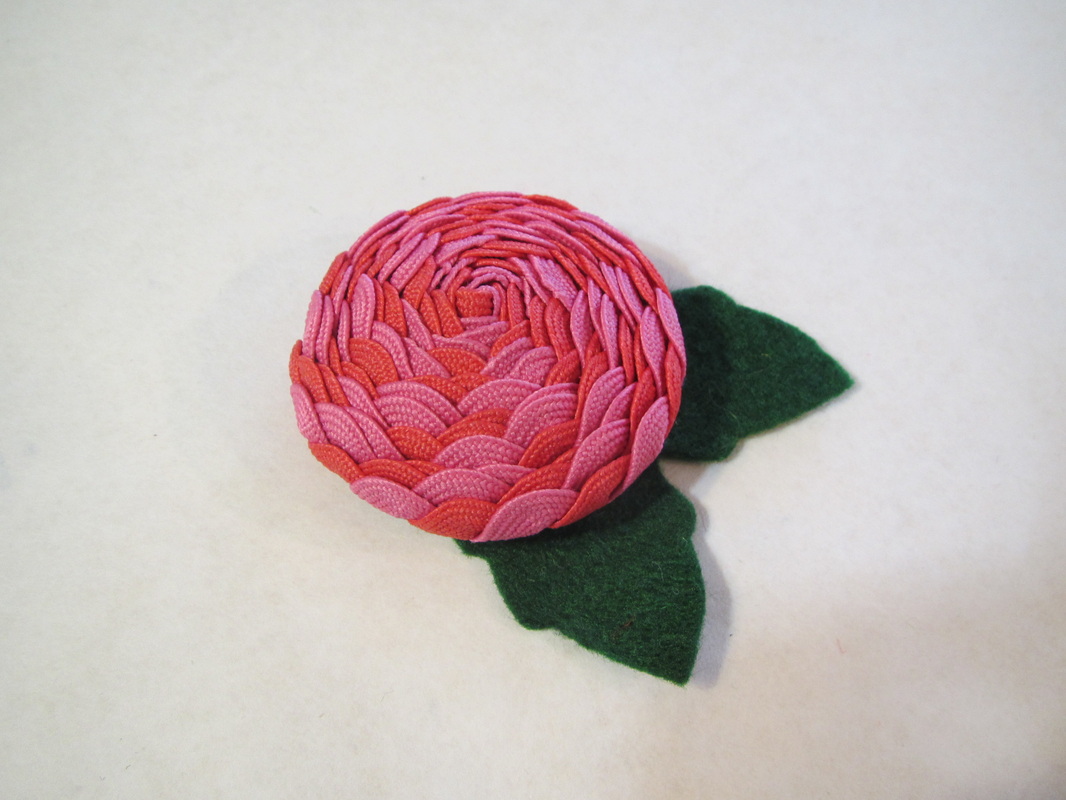
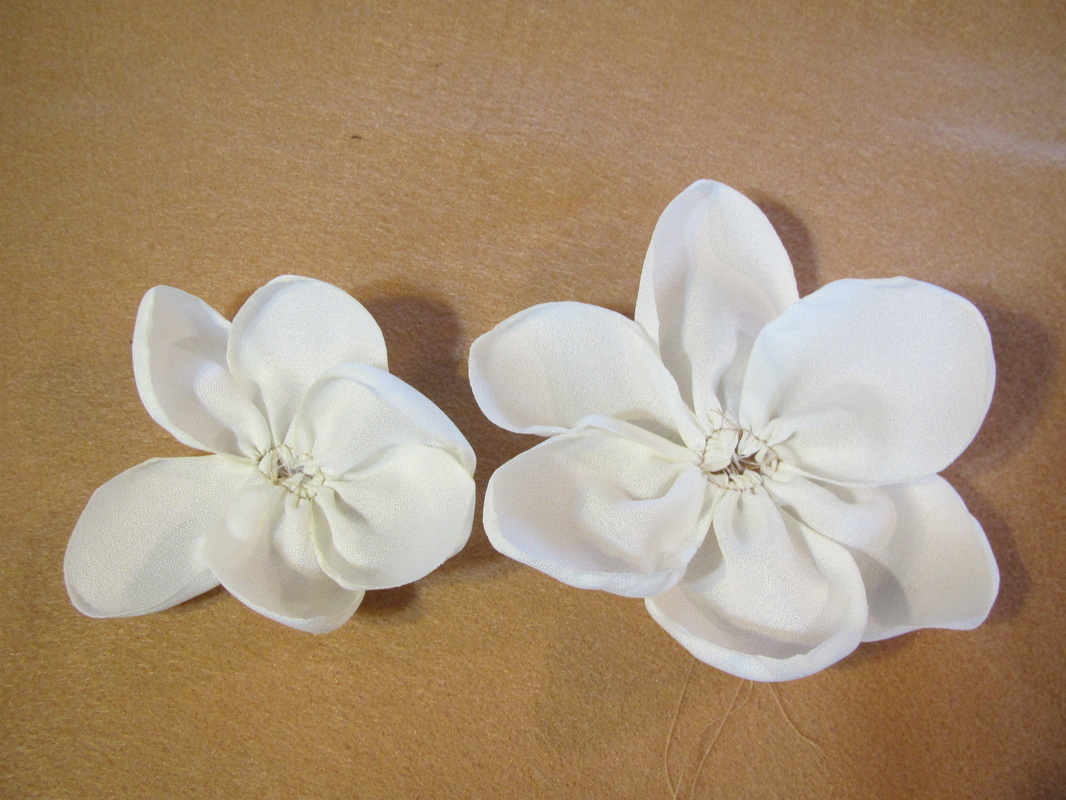
These two flowers (views G and E) are each constructed in a similar manner.

Picture
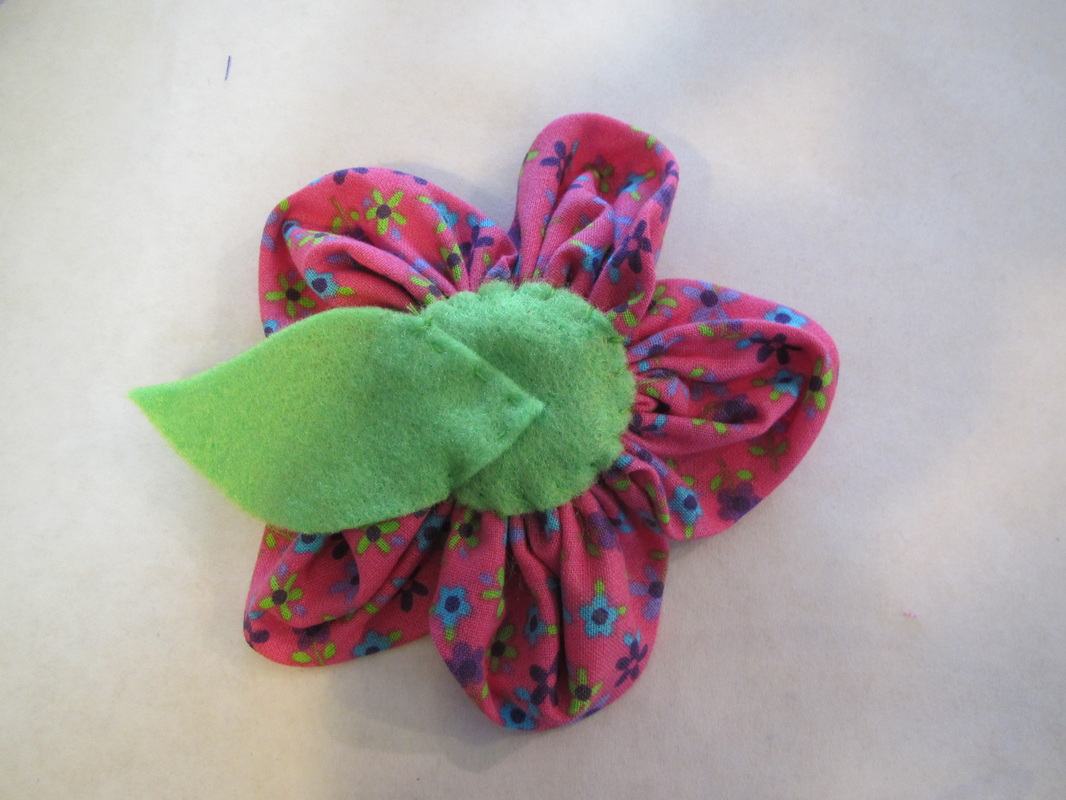
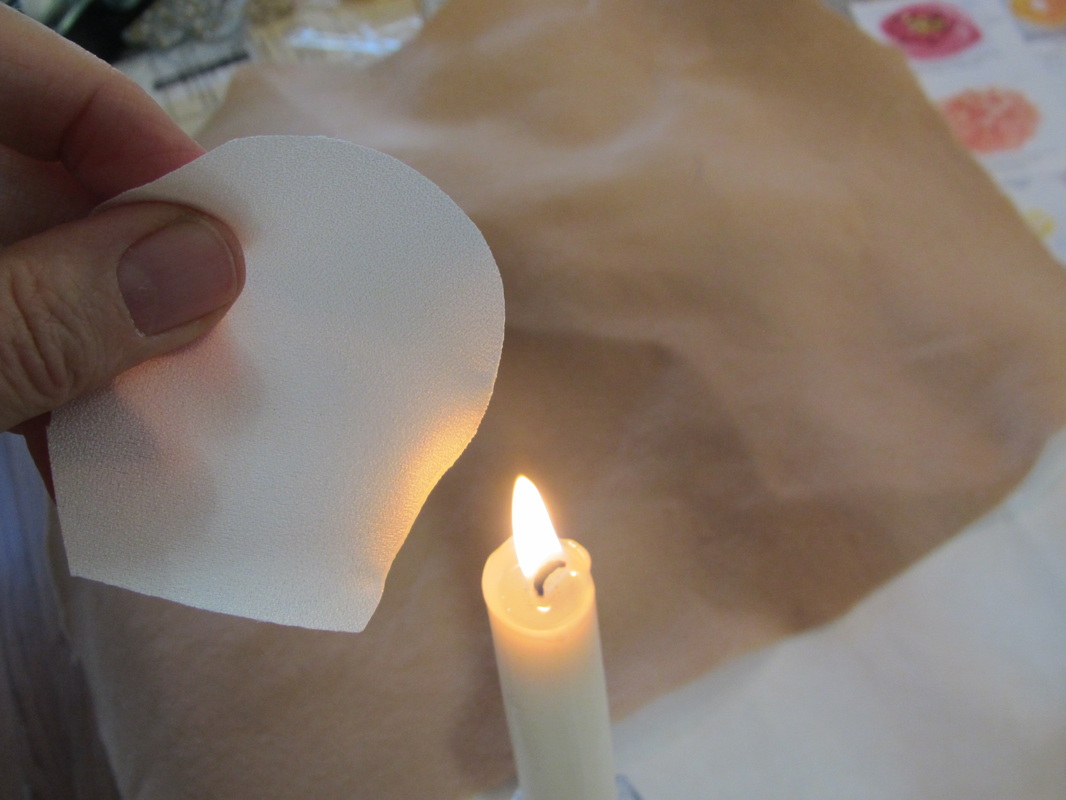
This simple flower (view G) can be made in any lightweight fabric. It works really well with quilting cottons. I really enjoy mixing prints.
Picture
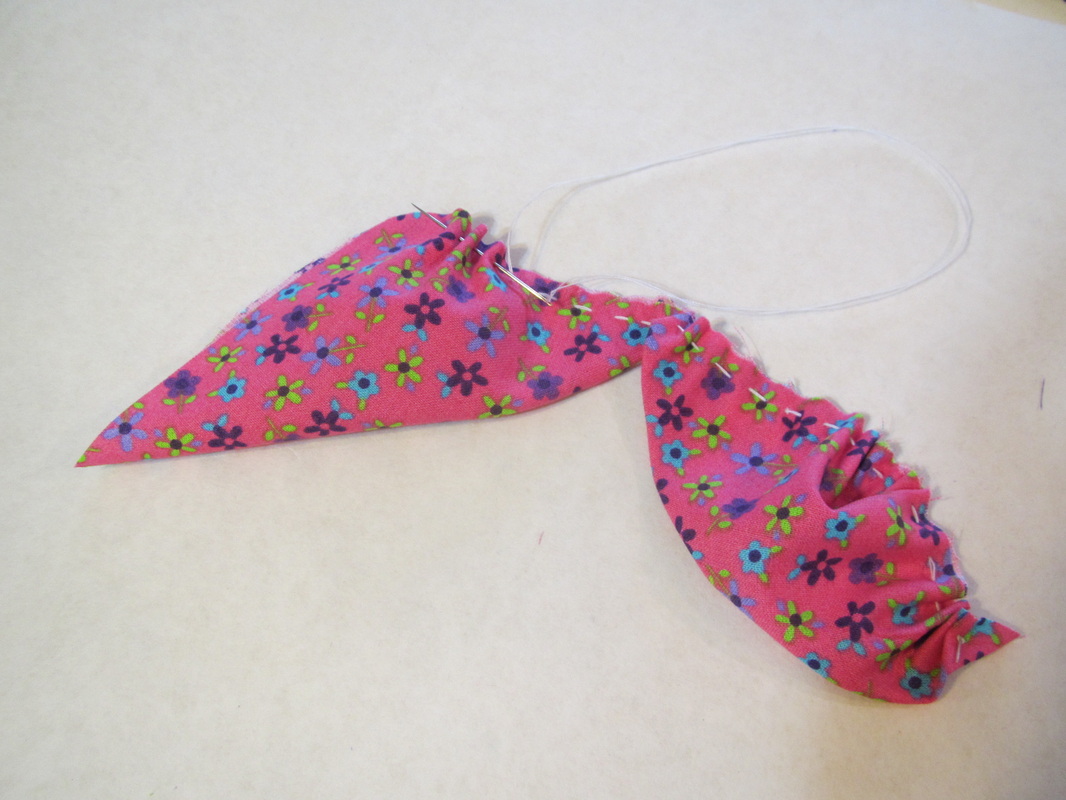
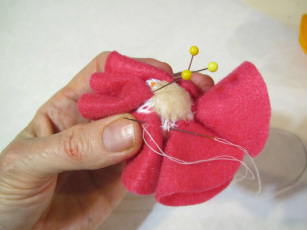
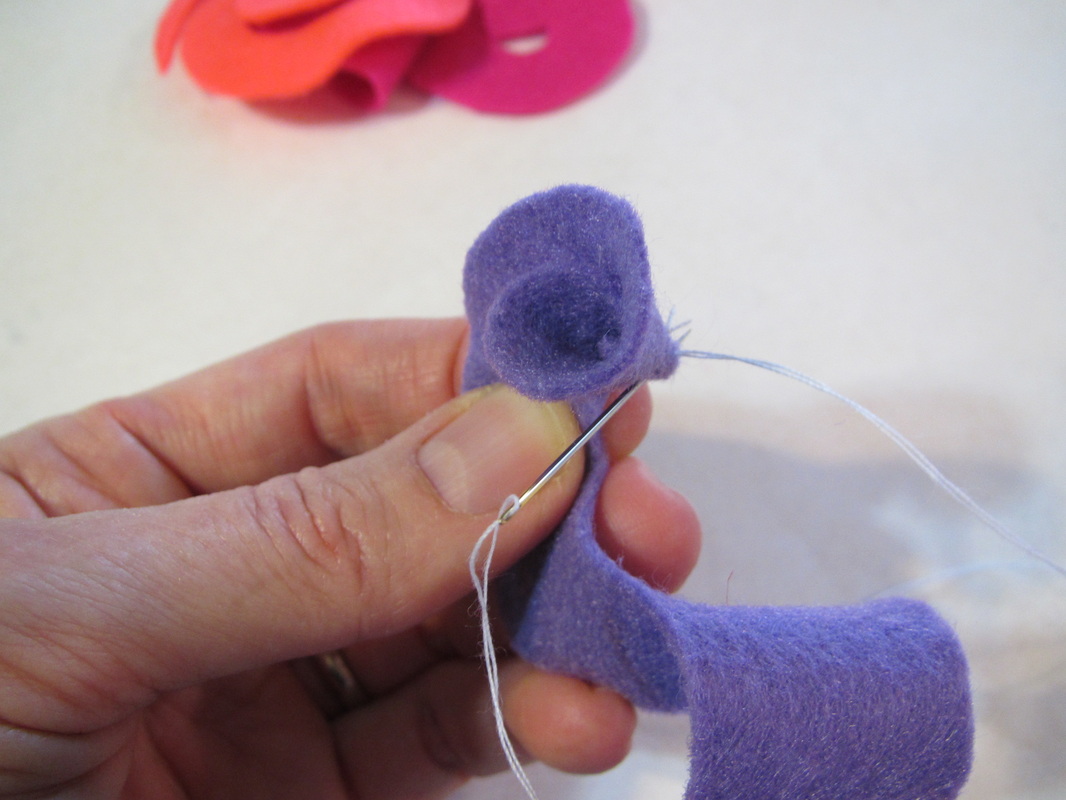
It is best sewn by hand.
Picture
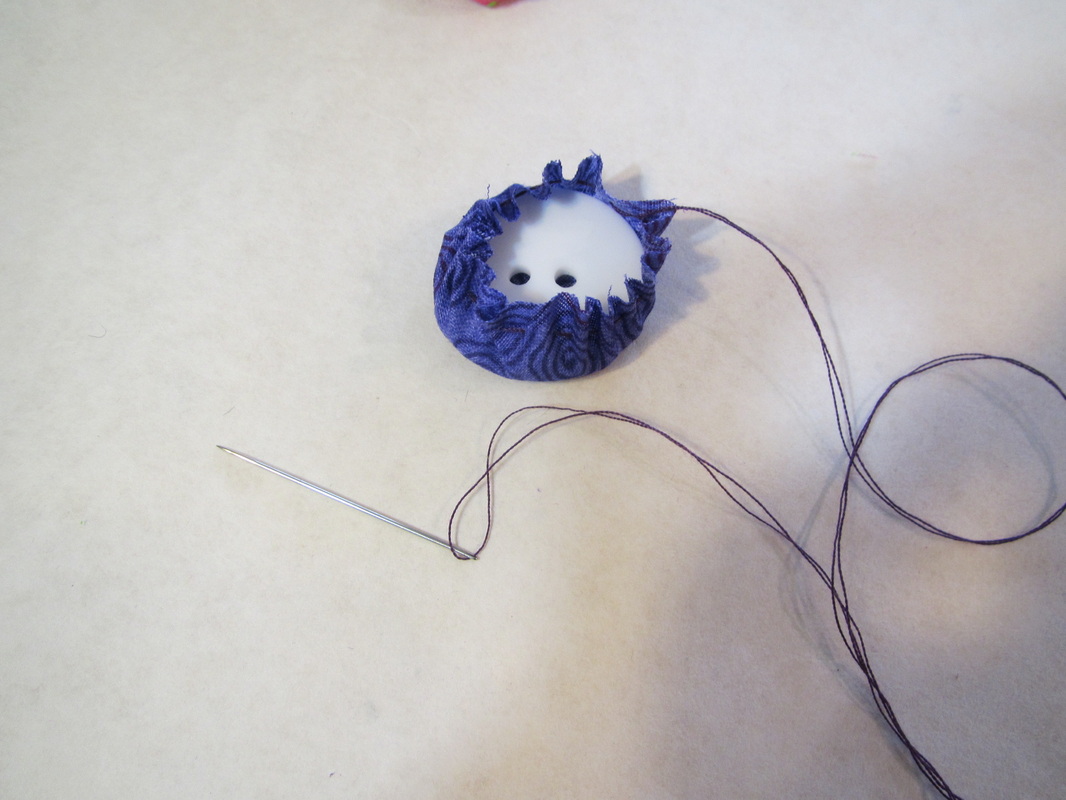
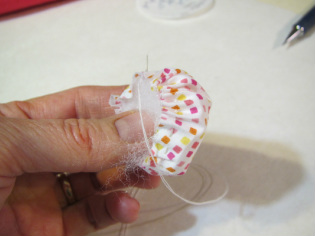
The center is simply a fabric covered button.
Picture
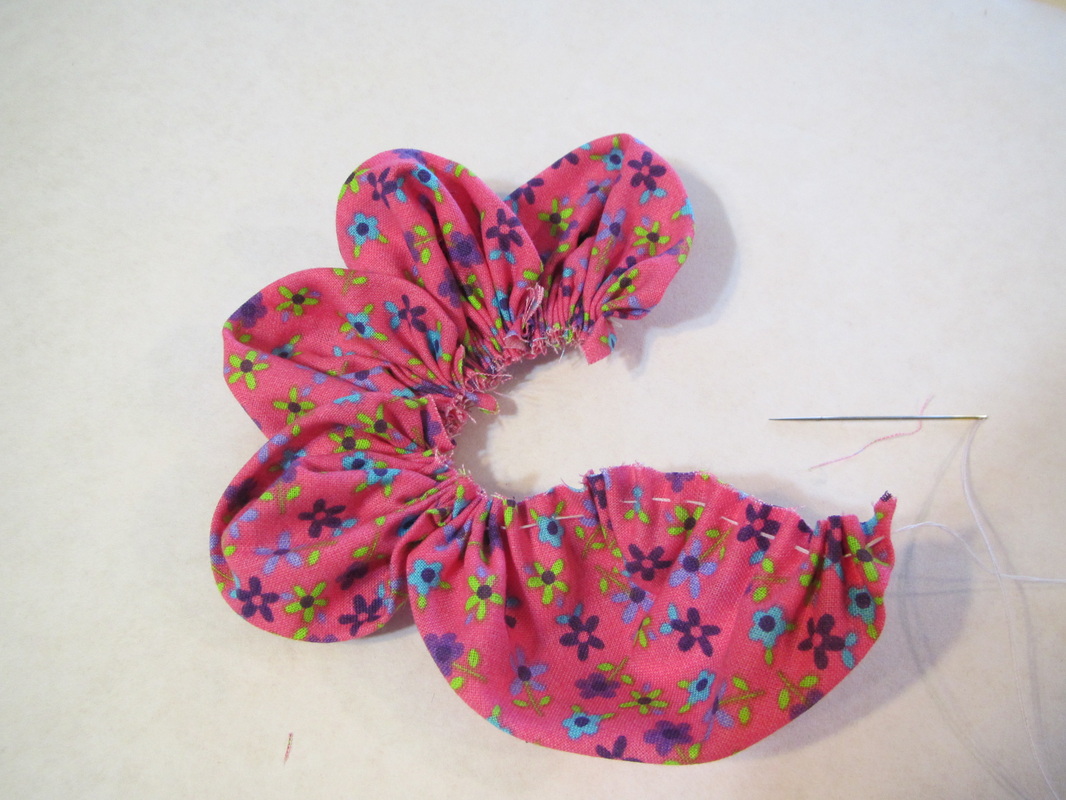
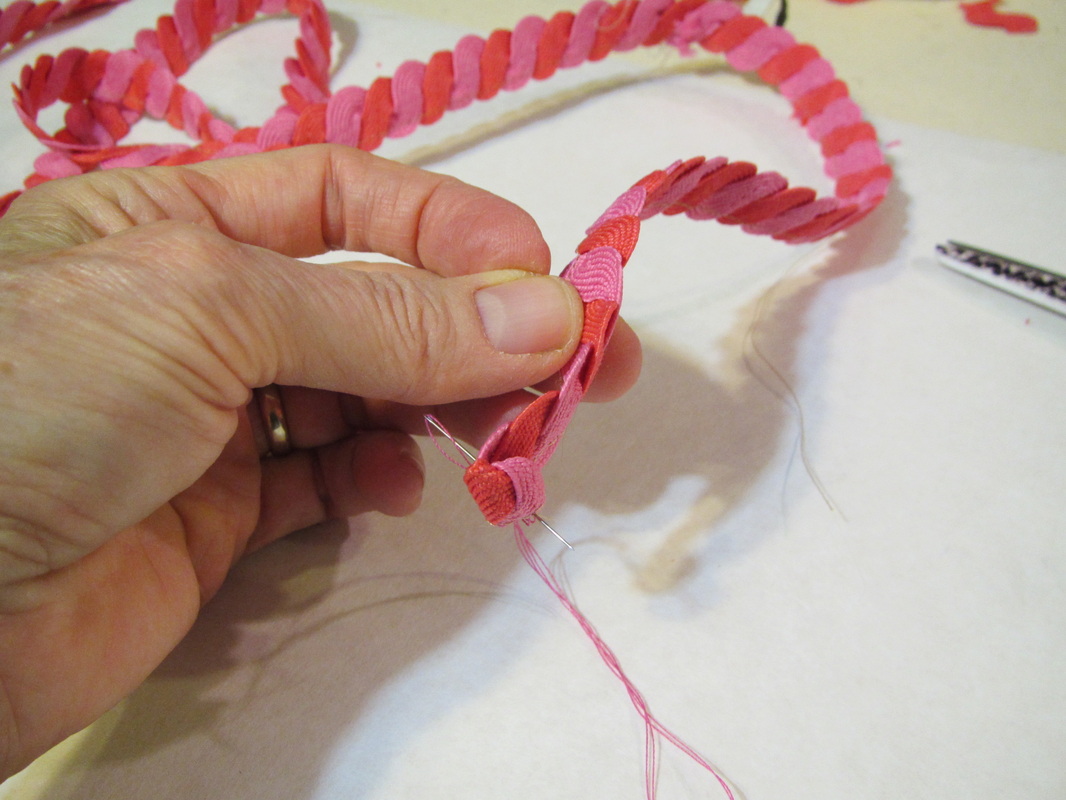
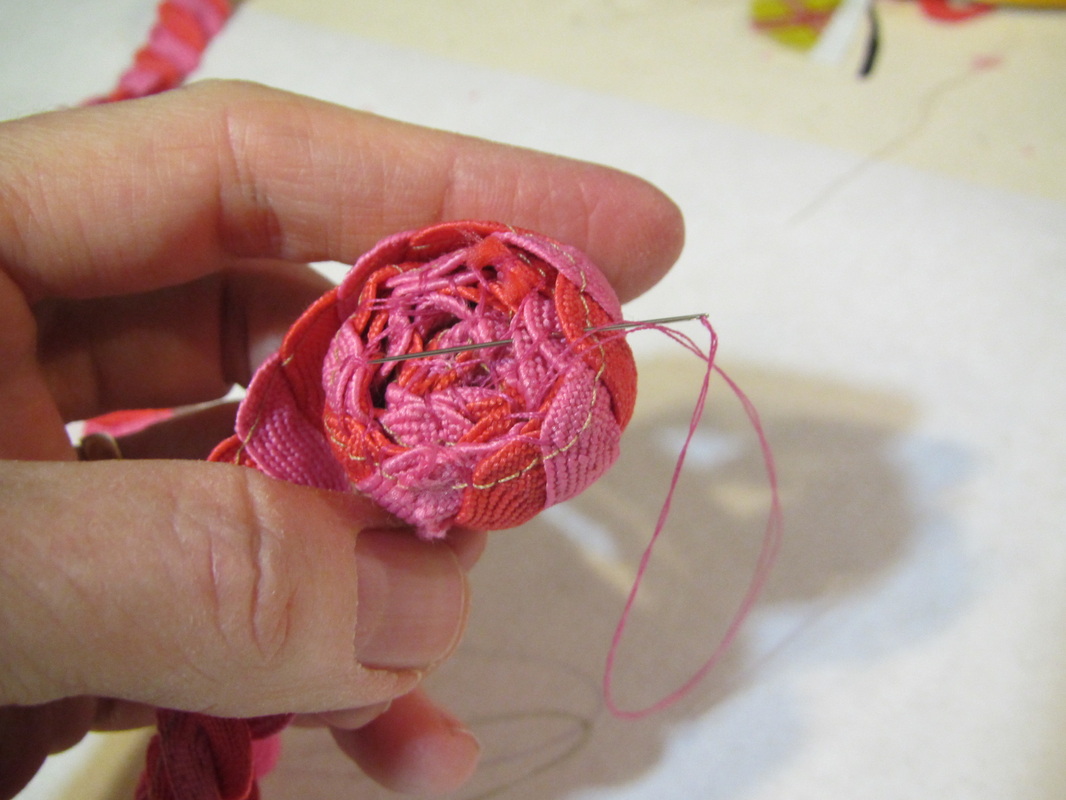
Because once the petals are all gathered it becomes very thick and hand gathering pulls up tighter.
Picture
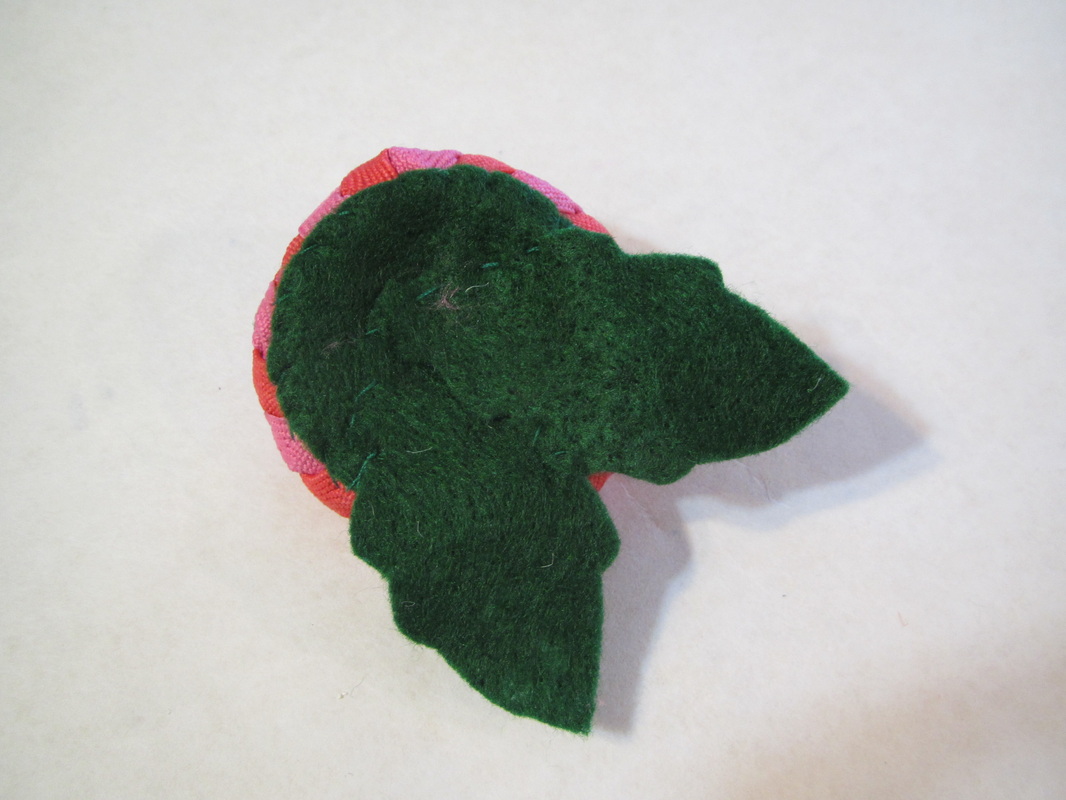
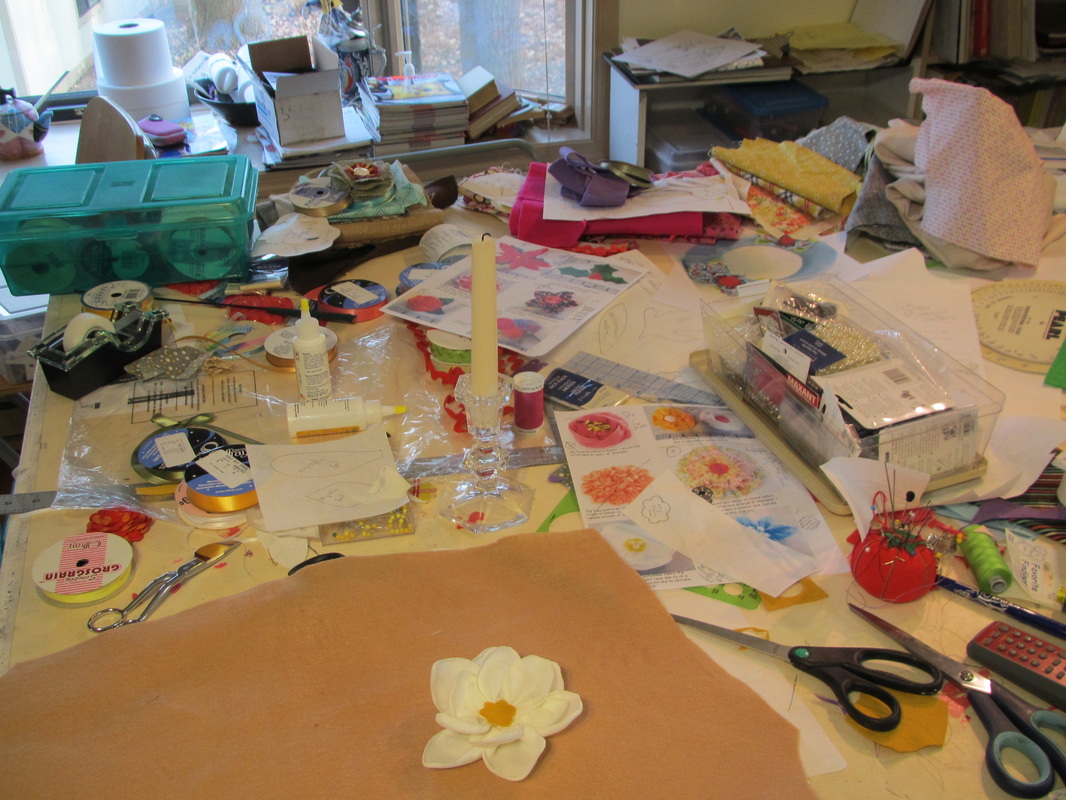
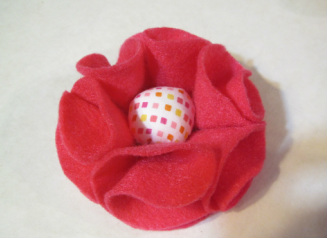
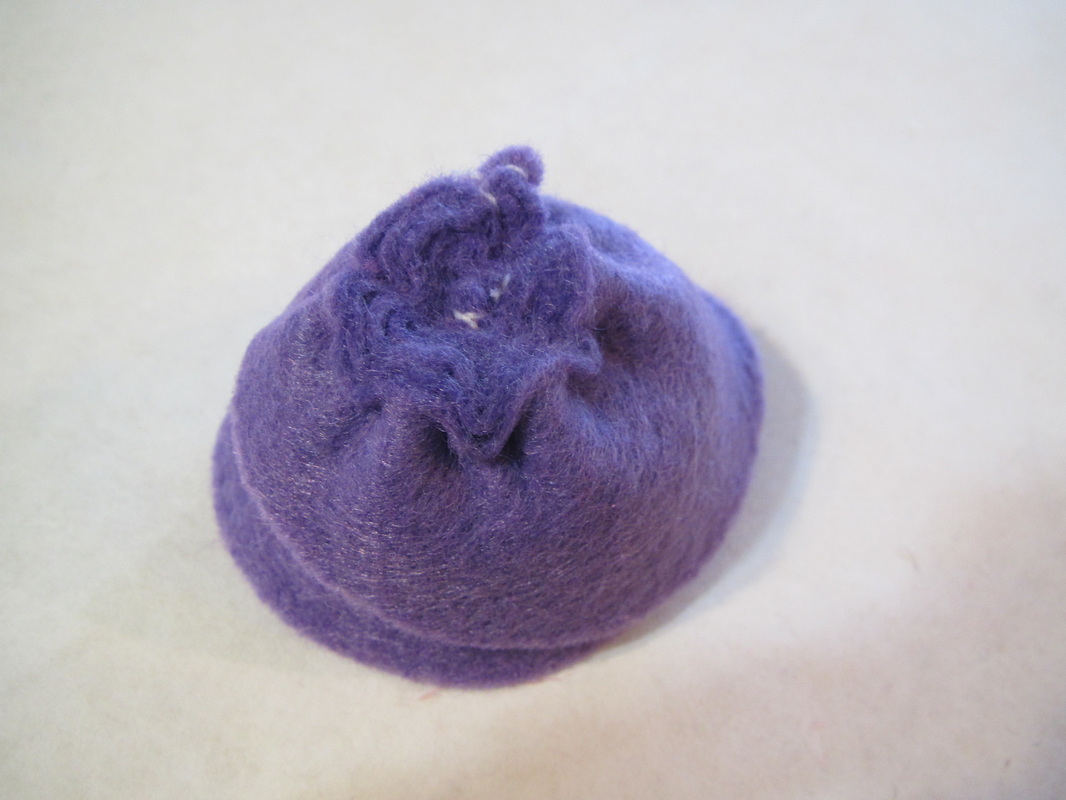
Here is the view of the bottom.
Picture
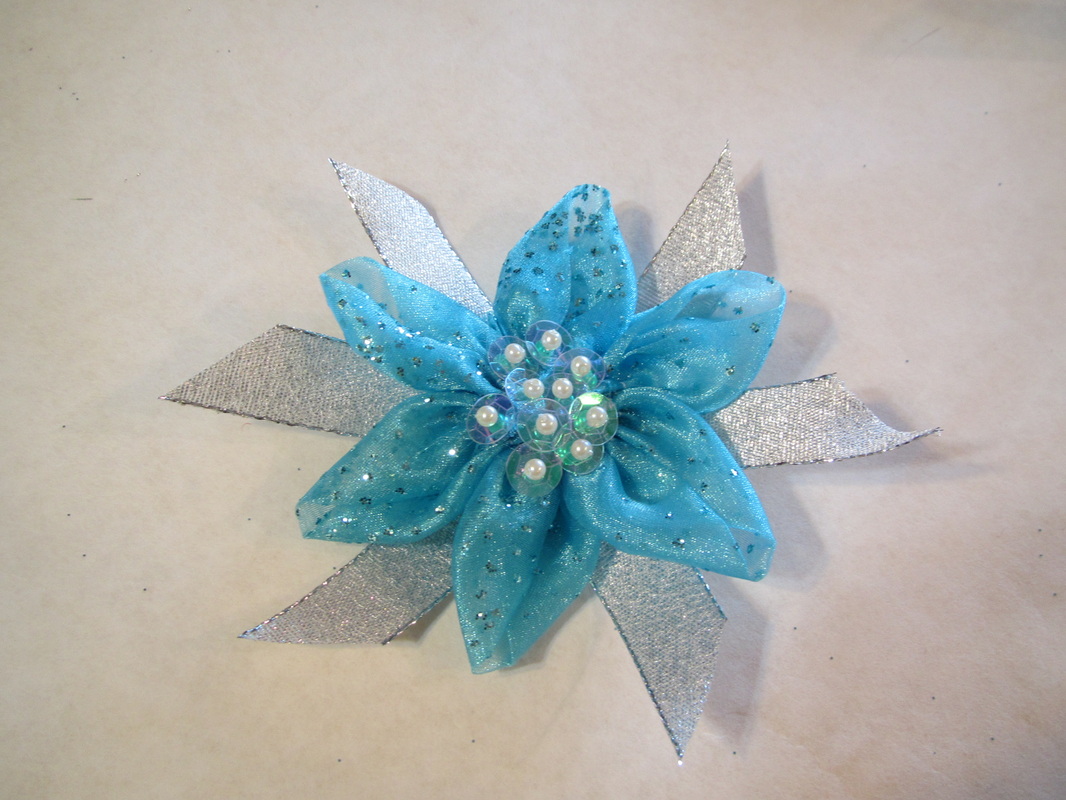
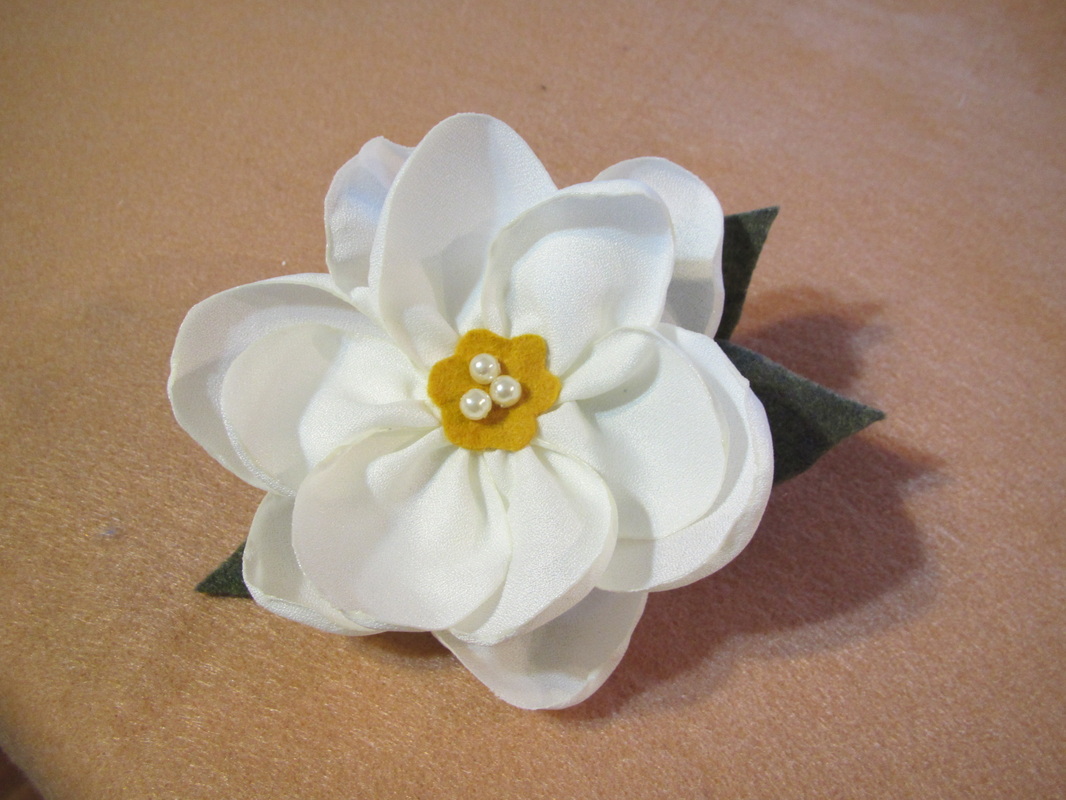
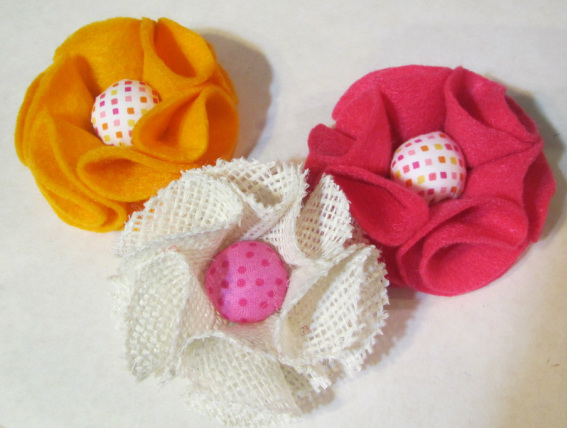
I made view E in a holiday or party fabric, but it can be made up in any light weight fabric. And the center doesn't have to have sequins. It could be a bunch of colored beads.
Picture
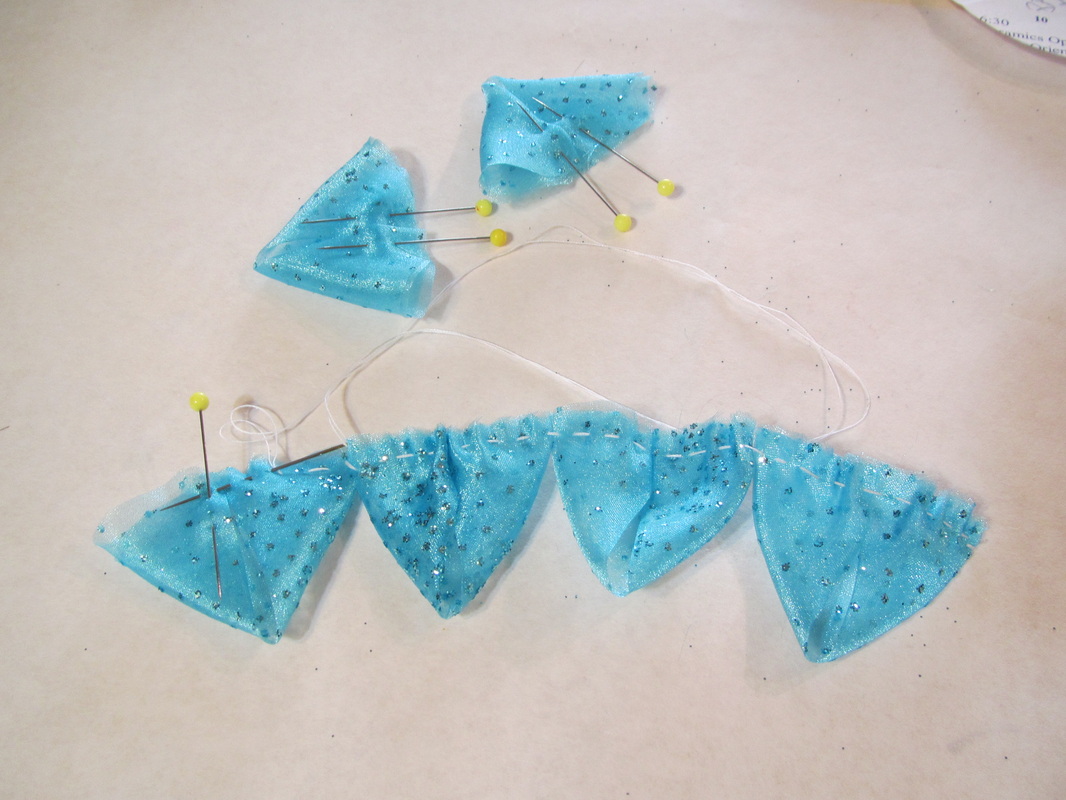
These petals also work best with a hand running stitch. I find machine gathering won't pull up tightly enough.
Picture
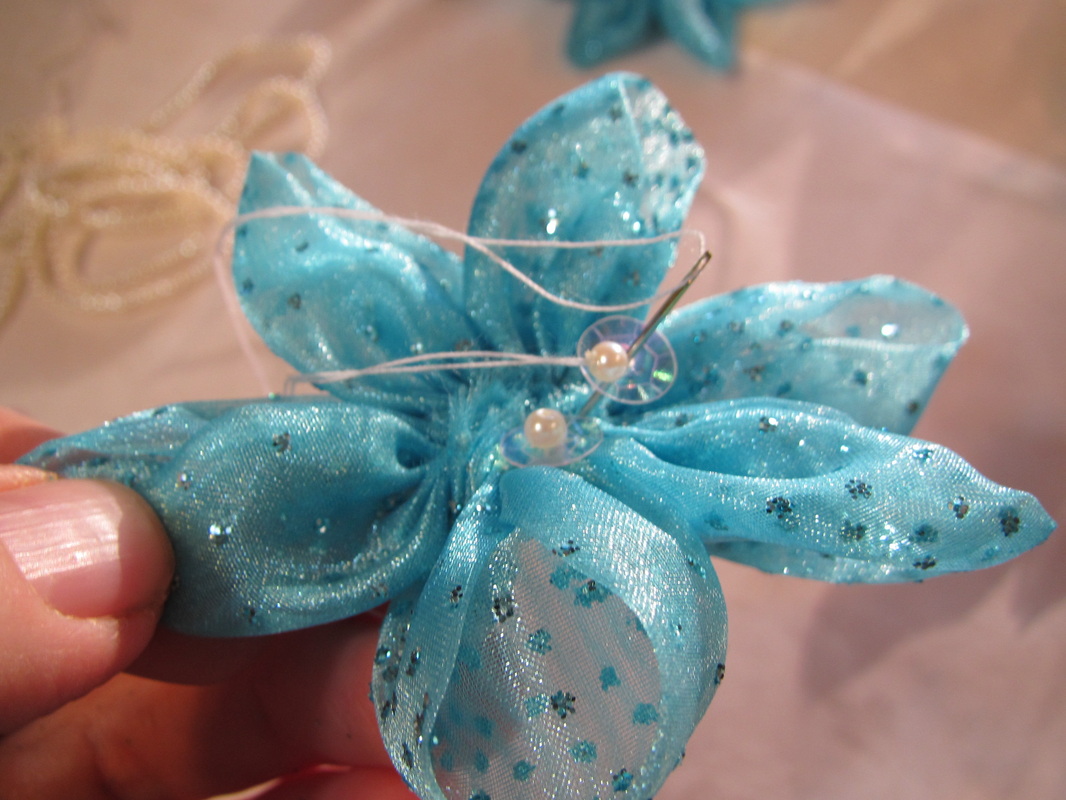
The thread goes through the sequin, then through the pearl and back again into the sequin before finally attaching it to the flower.
Picture
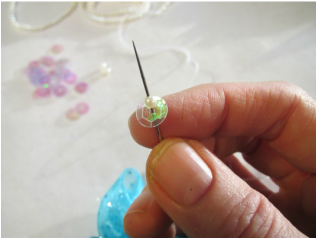
Here I have one sequin and one pearl on my needle.
Picture
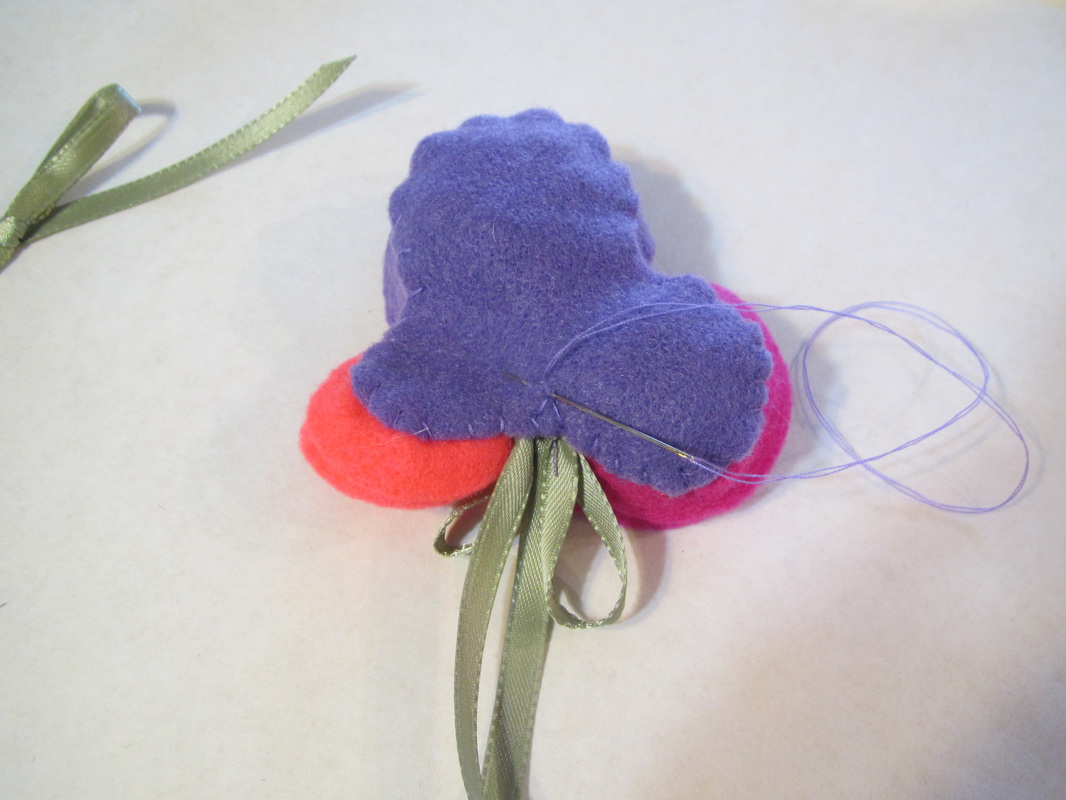
And this is what the bottom of the flower looks like .. before sewing the ribbons in place.
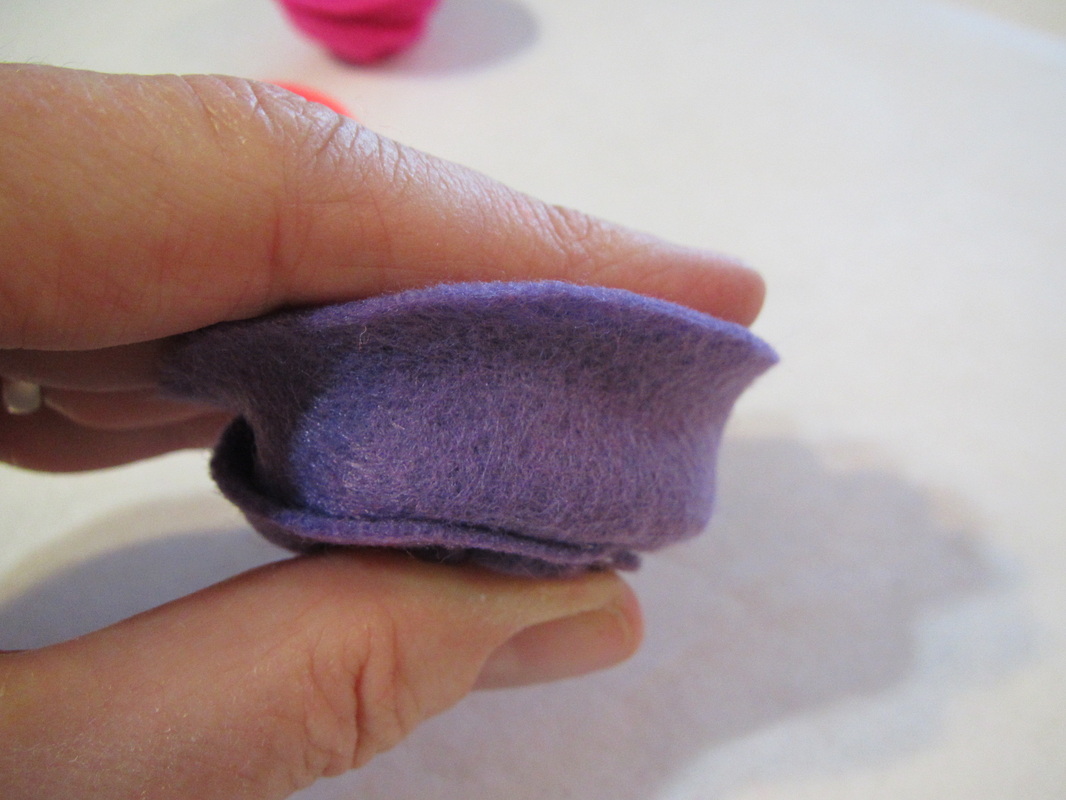
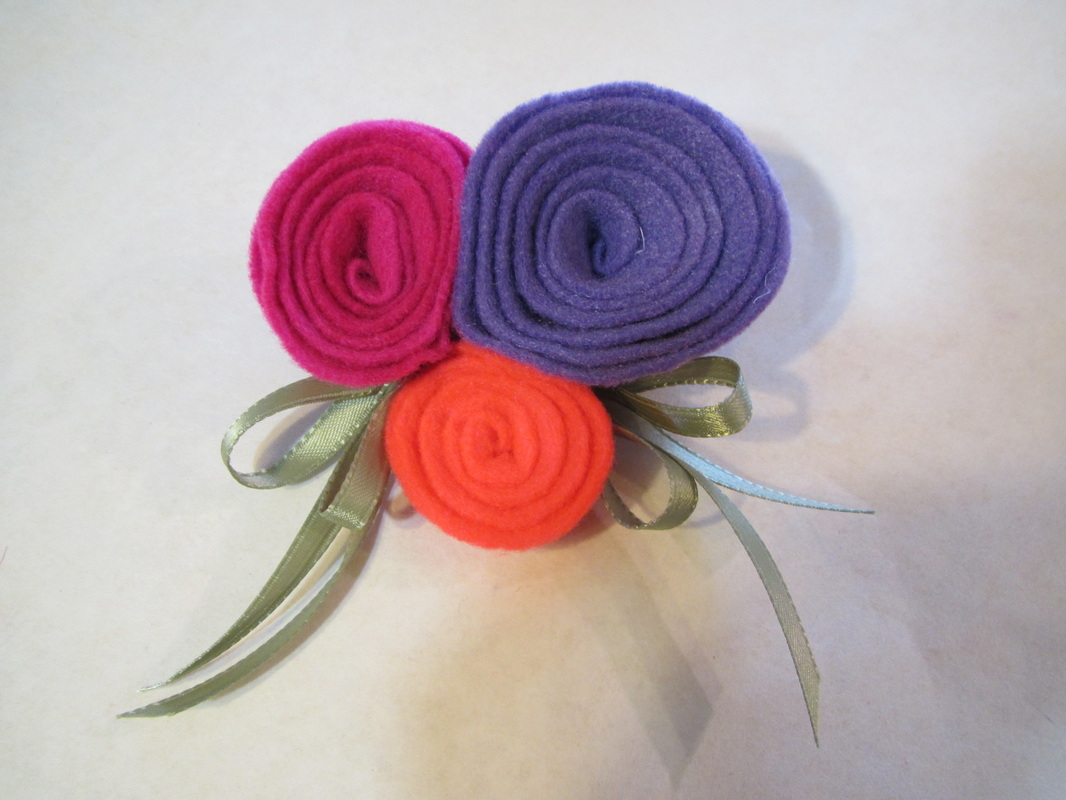
Tomorrow I will show two flowers made with gathered strips that have torn edges.
1 Comment

Second flower tutorial for pattern #1601

6/18/2013

3 Comments

 
Picture
And the chaos continues on my worktable.
Picture
Today I am going to show you some tips on make the flowers from this pattern, view H and L.

These two are each made differently than any of the other flowers.

Picture
This is view H. I made mine with 2 colors of rick rack, it could be made all one color.
Picture
Like many fabric flowers this one starts with a tiny fold on one end, being sure to tuck in the raw ends.
Picture
This is the bottom, all finished with the felt leaves.
Picture
The best stitch to use for this flower is a whip stitch that goes through 2 - 4 layers at a time.
Picture
And this is what the flower looks like before the rick rack points are flipped down like the large photo above.
Rose buds can be made in the same fashion using a couple short pieces of rick rack.
Picture
This Magnolia (view L) must be made of a polyester fabric only, because only polyester will melt the right way.
Picture
Pass the edge of each petal near the tip of a candle flame without actually touching it and you will see the petal cup immediately.
Picture
Here are the two layers of petals ready to stack.
Picture
Cut extra petals for practice and simply to get a line of petals that look good together. Each petal will melt a little differently.
Picture
And, again the finished flower.
Tomorrow I will show you views G and E ... flowers with flat gathered petals.
3 Comments

First flower tutorial for pattern #1601

6/17/2013

2 Comments

 
Picture
Picture
This flower project had my worktable in a more chaotic state than usual.  I tried out so many different kinds of flowers in many different fabrics.

All this week I am going to show you photos I took while making these samples. I hope my photos along with the pattern and instructions will help you create these fun and easy flowers.

Today I am going to give you some tips that should help in making the two felt flower, views B and I.

Picture
This is view B. The pattern only shows the felt version, but it works well with any stiff fabric. I zig-zagged around the edges of the burlap first though.
Picture
When making the stuffed ball for the center, I roll the stuffing into a ball and hold it in place with my thumb while drawing up the gathering stitches.
Picture
Here's what the bottom looks like when finished.
Picture
After whipstitching the bottoms of the petals in place, I also tack the petals to one another near the bottom to stabilize them.
Picture
That's it ... flower's done.
Picture
This is view I ... one of my favorites.
Picture
This is what the coil looks like when just starting.
Picture
so it can be pulled tight to allow the petals to open.
Picture
Here is the bottom view of this flower.
Picture
It's very important that a running stitch is used when sewing the coil ...
Picture
I find giving the the flower a little squeeze like this also help it open.
Picture
DONE!
More tomorrow ... 
2 Comments

New Pattern for fabric flowers # 1601

6/15/2013

1 Comment

 
Picture
This pattern, with 11 different fabric flowers you can make, is shipping to stores this week!  I had so much fun with these. I plan to share the photos I took while making these and explain some of the sewing all next week.

I would really love to see what different people will do with them.  SO ...

Would you be a volunteer tester and blogger for a day??   I will send a free pattern to the first 3 people who request one by sending me a message on the email page on this website. 

Then, will you make up 2 or 3 of the styles (or more), tell about your fabric choices and if you had any sewing problems and show us what you did with the flowers?

Thank you, Andrea
1 Comment

RenFaire Wear Part 2 - Lady's thrift store outfit

6/14/2013

3 Comments

 
Picture
Picture
This is my $15 quick costume, not an authentic Renaissance Costume.  Something that can be thrown together at the last minute, inexpensively to have fun at a party or "The Faire".  I am putting on my community theater costumer's hat to show you what I did with the things I found at my local thrift store.  As anyone knows who's been involved in community theater, the budget is low and there never is enough time, so this is the way a lot of costumes come together. So after my yoga class this morning I headed on over to my favorite thrift store.  Today was the day of the week where everything is 25% off the price stapled to each piece.  I love a bargain!

Picture
I looked through the sleeveless tops for something that could be used to make a lace up bodice
Picture
But, you never know WHAT you will find at the thift store. To bad I wasn't looking to dress up like a belly dancer.
Picture
I was ready to make a skirt out of a table cloth but lucked out and found this great olive green peasant skirt for $4.50.
Picture
I couldn't find a suitable skirt, so went over to housewares for a sheet or tablecloth to use to make a skirt.
Picture
This is what I got ... a 100% cotton peasanty blouse $6.25, a linen sleeveless top $1.50.

Picture
And a pair of muslin curtains with ruffles attached to make a petticoat for $2.25. So, the total is now $15.
Now, everything into the wash ... stuff from thrift stores always smells funny.  Oh, and I leave it all wrinkly when it's dry.  I don't think the common folk did much ironing then.

The blouse is perfect as is, but the sleeveless top needs it's neckline cut lower.  I was going to cut off the little cap sleeve, but I kind of like them.  The skirt has a really big waist, but that's easy to fix and I will show you how to make a simple petticoat out of the curtains.
Picture
Before the 2 curtain pieces can be sewn together, the ends need to be cut off leaving a flat piece of fabric with a ruffle on the long edge. I did this to both pieces.
Picture
I pin the fold in place for sewing over my ironing board. I can just work my way around the skirt and while the parts I'm not using are hanging to the floor.
Picture
The pieces can be machine or hand stitched together into a tube. I want the petticoat to be 38" from waist to hem, so I folded down the top edge to the inside of the skirt at the 38" line.
Picture
I, now, stitch 1 inch away from the fold all the way around. This forms a casing. Open up one of the seams in the casing and insert a piece of ribbon or twill tape about 2 yd. long.
Picture
Pull up the twill tape to fit, tie tight around the waist and you have a petticoat.
Picture
But it will look a lot better on, if the gathers are smoothed away from the stomach.
Picture
The waist of the green skirt can be pulled in with a piece of ribbon pulled through the casing created by the elastic band in the skirt waist.
Picture
This is where things stand. Not bad ... could be worn as is with the added sash, but I want to do 2 more things. First the blouse is way to white and the over blouse needs it's neck and bottom trimmed. The bottom is folded up right now.
Picture
To tone down the bright white of this 100% cotton blouse, bring a large pot of water to a boil, take it off the burner and drop 4 tea bags in. Let it steep for 5 minutes.
Picture
I drew a pencil line on one side of the top where I wanted the new neckline to be, folded and pinned the two sides together so I could cut the left and right neckline the same.
Picture
The bottom I am going to leave unfinished but the neck needs something, so I get out my box of embroidery thread and decide to mix 2 strands of brown with two strands of green.
Picture
Remove the tea bags and quickly push the blouse into the tea and stir and stir for about 5 minutes, rinse, and dry. The heat from a dryer should set the color.
Picture
I marked where I had folded the bottom when it was on the dress form (these marking can be done on a person, too), pinned the two sides together so they could be cut the same.
Picture
I am just going to do a blanket stitch over the raw edge all the way around. I found a great tutorial if you don't know how to do a blanket stitch. I'll put the link in the text below.
Click on this to go to the blanket stitch tutorial.
Picture
The apron is one of my dish towels tucked and safety pinned into the waist of the skirt.  I, also, pinned up one side of the skirt .... now all this outfit needs is a bandana or flowers and ribbons in your hair.  

I just remembered, I mentioned something earlier about making a lace up top.   But this top I found is great the way it is.  Some other time I will do a tutorial on that.

Next Renfaire installment will be for the guys ... then you can go, watch some jugglers, listen to some lute music and chew on a turkey leg.
3 Comments

Outdoor Chair Cushions Pt. 3 - the pattern

6/13/2013

2 Comments

 
In my last installment, I showed you how I made the pattern for the shape of the back and seat of my outdoor chair and how I cut the NU-Foam. See here.

If you remember, I didn't want to cut the foam for all 6 chairs until I made a muslin test of the cover.  So, today I am going to show you how I made that pattern and I will try it out in muslin.
Picture
Here is the chair.
Picture
And the corrected paper pattern.
To make the pattern for the fabric cover I will start with the patterns I made for the foam, which is the shape I want minus the seams.
Picture
First I hold the foam pattern down with weights and trace around it in pencil.
Picture
I use paper that is somewhat see through so I can line things up when I fold the paper in half down the center. I want the 2 halves to be the same and I only put my notches on one half. I staple just outside the cut line to keep it from slipping while I cut.
Picture
Then I add a 1/2" seam allowance with a few notches to help line things up while sewing. I like old fashioned pointy notches.
Picture
Here is the finished pattern. There are symmetrical notches on both halves now, although you can't see the ones on the right half because they are only cut shapes, not marked.
Because the foam is 2" thick and the shape is not a simple rectangle, I am going to make the kind of pillow that has dimensional sides as apposed to just a two piece pillow with the top and bottom sewn directly together, so I have to made a pattern for the side pieces.  And even though the foam is 2" I am making the side piece so it will finish just 1" because I want the stuffing to fit snuggly and the foam will compress over time. I read a review of NU-Foam on line that said it compresses fairly quickly.  I guess I can always open up the cushions and put in an additional 1" NU-Foam piece when that day comes.
Picture
To make the side piece, I draw parallel lines I" apart with 1/2" seams above and below. I'm going to make this pattern with a fold (saves time and paper), so I line up the stitching line for the center front of the seat pattern and slowly walk the seam lines of both pieces making corresponding notches as I go.
Picture
This photo shows a part of the seat pattern with a section of the edge piece with their coordinating notches.
I will make the edge piece for the back pattern the same way.  At this point I only have a  fuzzy idea how I am going to handle joining the seat to the back or where the ties will go.  After I cut, sew and assemble the 2 muslins sections the solutions to these problems should be easier to figure out.
Picture
Here is my little black crate of muslins of old projects. I try to reuse my muslin as many times as possible. I even stitch pieces together sometime to get them large enough.
Picture
Now the pieces are all cut and ready to be made into the test sample in muslin.
Picture
AND .... I am pretty happy with this sample. It's comfortable, too!
Picture
After pressing out the worst of the wrinkles, I line up my pattern with the straight grain of the fabric and hold the pattern down with my grandmother's old flat irons. My mother told me she remember's my grandmother pressing clothes with these. cool!
Picture
The corners of the seat cushion need a bit of clipping. I will try to work these into my pattern so the clipping will be done before I sew.
Picture
I have pinned in place 1" fabric tabs where I want the ties to be, that will hold the cushion to the chair.
But, they are not going to be ties.  They will be tabs with Velcro.  I know the people I live with. If the cushion has to be tied on and off, these cushions will never come inside.  Even though the materials can stay outside all the time, I'd rather they didn't.  I'm spending a lot of time on these and I hope they last a while.

Now the final problem ... how to attach the back to the seat cushion.  I was thinking of making some kind of hinge, but every way I thought to do it was going to be awkward the then it dawned on me that I can hold them together with Velcro tabs!!!! That will make them easier to store when not in use.  I will show you how I do this in the next installment which, I hope, will be the finishing of all these cushions.

Simplicity just gave me a rush job, and I think this project is going to sit for a a few days.
2 Comments

Diaghilev show at the National Gallery

6/12/2013

2 Comments

 
Picture
This weekend I saw a museum show I adored so much I bought the exhibition book, something I am usually to cheap to do, but there was so much there I wanted to remember and find out more about.This show is at the National Gallery in Washington DC and it doesn't close until September 2nd, so if you are traveling to DC or live near by, I highly recommend it. 
Diaghilev was a ballet impresario for the Ballet Russes in the early 20th century. He brought together the greatest artists of the time such as dancers (Nijinsky and Alicia Markova), composers (Stravinsky), artists (Picasso, Matisse) and choreographers (Balanchine) who created really famous pieces such as "The Rite of Spring"  Click this for a link to the National Gallery page about this show. Alas, there are  no images of the show on their website, so you have to go to see it, or buy the book HERE. And the book is very good.

AND, there is a second terrific show on the same floor. This is a very large exihibit of art by Albrecht Durer.  I don't know why, but the National Gallery website doesn't have a page for this show, although they have a number of images of his artwork to view on line HERE. 
Durer was the greatest German Renaissance artist.  There is work he did as a teenager that is so excellent.  The exhibit is quite large and shows a few pages of a book of detailed human anatomy that I never knew he made until this last weekend. So that explains why his nudes are always so good. I took a really fabulous photo of a drawing that shows the front and back of a woman's gown before (honestly) I saw the "no photos" sign. I feel a tiny bit guilty, but I can't delete it ... LOOK!
Picture
I think Simplicity needs a new high waisted Renaissance pattern ... if you do too, please write in!
And, as in any art gallery or museum, I have to check some of the permanent collection.  So, I spent some time in the rooms called "small French paintings"  Here are some paintings I liked.
Picture
A 1895 painting by Edouard Vuillard, one of my favorite painters. This is the height of the Leg-o-mutton sleeve and this is a beautiful image of that.
Picture
As I said in an earlier post, I love to see the back of people. This is a painting by Carolus-Duran done in 1887.
Picture
This green baby by van Gogh always makes me smile.
Picture
Here's a neat street scene from 1882. The activities look so modern, but in 19th C clothes. I like the fact that there are advertisements all over the scaffolding like there would be today. This is by Jean Beraud.
As I was leaving this exhibit a couple of interesting paintings caught my eye.  Look a the back of the garment in the first painting.  I could not figure out what was holding up the top point of that back bodice until I saw the second painting done by the same painter in the same year.
Interesting ...
Picture
"The Artist's Studio" 1868 by Jean-Baptiste-Camille-Corot
Picture
"Young Girl Reading" 1868 by Jean-Baptiste-Camille-Corot
I zoomed and cropped both of these so you could see better.  It looks like some kind of cord that connects the top edges of the front bodice to the back.  Strange top, in my opinion, but interesting.

Hope some of you can see these shows.
2 Comments

RenFaire Wear Part 1 - research

6/11/2013

0 Comments

 
This is the time of year when Renaissance Faires are starting up all around the county.  Now, you don't have to wear a costume to join in the fun, but it can be even more fun if you do.

I think Renaissance Faires are so popular is because they allow the Renaissance to span about 300years and they welcome so many different costume styles. The classic garb for a lady is a wench outfit, but I've seen ladies dressed as beggars, royalty, pirates, belly dancers, even fairies and more.  What's the guy equivalent of a wench?  I guess some kind of festive get up consisting of knee pants, poet shirt and a vest or sash.  Although lots of the guys really like to do the pirate thing or it's their chance to wear a kilt.

Before making any kind of costume, research needs to be done and now these days we can do tons of research without getting out of our chairs.  But, to get started let me share some of my personal photos taken at the Renaissance Faire near me.
Picture
Here I am (not at a Renaissance Faire) in a subdued wench outfit.
Picture
A slightly different version of some easy to wear costumes.
Picture
Here is a colorful pirate.
Picture
Here we have a Great Kilt (predecessor to the modern Kilt) with a couple well dressed ladies.
Picture
This is great example of the basic RenFaire costume.
Picture
This is very fine royal attire, but you might not want to chew on a turkey leg wearing this.
Picture
And a pirate with a sense of humor, check out the fabric on his cuffs and coat front band.
Picture
And don't forget about hats!
You can see how much fun the people wearing costumes are having.  Of course, I didn't take any photos of people not wearing costumes.  They are probably having fun, too ... but not as much fun!

Here is a link to a website that lists almost every Renaissance Faire in the country. I recommend visiting some of their websites to look at their photo galleries.  
CLICK HERE

If you aren't ready for the time and money commitment in sewing a costume, your local thrift store can dress you very well with some changes here and there. I will be posting two tutorials, one for men and one for women on how to do that.

AND, if anyone has a Renaissance costume made with one of my patterns they would like to share, please send me an email using the form on this website and I will give you an email address where you can send images.

thanks
0 Comments
<<Previous
Forward>>

    From Andrea 

    I am a commercial pattern maker who is now "sewing over 50"!
    I love to sew and hope to encourage others to come back to sewing.
    The water is fine!!

    Archives

    August 2019
    July 2019
    June 2019
    May 2019
    April 2019
    March 2019
    August 2017
    July 2017
    June 2017
    May 2017
    April 2017
    March 2017
    February 2017
    July 2016
    June 2016
    May 2016
    April 2016
    March 2016
    February 2016
    January 2016
    December 2015
    November 2015
    October 2015
    September 2015
    August 2015
    July 2015
    June 2015
    May 2015
    April 2015
    March 2015
    February 2015
    January 2015
    December 2014
    November 2014
    October 2014
    September 2014
    August 2014
    July 2014
    June 2014
    May 2014
    April 2014
    March 2014
    February 2014
    January 2014
    December 2013
    November 2013
    October 2013
    September 2013
    August 2013
    July 2013
    June 2013
    May 2013

    Archives by Subject

    To search for blog posts in specific categories, use the drop down menu above by hovering over the word "Blog"

    Enter your email address:

    Delivered by FeedBurner

    RSS Feed

    Andrea Schewe participates in Amazon's associates program.