So, since it was my first time attending this event, I decided to go for the full experience! When the call went out for people to participate in a fashion show, I said to myself "why not?"
I really like this dress!
|
I've fallen a bit off my New Year's resolution to sew something for myself every month this year. But, actually I HAVE been sewing things, but couldn't show you until now, because they were things for the American Sewing Guild Conference two weeks ago. So, since it was my first time attending this event, I decided to go for the full experience! When the call went out for people to participate in a fashion show, I said to myself "why not?" I had this fun Michael Miller border print I bought a little over a year ago and have been wanting to make it up for while. Deborah Kreiling and Bonnie Simmons at Simplicity thought this pattern would work well with a border print. The skirt of view A, the white dress, is a perfectly straight piece which the border print can lay on. I had to make a muslin. No room for mistakes because only I had two yards, period. Less than the pattern calls for. Good thing, too, because when I made the muslin, I found out the front opening gapped on me. So I pinned it in like this ... which solved the problem. These are the changes I needed to make on the pattern. When it came time to cut it out, I eliminated the skirt seam and the seam that joins the center front bodice to the front skirt by overlapping these pieces on their stitching lines. This was to keep the border as much in one piece as possible. Doing this kind of messed up the pleats marked on the fabric, but I modified them to work.
I really like this dress!
3 Comments
What do two designing sisters do on their day off????? Go on the rollercoaster, of course! I stopped off to spend some time with my sister Theresa LaQuey (of Steampunk pattern fame) after attending the American Sewing Guild conference last week and we went to the Santa Cruz Boardwalk and rode the Giant Dipper ... FUN! The photos they sell are taken at the bottom of the first BIG drop. I was holding on for dear life. Theresa was hanging on to her purse! The Giant Dipper is one of those old all wooden rollercoasters that rattle. On February 27, 1987, the United States National Park Service recognized the Giant Dipper as a National Historic Landmark. Read more about it on the Wikipedia page. We also went on the Merry-Go-Round that has an actual brass ring you can throw at a huge clown face. Alas, neither one of us made it into the clown's mouth, which sets off all kinds of fun noises. Theresa got two rings right on the edge of the mouth, but they bounced out ... sigh ... we can design, but not throw so well.
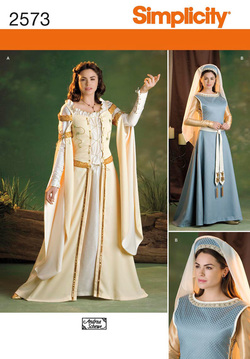
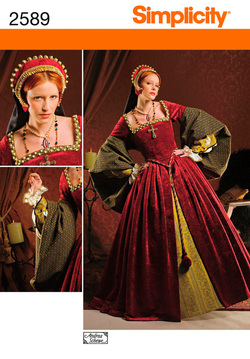
Back home and back posting more of costume photos submitted by YOU! Many, many of the pictures I've received have been beautiful costumes worn by very pretty ladies. So, that's my theme for the day.  I'm starting with Tarisa Walker http://www.firelilycosplay.com/ She wrote quite a bit about making this costume above. Lily from Legend - Simplicity 2573. "Lots of hand detailing and hand sewing went into this to make it screen accurate, but the pattern was fantastic and required very little alteration. The under dress is made from a really neat slinky fabric with a slick texture and great drape - I am so thrilled I found it because it's perfect for the costume. The neckline is sewn over with a blanket stitch, and the sleeves feature hand sewn eyelets and hand stitched gold cord trim along the edges. The over dress is made from a gorgeous buttercream yellow sateen. The shoulder straps are decorated in tiny white and iridescent pearl flowers, leaves, and rhinestones. The sleeve straps are decorated with some sequin and bullion trim I've had for several years and rhinestones and gold cord. The long sleeves and bodice are lined with a straw colored lining fabric to match. The bodice features hand sewn gold cord, beads, and various flowers and hand cut leaves. The lacing holes at the bodice front are also hand sewn. The belt piece is hand beaded with smooth and rough purl gold bullion, sequins, and beads. The dress also has two lengths of sequin trim at the front with two gold diamond-shaped tails and fringe. I hand beaded the necklace using bugle and seed beads, and a heart button with hanging pearls, and the earrings with pearls and bicone beads. The crown/snood is made from a length of flat ribbon wire coated with hot glue for shape and painted gold. The netting portion is gold embroidery floss and each intersection is hand tied. I then added some super sparkly gold flowers with rhinestone centers to the front and back barrette. Not seen in this picture are the shoes - red suede with gold design painted on using glitter glue. And I have the ring, but it's also not pictured here." This next costume is by Danielle Fiore www.facebook.com/daniellefiorearts , a pink version of the "drowning" dress from Titanic. This is Danielle again in pattern, I think 9531, one of my lesser known ones.  Can't believe I missed posting this beautiful costume when I posted other versions of my Tudor dress. This is Morgan Githens. And how could I not post her lovely comments. I own so many of your patterns but I've only made 1! The Tudor gown! And can I say I'm in love with it. Still my go-to for any Renfaire and the pattern was perfectttttttt! I have the French hood as well, however I haven't finished I want to share with you today something that made me laugh so hard. This video is the second place winner in a contest the American Sewing Guild had for chapters to send in a video that would demonstrate "What the American Sewing Guild means to me" They showed this at one of the luncheons and I thought it was brilliant! BTW ... I want to know where to get one of those scissors through the head - headbands.
Thank you Southern Oregon Chapter. You made me laugh hard, my sister Theresa LaQuey and now, I know, all the people who read this blog. While preparing my booth at the American Sewing Guild conference I was reminded of all the Renaissance costume patterns I made back in the RenFair hey day. I think Renaissance Fairs are still really popular. But now there is so much ready to wear RenFair stuff available, not as many people are sewing for themselves. This was the board I made for my booth, but there were SO MANY MORE. Below are all the ones I could find one line. I don't own many of these at all. This is the one that got it all started. This is the one that broke sales records. And then below are all the ones I kept making and making. Some more successful than others. This one was supposed to be super easy and quick to sew. This was my first foray into an attempt at authenticity. So So .... From the movie Ever After. It sold so well, I made it up in new fabrics a few years later and they raised the price. For girls and babies! The short lived King Henry. It was pulled because the model was an actor and his agent demanded royalties every time the photo was published. For men ... and I got to sew the second one up in better fabrics for an extra photo in the catalog. Can't believe I did all this ... good memories.
I've got a booth at the American Sewing Guild Conference! In addition to speaking they offered me the opportunity to show some of my work, so ... I arrived in San Diego yesterday at around noon and came directly to the exhibit hall ... and this is what I saw, a big empty space with a big box of costumes Simplicity sent and a pile of smaller boxes that contained display mannikins that all needed to be assembled. I was so lucky to have a small crew of hard working and creative ladies that helped me do all this. Some of the costumes were crushed from being stored in an over stuffed closet so one lady had to find an iron. BUT, she couldn't get her hands on an ironing board. We used a piece of cardboard. But it worked. In addition to the costumes Simplicity sent, I made up seven posters filled with catalog pages of my work going back to 1985 ... so 30 years of my work. How did THAT happen? This poster shows my oldest work when I worked for McCall's. The baby room was the very first sewing pattern I ever made. The Bat, Bear and Devil are from my very first licensed design with my name on it, very exciting! And the bottom set of sort of Medievalish/Renaissance costumes is the pattern that caught Simplicity's eye. It was selling very well and they noticed. I had designed these as costumes for kid's dress up and play. AND, surprise! people were using it to make things to were to Renaissance Fairs because there were very few patterns like that at the time.
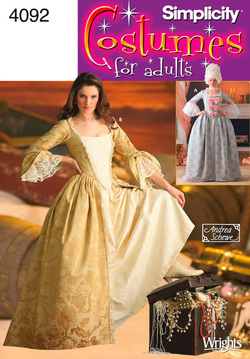
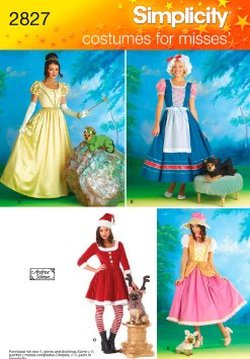
How things have changed. And I can't help but wonder what became of that baby in the crib, and the little kids in the toddler costumes and the models in the Medieval costumes. Hmmm Well, I have plenty more costume of reader's work to post next week. Stay tuned. More photos of your wonderful costumes. This is happening at the perfect time, because I'm really busy getting ready for the American Sewing Guild Conference which is two days away. I'm a little crazed and it's nice having great blog material ready to go ... so THANKS. I'm posting Cosplay stuff today. And first is from Malinda Mathis. She sent in a photo of her costume, a few words about it and some reference pictures, too. I used Simplicity 4080 (the Kimono pattern) for my Final Fantasy XIV character. The top is a Summer festival item called "Redfly Yukata." Some alterations were made to match design elements from the concept artwork and game models. Her stencil/painting work is really fine. Here is another costume made with the same Kimono Pattern by AJ Wu. Cool mask! What's the name of the character, AJ? And another costume using the Kimono pattern. BTW ...Thanks everyone for keeping this pattern in the catalog! It is made by Tarisa Walker (aka Fire Lily Cosplay - www.facebook.com/cosplayfirelily ) Seaking Kimono (Pokemon) - Simplicity 4080 for the kimono. "I used a red cotton for the kimono base, and a white cotton for the sleeves that I dyed red and bleach gradated the ends to a peachy color. I also used white cotton for the bottom of the sleeves and kimono body and satin stitched it onto the red base. The colored circles are cut from cotton and Heat 'n Bonded on. The obi is ice blue cotton and is wrapped over an obi-ita for support. The bow and tail are separate and slip into the obi using a wire base, much like the pre-tied obi you can buy. I wanted to try and made this costume as close to an authentic kimono as possible, but still keeping it reasonable to put on."  Here is a stunner, again by Tarisa Walker Red Queen - Made using Simplicity 4092 for the dress, Simplicity 3635 for the corset underneath, and Simplicity 3637 for the sleeves. "The Red Queen (based on an illustration by CrimsonCobwebs from DeviantArt). I had to alter this costume somewhat to get the correct proportions and to accommodate fabric. I found a lovely burgundy taffeta embroidered with red swirls, but when I received the fabric order, the red swirls were the same color as the fabric. In order to remedy this, there are over 19,000 rhinestones hand-glued onto this costume!! All the red swirls = Rhinestones! I made the corset using a French 1700s style pattern from Simplicity to get the correct silhouette. The dress is a mish-mash of styles in keeping with the illustration. I opted for a mini skirt (to save myself from a never-ending bout of rhinestone gluing) over a petticoat with a bustled train on the back. I added white thigh high stockings with maroon and white heart ribbon garters, and 5 inch red velvet heels with ruffles and heart ribbon closure."  Now these by Elizabeth Lepiston. She doesn't say, but I'm pretty sure she used this pattern to make these two dresses AND I love that she wore it once like this then turned it into something else! Comments by Elizabeth Princess Peach and Princess Daisy from Super Mario Bros. This were quickly made to wear once (hence why I didn't care that I kind of messed up the bottom of Daisy's dress, which is why it looks weird at the bottom with the hoop skirt). The end plan for them was to destroy them and make post apocalyptic versions. I've attached photos of both. (attached photo of both is from Photography by Amie E., one of just Peach by a friend) Everyone looks like they are having a great time, but I am seeing the costumes being modeled. I hope everyone was happy while they were sewing, too.
Again, thank you for all the costume photos. There are many more that I will share over time. I plan to post something from everyone, but I'm trying to put things into groups to kind of tie things together. Back about 10 - 15 years ago, Renaissance costuming was big for me. I can't even remember all the different patterns I had out, so I particularly like seeing some of these. First is Jessica Pugliano in a gown made from pattern #3782. This is what she has to say about it. I've used this pattern several times, making both versions. The first time resulted in one of my absolutely favorite gowns of mine - my tudor rose elizabethan. Fits perfectly (and I don't always wear a corset). The only changes I've made have been to just sew on hooks and eyes instead of using the tape. I feel more secure that way. Here are my samples. This is one of the few Renaissance patterns still being printed! This is Jessica again. This was the first gown I ever really made for myself - I had done a loose medieval thing, but it was my first try making anything fitted. I feel in love with the Tudor pattern and found the perfect fabric. I've only ever worn it once to a Renaissance Faire, but have loaned it out countless times to others. Pattern #4508 isn't too well known. It came before my more historical accurate ones. It is one of those patterns that came out of a theater costume I made for myself. Here I am playing the Duchess in Gilbert and Sullivan's operetta The Gondoliers. Jessica also made this dress above for a friend using pattern #7756. This was my first Refair costume that really sold well and thus made all the others possible. Jessica one more time! I'm not sure what pattern she used for this dress, but I couldn't not show it. WOW! love it. But, she sent this picture to for the costume her husband is wearing made with pattern #4059. Well done. She has made this pattern for others, too! He is another costume made with the same men's pattern made by Tracey Edwards for her father. Here are her comments. This is another pattern that I love to play around with. I originally made this coat for somebody smaller than my father, but he loved the fabric and style so much that I added a stomacher to it so that he could wear it. He loves being able to remove the sleeves. This is Tracey herself wearing what she says was her first really big sewing project made with pattern #3782. Same as the first photo at the top of this blog. 3782 was the first Renaissance ( and first big sewing project) that I ever tackled. It's my favorite sewing pattern, ever. I know use it as a base for creating different Elizabethan bodice styles because this one fits my body so well. I wasn't wearing the proper undergarments here but when the pattern for those came out I found my gown fit even more wonderfully over them. And Tracey clearly has become really good at sewing Tudor gowns. Look at the beautiful job she did on her version of #2589. I really love the fabric choices. And last for today, but certainly not least if Danielle Fiore also wearing pattern #2589. I have some other work by Danielle for you all to see in the near future.
Thanks all ... enjoy your weekend. |
From AndreaI am a commercial pattern maker who is now "sewing over 50"! Archives
August 2019
Archives by Subject
To search for blog posts in specific categories, use the drop down menu above by hovering over the word "Blog" Andrea Schewe participates in Amazon's associates program.
|
