Andrea Schewe Design
  • Home
  • Costumes
    • Reader's Gallery
    • Fantasy Costumes
    • Theatrical
    • Historic >
      • Easier to make
    • International
    • Costumes for Kid's and Babies
  • Crafts
    • Home Decor >
      • Pillows
    • Fashion Accessories
    • Doll Clothes
    • For Kids and Babies
  • Blog
    • Past Blogs by subject >
      • My patterns by number
      • Sewing basics
      • Personal sewing Projects
      • Fashion History
      • Fun and funny stuff
      • Guest Bloggers
      • Crafts and Home Dec
  • Links
  • Contact

A tourist in St. Louis

3/30/2015

4 Comments

 
Picture
I got to have a fun, fun day in St. Louis the day before the Costume Academy.  Sheila Lenkman, my host, and one of the master minds behind the Academy AND and amazing theatrical costumer was my guide.

Her mother is British and so she knew were to find, honest to god, real English scones and tea for breakfast. SO GOOD! I've got to learn how to make them. I have several recipe books from England, but mine never turn out just right.


There was even clotted cream!!
Picture
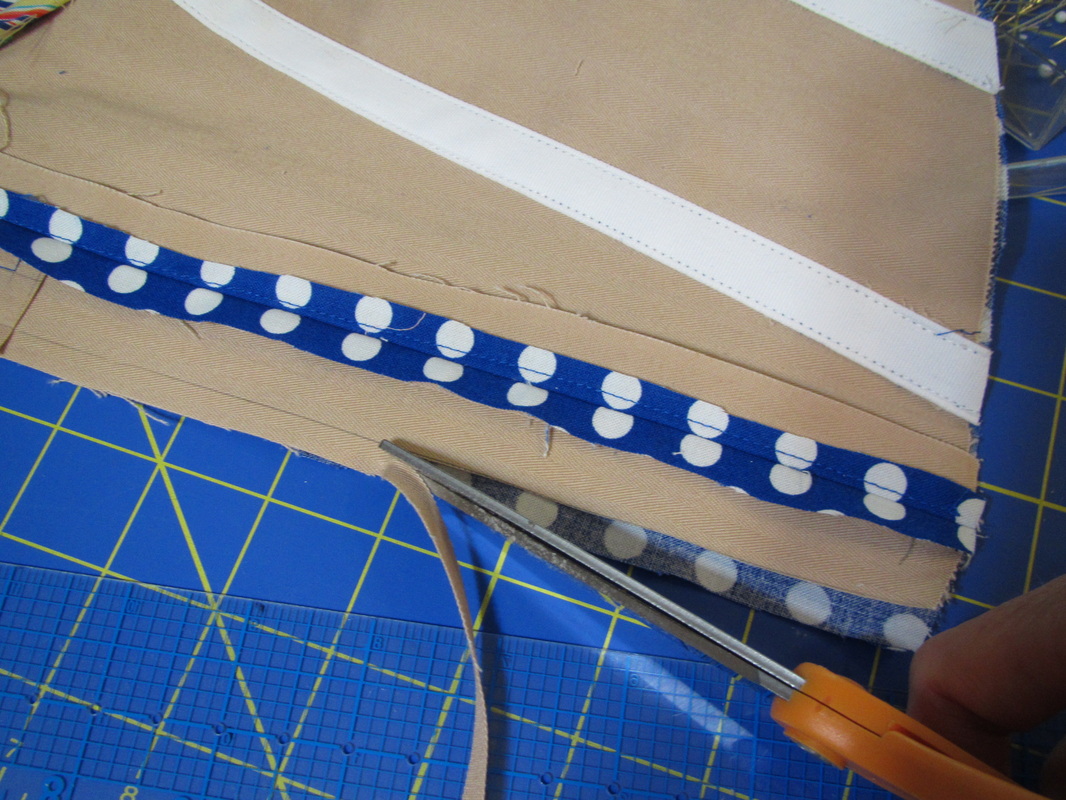
After this Sheila and I went to see the costume storage facility for the Missouri Historical Society. I took some photos for personal reference, but can't publish them. They have an amazing collection. I felt so privileged to get to see everything up close. 

Here is a link to a list of some of their costume exhibits you can see on line.
Picture
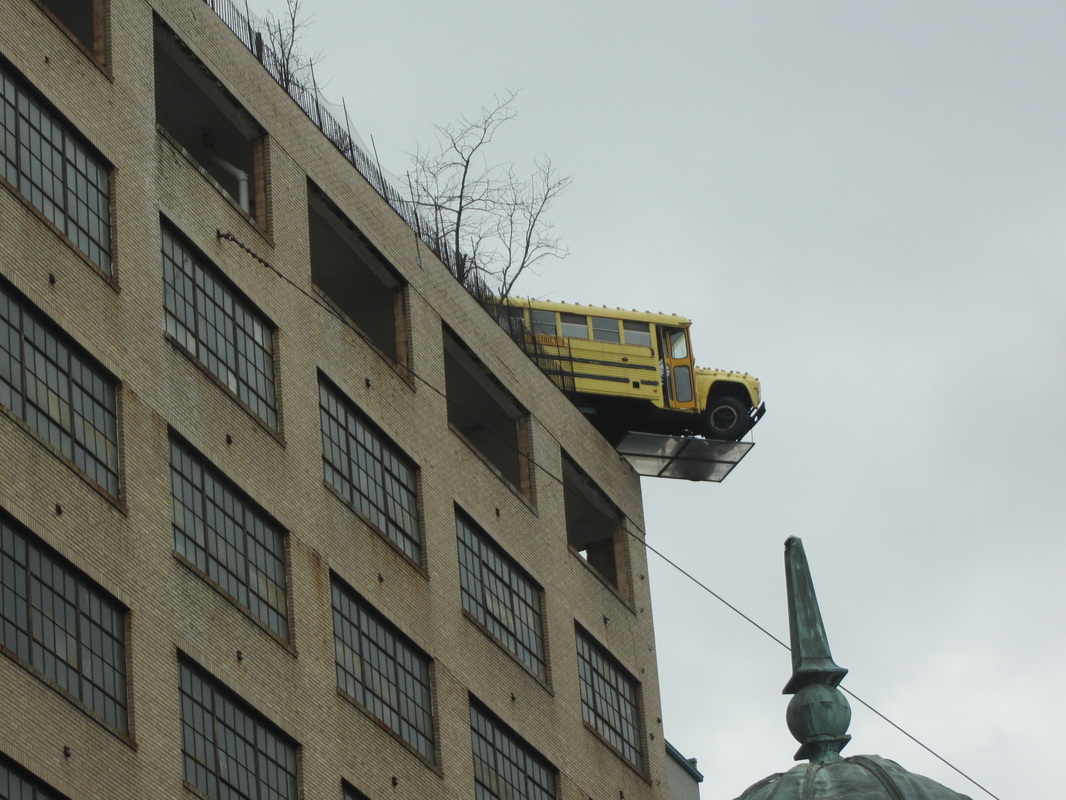
THEN she took me to this place called the City Museum of St. Louis. It's housed in a ten story tall former shoe factory. This was the first thing I saw from a couple blocks away. When the weather is warm, people can go on the roof and go into the bus ... cool.

This link will take you to the Wikipedia article about it.
Picture
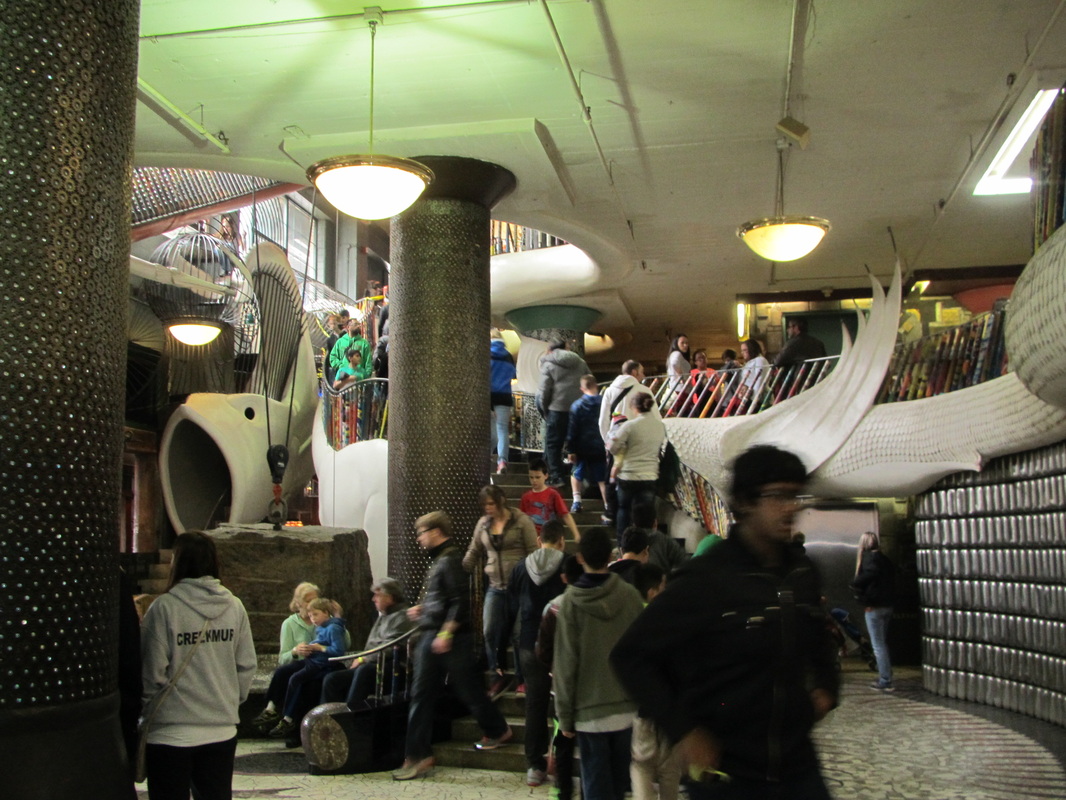
This place is a wonderland to explore with all sorts of nooks and crannies for kids to clime in, under and through. AND is it a never ending work of art, mostly made up of found objects.
Picture
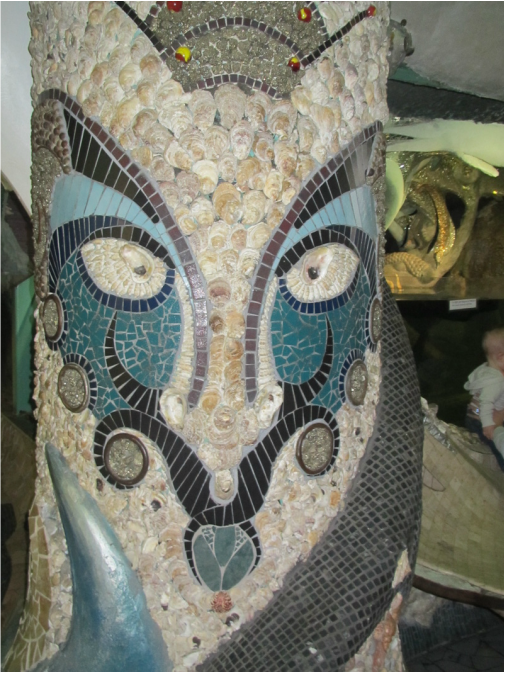
Here's an example of one of the mosaics.
Picture
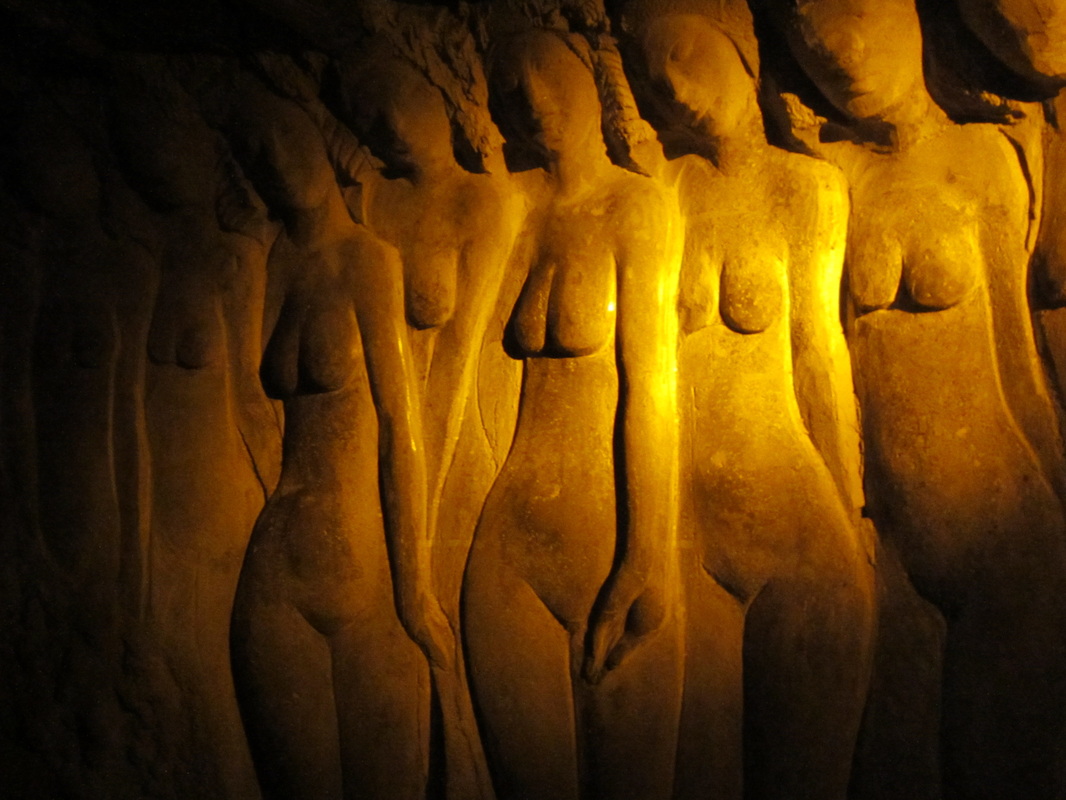
And an example of some of the sculpture. So, while the kids are climbing, crawling and throwing themselves down all the slides, the adults have so much exquisite stuff to look at.
Picture
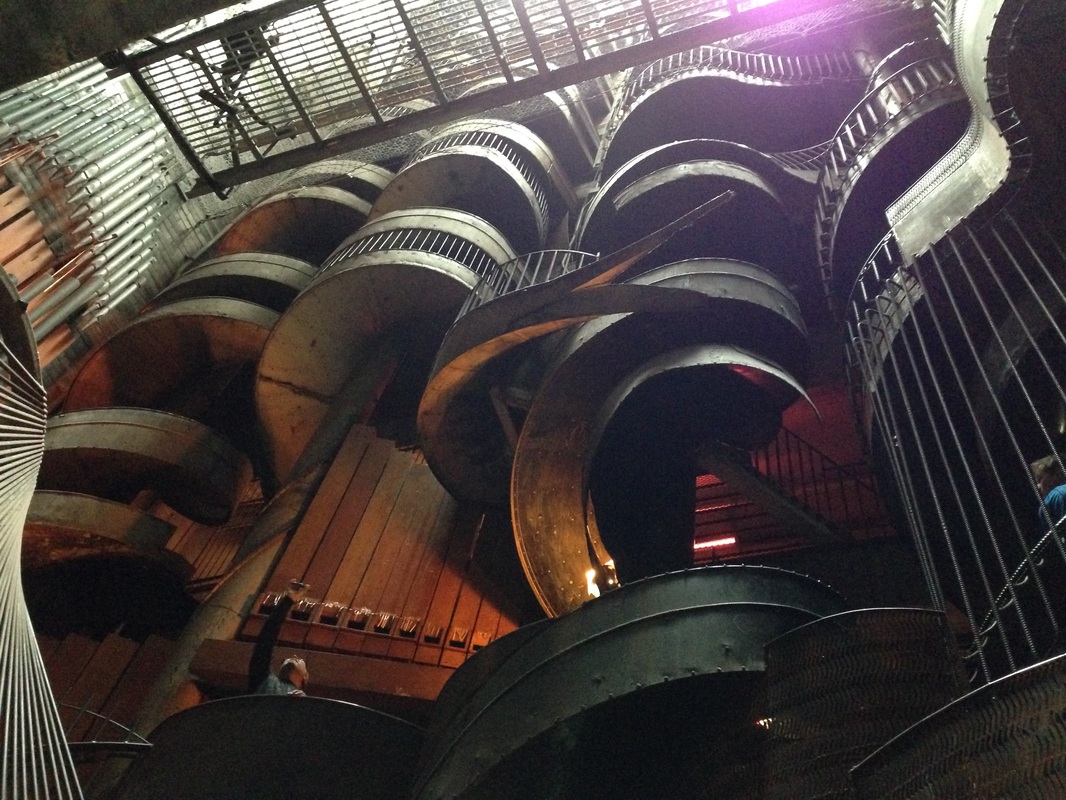
In the center of the building are multiple spiral chutes. These were originally used to transport finished shoes from the upper floors to the ground for shipping. But, a couple have been made into LONG slides, a 10 story one and a 5 story one. I went down the 5 story one and got a nice bruise on my knee to prove it. I was told you really haven't visited the City Museum unless you, at least, get a bruise!
Picture
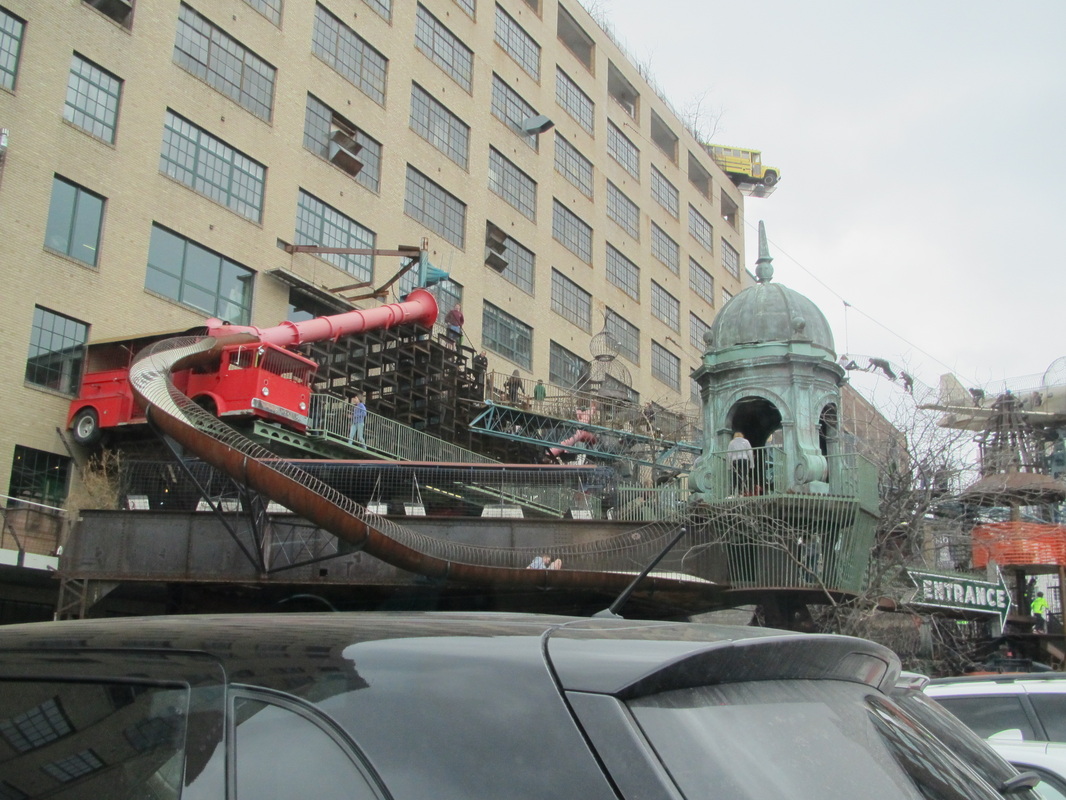
Then we went to the outside aerial maze/climbing thing. The photo on the Wikipedia link I gave above is much better.

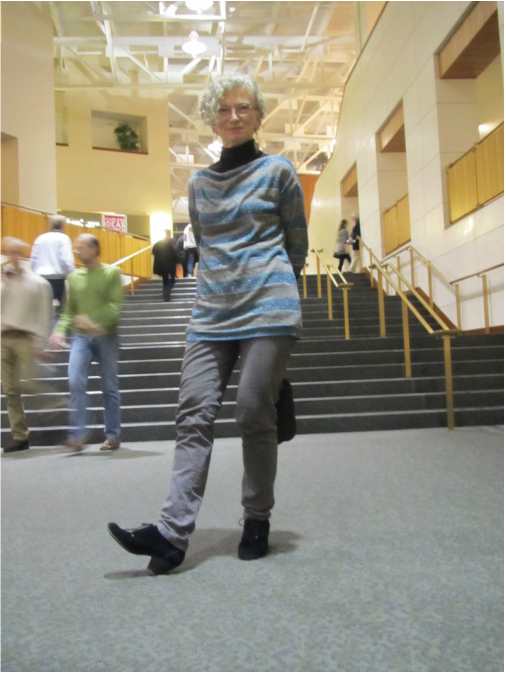
The photo at the top of this blog was taken while on this structure.


I really did work in St. Louis, but not until the next day. 
4 Comments

In St. Louis

3/27/2015

1 Comment

 
Picture
So, this has been a rough couple of weeks and I'm sorry I haven't posted anything since last Friday. Simplicity assigned me three pattern packages to make with about two and a half weeks to do it AND I had to get ready to teach at the 2nd Midwest Costume Academy. So, my my whole weekly routine went out the window. 

But, I got my project done with the help of my wonderful sister Theresa LaQuey and I'm now here in St. Louis and will be teaching all day tomorrow. One of my classes will be showing people how to combine commercial patterns without guess work.

We will be working with 50% scale patterns, so in preparation I've made an outfit for my 50% scale dress form.

She was naked before!
Picture
I've gotten to do some fun things already here, and will tell you all about it on Monday.

1 Comment

Sewing my March project

3/20/2015

1 Comment

 
Picture
Well, Monday I talked about choosing to make this top and Wednesday I showed how I cut it. Today I will show how I sewed it.
Picture
As you can see, the front neckline is drapey, but the back is not. As a matter of fact, the back needs to be stabilized so it doesn't stretch, to allow the front to hang nicely.

The first thing to do was finish the back neckline, which I did with a strip of the knit fabric cut on the crossgrain.
Picture
I measured the paper pattern to get the neckline length and cut a piece of soft seam binding (NOT bias tape).  This stuff is extremely useful, but I can only find it on line in 100 yard reels ... not too expensive and you will have it for YEARS!
Picture
After sewing it into the neck seam, I trimmed the excess off.
Picture
And, pressed and slipstitched it down.
Picture
The instructions gave measurements, but I wasn't trusting them.  The clear elastic (used to stabilized the shoulder seam) was supposed to be 5" for all sizes but ...
Picture
The pattern measured 6" for the small size. I imagine the larger sizes needed an even longer piece.
Picture
The front drape is just an extension of the front pattern piece that sticks up high. I serged the edge and then folded it over the finish back neckline.
Picture
This is what it looks like when all finished.
Picture
So, neckline is all done and now it's time to sew on the sleeves.
Picture
I used the stripes, again, to help me make ...
Picture
a very straight and even sleeve seam.
Picture
Picture
WHOA!! it's BIG! too wide and too long. So, I folded it to the length I thought I would like. 
Picture
Instead of turning and stitching a hem like the instructions said, I decided used folded bands of fabric to finish the bottom and sleeves.

BUT, I'm glad I only machine basted this because I still think it is too long and I can now see I need to take it in on the sides, too.
Picture
It didn't really matter though how I sewed on that lower band, because I just cut the whole thing off and made a new band.  Again, those lovely stripes makes all this cutting very quick.
Picture
I now have a great top I think I will wear a lot.
1 Comment

March sewing project - cutting

3/18/2015

1 Comment

 
Picture
More on my March project.  
Picture
As I said Monday, I took the pattern from this book by Dolin Bliss O'Shea. She has a ready to wear background. The patterns in this book are very basic, which is great for many reasons. But, I ran into a couple of things I would change while making the one I did.
Picture
All the patterns fit into this rather small pouch at the front of the book ... amazing!
Picture
And, all each dress is named after the famous person who wore it. I decided to make the "Angelika"!
Picture
Here is the line drawing. Good basic cut for a knit dress or top, which is what I ended up making.
Picture
Picture
No surprise really to find that the patterns are all drawn on top of each other on both sides of all the papers stuffed in that pouch.  They need to be traced out. I recently bought myself a roll of doctor examination table paper. It is cheap, and you can see through it, and write on it and it is a little stronger that pattern tissue ... just the thing.
Picture
I love working with stripes and checks. It is so easy to straighten out the bottom edge of the fabric before cutting, which is always really important!
Picture
And, here is the first thing I changed.  The instructions say to fold the fabric in half, put the front on the fold and the back piece along the selvedge which means a seam is needed up the center back.  WHY? I want as few seams as possible in this knit.  I don't know why they didn't say to fold the fabric like this so both the front and back can be on a fold.


So, that's it .. all cut.  The sewing happens on Friday.
1 Comment

My March Project - Planning

3/16/2015

0 Comments

 
Picture
I am keeping my New Year's resolution!  It's March and here is my March project.
Picture
This knit was in the stash photos I shared in January. I got it from the sale section at Joann's for about $7 a yard. It is very soft and slightly "see-through".  I don't want to make anything too involved with it for 2 reasons. First being, I'm super super busy and don't have much time and really this is a beautiful piece of fabric and it doesn't need much.
Picture
I bought this book recently. I think I read about it in a magazine ... can't remember. Anyway, it talks about 10 iconic black dresses worn by famous people over the last 60 years or so and gives patterns for these dresses with one variation each, which explains the 20 garments mentioned on the cover.
Picture
See the pouch with all the folded up patterns?
Picture
I wondered how she got so many patterns squished into that small envelope. Well, this is how! The patterns are all printed on top of each other. And all sheets are printed front and back, so you have to trace out the pieces you need.


Next time I will show how I did that and cut this top out.
0 Comments

Amazing Fit Corset #1183 - sewing

3/13/2015

9 Comments

 
Picture
This will be my last blog about these corsets. I have some random sewing photographs that should be a nice supplement to the guide sheet that comes in the pattern. I get so involved while sewing, I often forget to stop and take pictures. AND, I often am working on a tight deadline and don't have time to take too many photos, but I think the few I have will be of interest.
Picture
The inner cups are backed with fleece. It is a good idea to trim away the fleece that's in the seam allowance.
Picture
Then I like to use the 3 step zig zag right over the seam to hold the seam allowances out and flat. Many store bought bras are done this way.
Picture
If you've been reading all the other blogs I wrote about this corset, you will know I had to figure out a way to have one of the bones go up and over the bust. But, I didn't want the boning to show from the outside of the bust cup. All the other boning is machine stitched through to the outside. It's kind of a design feature. But, the bit of boning that is inside the bust cup has to be slip stitched just to the lining of the cup, like this.
Picture
The corset has an under bust inside stay or band that hooks separately to hold the bottom of the bust cups against the body. This needs to be hand tacked to all the seams over the bone tape.  I thought you might like to see the stitch I used, looks like an embroidery cross stitch.
Picture
Look closely, the inside waist stay on this 1890's bodice is attached with similar cross stitches.
Picture
After the bone tape is sewn to the inner cup with the bone inserted, and the waist stay is tacked in place, the fit will be better if that bone is bent at the bottom of the bust cup.  I used the edge of a screw driver to force the bone to bend exactly at that point.
Picture
Another challenge making a corset with a bust cup that closes with a metal busk closure, is keeping the breasts close together. If the busk closure goes all the way to the top of the front opening, that would force the bust cups to be almost 2 inches apart!!!

So, I created a little pattern piece that makes a casing for a short piece of boning that extends above the busk.  Hand sewn hooks and eyes are then used to hold this upper part of the front opening together.
Picture
This photo just shows how I used the busk piece itself to determine where to leave the facing seam open to let the hooks parts through.
Picture
Because the coutil interfacing is pretty thick, I find it easier to fold an edge for hemming if I trim away the coutil and the press the fashion fabric over that.
Picture
A zipper foot is needed to stitch the facing over the busk.
Picture
For the side with the little knobs, you have to stitch from the right side and feel through all the fabric so you don't miss stitching the folded facing edge.
Picture
A lot of hand sewing is needed in the area around the bust cup. The bone is sticking out there, just to show where it will go.  It should be pushed all the way in.
Picture
Next I wanted to show you was how I matched up the lace motifs on the black lace corset. Each piece has to be cut separately. After the first piece is cut, a good motif match needs to be found to sew it to the second piece and so forth. Then mirror image motifs need to be found for all the pieces on the opposite side of the body. I use the actual cut pieces from the first side to use as pattern pieces for the second. That makes finding the matching motifs easier.
Picture
It is so satisfying to get things to match like this.
Picture
Last, I want to show how I finished the ends of the lacing ribbons to make it easy to poke them in and out of the eyelets.

First, pleat up the cut end.
Picture
Then, wrap and wrap with thread, sew a few stitches and secure. Then a dot of glue on the end to keep it from fraying.


So, that's it! I'm always happy to answer any questions, if I can. So, please ask.

9 Comments

My new toy!

3/11/2015

2 Comments

 
Picture
OK, isn't this the cutest thing?

I just bought this to teach my class showing how to combine the parts from different commercial patterns.

I've given this class several times over the last year as a one hour lecture, but someone suggested I use 50% scale patterns and someone else suggested I make the class "hands-on" so people could actually do what I'm talking about. 

I will be teaching the "hands-on" version of this class for the first time on March 28th, at the Midwest Costume Academy in St. Louis.
So ...
Picture
I got Simplicity to print out a few patterns at the 50% scale for me. I've chosen pieces from each pattern and will make copies for everyone in the class.
Picture
This looks smaller than 50%, doesn't it?  But the measurements are half of a Simplicity size 10 (which is a ready-to-wear size 4 as you can see on this little form). Remember it's 50% shorter and 50% narrower, which makes look to be 25%.  I love little things.

I will be teaching this class, also at the American Sewing Guild conference in San Dieg0, in July and at the American Sewing Expo in Michigan in September.
2 Comments

Monday Diversion - grow fabric!

3/9/2015

1 Comment

 
Picture
Again, no time to write a blog about my corset pattern that would be coherent in anyway today. Maybe I could relax if I could GROW the garments I 'm making???

I saw this in the Washington Post about a week ago, so interesting!
Picture
By Nancy Szokan March 2 
In a warren of sterile, high-tech labs in Brooklyn, fashion designer Suzanne Lee is working with scientists to grow bovine cells into a dense material very similar to cowhide. “Lee, in other words, is growing petri plates of leather,” Daniel Grushkin writes in “Cultured Couture” in Popular Science magazine.

Lee has been working at the intersection of biotech and fashion since the early 2000s, when, as a senior fellow at an art school, she encountered biologist David Hepworth. They began growing a tea-based cellulose in the lab; the gelatinous mat they produced turned into a fabric that was extraordinarily strong, absorbed dyes beautifully and, when molded into a garment while wet, could knit itself together so it had no seams at all. “You can actually have a dress growing in a vat of liquid,” Lee says. “I had never imagined a piece of clothing could be alive.”

There’s more, but let’s skip to the fun part: Grow — and sew — your own! Pop Sci offers a recipe that starts with the ingredients for kombucha — vinegar, sugar, green tea and kombucha culture. After some boiling, brewing, letting the fabric develop at room temperature and washing it, you get a sheet of material. Let it dry, get out that old Singer and start stitching.


AND, I found a short TED talk by this designer about this!


ENJOY!
1 Comment
<<Previous

    From Andrea 

    I am a commercial pattern maker who is now "sewing over 50"!
    I love to sew and hope to encourage others to come back to sewing.
    The water is fine!!

    Archives

    May 2019
    April 2019
    March 2019
    August 2017
    July 2017
    June 2017
    May 2017
    April 2017
    March 2017
    February 2017
    July 2016
    June 2016
    May 2016
    April 2016
    March 2016
    February 2016
    January 2016
    December 2015
    November 2015
    October 2015
    September 2015
    August 2015
    July 2015
    June 2015
    May 2015
    April 2015
    March 2015
    February 2015
    January 2015
    December 2014
    November 2014
    October 2014
    September 2014
    August 2014
    July 2014
    June 2014
    May 2014
    April 2014
    March 2014
    February 2014
    January 2014
    December 2013
    November 2013
    October 2013
    September 2013
    August 2013
    July 2013
    June 2013
    May 2013

    Archives by Subject

    To search for blog posts in specific categories, use the drop down menu above by hovering over the word "Blog"

    Enter your email address:

    Delivered by FeedBurner

    RSS Feed

    Andrea Schewe participates in Amazon's associates program.