Andrea Schewe Design
  • Home
  • Costumes
    • Reader's Gallery
    • Fantasy Costumes
    • Theatrical
    • Historic >
      • Easier to make
    • International
    • Costumes for Kid's and Babies
  • Crafts
    • Home Decor >
      • Pillows
    • Fashion Accessories
    • Doll Clothes
    • For Kids and Babies
  • Blog
    • Past Blogs by subject >
      • My patterns by number
      • Sewing basics
      • Personal sewing Projects
      • Fashion History
      • Fun and funny stuff
      • Guest Bloggers
      • Crafts and Home Dec
  • Links
  • Contact

#8201 - Lady Space Warriors - Elements

6/27/2016

2 Comments

 
Picture
Just out! Lady Space Warriors ... wink! wink!

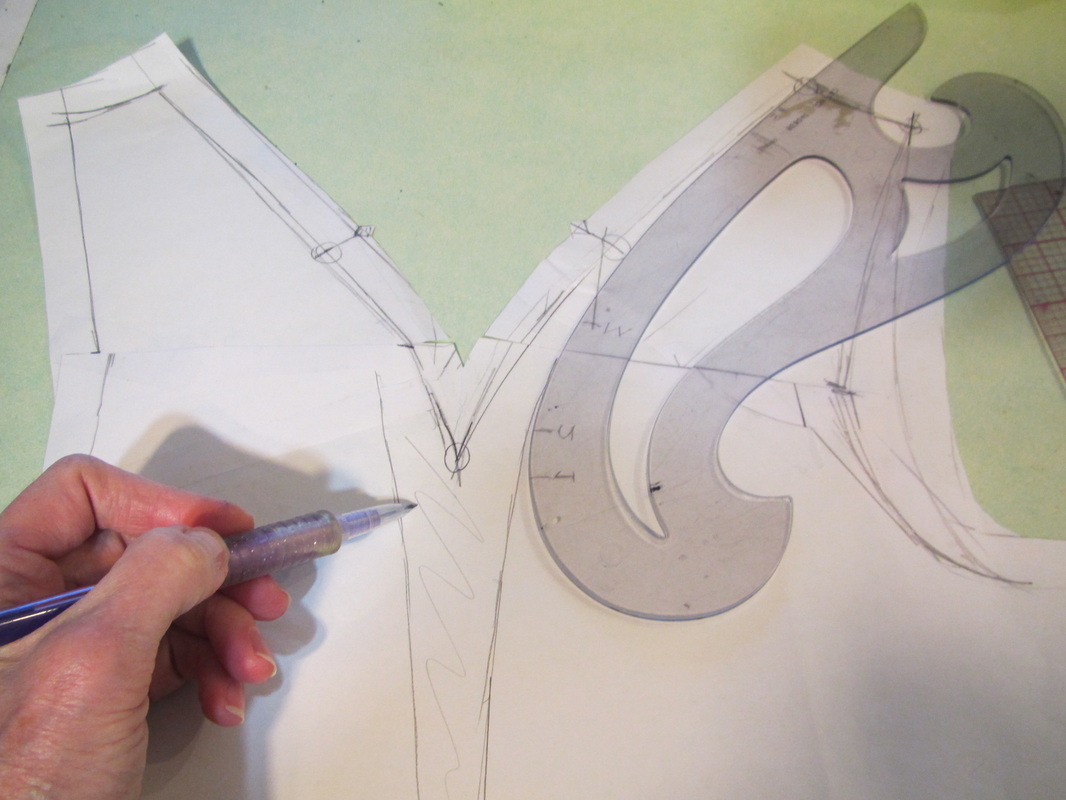
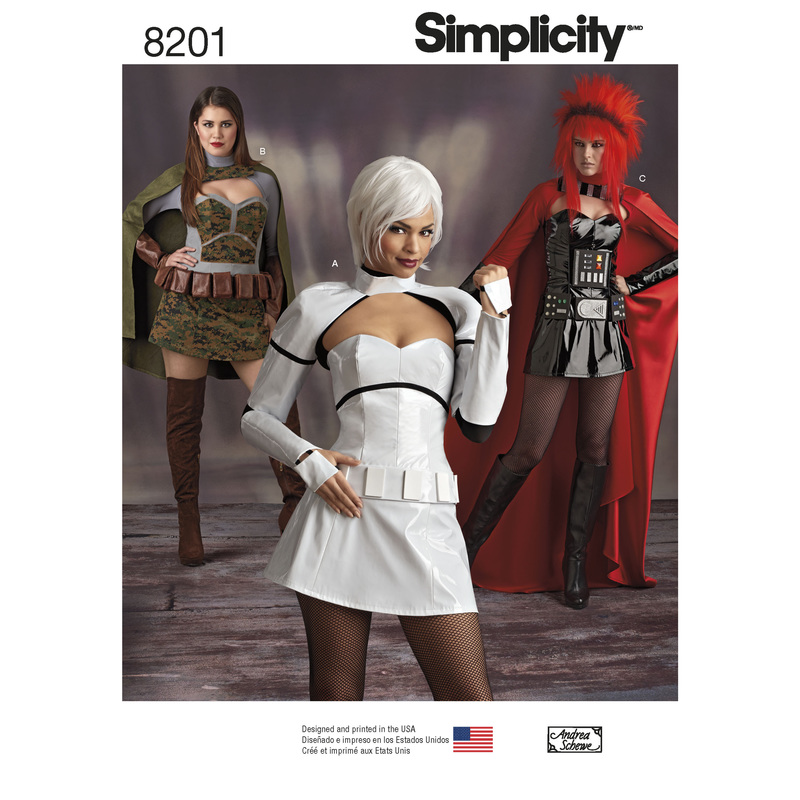
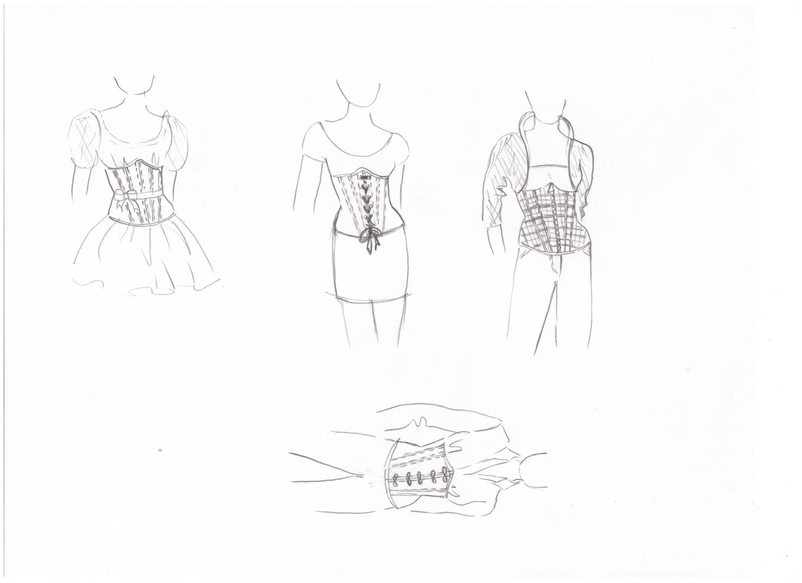
This is a pattern of elements, which I hope will be useful for all sorts of imaginative creations.

Picture
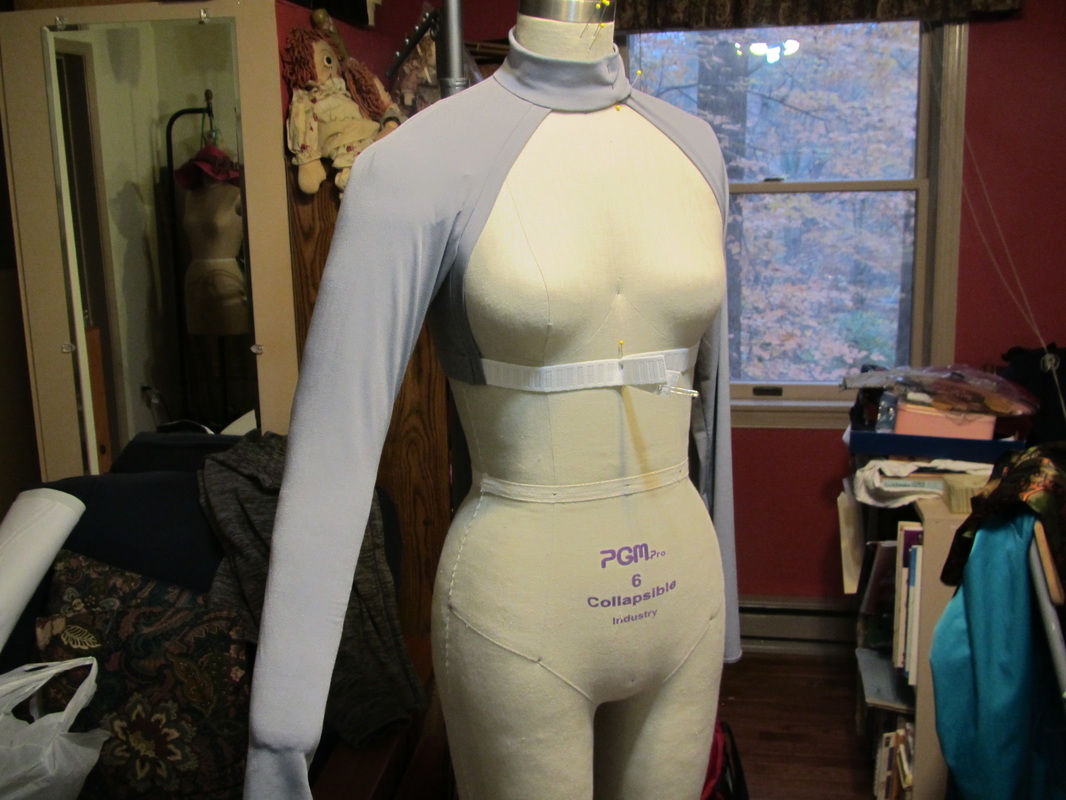
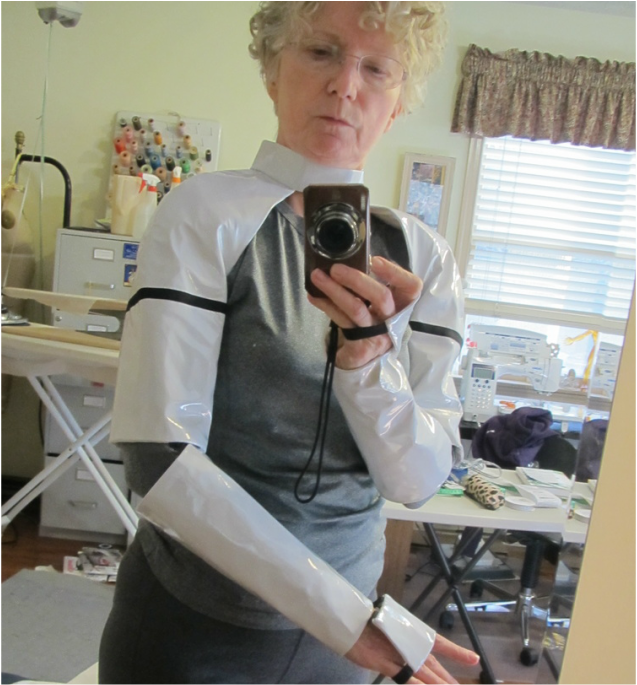
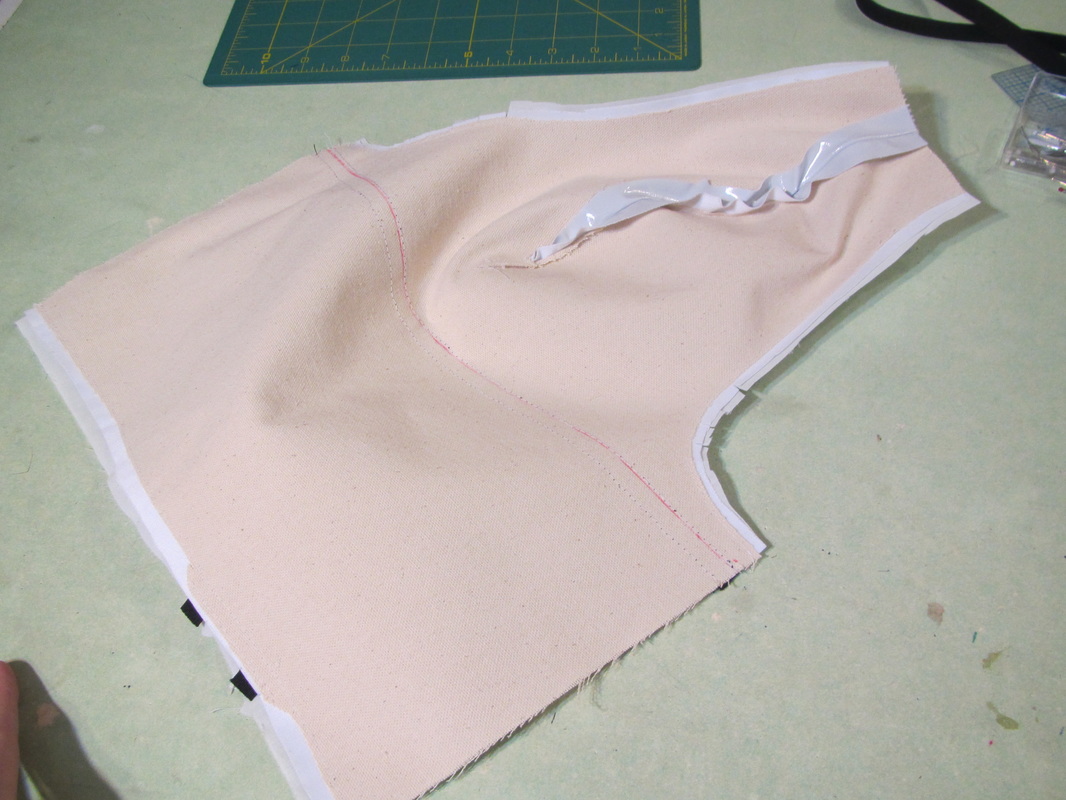
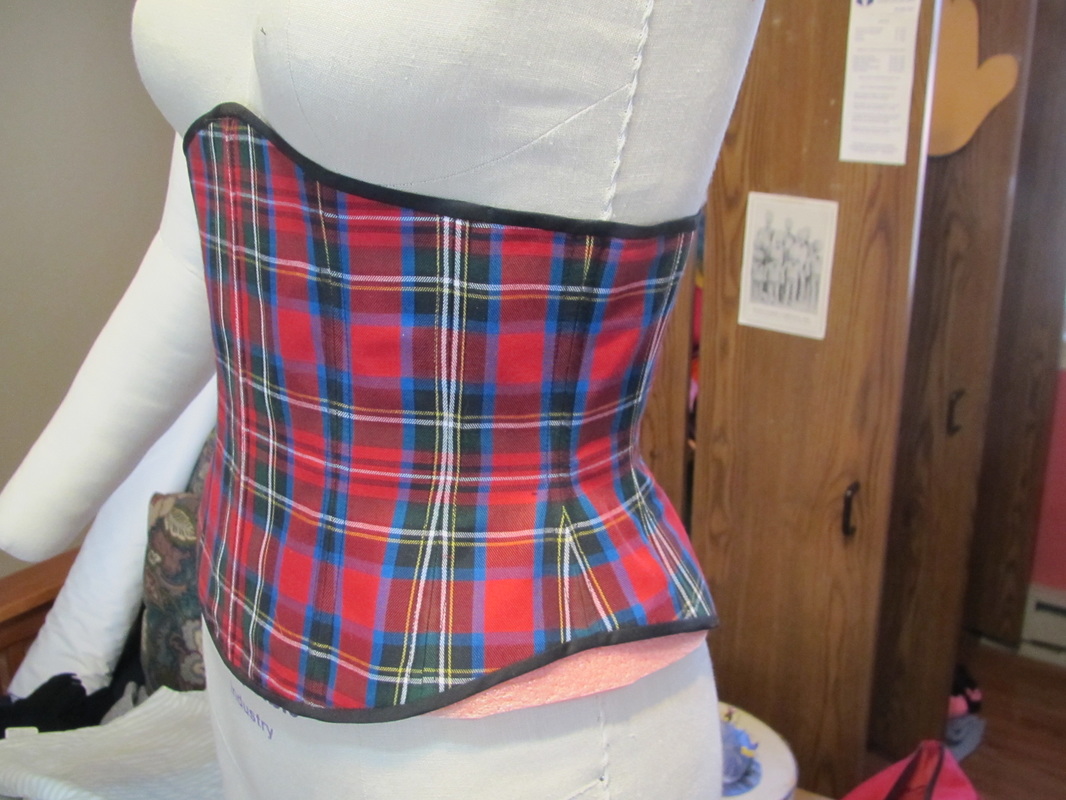
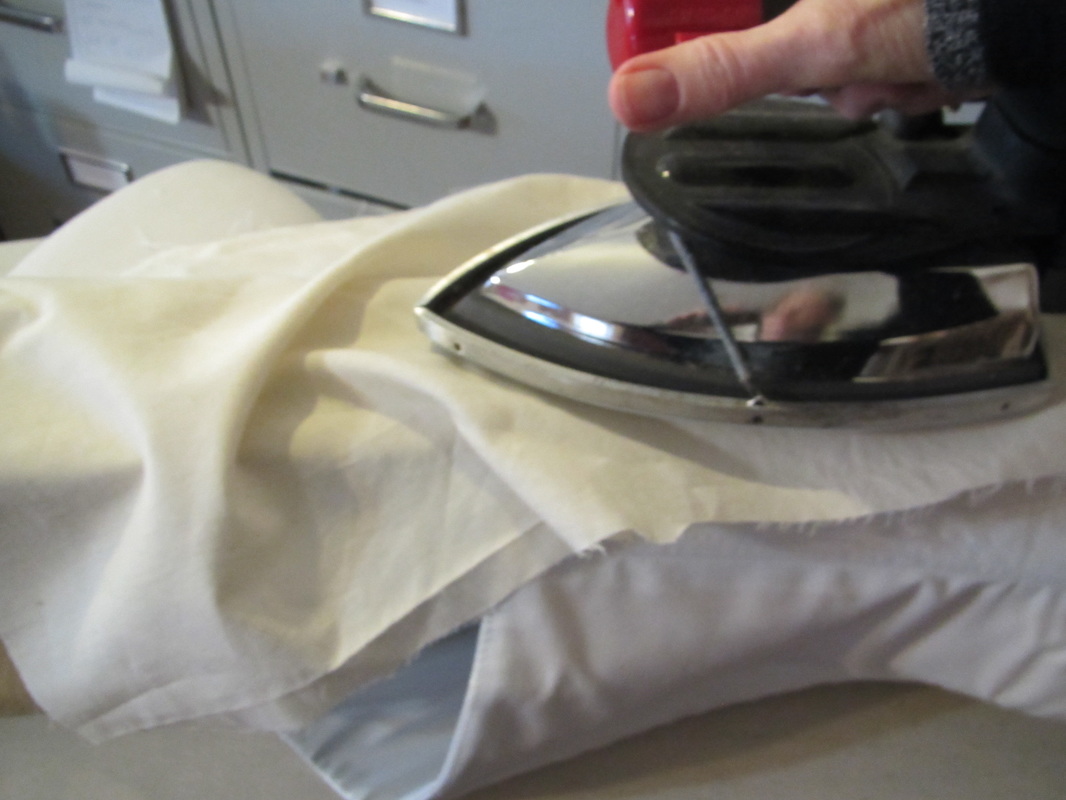
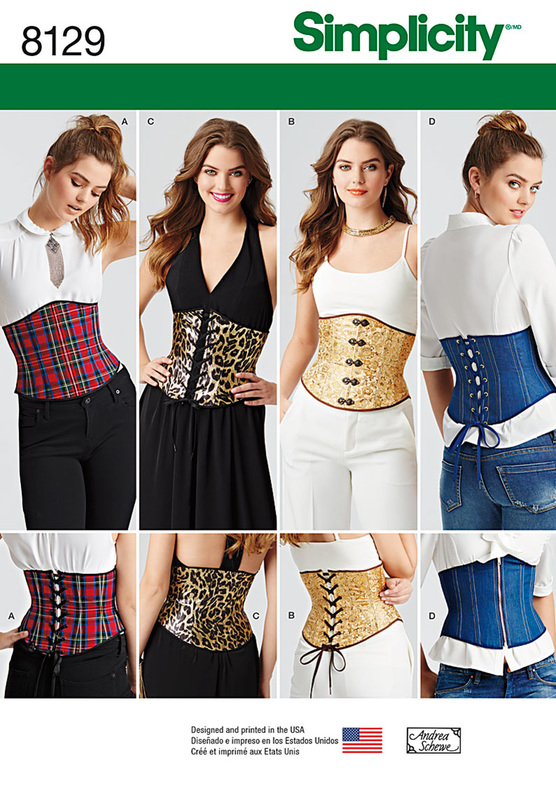
First piece is a midriff top that leaves the chest open ... TO BE WORN WITH A CORSET!

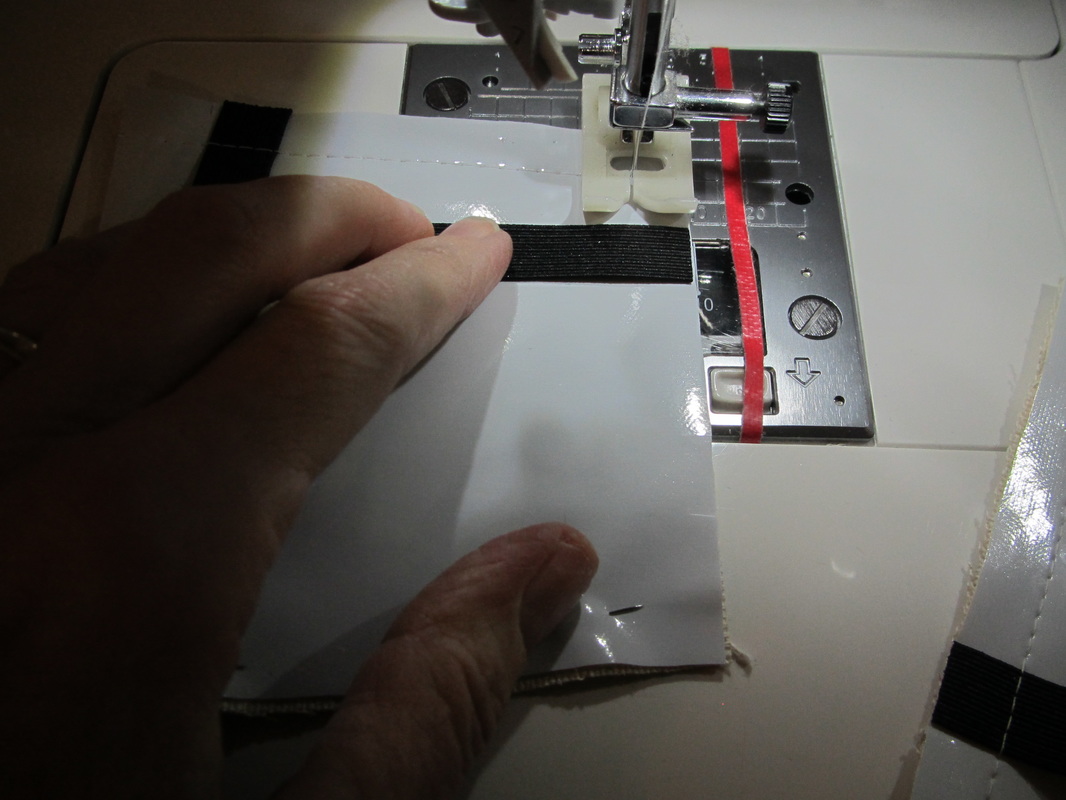
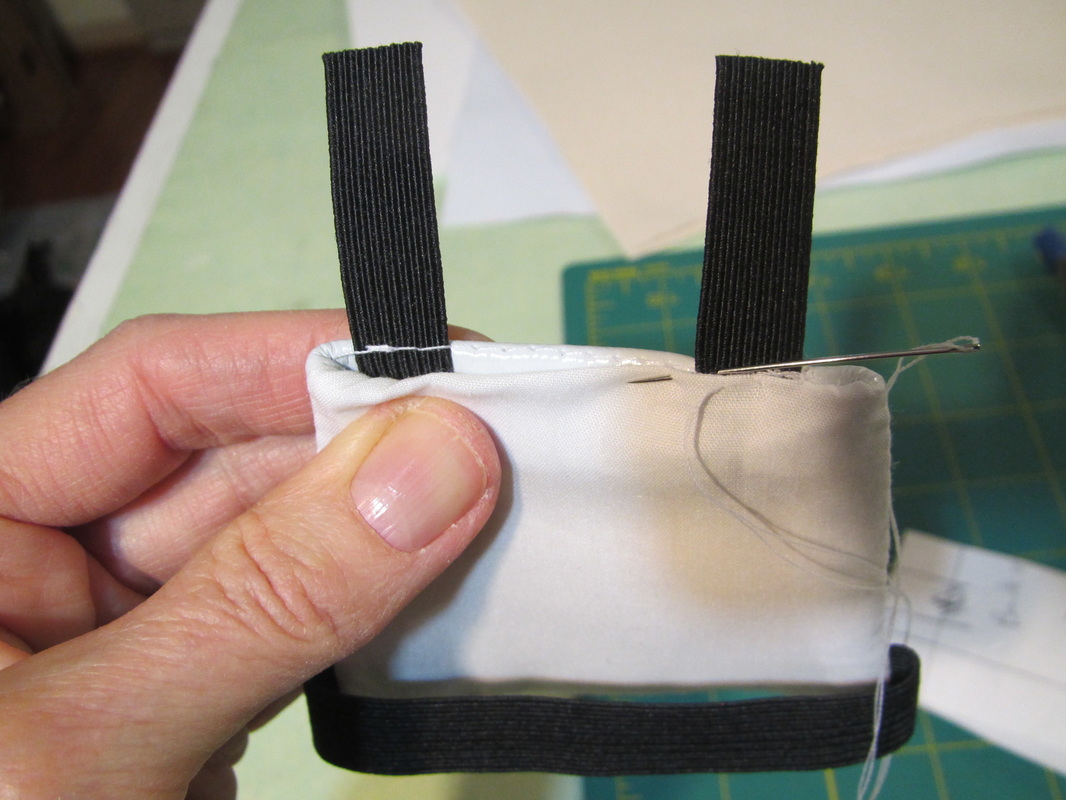
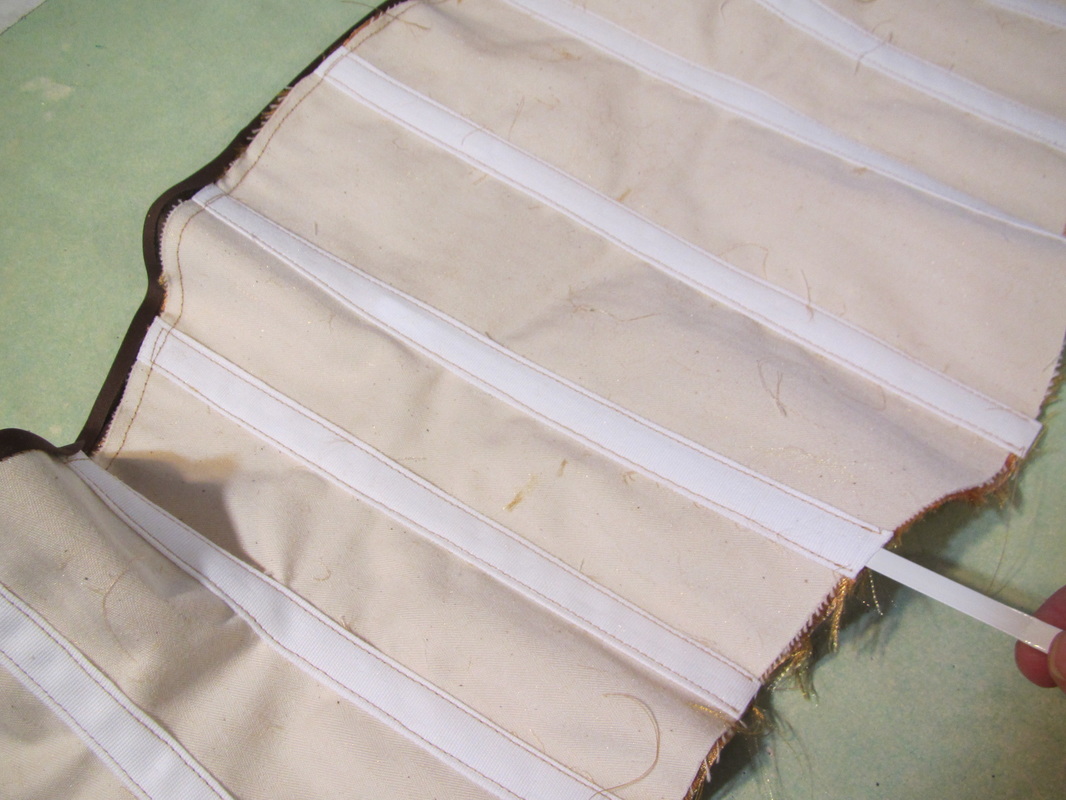
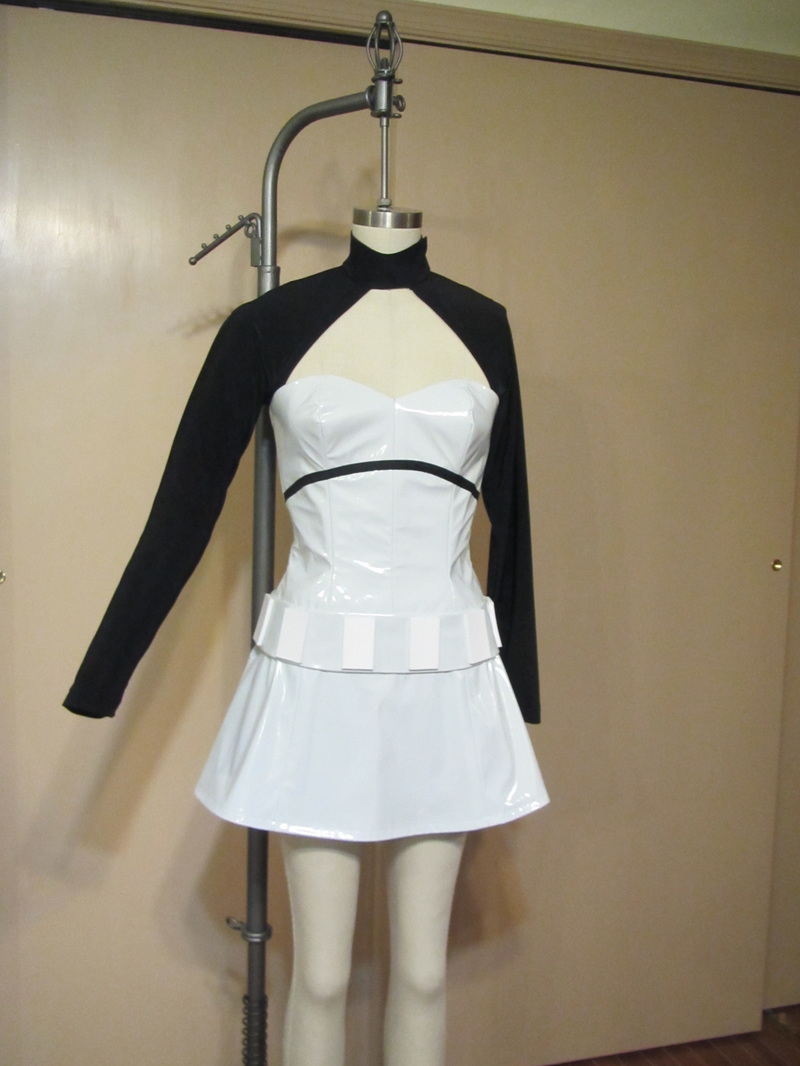
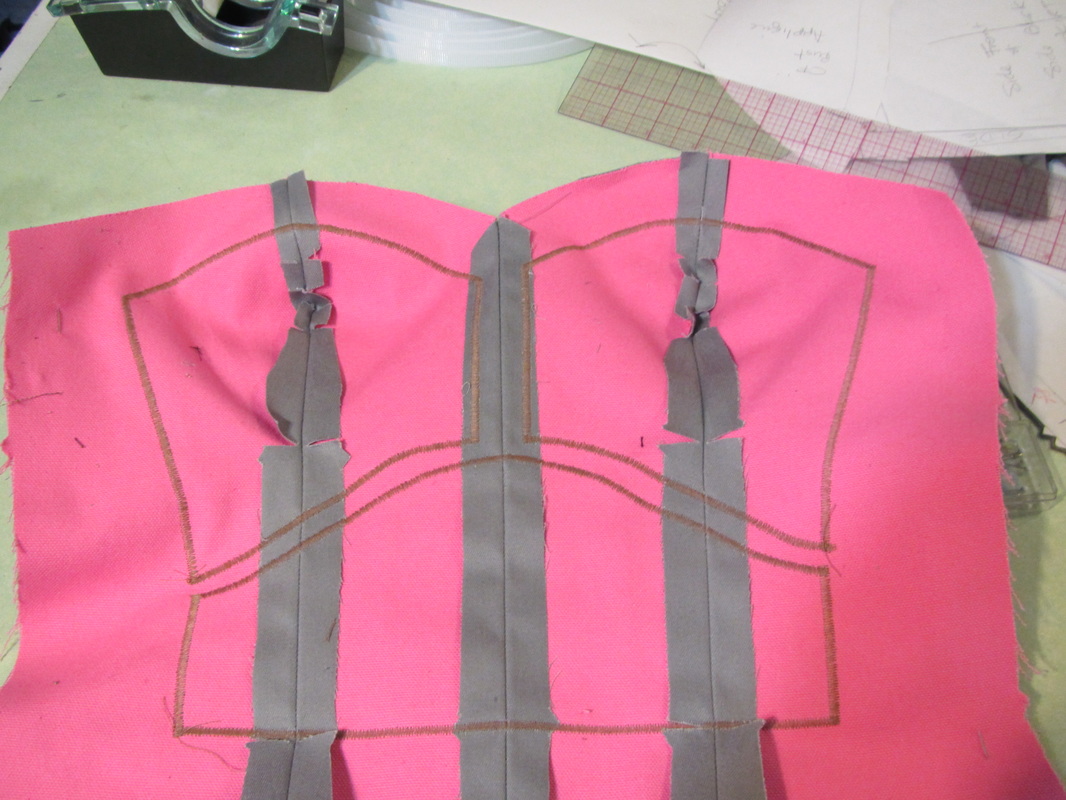
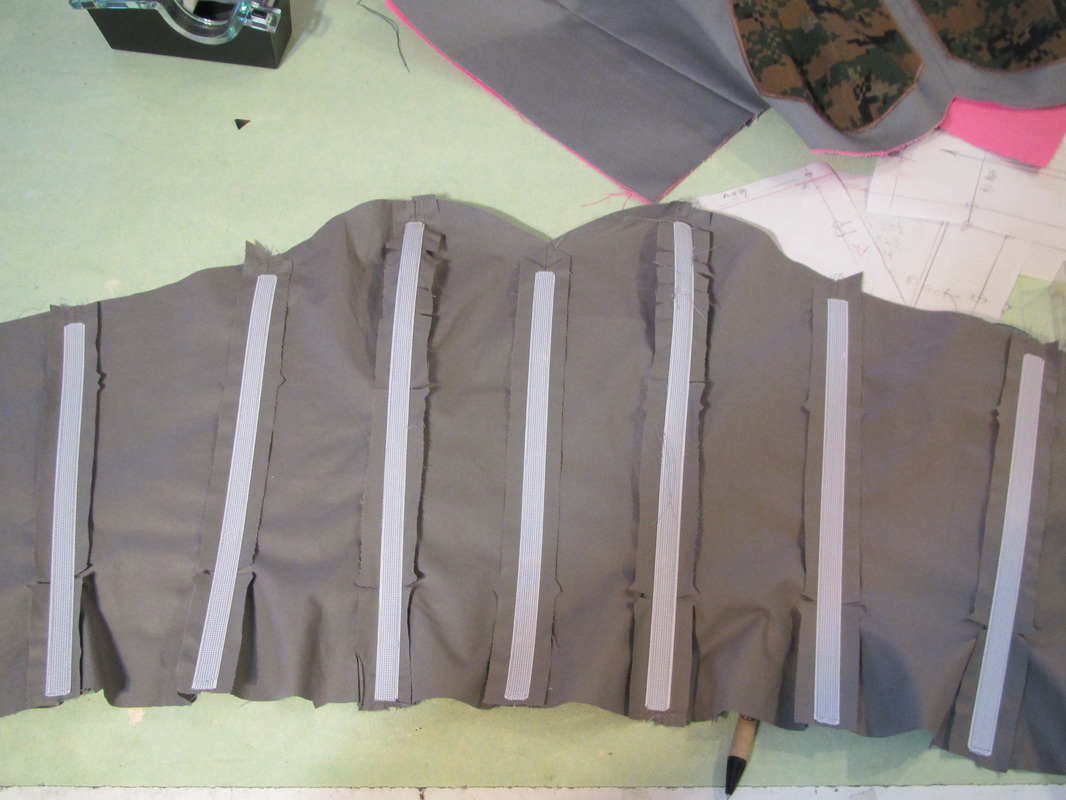
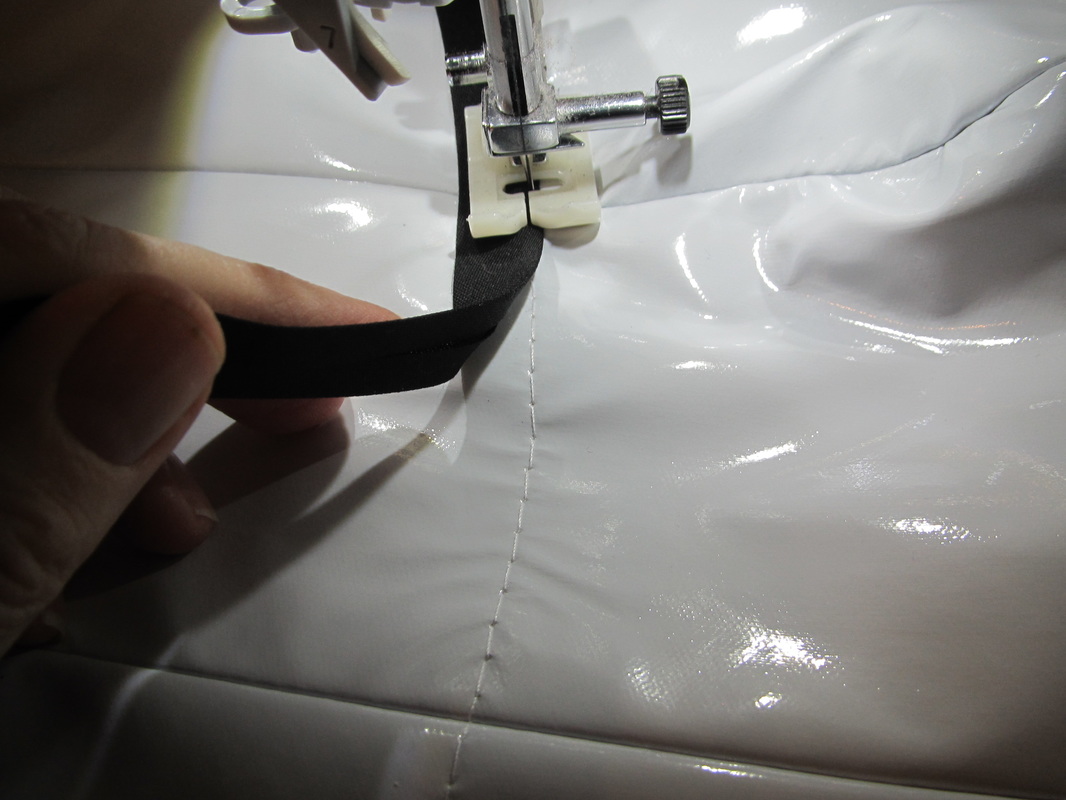
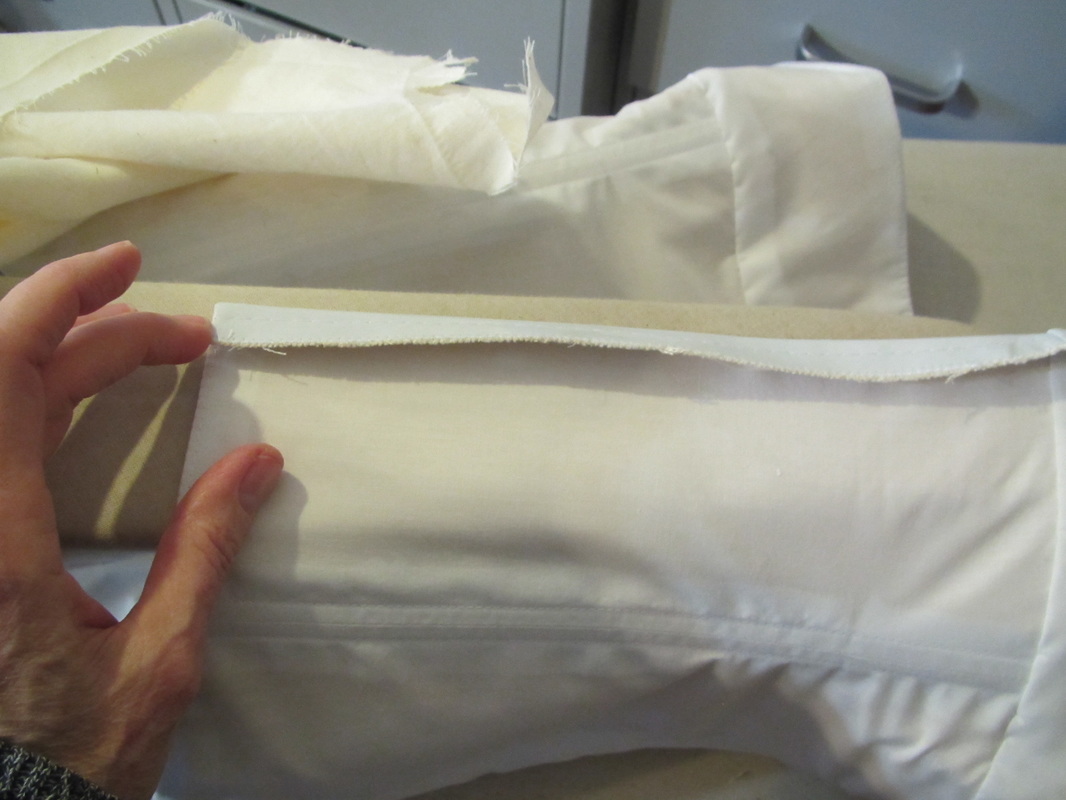
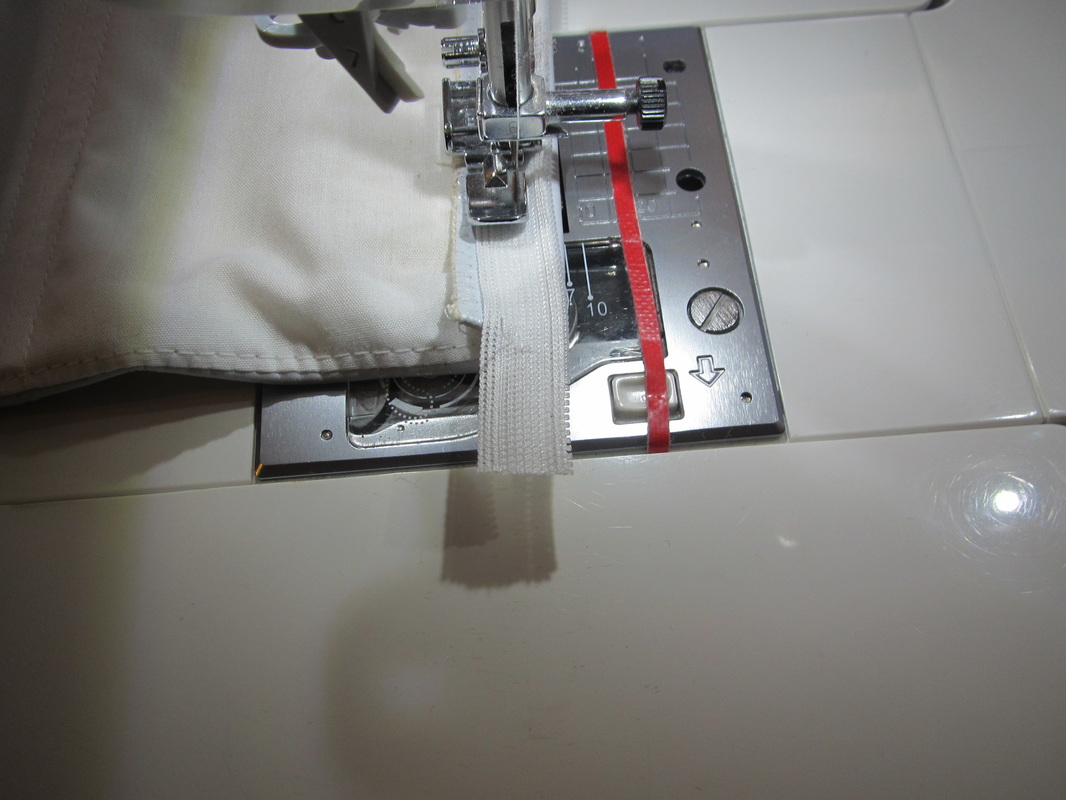
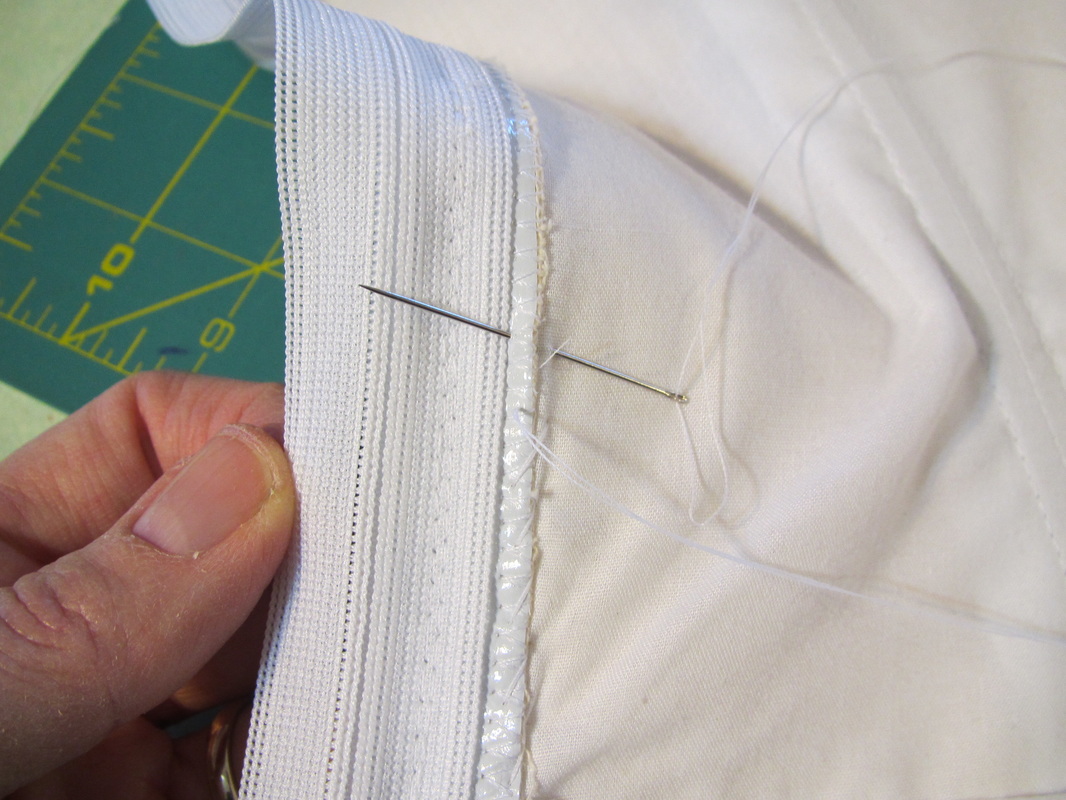
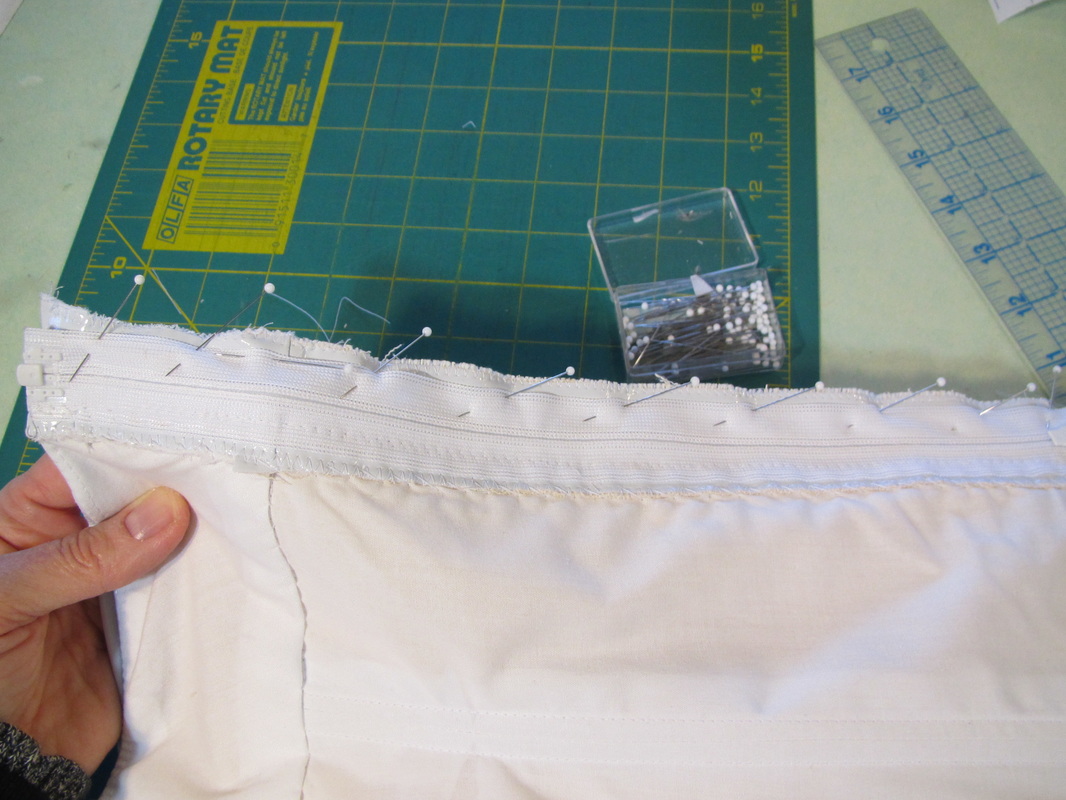
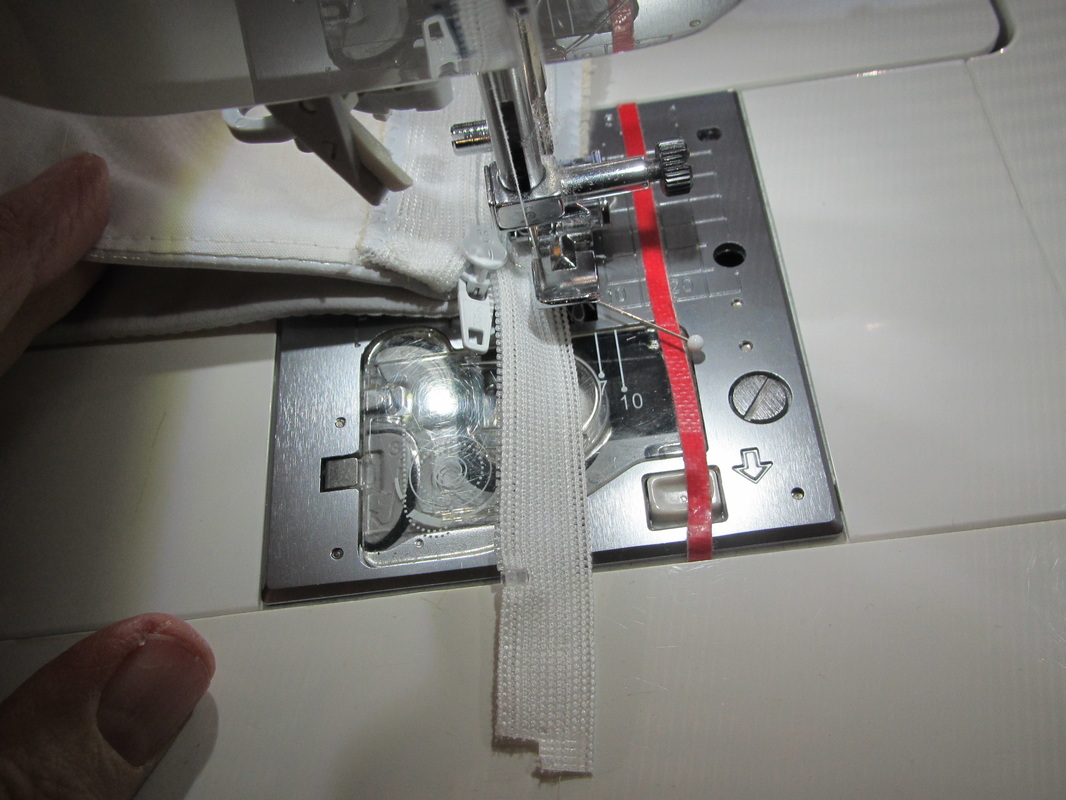
You can see the under bust elastic band. This will hold the top smooth and in place.
Picture
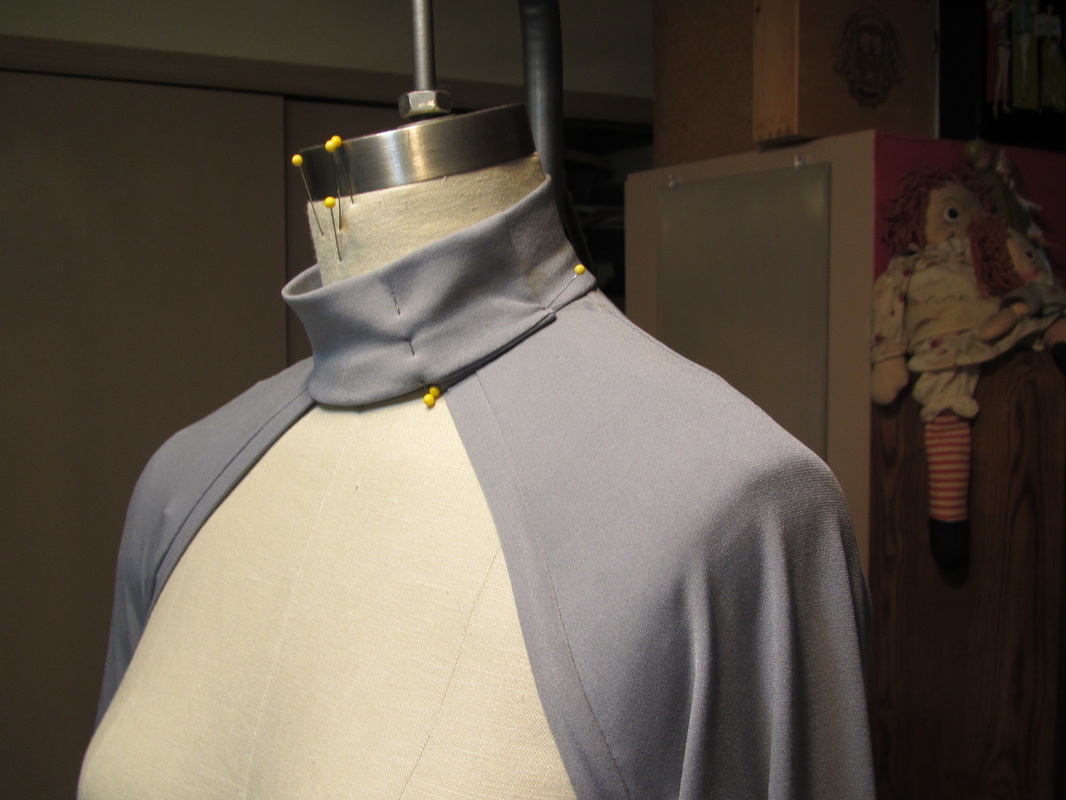
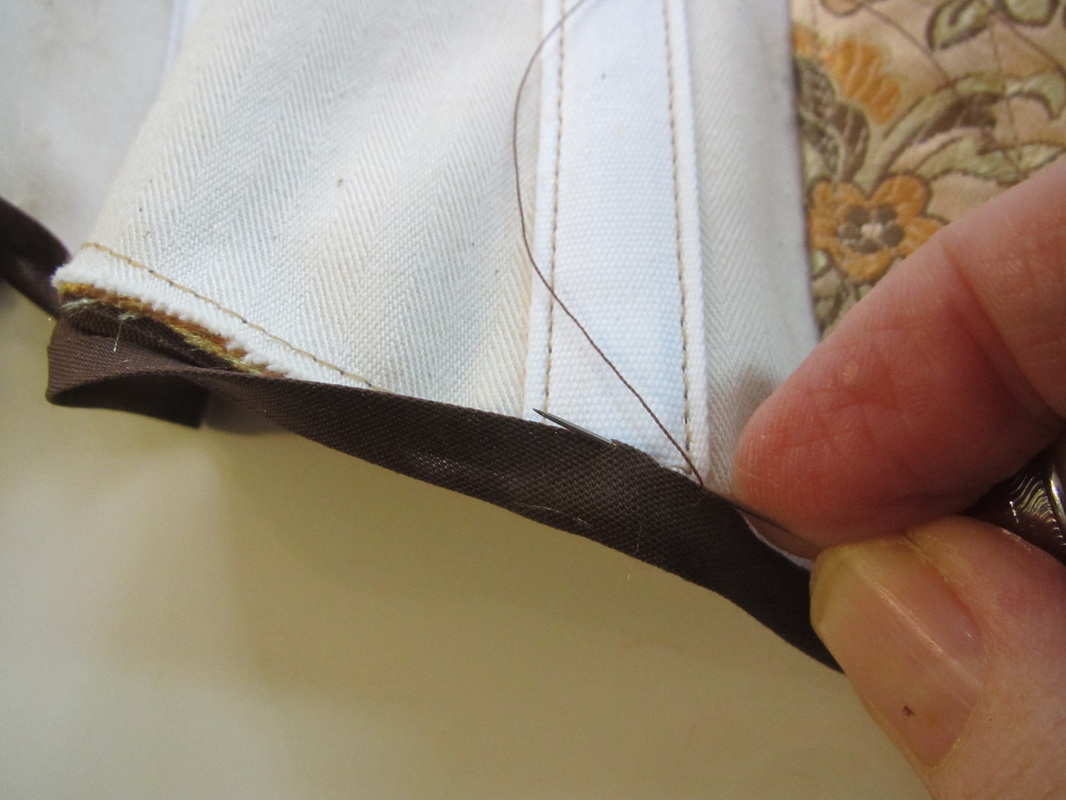
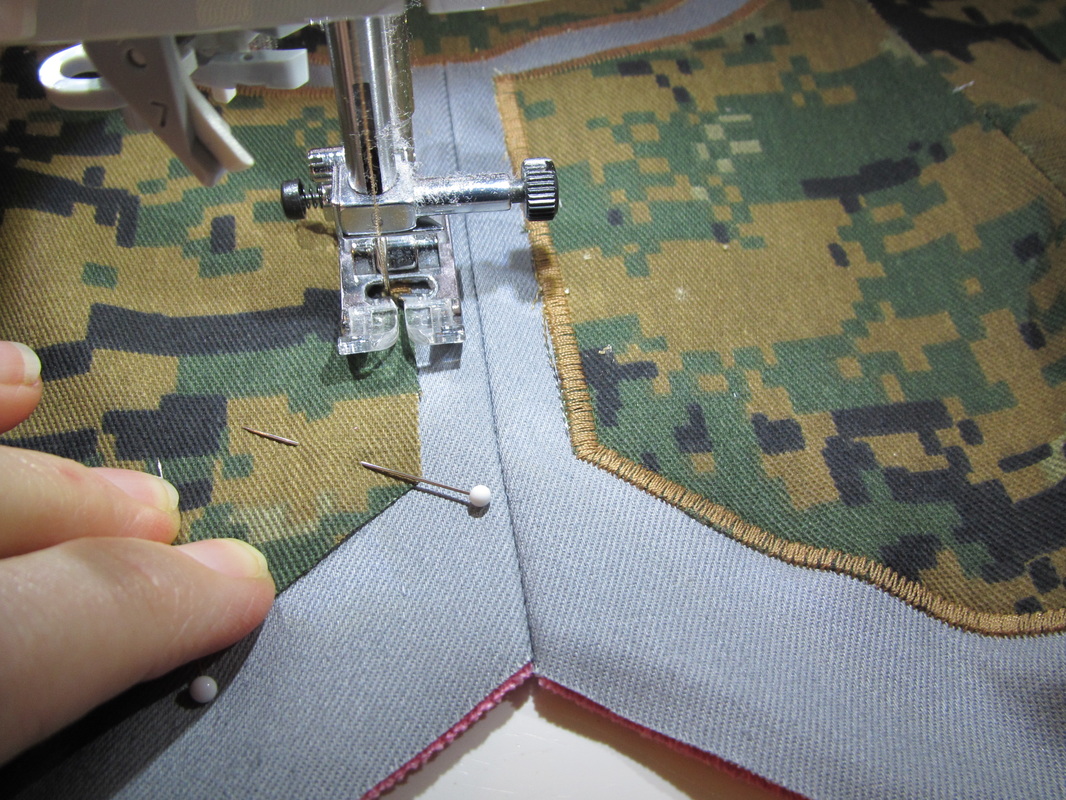
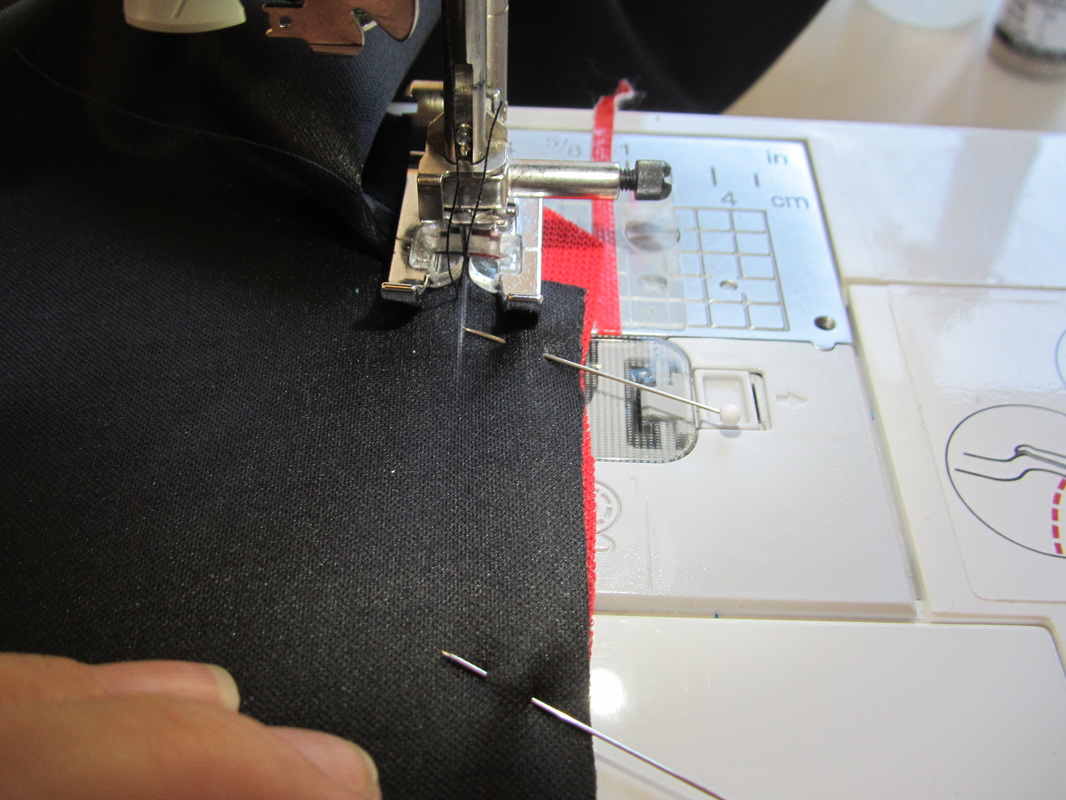
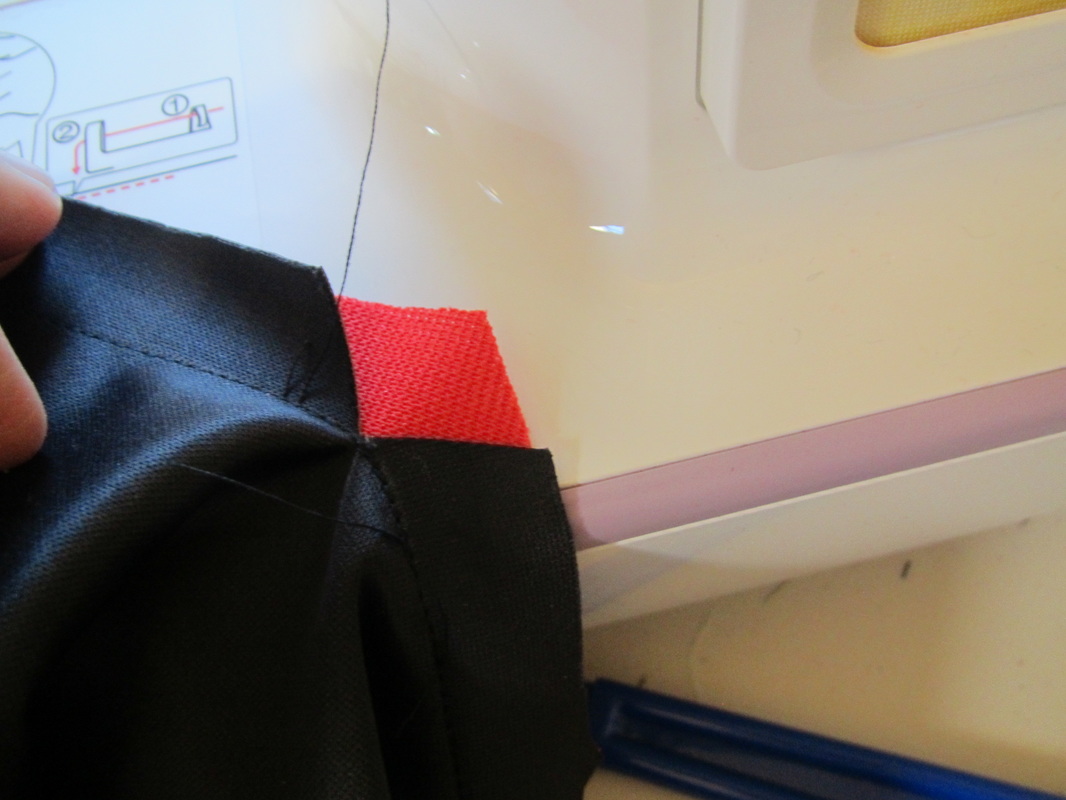
The collar opens in the front, too, so it is easy to put on. But the closure is off to the side so it is less noticeable.
Picture
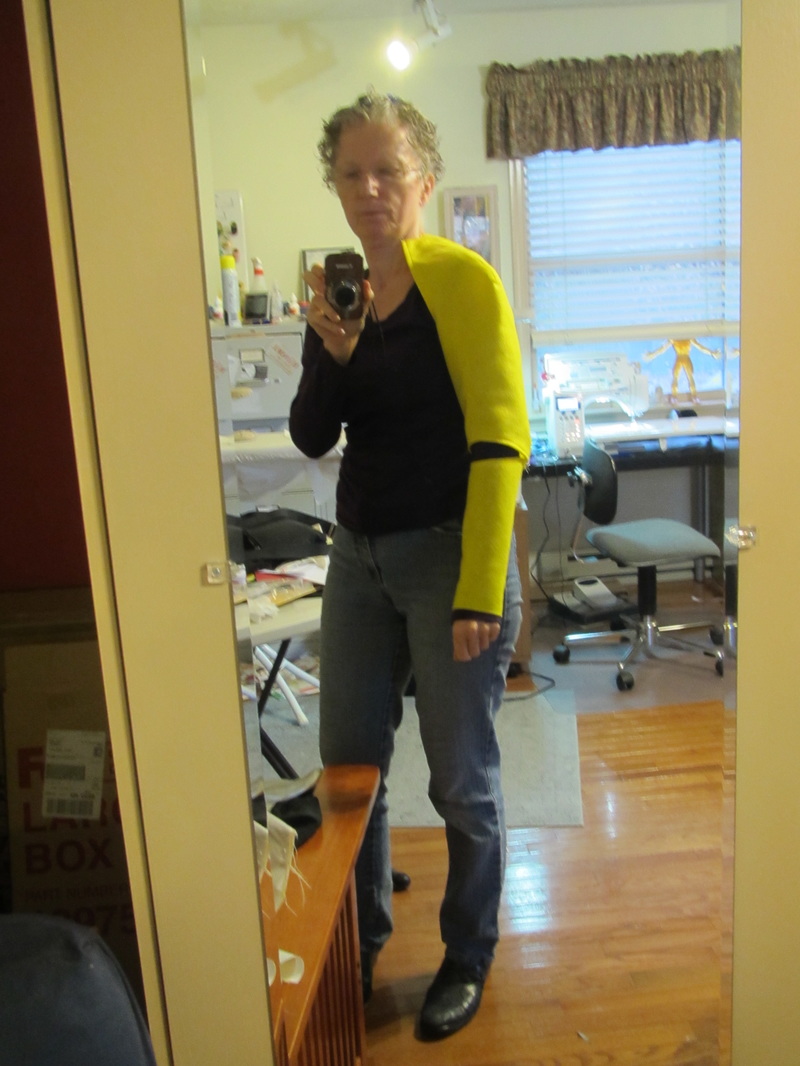
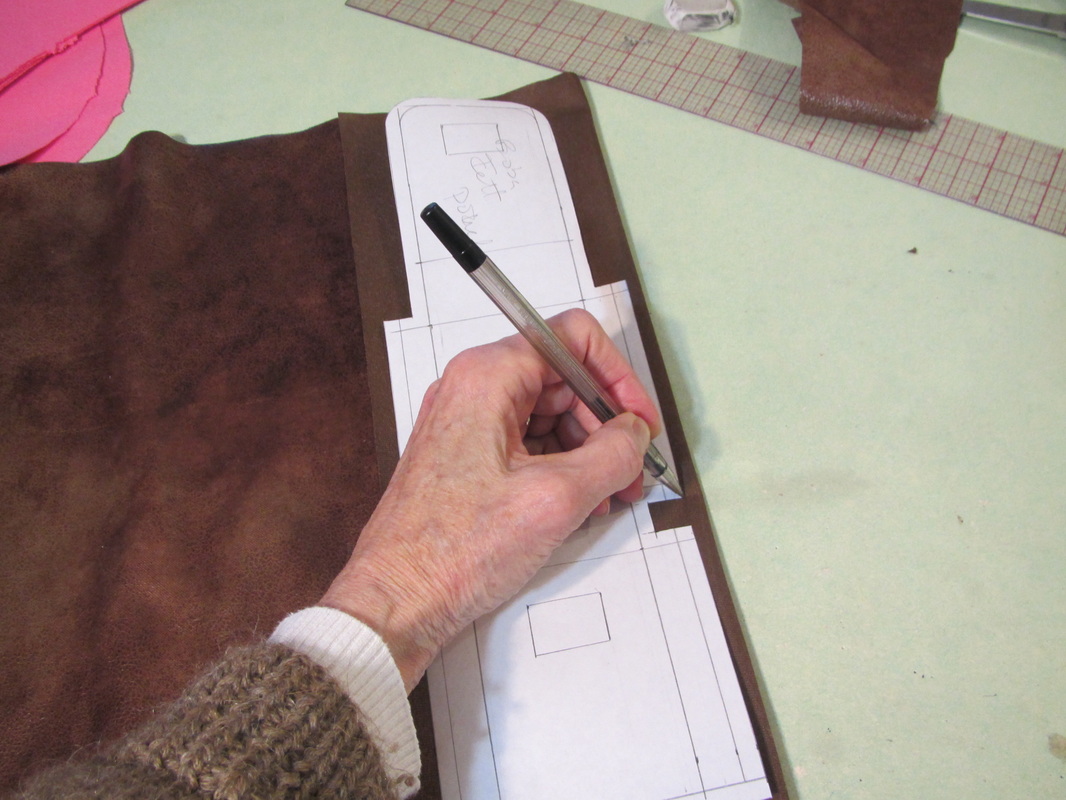
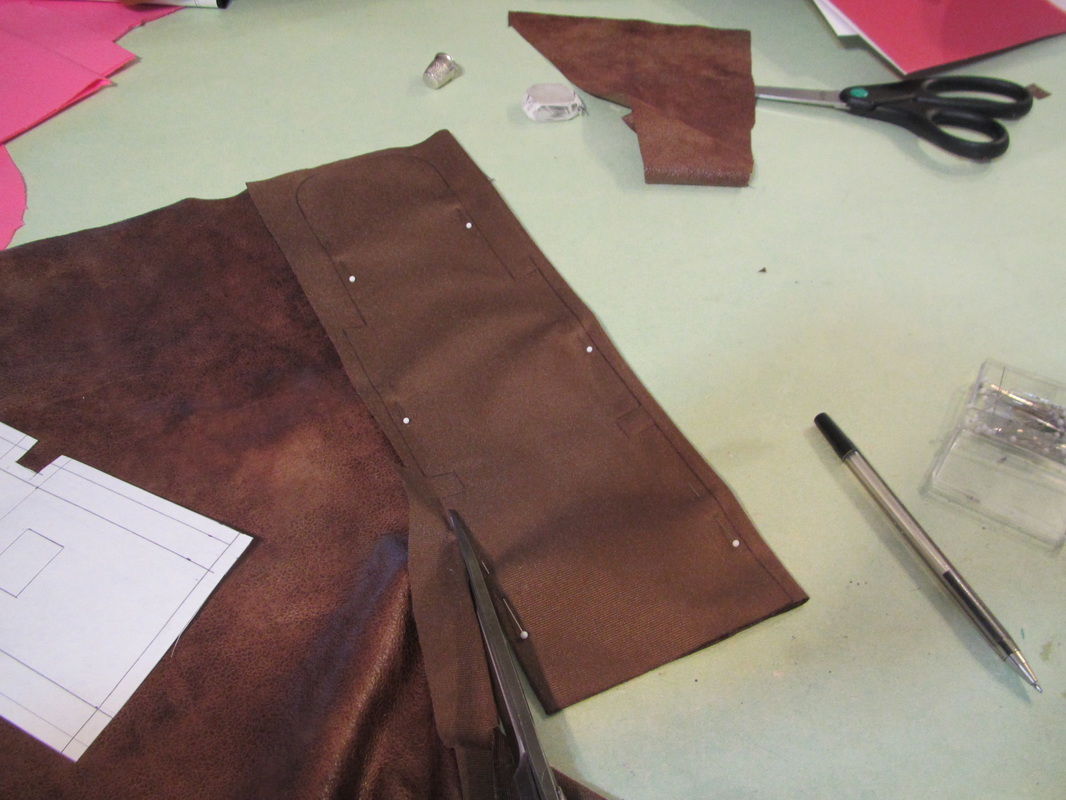
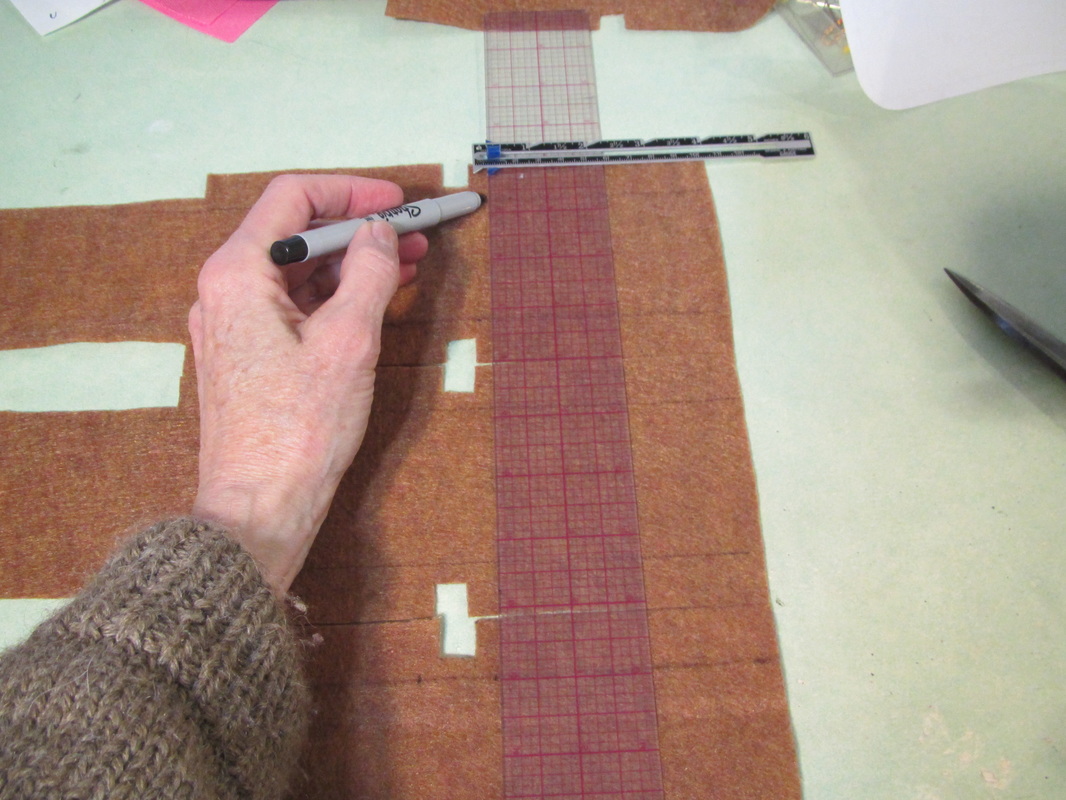
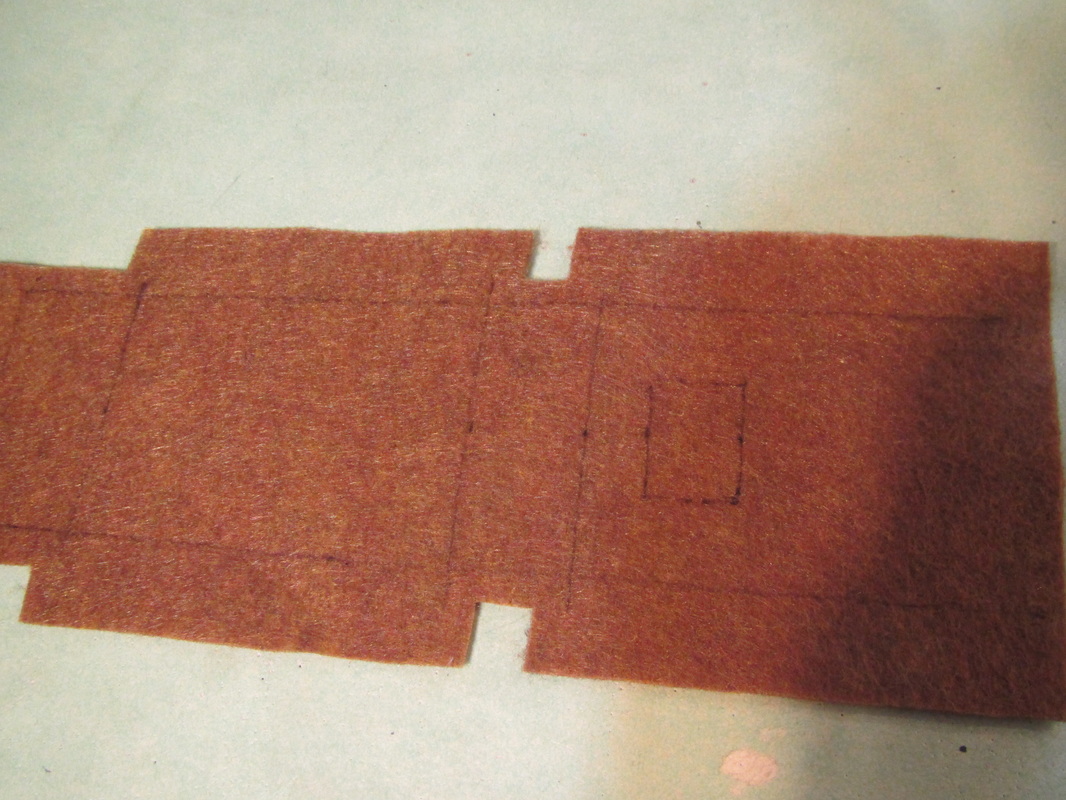
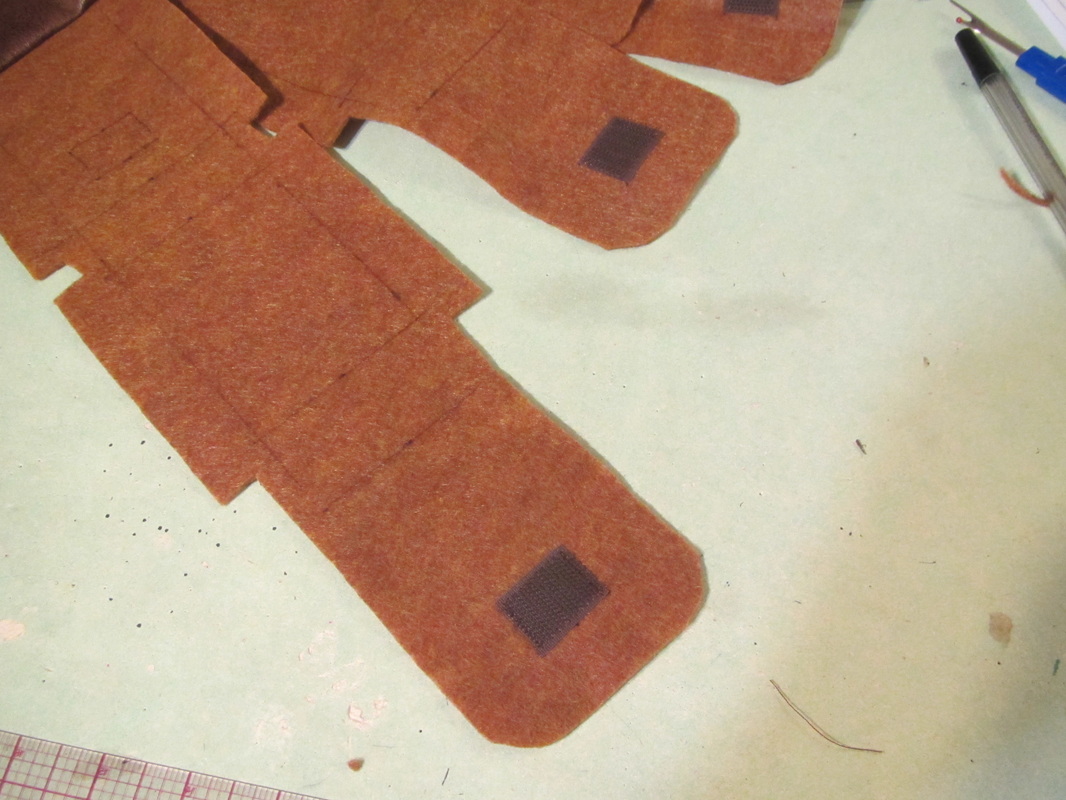
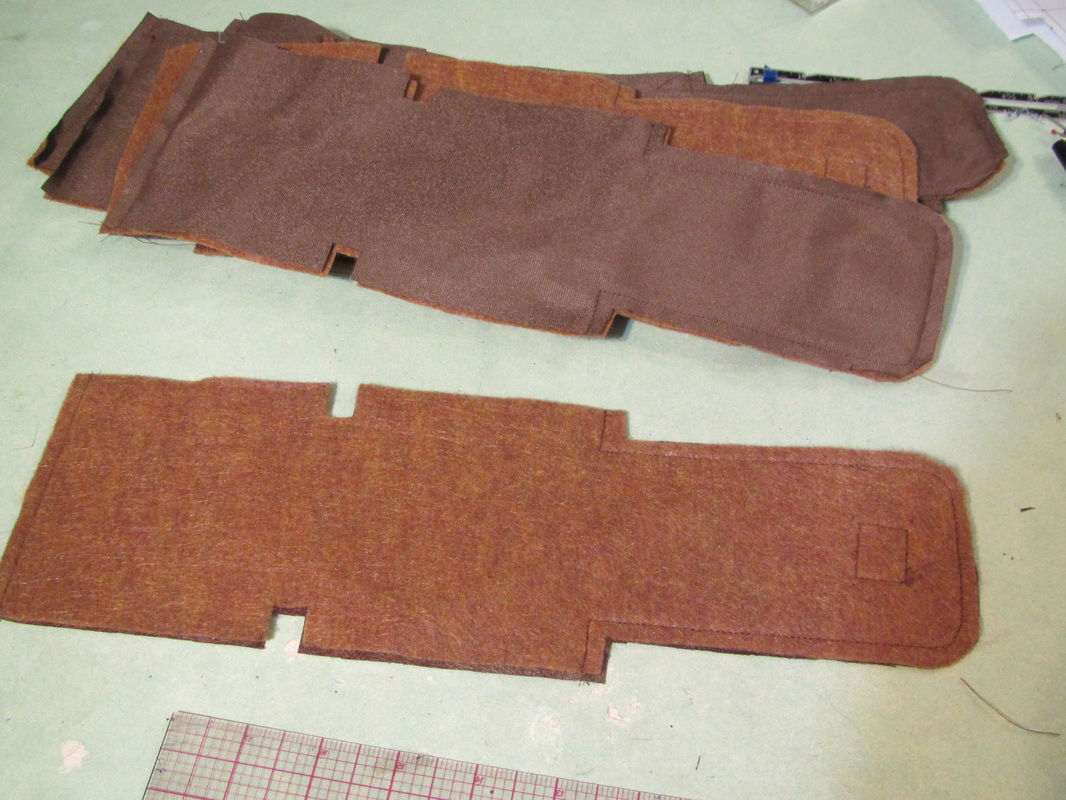
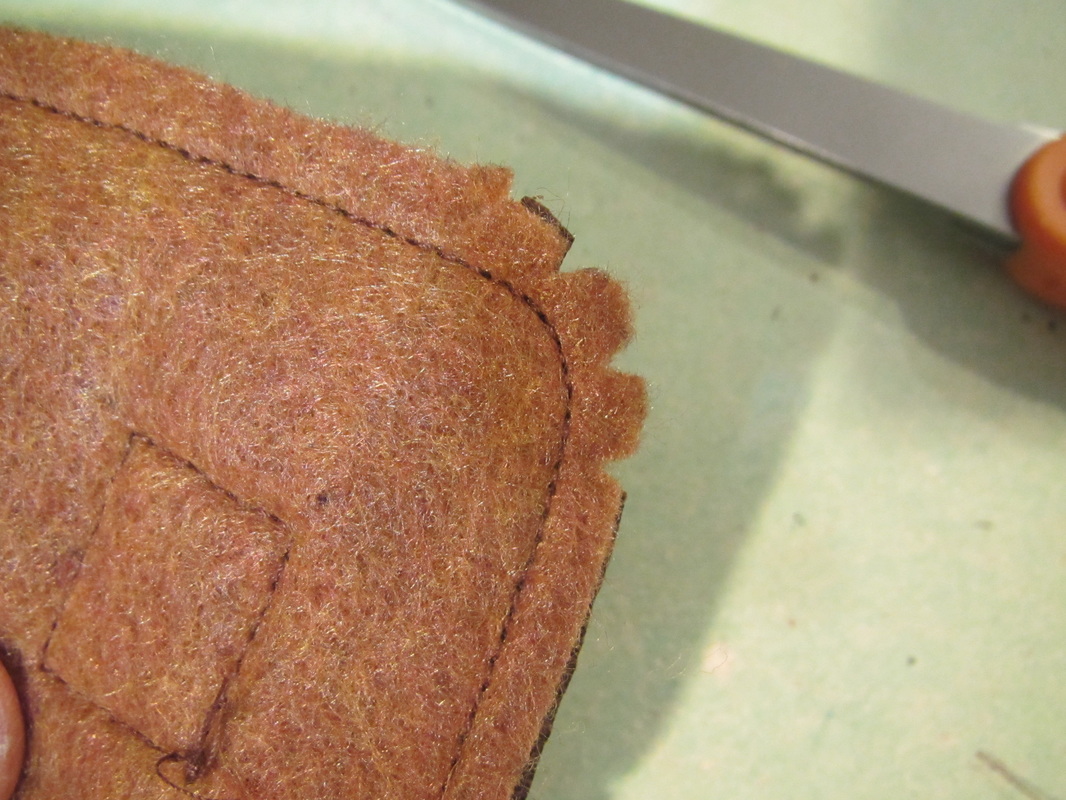
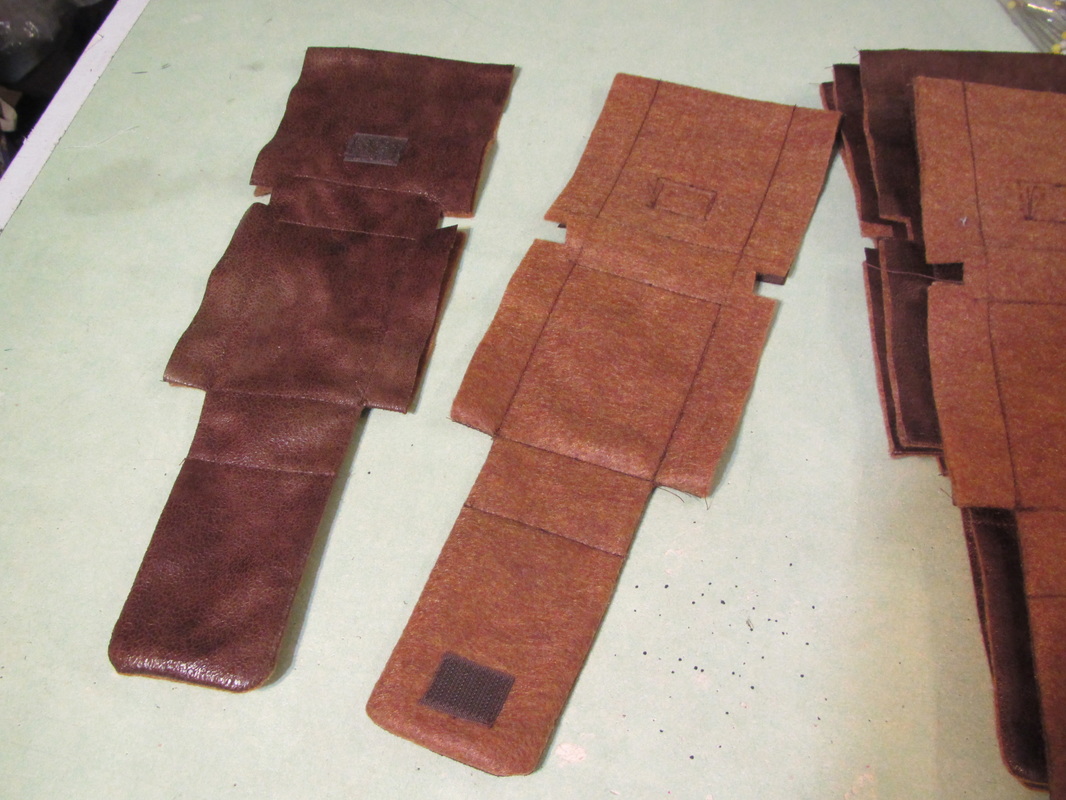
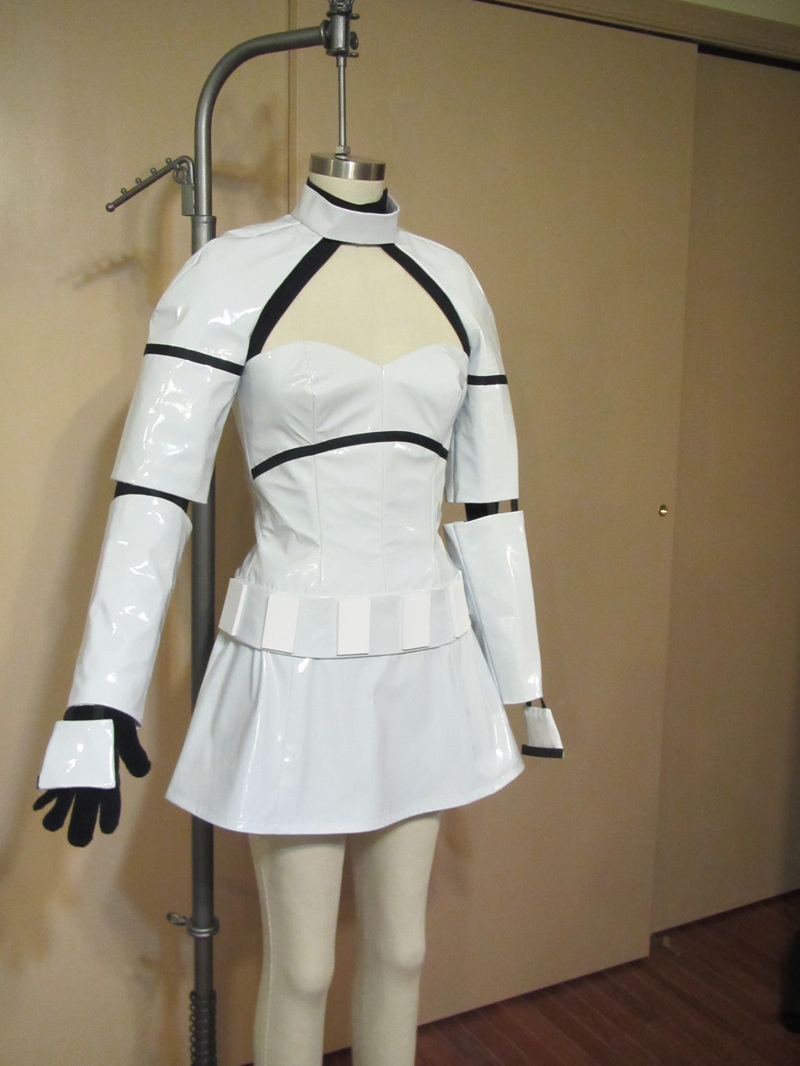
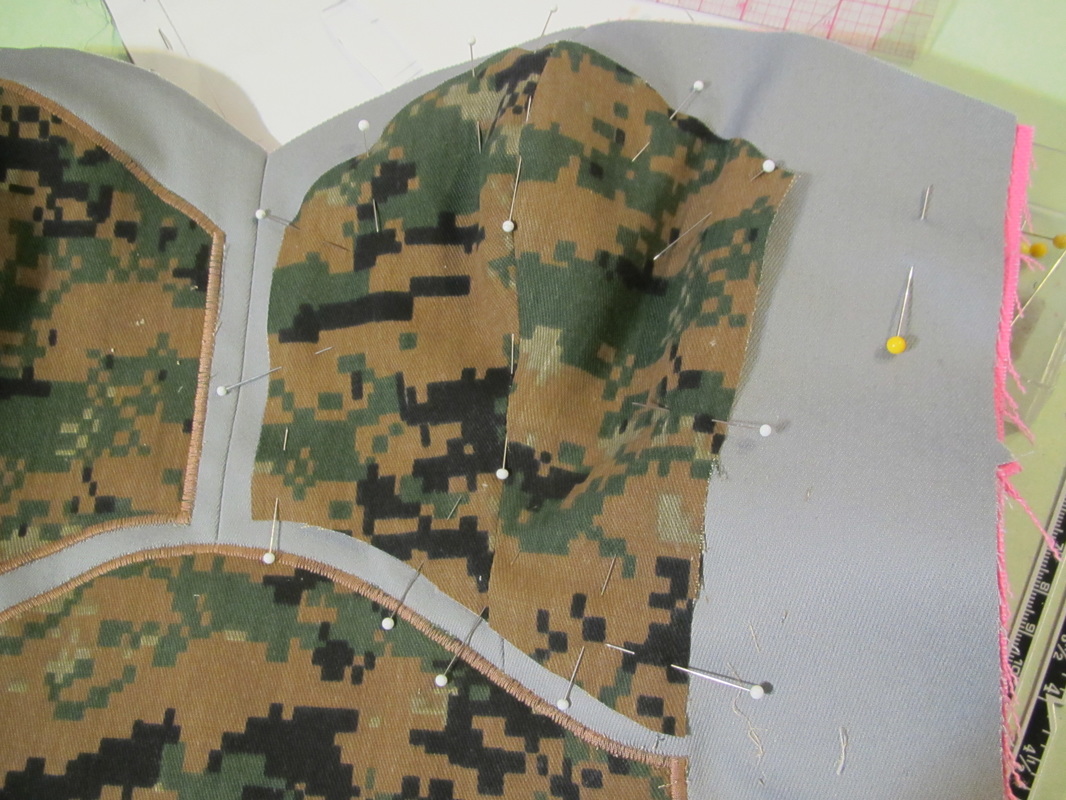
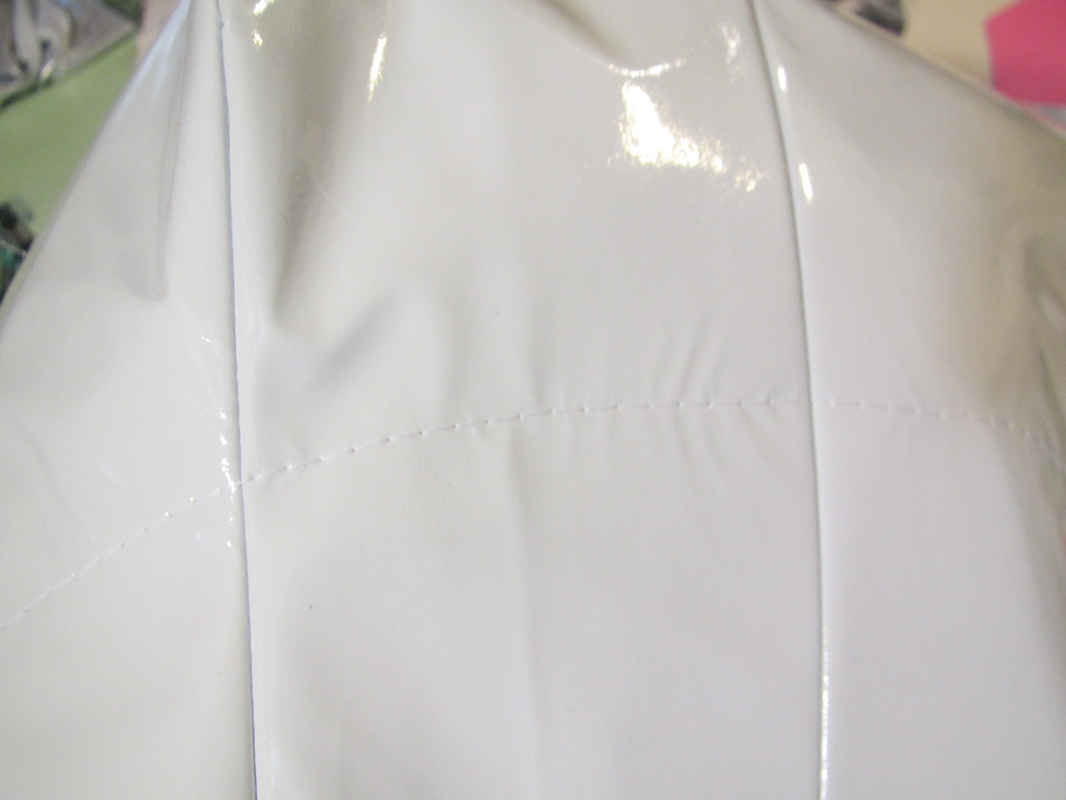
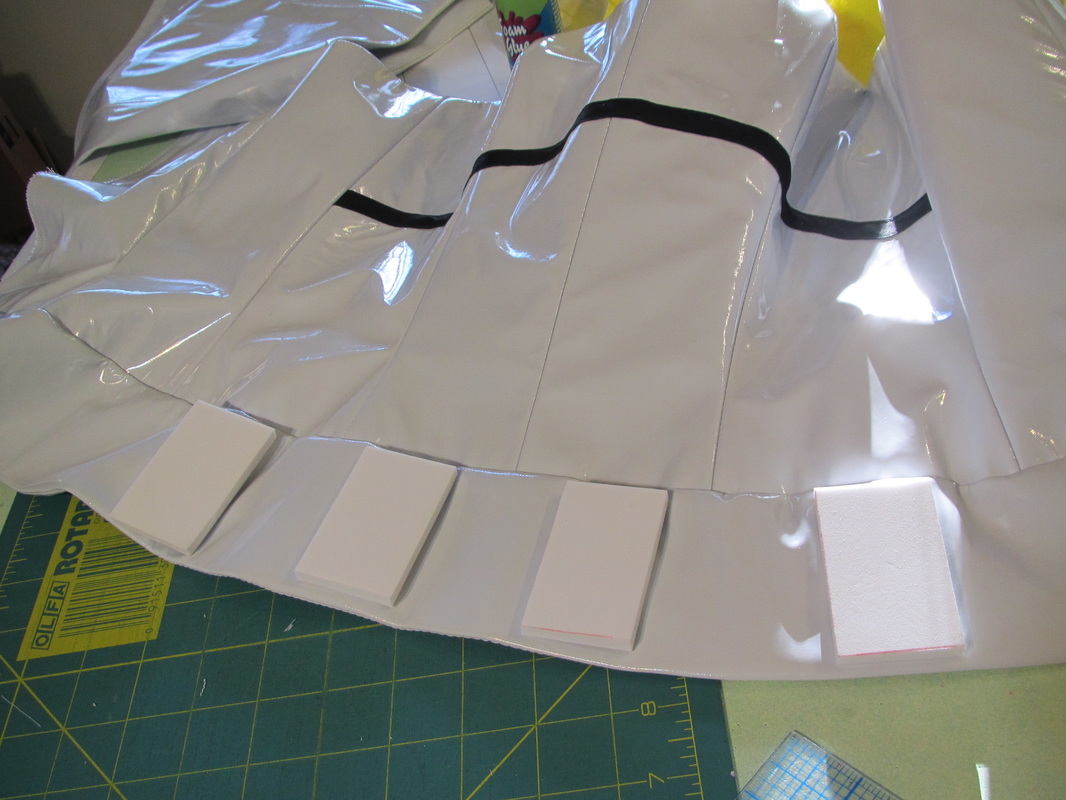
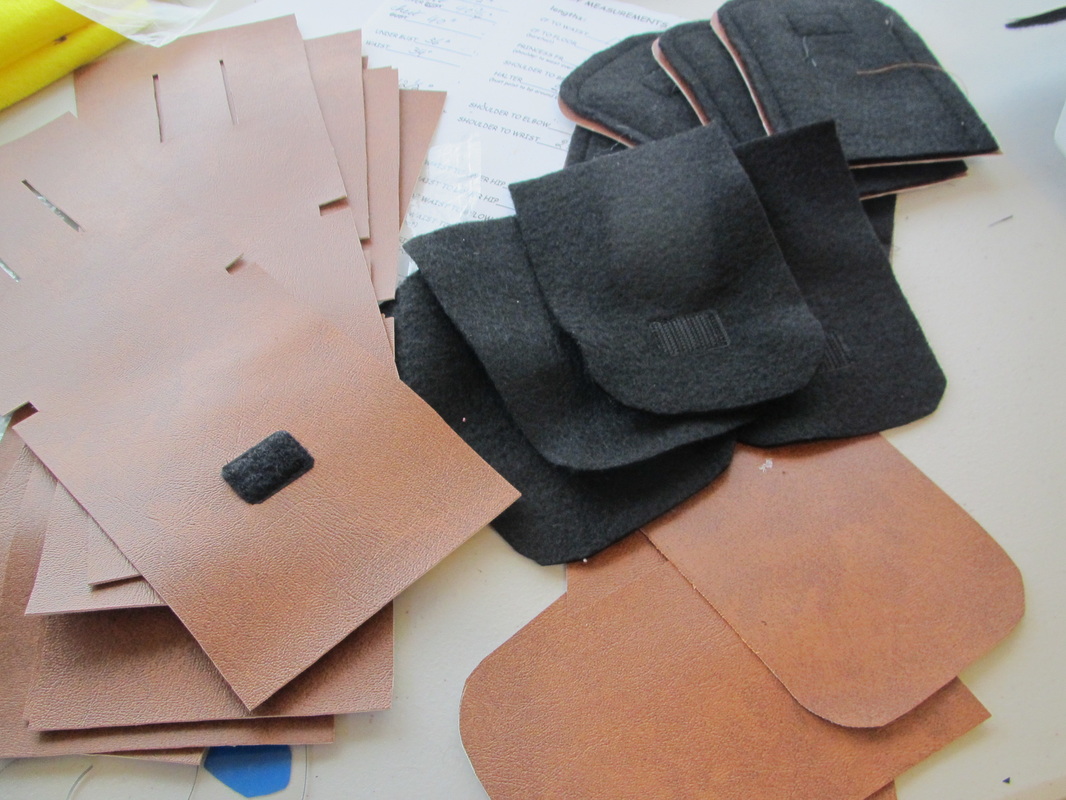
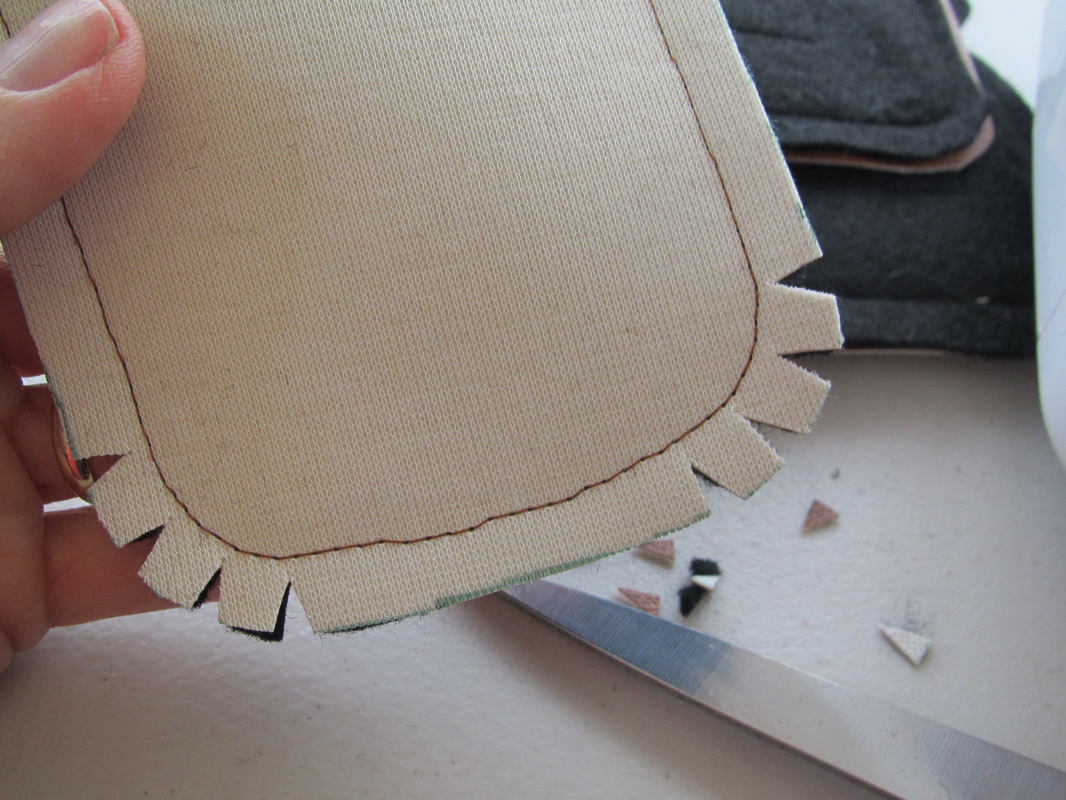
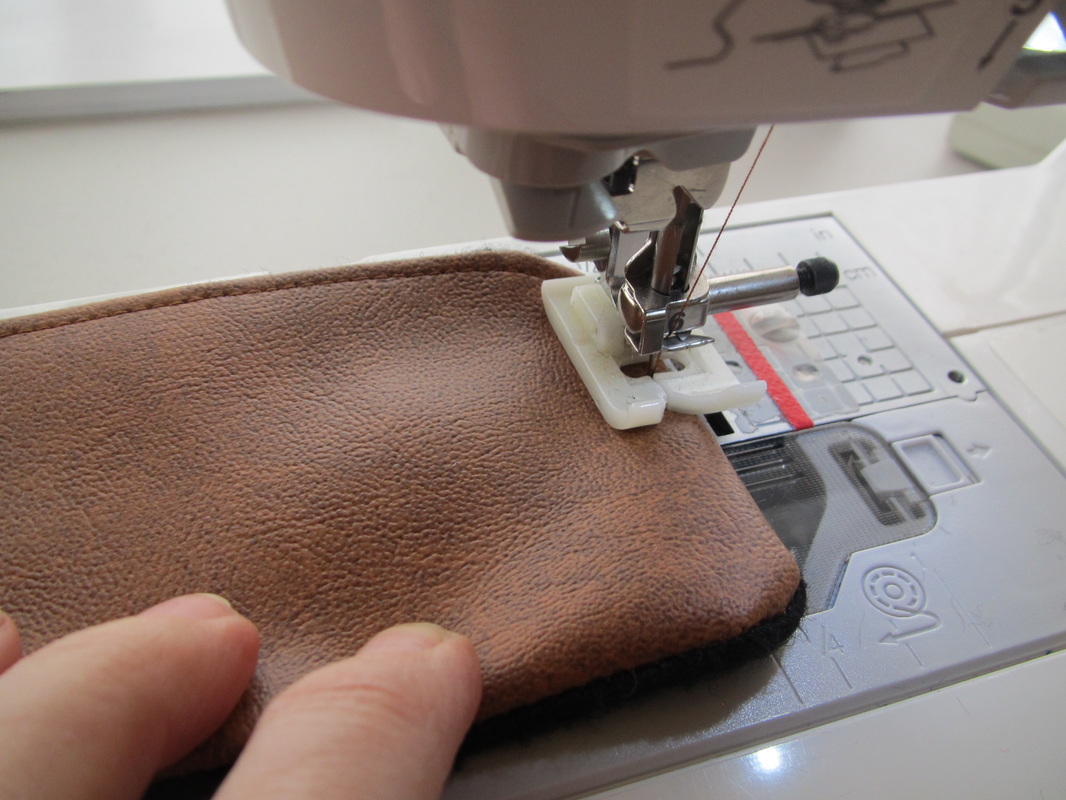
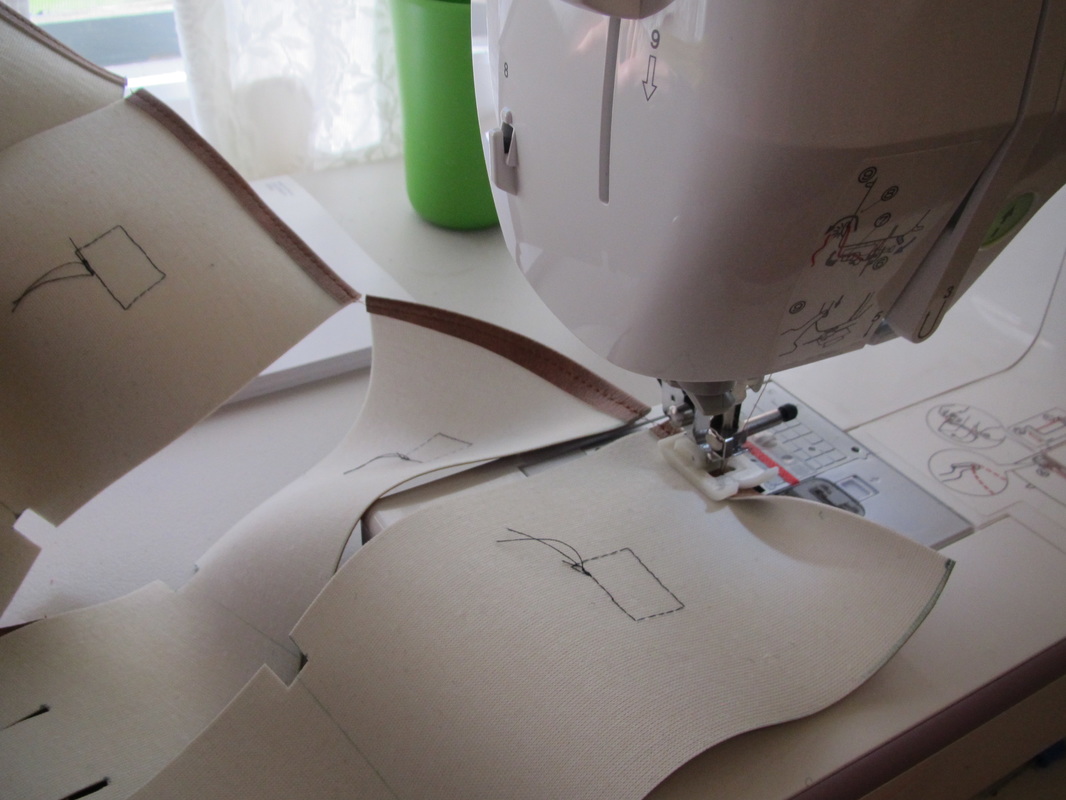
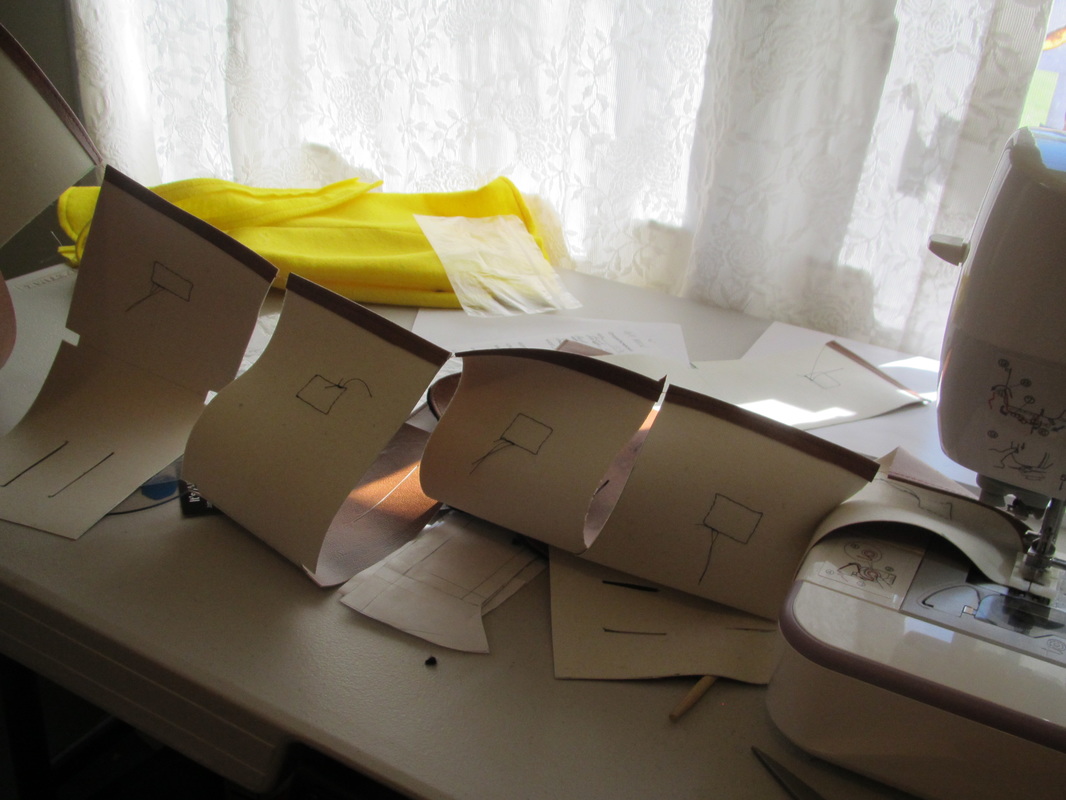
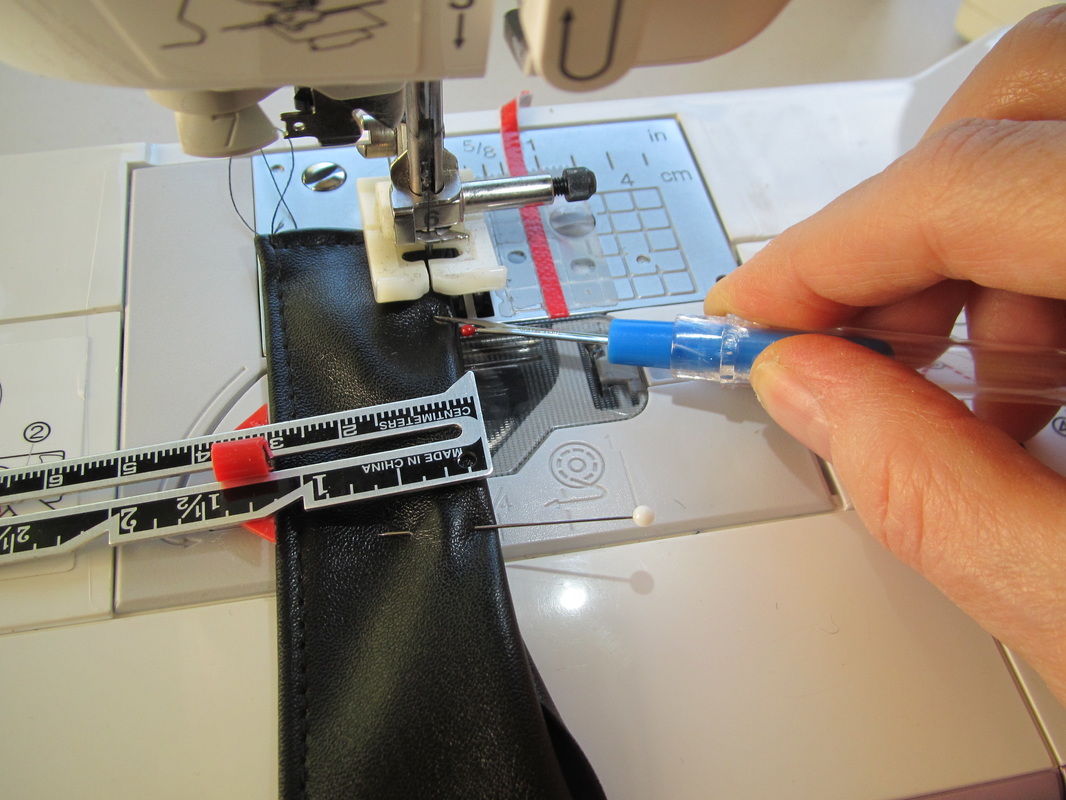
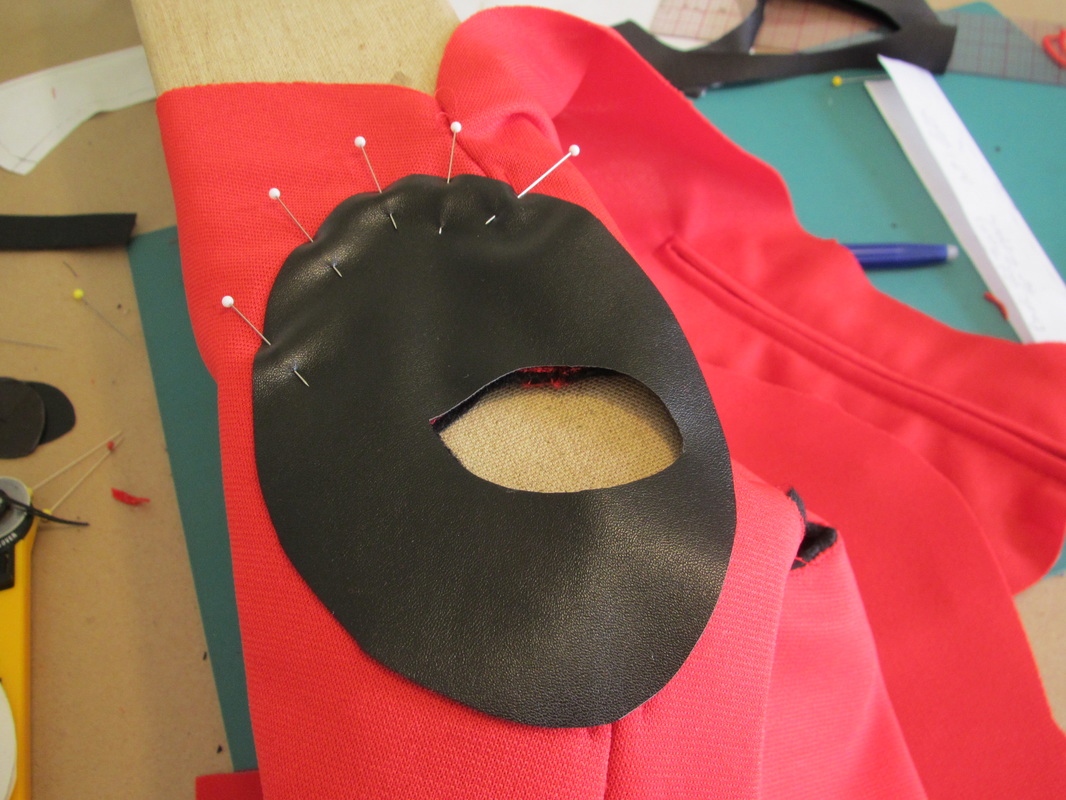
Then there are the robotic over sleeves, that took quite a while to work out.
Picture
Picture
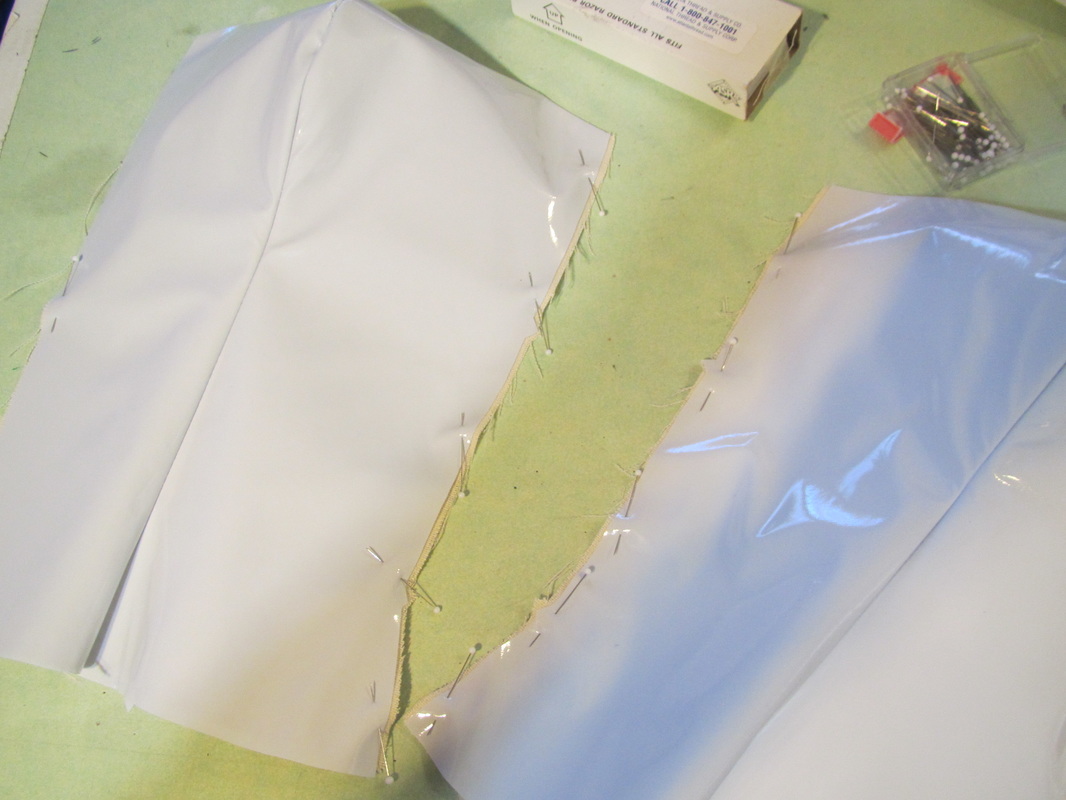
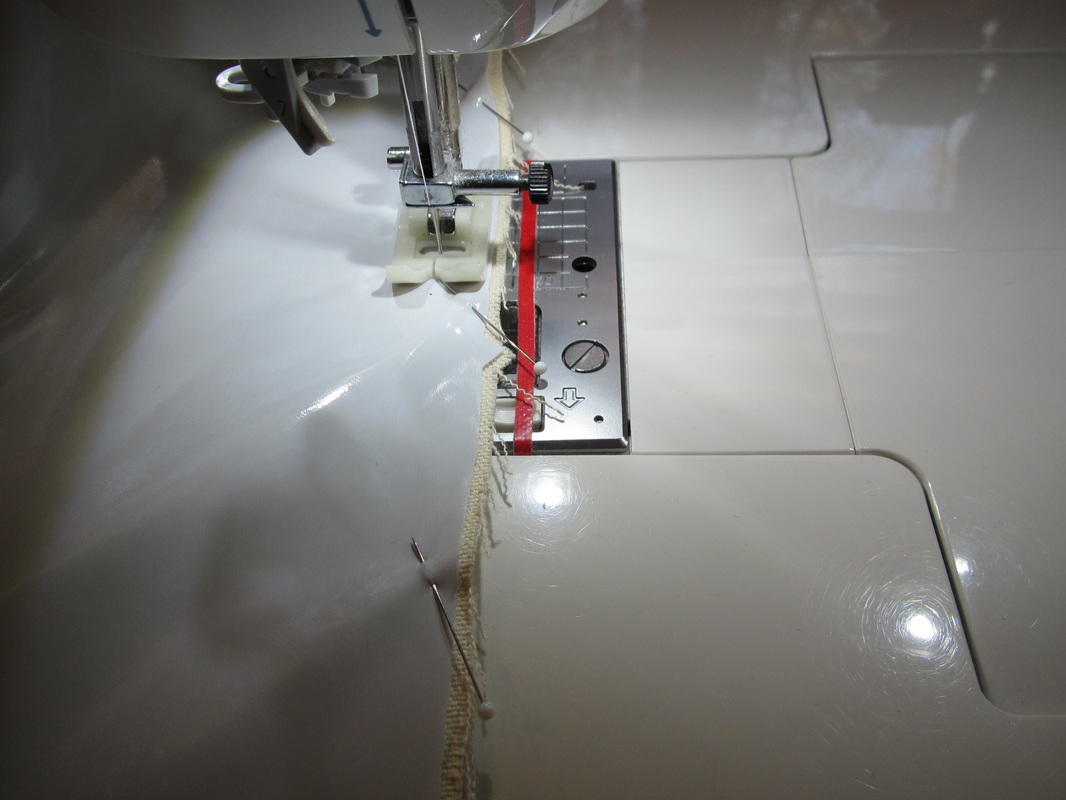
The shoulder dart and curve of the whole shoulder being the main headache.
Picture
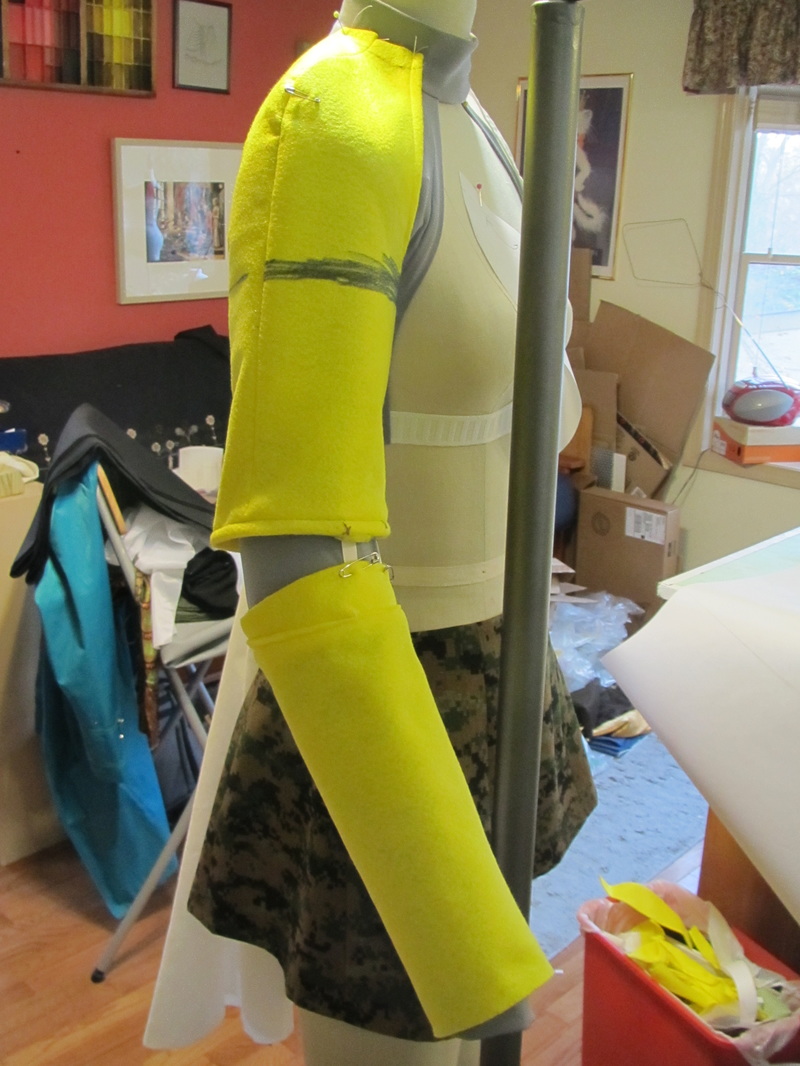
But, getting the hinging correct took several iterations. 
Picture
They are a bit long for me, but I have short arms for average. And it is always easier to shorten something than lengthen it.
Picture
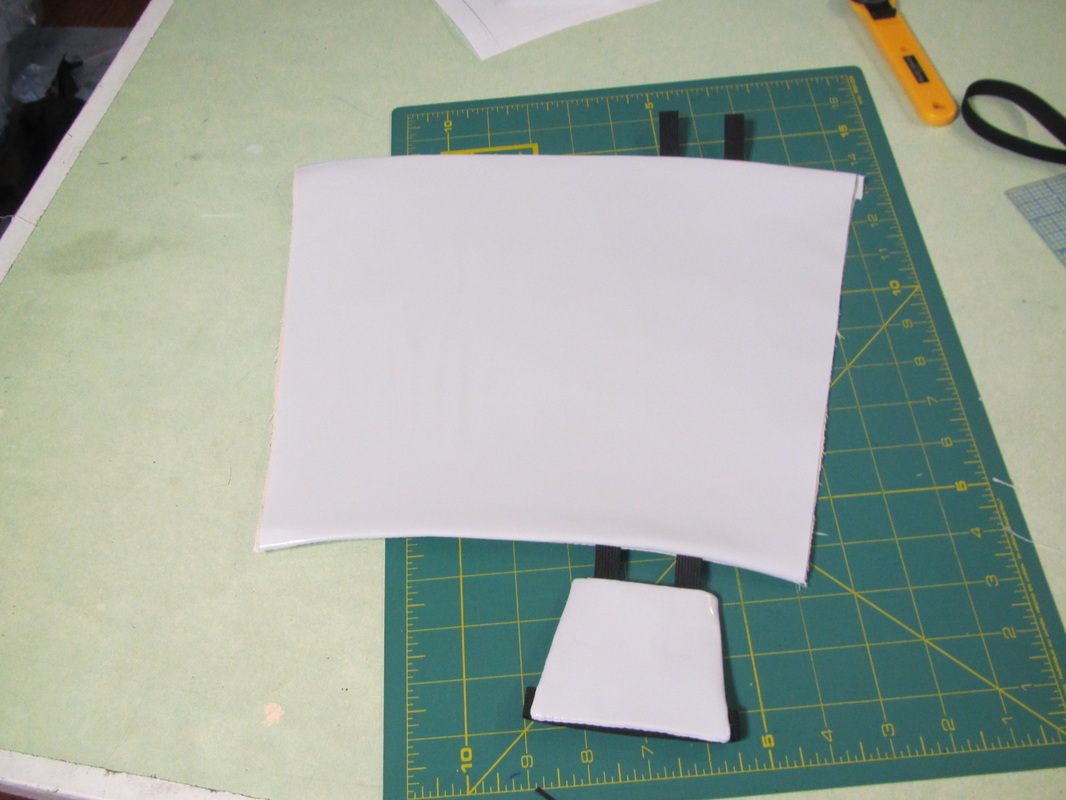
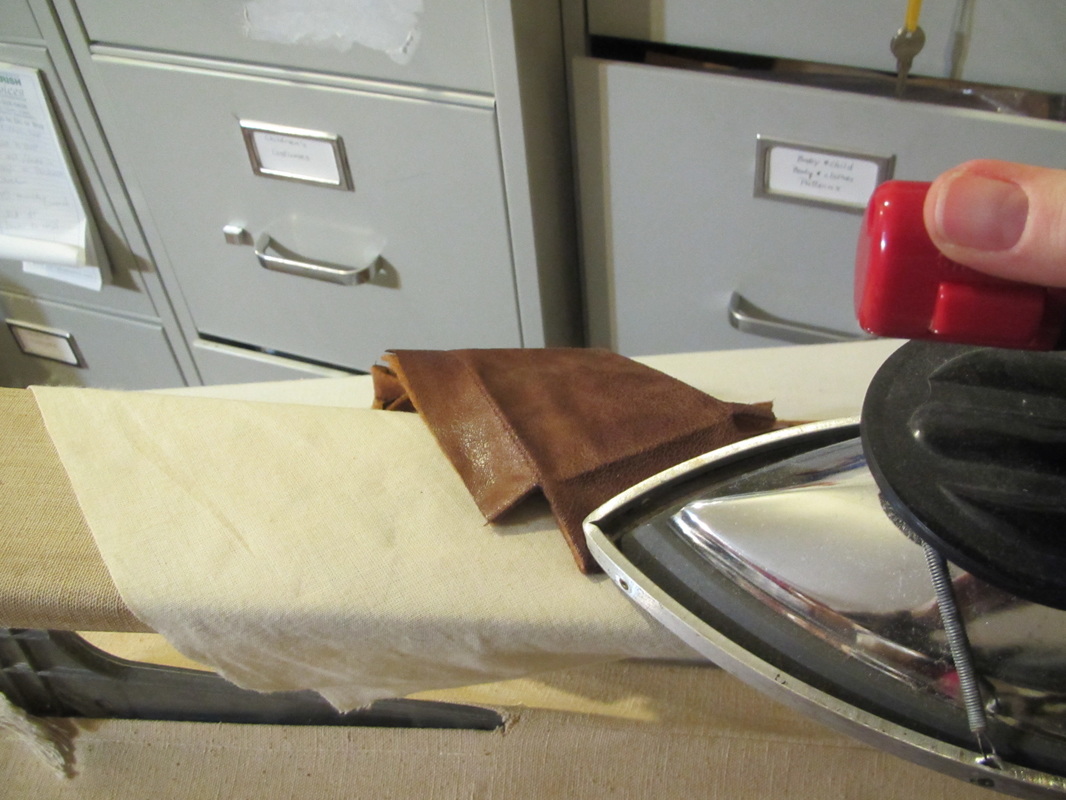
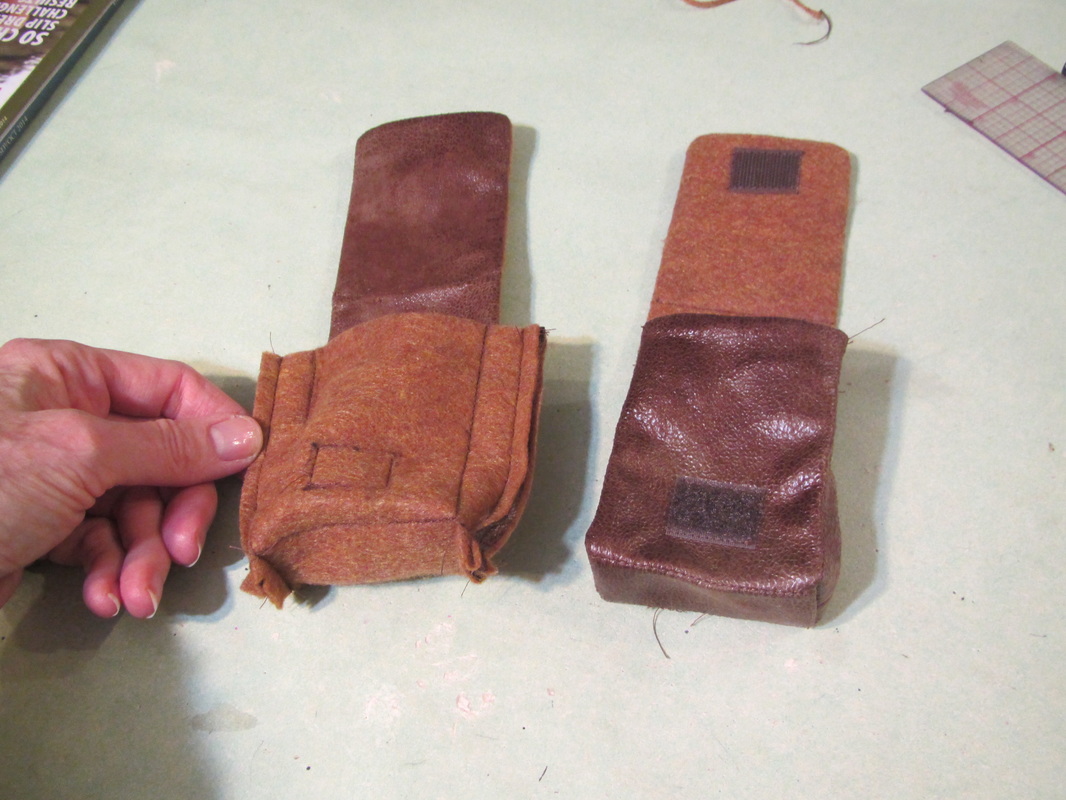
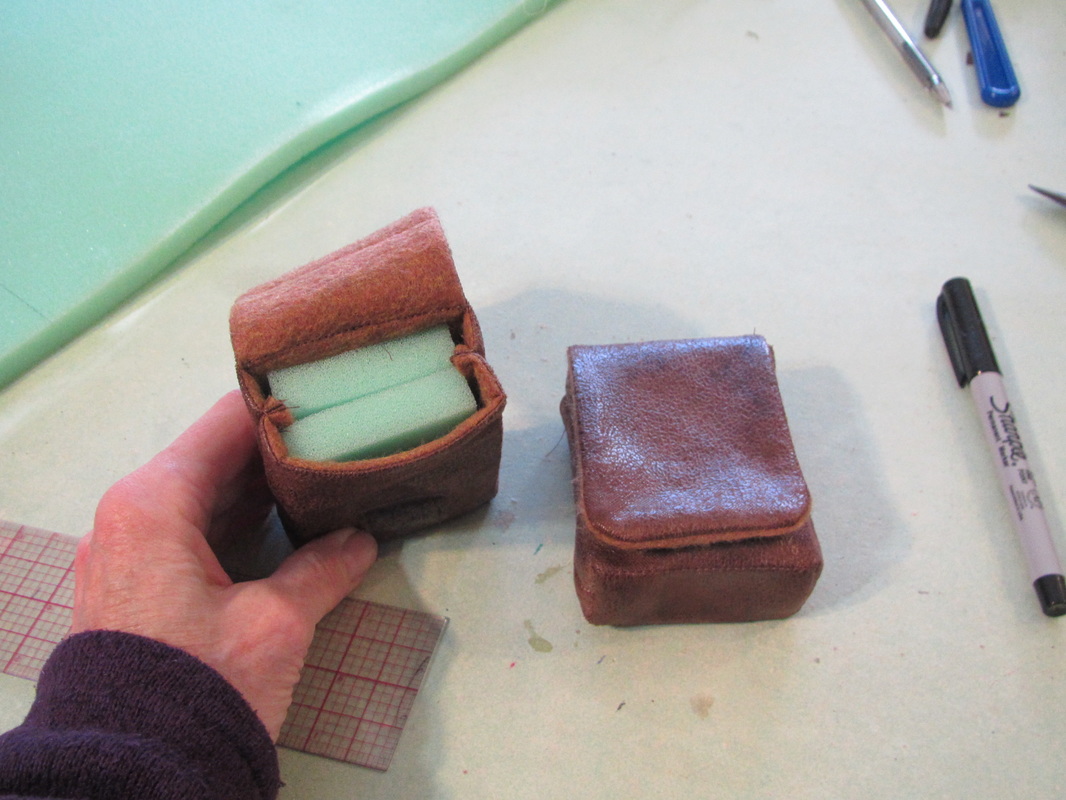
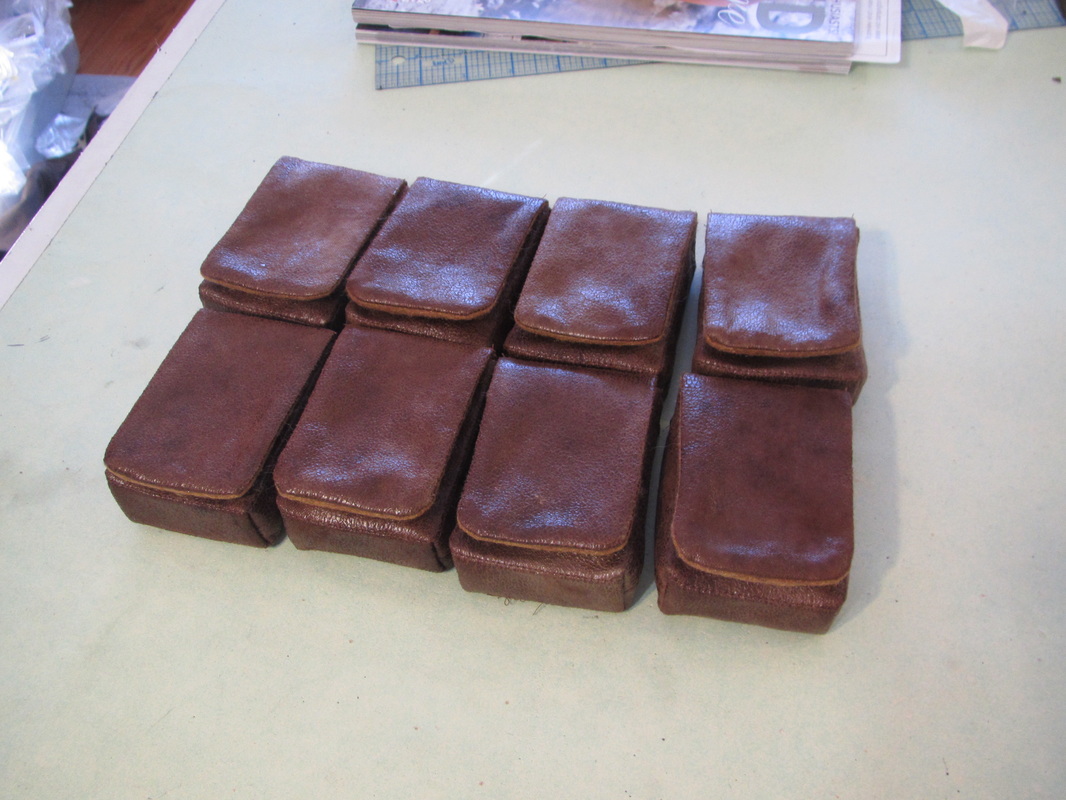
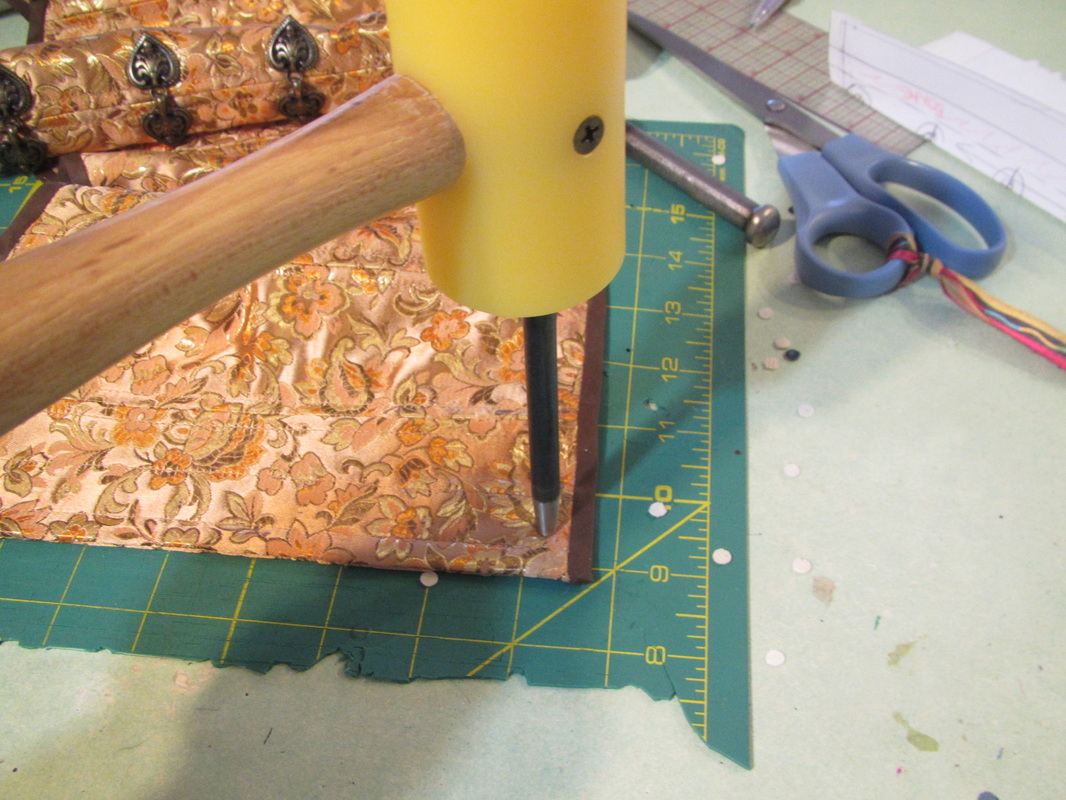
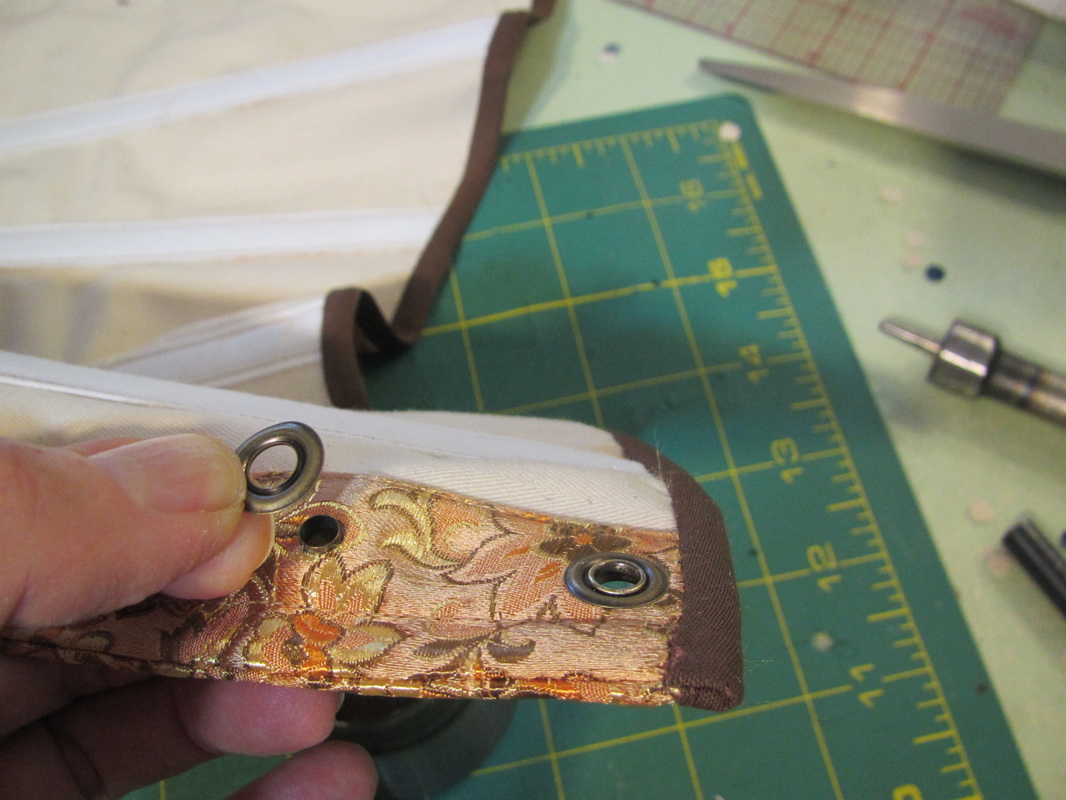
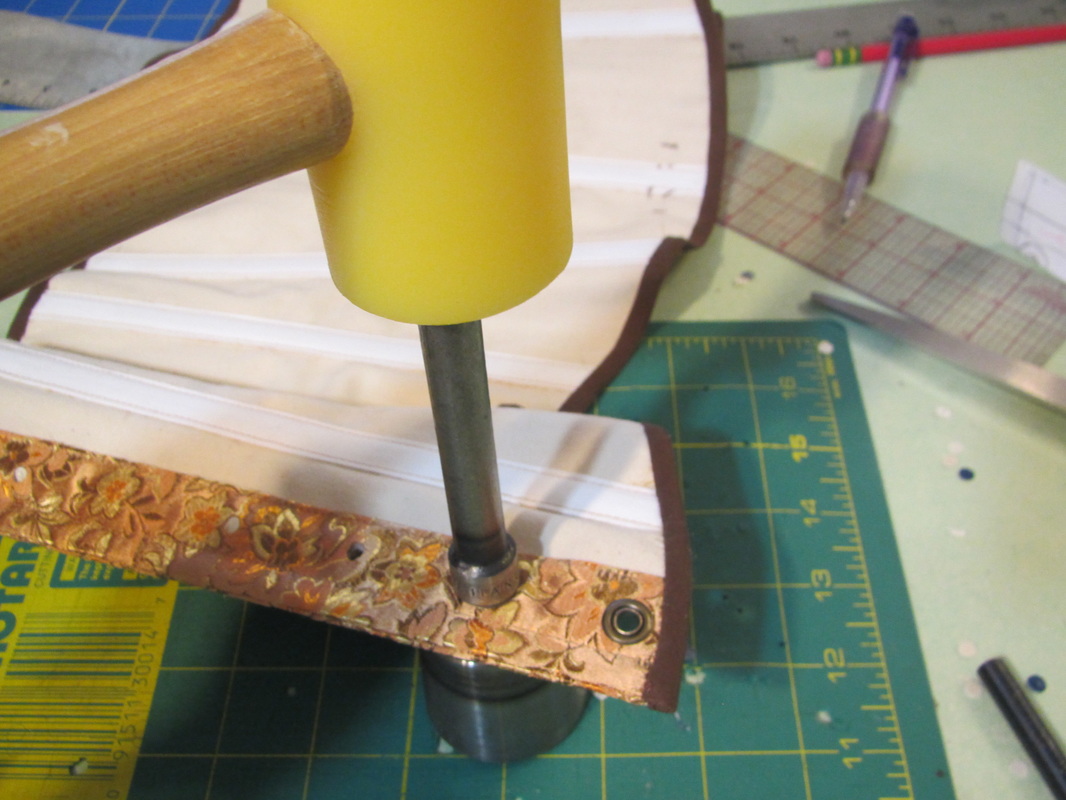
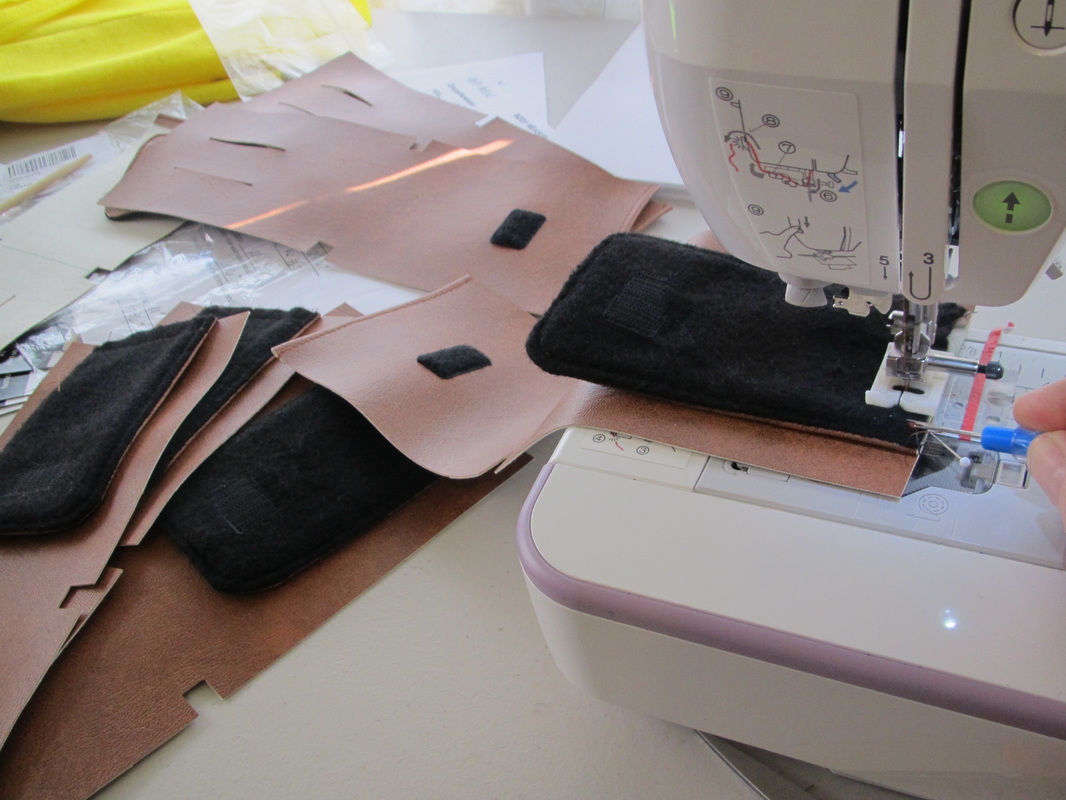
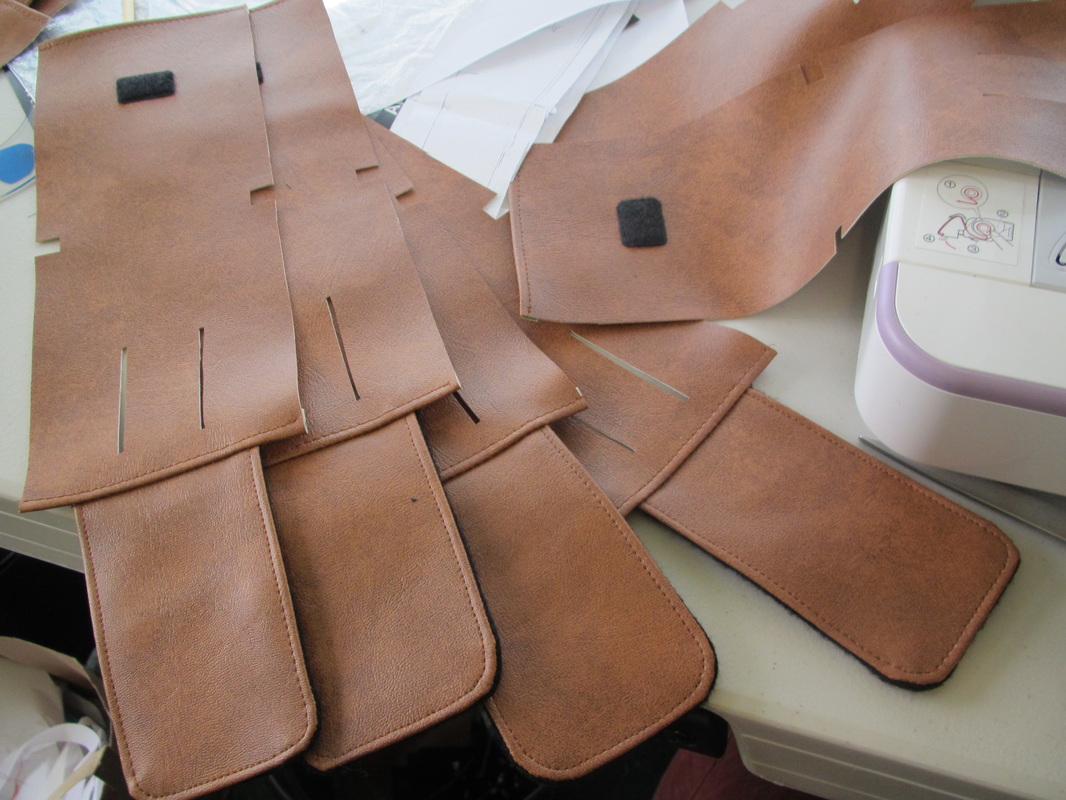
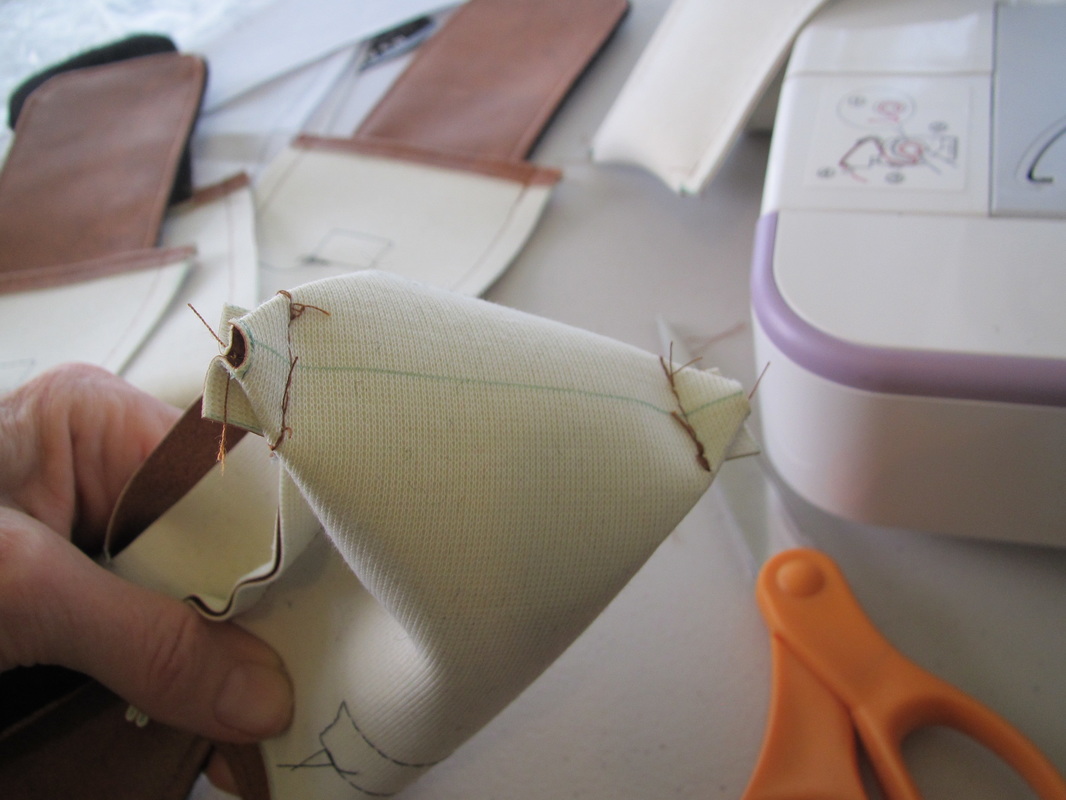
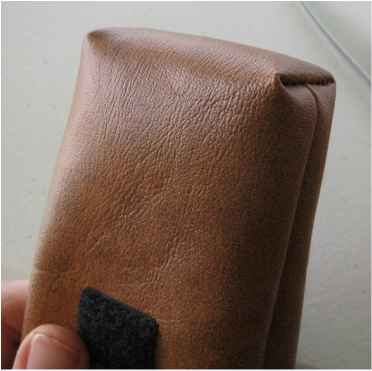
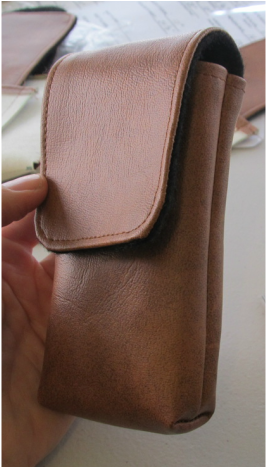
Don't forget the pouches ... I seem to be specializing in these recently and will blog about them in the very near future.
Picture
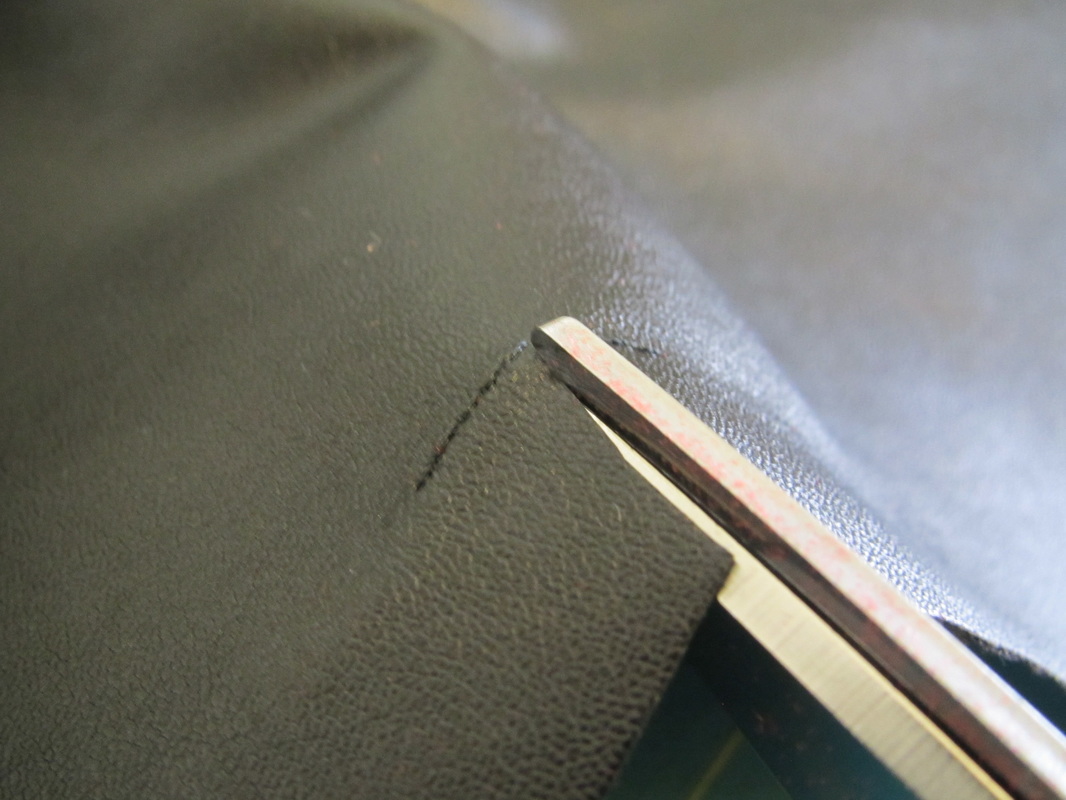
This pattern uses craft foam for some of the embellishments. I always use the official Foam Glue. It works best for sticking the foam to fabric and to itself. But, I wanted to use some acrylic gem stones as well, so I need to run some tests.
Picture
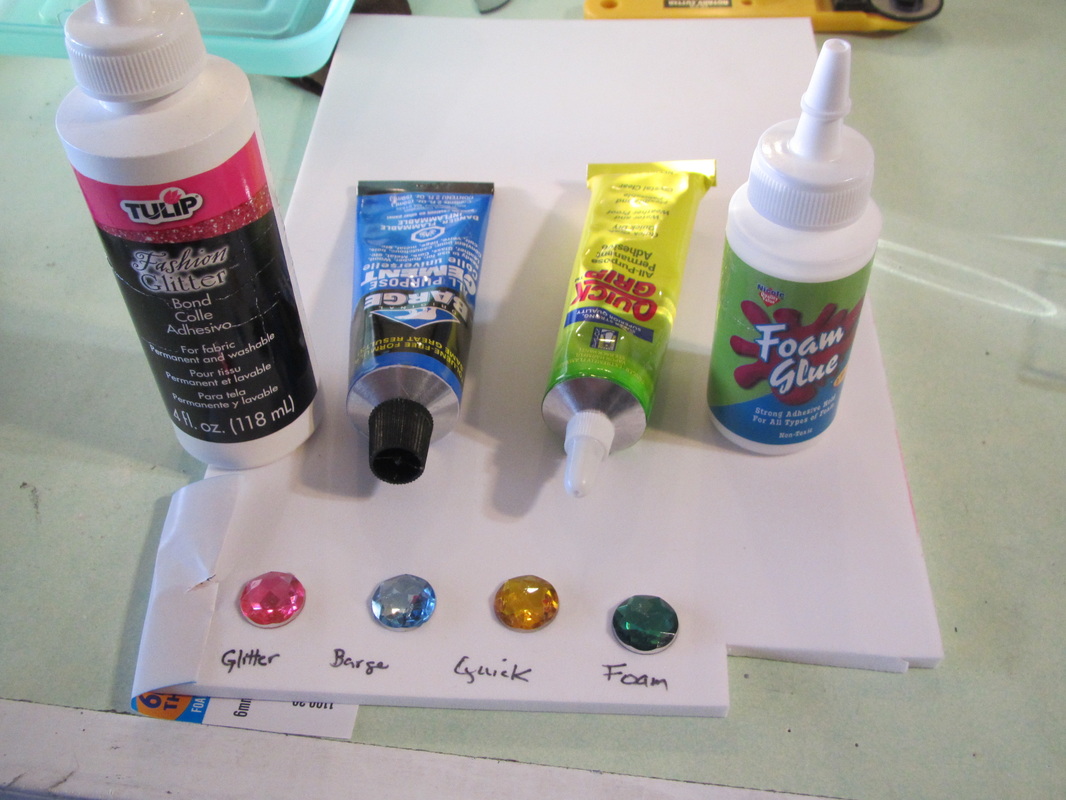
Here are the four glues I tried. All four worked well as glue. Those stones adhered securely to the craft foam. But the Barge Cement and the Quick Glue dissolved the metallic back of the stones and they didn't look clear and pretty any more.

So, since I was using Foam Glue anyway, I stuck with it ... ha ha.
Picture
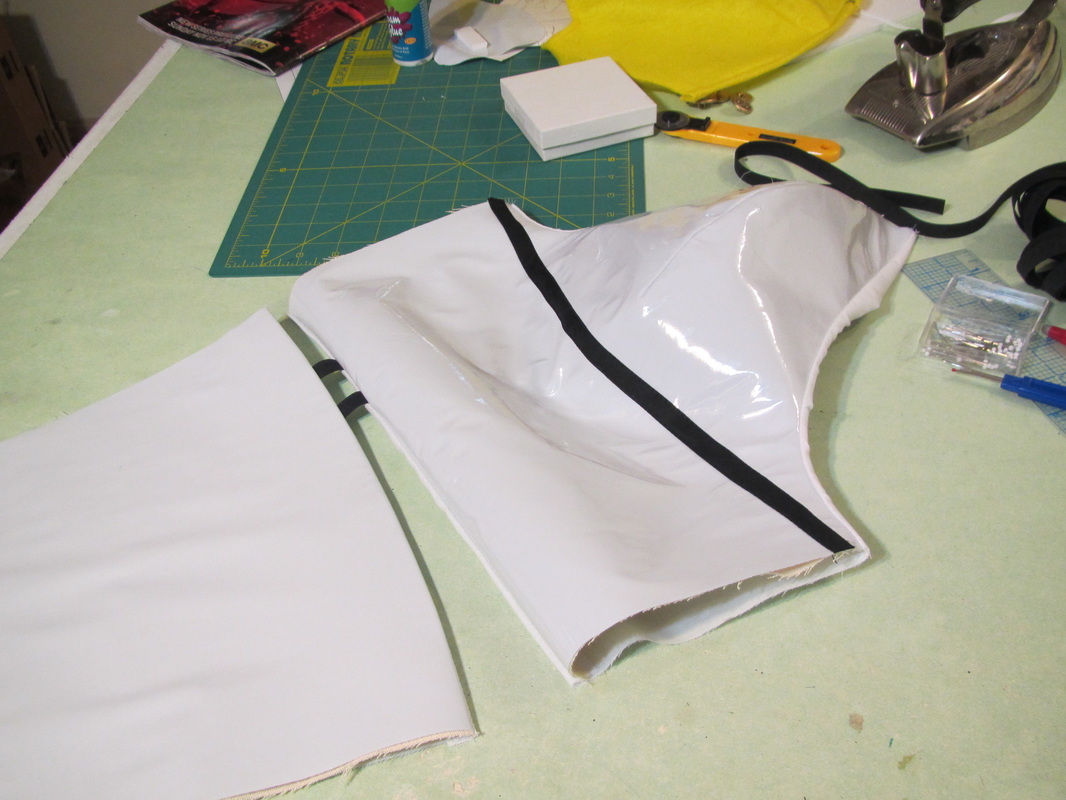
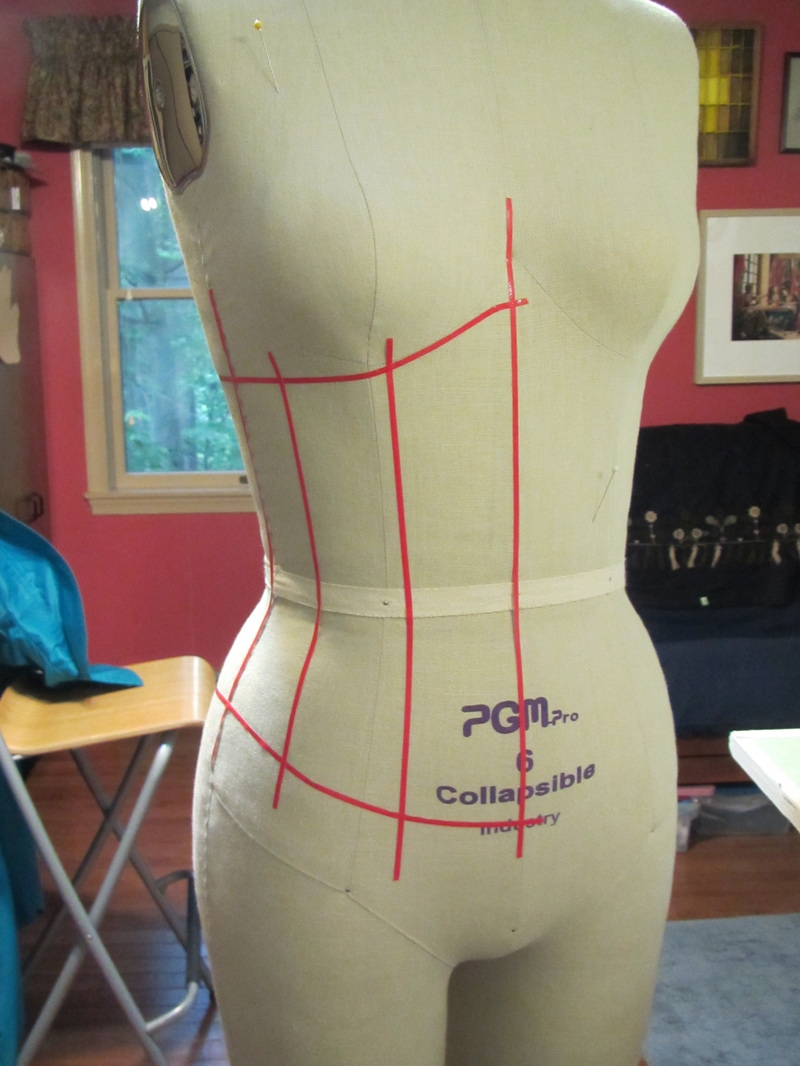
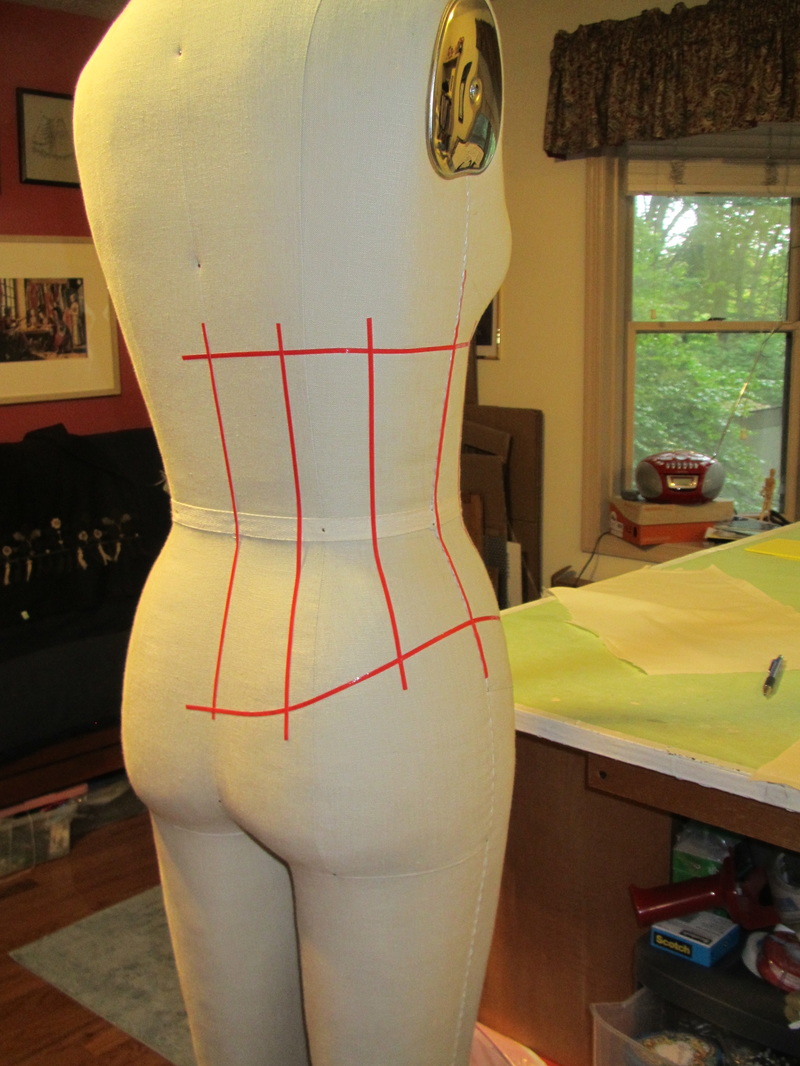
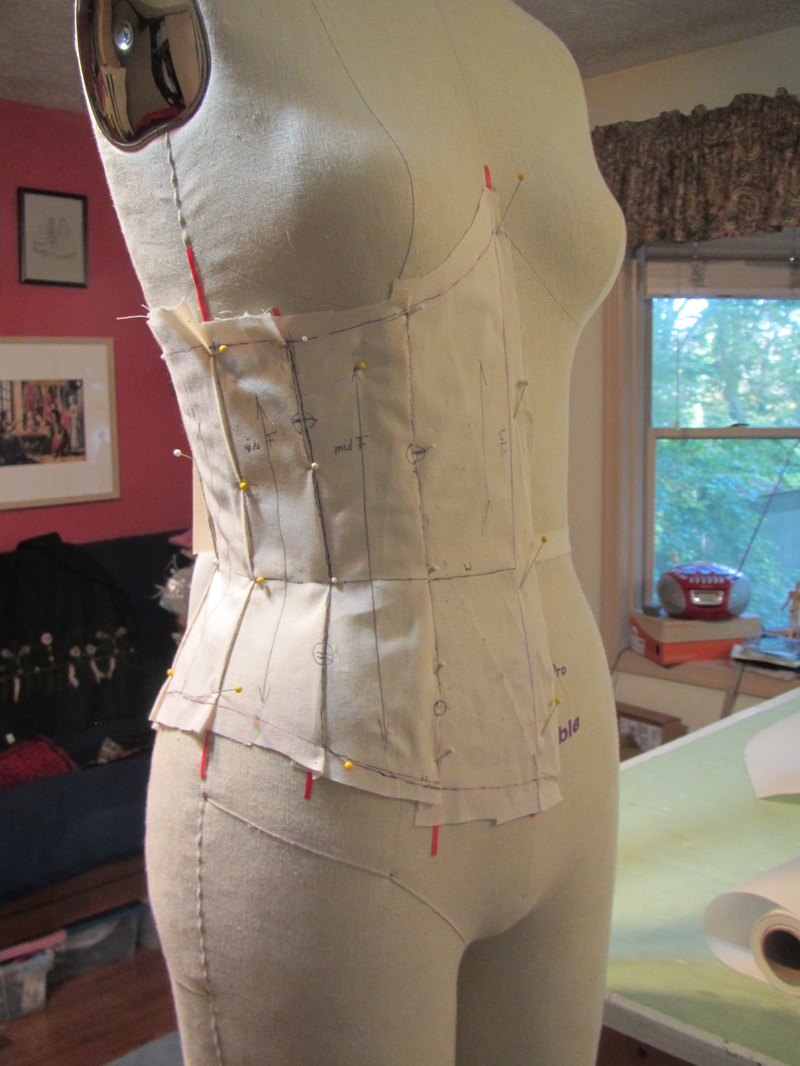
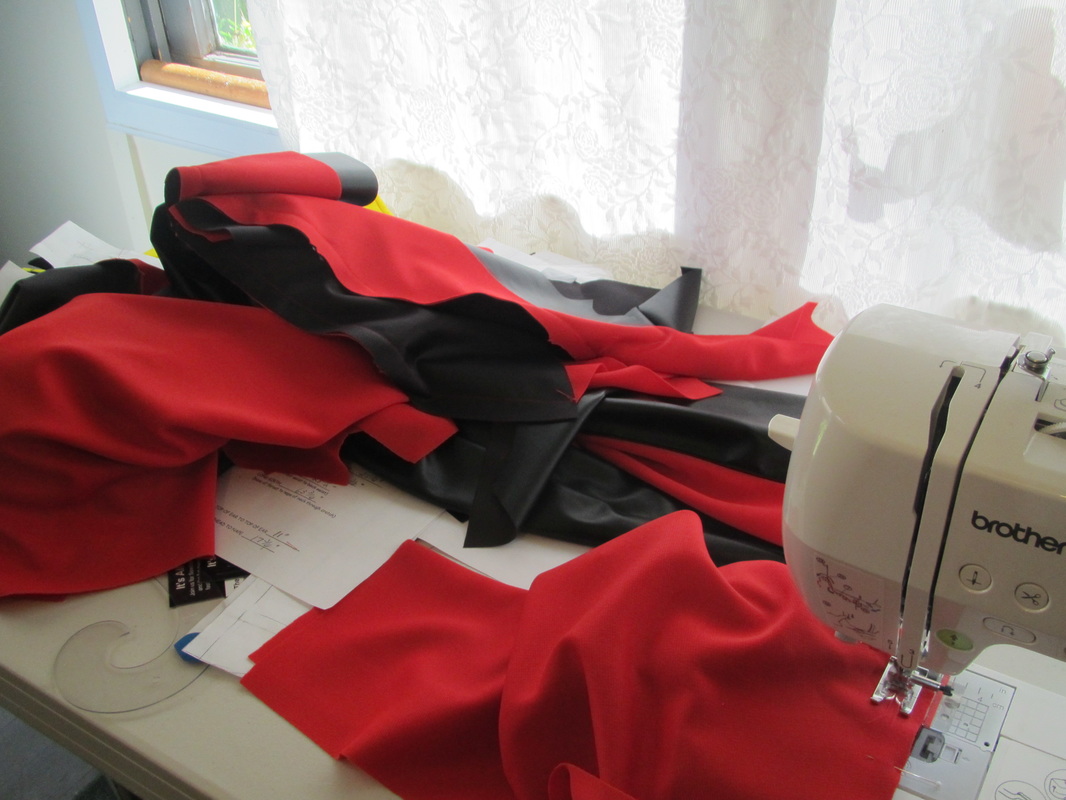
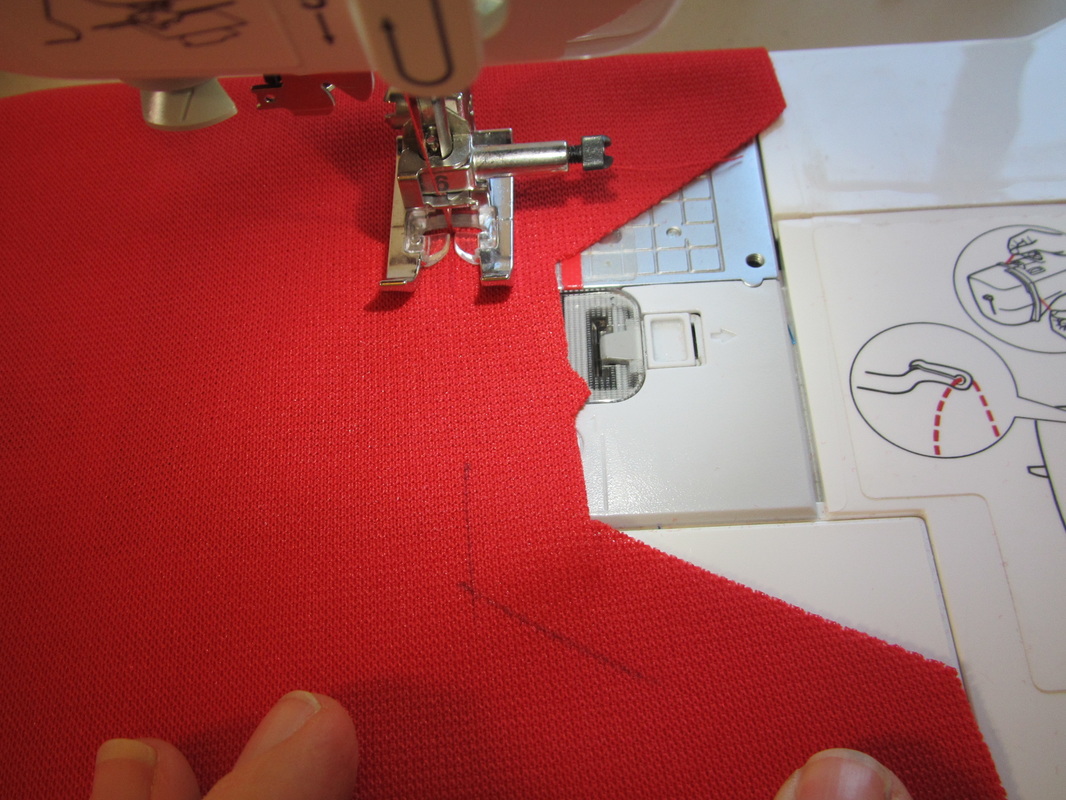
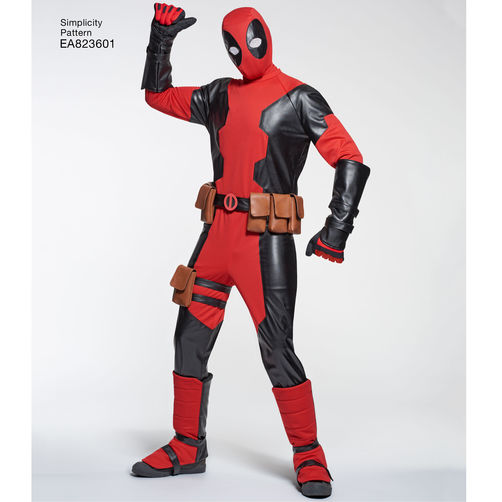
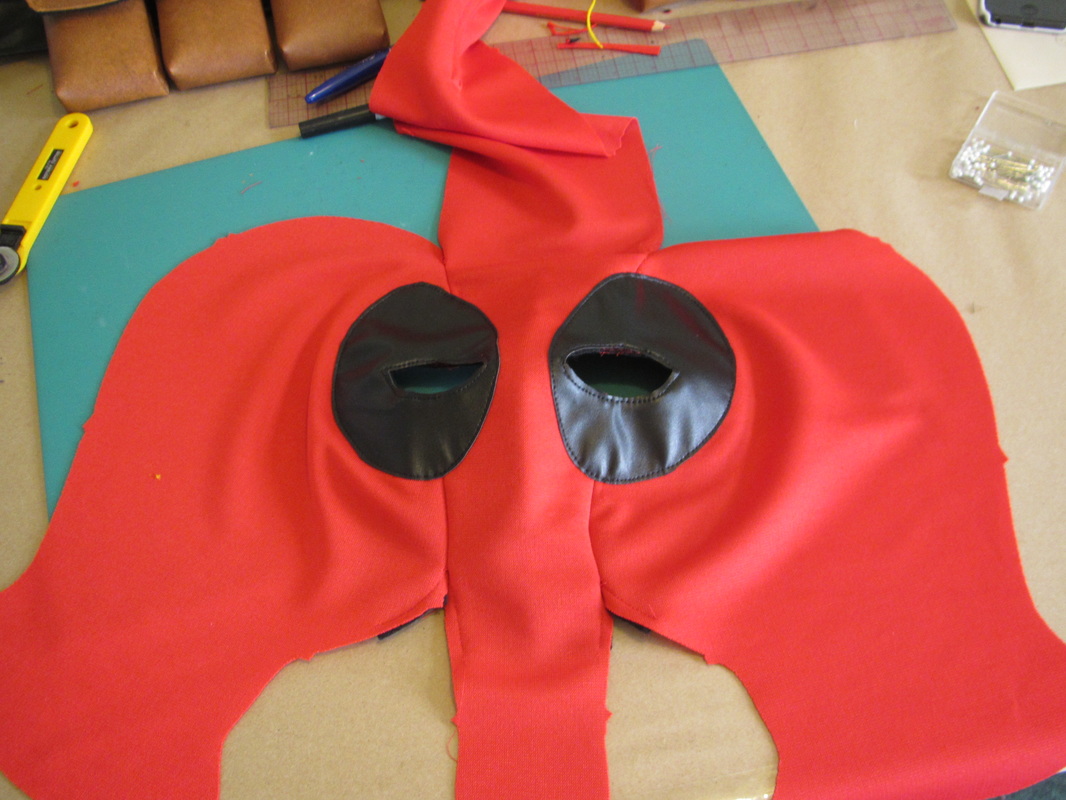
And I was surprised to see the cape and midriff top sewn in red on the pattern. This is what it looked like when I was finished with it.

Hmmm!

2 Comments

Pattern #8201 - Nasty fabrics ... or not! ...

6/23/2016

0 Comments

 
Picture
This fabric is very nasty to sew ...
Picture
This one is not. AND they are both vinyl.
Picture
When sewing with vinyl always use a long machine stitch. And if the vinyl is sticky use a Teflon foot or tissues paper over the sticky fabric. Tear it away when done.
Picture
To keep the interfacing and the outer fabric together when sewing the long shoulder dart on the separate outer sleeve or any dart for that matter. Baste from the apex of the dart down the middle ... remember LONG STITCH.
Picture
Then when the whole unit is folded for sewing, the fabrics stay together down to the apex of the dart ... that red dot.
Picture
Comme ça!
Picture
I have constructed things to avoid hand sewing as much as possible, but there are a few places where it is just needed. Hand sewing vinyl is tricky ... use LONG STITCHES.
Picture
The final seam for each arm section is saved for last.
Picture
This is the easiest construction. The raw seam is exposed inside the sleeve, but it is super easy to fit the sleeve tighter, if wanted.
Picture
Although there is some icky sticky turning right side out to do.
Picture
And remember to press ... carefully with a pressing cloth. See the difference between the pressed and unpressed section.
Picture
But this really nice looking fabric is a dream to sew on. It is quite thin though, so I lined it all with felt for body.

Joann's carries it. I love this fabric for all sorts of things, even doll clothes because it is so thin.

Picture
To avoid too much pinning, this is vinyl after all, I hold down and trace the pattern pieces for cutting.
Picture
I do use pins at the every edges to hold a few layers together to speed up cutting.
Picture
The felt came out really uneven after cutting it stacked in several layers. So, I am lining up all the pouch pieces and drawing on stitching lines to make sure they all come exactly out the same.
Picture
Like this.
Picture
Velcro is applied first.
Picture
And the first seam is joining the layers at the rounded flap.
Picture
They require "V" clips so the edge turns smoothly.
Picture
I want these pouches to have very crisp edges so I first stitch through both layers where all the folds will be.
Picture
Then press those folds and ...
Picture
and do the final, very easy, assembly.
Picture
They need to be fill up, but instead of just stuffing them with fiberfill or paper I want the filling to have square edges. Half inch foam will work perfectly.
Picture
I supposed a single 1" piece would work, too. But, 1/2" is cheaper and easier to cut.
Picture
Done ... YAY!
0 Comments

Basic Corset Seams, Boning and Grommets

6/23/2016

2 Comments

 
Picture
Here is the plaid view for my new corset pattern. If you read my previous blog about this pattern you will know that I originally planned for the front to have angled seams, but then changed the design so all the seams are straight and the curves balanced. This makes matching the plaid easier and fitting easier.
Picture
So, today I am going to show you how I put together a corset. This is just the sewing bits, not fitting. But, fitting an under bust corset usually isn't too tricky. Especially if you get a friend to help.
Picture
Even though when the corset is finished all the seams will end up being 1/4", the pattern has 5/8" to start off. This is for fitting. Think about it. This corset has 11 seams. If each 5/8" seam is let out so it is only 1/4" (the desired finished seam allowance) that gives you about 8 extra inches to work with ... not bad.
Picture
After you have sewn the seams for the last time (assuming you changed them once or twice), they should be trimmed down to 1/4". I think a rotary cutter and ruler is the easiest and most accurate way to do this.
Picture
Picture
It was hard to see the stitching line through the ruler with this black fabric and black stitching, so I drew over the stitches with a white pencil to make the stitching visible.
Picture
Next, press the seams open.
Picture
And then the bone tape is to be sewn over the seam allowance. Proper bone tape, that can be obtained from any on line corset supplier, is exactly the correct width to just cover an 1/4" seam and a tiny bit more.

For this denim corset, the topstitching is very important and visible, so I want to do all the stitching on the denim (outside) of the corset. It HAS to be perfectly centered.

Picture
So I use pins exactly through the seam line ...
Picture
through to the center of the bone tape.
Picture
Then I can stitch from the outside and be sure to catch both sides of the bone tape inside.
Picture
To really look like jeans, I used gold colored thick topstitching thread.
Picture
But for the other corsets I stitched the bone tape on from the inside. I carefully pinned it in place so it will be well centered, too. But, if it is a tiny bit off, it won't be noticeable with the printed fabric used on the other corsets.
Picture
The open edges of the corset (the back for all but the leopard print on) need to be finished according to the pattern. Then the binding can be applied.

This pattern calls for packaged binding, but it would be super nice to cut your own ... maybe from the same fabric as the corset is made of.
Picture
Anyway, I apply the bias tape, opened up with a 1/4" seam allowance to one side first. I will hand finish it later.

This way I can wait as long as possible before sliding the boning into the bone casings. It's just easier to work on a corset the longer you wait for the bones.
Picture
And, very important ...

Before applying the bias to the other edge, make very sure the two open ends, the ones that will get grommets and be laced up, are exactly the same length. I always put the two sides next to each other and if one is longer, trim it to be the same.

Picture
Finished the back sides of the binding with a hand slipstitch.
Picture
And now it's time for the grommets!!!
Picture
If you can get your hands on a really good grommet setter ... DO. Go in with some friends to buy and share one ... totally worth it.

It will give you so much better results, not to mention you can use "00" sized grommets which are a tad smaller than the ones available in most fabric store ... a nicer size.

AND, the setter has a nifty and very good hole punch. You can see I save my old beat up rotary mats for a cutting surface.
Picture
The grommets are two sided. Make sure you get the right side on the right side, if you get my drift.
Picture
Then hammer away. A plastic or rubber mallet is recommended, but I used a regular hammer for quite a while ... don't tell.
Picture
Nice grommets!

Please let me know if you make this and it IS your first corset. That would be lovely to know. And PLEASE write in with any questions.

2 Comments

#8201 - NOT a corset ... a bustier!

6/22/2016

1 Comment

 
Picture
The top of this costume looks like a corset but, at least in my definition, is not. I call it a bustier because it zips in the back, it has a complete lining and I used plastic Ridgeline boning sewn to the seams of the lining instead of using bones inserted into bone tape sewn over the seams of the outer fabric. Basically it is made like a modern special occasion dress.

I will explain why.
Picture
First of all I want to show all the separate parts of this costume. It starts with the little A-line skirt and the midriff top that is designed to be worn with a strapless top.
Picture
Next is the strapless top ... AKA bustier.
Picture
And the sectioned over-sleeves which stay on because they are attached to a band collar.

I thought it would look good to wear black gloves, but the stylist in charge of photography thought otherwise. So ... you can do whatever you think is best!
Picture
Now here is reason one for my choice to make this a bustier instead of a corset.
Picture
This camouflage view has appliqués sewn to it. These need to go over the seams.
Picture
Which would make it really difficult to impossible to sew boning over those seam allowance. And I don't want topstitching from the boning showing on the outset.

BTW, the bright pink interlining, is because I had this on hand, it was the perfect weight and when the costume is finished it won't matter what color it is.
Picture
Instead, I sewed plastic boning to the seam allowances of the lining.
Picture
Also, this shiny vinyl is a super pain to work with. It's difficult to iron.

Big reason number two for not construction this like a corset with bone tape stitch to the outside.

Picture
It can be done, but carefully with a pressing cloth.
Picture
Great care needs to be taken when pinning this vinyl. Use very fine pins and try to only pin in the seam allowance area.
Picture
A Teflon foot is HUGE help. If you don't have one, place thin tissue paper over the vinyl and stitch through that. Tear it away when finished.

Note that my cut edges don't exactly match up. You have to go by feel. Smooth out the lumps and if the edges don't match ... so be it. 

Picture
The white vinyl bustier also has a decorative element that goes over all the seams ... that strip of black bias tape. Because it is impossible to mark on shiny vinyl like this. It just wipes off. I mark on the interfacing and (with a very long stitch) machine sew on that line.
Picture
That stitching will be visible on the right side ...
Picture
becoming the guide for applying the bias tape decoration.
Picture
This bustier is lined like an evening dress. The lining is attached to the outer fabric along the to edge.
Picture
Which I under stitch like you would a facing. This give a nice top edge and ensures the lining stays rolled to the inside.
Picture
After the bottom edges are basted together, the bottom hip band is sewn on, which serves to finish the bottom of the bustier, too.
Picture
Now the zipper ... OY!  I can't think of a worse fabric to sew a zipper into.

First press the seam allowance back ... 

Picture
Carefully with a pressing cloth.
Picture
This is a separating zipper, so one side is applied first. Sew the zipper only to the seam allowance first. It is probably going to be too long, so make sure it lines up at the bottom, where the hardware for joining the two sides is. And allow it to extend off the top.
Picture
Then for a second stitching fold the pressed seam allowance back and stitch the zipper with the seam allowance down. 

For this and all stitching on vinyl use a LONG STITCH.
Picture
Here the zipper has extended off the top. You can see it is clipped. It will get tucked in. 
Picture
I whipstitch the seam allowance to the lining and through to the interfacing of the bustier to hold the zipper firmer and keep it from gapping if the bustier fits tightly.
Picture
The second side needs to be VERY CAREFULLY pinned so the two sides match up when zipped.
Picture
It is sewn the same way. In this photo you can see how the extended piece of zipper from the first side is tucked in. I did this by hand at the same time as whipstitching the seam allowance down.

When there is a will there's a way!!

1 Comment

Corset for Beginners! New Pattern

6/16/2016

2 Comments

 
Picture
Sometimes the simplest things take the longer to get right than you would think. Simplicity asked me to design an under bust corset ... AKA a waistcincher for the fashion section of the catalog.

​Cool!

Picture
There was talk of it being in the "Learn to Sew" line or the "Amazing Fit" line. Any pattern in the Learn to Sew line has to have a number of specific skills that will be learned. So, you see the list of things I proposed in the sketch above.
Picture
At the same time, we were discussing styling options. Some of my experiments here. This is always a struggle for me. Especially when a pattern is going in as a fashion pattern. The people at Simplicity have access to fashion trend reports that I don't. So, I often need guidance from them.

And, honestly, I do tend to lean towards the costumey look ... ; -)
Picture
They suggested that one view should zip up in the front. I thought that was a very nice idea. Especially since I didn't want to deal with a front closing busk in this pattern, because it is supposed to an easy corset.

So, I revised my original sketch here.


Picture
They asked for a plaid corset which I have drawn here.  If you notice, at this point the plaid corset is the one with the zipper. But, the in the final pattern the denim corset gets the zipper.

Deciding to use a plaid fabric made me rethink the shape of the seams. All the sketches above have straight front seams that angle inward at the bottom. I like this look because I think it is flattering. BUT, plaids are much, much easier to match up if the seams curve in the same way, in the same place. So, I set out to make a very balanced and basic corset.
Picture
Picture
I love style tape. It can just be moved and moved and moved until the look is perfect. I wanted a graceful up and down curve at the bottom and a nice lift in the center of the bust.
Picture
Then I can fit on the muslin and start refining the pattern.

And start making samples ... to be continued.

2 Comments

DEADPOOL - Straps and Pouches

6/6/2016

2 Comments

 
Picture
DEADPOOL has a lot of pouches and straps, and they need to be made out of vinyl/faux leather/pleather. Of course, real leather would be super nice, too ... I kind of did them factory style.
Picture
Here are all the pieces with a little bit of sewing. You can see I put all the Velcro pieces on before doing anything else. These are going to be functional pouches.
Picture
This is much, much, much stiffer vinyl than I prefer working with, but it had the best color, so I had to make it work. You can see how my sewing machine skipped around a bit (not enough to matter) And see the distinct "V" clips I put in the corners, so the flaps would have smooth rounded corners.

PLEASE NOTE, WHEN SEWING VINYL, PLEATHER OR REAL LEATHER, USE A LONGER STITCH LENGTH THAN YOU WOULD WITH REGULAR FABRIC.
TOO MANY CLOSE TOGETHER HOLES CAN MAKE THIS KIND OF FABRIC RIP.
Picture
I'm using the upholstery weight vinyl on one side and felt on the other. The only way to make this lie flat is to edge stitch, again with my life saving Teflon foot.
Picture
A simple 1/4" hem along the top edge with with Teflon foot.
Picture
I sew it all in a string, then cut apart. I think this is even faster than using the automatic cutter built into the machine. Plus it looks cool ... like I'm a factory.
Picture
Now the flaps can be attached to the other side of each pouch.
Picture
Plenty of Partially comPleted Pouches ... Perfectly Pleasing!
Picture
I made the pattern for these pouches really simple for two reasons. First there are so many to make and second, vinyl can be a pain ... depending on the kind you end up using. The fewer seams the better.

So. now the sides are sewn up.
Picture
Picture
And the squared off bottom is simply created with a fold and short cross seams at each corner.
Picture
Picture
Picture
Here is what it looks like from the outside.

Neat bottom.

Functional Flap.

And slits in the back for the straps which is what I will talk about next.

Picture
Here they are ... a lot ... 

This vinyl is much nicer and softer than the other, but STILL any vinyl is somewhat stiff and sticky, so these straps are made with topstitching from the outside, instead of sewing inside out and then turning.
Picture
Vinyl CAN be ironed. But do some testing on scraps to be sure of how hot to make the iron and to determine if a pressing cloth is needed.
Picture
A pressing cloth is usually a good idea. Vinyl can melt onto an iron if you are not careful.
Picture
When I make topstitched straps I always stitch the middle, simple folded side first. Then the open double folded side.
Picture
Picture
If I feel the layers are slipping which will make the strap twisted, I will use strategically place pins and the point of a seam ripper to help guide all the layers evenly under the presser foot.

Hope gives you some ideas of how to handle sewing with pleater and real leather.


2 Comments

DEADPOOL - a little sewing

6/2/2016

6 Comments

 
Picture
As promised ... albeit a little later than intending ... some pics of me sewing Mr. Deadpool.
Picture
Seeing these photos brings back memories of my 3 months in Santa Barbara. That was a great place to be for the winter, but I am STILL picking up the pieces of my life since returning home ... taxes, doctor's visits, driver's license renewal, and OY!!! the GARDEN ...

but, I digress. I am going to show you how to deal with all the corners between the red and black sections. How to make them clean and even.

Picture
Picture
The side of the corner the dents inward needs to be reinforced first.
Draw on the back side of the fabric the exact stitching line and machine stitch along that line about one inch on either side from the corner.

Picture
Then you can clip all the way into that corner without worrying that the fabric will tear or run.
Picture
This allows the corner to open up to fit the outward pointing piece it needs to be sewn to.
Picture
To look like this.
Picture
Picture
Some of the corners need the black stitched clipped and some need the red. This means you will be flipping the piece back and forth while working, sewing sections at a time.
Picture
There are a lot of corners here.
Picture
To make all the seams lie flat, I edge stitched on the black pleather close to the seam line. Pleather doesn't press very well ...
A Teflon foot makes ALL THE DIFFERENCE ... it just glides over the vinyl instead of sticking and pulling.

Picture
Speaking of sticking and pulling ... the eye patches on the mask are tricky, too.
Picture
You can see, I pinned the liv'n' daylights out of it. Those are really, really thin pins that do not leave a visible hole. I found I needed this many pins to keep it from twisting and buckling. The Teflon foot is my friend again.
Picture
Also, only sew as much of the mask as it needed for the eye patches. It is much easier to work with the piece as flat as possible.

There will be another DEADPOOL sewing post soon ... really ...

6 Comments

    From Andrea 

    I am a commercial pattern maker who is now "sewing over 50"!
    I love to sew and hope to encourage others to come back to sewing.
    The water is fine!!

    Archives

    May 2019
    April 2019
    March 2019
    August 2017
    July 2017
    June 2017
    May 2017
    April 2017
    March 2017
    February 2017
    July 2016
    June 2016
    May 2016
    April 2016
    March 2016
    February 2016
    January 2016
    December 2015
    November 2015
    October 2015
    September 2015
    August 2015
    July 2015
    June 2015
    May 2015
    April 2015
    March 2015
    February 2015
    January 2015
    December 2014
    November 2014
    October 2014
    September 2014
    August 2014
    July 2014
    June 2014
    May 2014
    April 2014
    March 2014
    February 2014
    January 2014
    December 2013
    November 2013
    October 2013
    September 2013
    August 2013
    July 2013
    June 2013
    May 2013

    Archives by Subject

    To search for blog posts in specific categories, use the drop down menu above by hovering over the word "Blog"

    Enter your email address:

    Delivered by FeedBurner

    RSS Feed

    Andrea Schewe participates in Amazon's associates program.