The program is call Planet Money and you can find all the segments to listen to by clicking on this link. Planet Money T-shirt project.
Since I wrote about the history of the T-Shirt, I was very interested to hear this series of radio broadcasts about the economics of making a T-Shirt now a days. If you listen to NPR you may have already heard some or all of this broadcasts. 
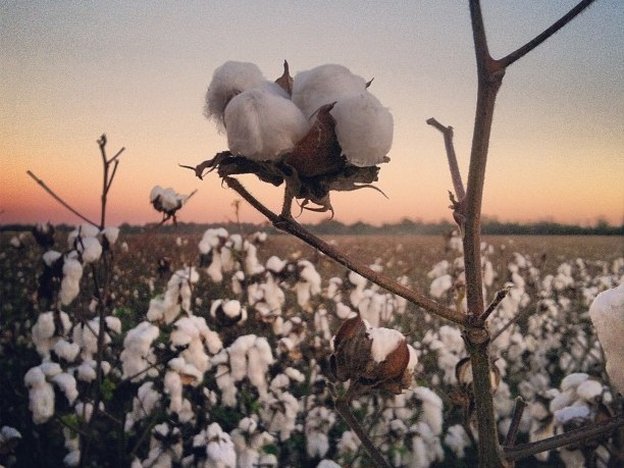
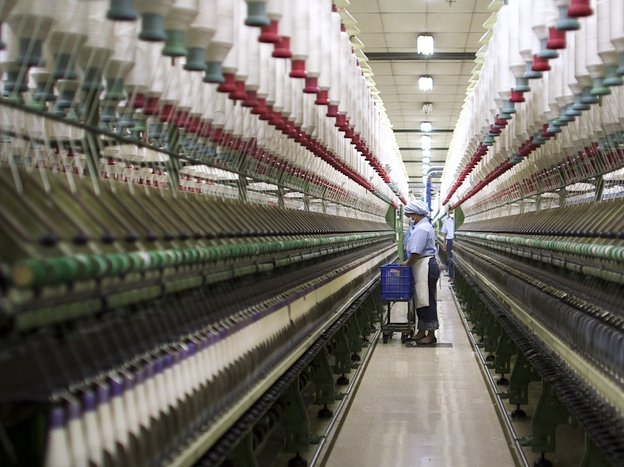
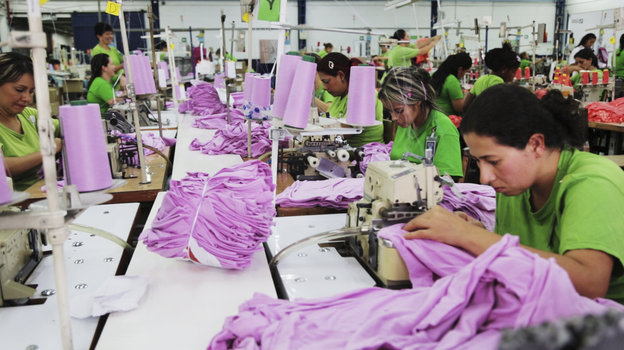
They take you from the cotton field to see the spinning and weaving being done to the sewing factory. The program is call Planet Money and you can find all the segments to listen to by clicking on this link. Planet Money T-shirt project. It is really well done, I think you will enjoy it.
0 Comments
I finished it and wore it downtown to meet up with a friend of mine. I got a couple compliments and one lady wanted to know where I got it ... Ha Ha! Said it looked like snow balls all over me. Here is the winter white wool I bought for the collar . I was going to make loops and buttons for the closure, but the more I though about it, there are already so many little white bumps that looks like buttons, I didn't thing that would look very good. I decided a big exposed zipper would be the best choice. I wanted the zipper to run up into the collar so I ordered two zippers 30 inches long. I wasn't sure which color would be best. It was cheaper to order 2 zippers from Wawak than it would have been to go to the store AND they have a much better selection. I ordered them Tuesday afternoon and they were on my door step at 11 am the next day. WOW You can see the white zipper is too white, so grey it will be. Now I can cut the collar out of the real fabric. After one side of it is sewn to the neckline, I can put in the zipper.
Now all that's left is to close everything up with mostly a bunch of hand stitching. I pinned and slipstitched in inside of the collar. And don't you hate it when you are trying to sew fast and the thread gets into a horrible knot! Then, I Hong Kong finished the inside edge of the collar, graded the seam and then carefully stitched in the ditch from the outside. This reduced the bulk of this very thick fabric because some of the seams allowance was going up into the collar and some was going down below the seam line.
I love this jacket, a lot. These are the containers where I keep my supplies of hooks, eyes and snaps. I like to have an assortment of all the sizes in silver and black on hand. So a couple days ago I places an order to replenish my stock, like I recommended in a previous blog about buying in bulk. BUT ... when I looked closely at the assorted snaps that arrived I quickly noticed that the snaps on one card were different. LOOK! ... what's wrong with this picture?? They are missing the hole. The ones on the left are the new version and the ones on the right have the all important hole in the center to help line up the two sides of the snap. I was taught to put a pin through the center of the snap to make sure the top and bottom line up perfectly. This photo from the blog Of Dreams and Seams shows how a pin through the snap will also help hold it in place while sewing. I started wondering if I was in the minority in learning this way, but found a bunch of tutorials. Here are two samples, a photo tutorial and a video tutorial showing just that. Click on these links below. Cindy Rice Designs - snap tutorial MonkeySee - snap video tutorial I went to the Dritz site and wrote in to let them know I did not like this new kind of snap. You can too, if you feel the same way. Here is the link ... Dritz contact page. This does work. Do you remember when the straight eyes from hook and eye packages disappeared for a while? They only had looped eyes for at least 5 to 10 years, but enough people complained and they brought them back. I LIKE the straight eyes. During this time you could still buy the straight eyes by the gross from professional suppliers, which my sister Theresa did for her custom business I can only imagine a bunch of executives (who don't sew!) sitting around a board table trying to figure out how to reduce costs saying, why are we giving the customer twice as many eyes as hooks? ... grrrr Now you get 14 hooks in a package with 7 looped eyes and 7 straight eyes. I still wish they came the old way with the hooks and eyes sewn to a card with same number of hooks, straight and looped eyes for you to choose from. If you notice, the person who owned these hooks used a few straight eyes AND a few looped eyes. You need both depending on the application.
They just don't make sewing notions the way they used to, do they? I always make some of the gifts I give. And since we are approaching the biggest gift giving season of the year, I thought I would give you some suggestions. Scarves are so fashionable these days and I don't think it is possible to have too many, small, large or in-between. The easiest thing to do is get a beautiful piece of fabric, silky or wooly, cut it to size and hem it. Pull threads on either end to make fringe or sew on some purchased fringe. I particularly like this lace fringe. Simplicity carries it in white. But, if you look around I bet you can find it in other colors. This is a great way to use remnants of expensive fabrics that are too small for anything else. You can even combine some remnants if they work together. Now if you want to do something a little different. I just happened to have 2 scarf patterns in Simplicity's line right now. This red one below doesn't even require sewing. The scarf around my neck in this photo was made with the pattern for view A of pattern #1790 above. Aren't scarves magic? No one would ever know about the crummy shirt and jeans I'm wearing below that polka dotted scarf! And if you want to knit a scarf ... you can always just buy some beautiful yarn and knit a long rectangle ... Check out this really good video with instructions for a total beginning knitter. OR if you are skilled check this one out. Thanks to my friend Jonatha! When you hand make a gift, not only are you giving love along with your gift, you or your lucky recipient will have something one of a kind.
I made some progress today on the jacket/sweater I'm making from that fun bumpy, dotty Korean fabric I got on Ebay. Read my previous post to refresh your memory. I'm kind of making this up as I go along with the help of the Vogue pattern I bought (see previous blog). I'm wondering if I would have had fewer problems if I had made a muslin, but this fabric is so different, I'm not sure if a muslin would have helped that much. A big problem for people who make sewing patterns and for people who use them is fabric choice. A pattern will behave very, very differently depending on the fabric used to make it up. And this is something the pattern companies have no control over. I don't have enough fabric to make the entire jacket out of the dotty fabric, the collar is really big. So I've gotten some winter white wool for the collar, which will look better anyway I think. But since I want to reshape the collar, I thought I would make up the jacket without the collar and then make a muslin or two to work out the collar before cutting into the wool. This is an unlined jacket so I plan to use a Hong Kong finish on all the seams so it will look nice inside when I take it off. So, after I cut out the back, sleeves and two different fronts, I will put Hong Kong finishes on the shoulder seams before I sew them. But before doing anything, I measure in 5/8" from the cut edge for the seam allowance and cut off the big white bumps to reduce bulk in the seams. And I need to cut some bias out of a good quality polyester lining fabric. I machine baste the other seams so I can try it on and OH BOY it is WAY TOO BIG! Looks like a tent. But, this is much better than way too small. I said that I was following my mother's advice to cut things large, if unsure. But the funny thing is I think I will be cutting off what I added on. And even though I moved the sleeve seam up 2 inches from where the pattern had it, it is still too low, in my opinion. I baste it up again, try it on and it is STILL too big, so I pin up the shoulder seam one more time and trim it off once more time. Now its' time for the bottom band. I want a better finish that just a hem at the bottom, so I cut a 6 inch wide strip of fabric and give it a Hong Kong finish along one side. It is a bit shorter than the bottom width of the jacket itself which means I have to stretch it to fit, but I like the look of the body of a knit garment easing into a smaller hip band. After sewing the band on, I fold it up in half and stitch in the ditch to hold it up. It is now ready for a collar. See photo up at the beginning. And see the photo below for the inside. I love a good Hong Kong finish. Next time, the collar. I also have to figure out the front closing. I was going to make some special buttons, but maybe a big decorative zipper would be better. Need to think.
My name is Theresa LaQuey and thanks to my big sister, Andrea, I am going to do a bit of blogging here myself. Never have blogged before, but I hope it can inspire and amuse you. Although our mother was a costume designer and sewed for us all, it was Andrea who taught me to embroider, knit and finally to sew. I remember cutting out that first dress with her. I was just 10 years old at the time. It was a Barbie pink and white polyester trapeze dress and I wore it to the cast party of a summer time play we were in together. Little did I know what that would lead to. Andrea left for New York City at the end of that summer, and I dabbled in sewing for the next several years. I loved going to the thrift shops looking for vintage, but being a bit tall found getting a good fit challenging. I also used to get very upset when my vintage dresses would die from the fabric being old. It was at the San Francisco Mission District Salvation Army that I had an epiphany, I walked past a huge bin of old patterns. I thought to myself, if there are cool vintage clothes in this store, then there must be cool vintage patterns that bin! Here is when things got interesting for me. I found five patterns that I loved, 10 cents each and brought them home to my mother. She loved them so much that we ended up making most of them, a couple of dresses for her and a couple for me. I kept on digging through the thrift stores, garage sales and eventually on line. I now own approximately three thousand patterns. I loved sewing vintage so much that when I was nineteen I decided to start my own business making vintage style clothing. I sold to a few local stores and a few custom clients. But, I really needed training, so my mother encouraged me to enroll in the apparel design program at Diablo Valley College in the San Francisco Bay Area. I spent the next three years there, waiting tables forty hours a week to boot. It was fabulous and very tough. They would actually measure your hand stitches to make sure they were perfect. Several times a week you would have to turn in sewing samples while you were working on your projects. Having always been a rather lazy person, the thrill of competition overcame me. Laziness was set aside and I was soon slamming straight A's right out of the park. To give you an idea of what we studied there, my first year I did fashion art and textiles. Second year was construction, tailoring and fashion history. The third year was the best, flat pattern and then draping. I did modern styles and also vintage inspired styles. To make matters even better, I discovered and then became a member of the Art Deco Society of California. Perfect! An outlet for the things I wanted to create! After graduation, I was assistant at the San Francisco Ballet's shop, then assistant to a local couturier named Mark Jones. He was a lovely, brilliant and talented man who not only made spectacular gowns but taught me how to do the same kind of beading that was done in the Hollywood studios during the 1930s. After one year, he made me his partner because he liked my work and I had the knack of getting checks out of the clients. We happily worked together from 1989 until 1994, when we sadly lost him to AIDS. To this day I still sign his name in all of my designs. After Mark's passing, I tried to do manufacturing. I did a line of evening outerwear and some vintage inspired daywear, but I was still having to wait tables because the shops I was selling to were not paying me, I eventually threw in the towel. I decided to do nothing but custom work. This is where my big sister comes in again. In 1998 on a trip to New York City, Andrea suggested that I bring along my portfolio. She introduced me to Betsy Burger at Simplicity Pattern Company. I got to see the whole operation there and, what with being a pattern hound my whole life, I was in heaven. After showing my portfolio, she asked me what I could do for them and I said a dress for swing dancing. This was my first Simplicity pattern and it did rather well. After 10 years of struggling with brides and society mavens, I just can't emote what a happy turn this was. As I have said many times, thank you sis! (And thanks to all of my teachers at DVC, you made me do my patterns to a 32nd of an inch in accuracy, I think that sure helped). So this long yarn gets us up to the what I am doing now. I still do custom work for clients and also design for Simplicity. I have made everything from doll clothes and aprons to Steampunk for them. It is always such a wow! I work from my home basement in Oakland California, have a loving husband and a wiener dog who helps amuse the clients when they come for consultations. I also sing with a big band and at various festivals around the country, which leads me to the project that I will be sharing with you over the next month. Joe, (hubby) and I are going to London, England for New Year's Eve. Our friend, Alex Mendham is now the orchestra leader at the Savoy Hotel. He has asked me to sing a couple of numbers with the band. What to wear, what to wear! I have designed a fully beaded evening gown, perhaps the highest form of my sewing skills. So, as I trundle along on this project, I will post what has to be done to put up approximately 200,000 bugle beads onto silk. I hope you all get a kick out of the project.
Thanks, Theresa |
From AndreaI am a commercial pattern maker who is now "sewing over 50"! Archives
August 2019
Archives by Subject
To search for blog posts in specific categories, use the drop down menu above by hovering over the word "Blog" Andrea Schewe participates in Amazon's associates program.
|