
I made some progress today on the jacket/sweater I'm making from that fun bumpy, dotty Korean fabric I got on Ebay. Read my previous post to refresh your memory.
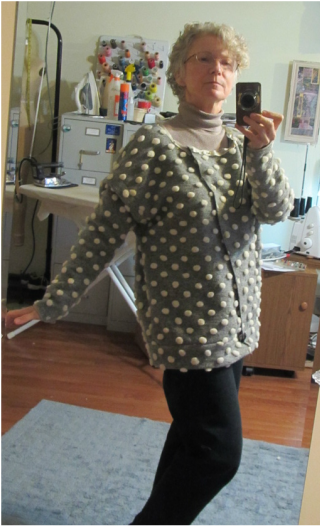
This is how far I got ... assembled, but no collar
I'm kind of making this up as I go along with the help of the Vogue pattern I bought (see previous blog). I'm wondering if I would have had fewer problems if I had made a muslin, but this fabric is so different, I'm not sure if a muslin would have helped that much. A big problem for people who make sewing patterns and for people who use them is fabric choice. A pattern will behave very, very differently depending on the fabric used to make it up. And this is something the pattern companies have no control over.
I don't have enough fabric to make the entire jacket out of the dotty fabric, the collar is really big. So I've gotten some winter white wool for the collar, which will look better anyway I think. But since I want to reshape the collar, I thought I would make up the jacket without the collar and then make a muslin or two to work out the collar before cutting into the wool.
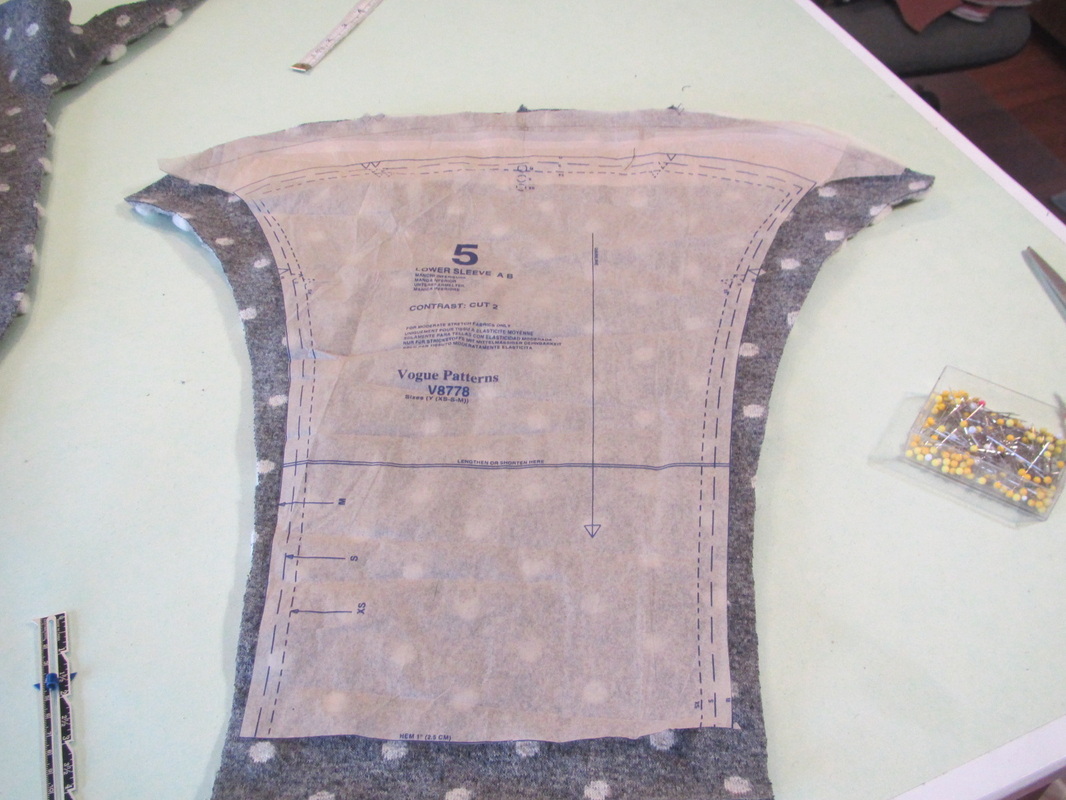
This is an unlined jacket so I plan to use a Hong Kong finish on all the seams so it will look nice inside when I take it off. So, after I cut out the back, sleeves and two different fronts, I will put Hong Kong finishes on the shoulder seams before I sew them.
I don't have enough fabric to make the entire jacket out of the dotty fabric, the collar is really big. So I've gotten some winter white wool for the collar, which will look better anyway I think. But since I want to reshape the collar, I thought I would make up the jacket without the collar and then make a muslin or two to work out the collar before cutting into the wool.
This is an unlined jacket so I plan to use a Hong Kong finish on all the seams so it will look nice inside when I take it off. So, after I cut out the back, sleeves and two different fronts, I will put Hong Kong finishes on the shoulder seams before I sew them.
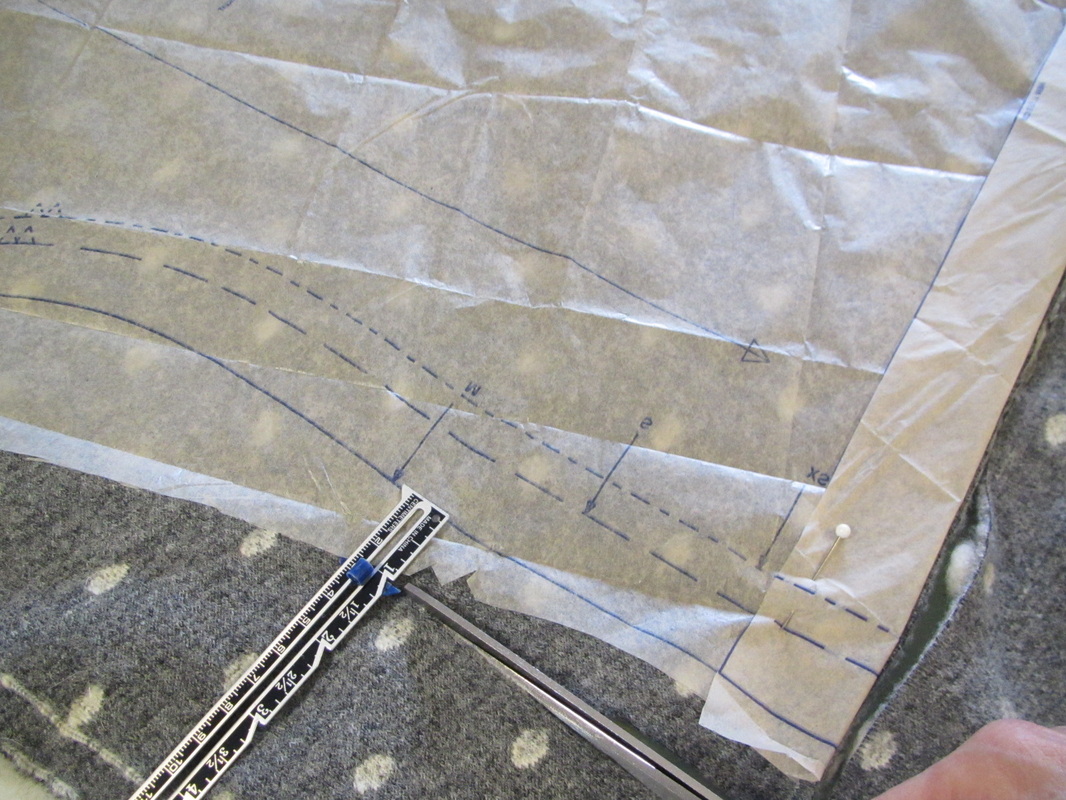
I've added about 1" along all the side seams to give myself room to maneuver.
| 
And I've added to the sleeve like this. I can always cut if off.
|
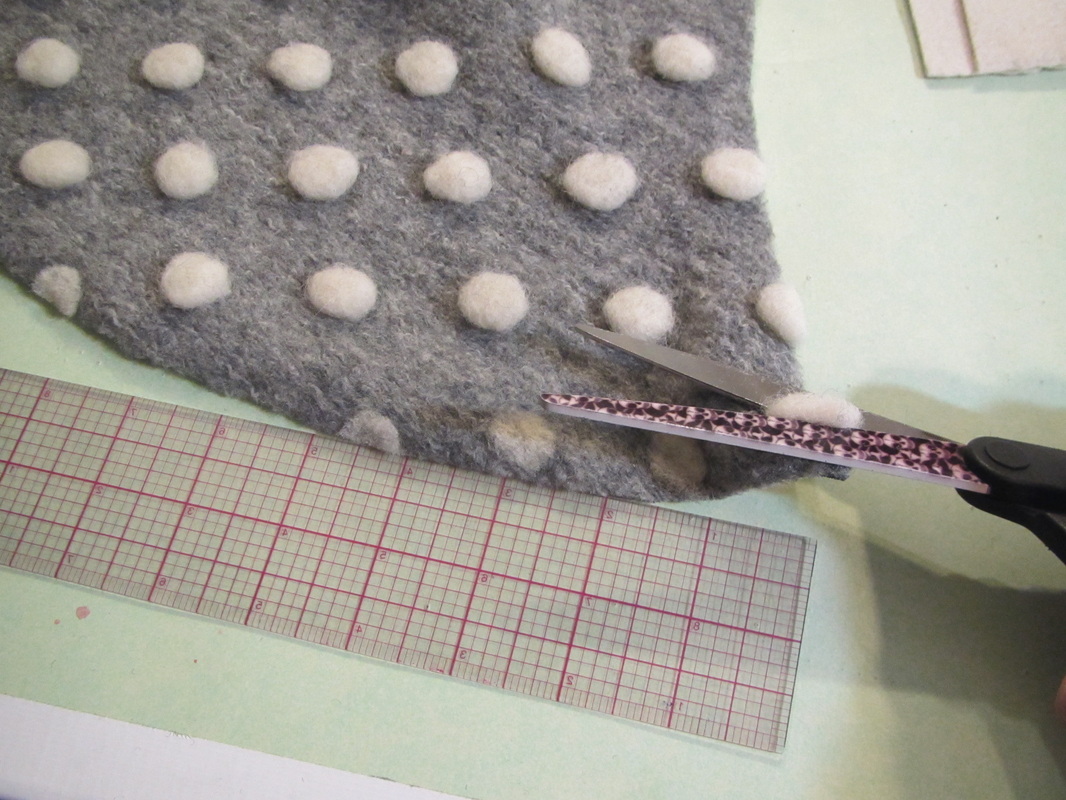
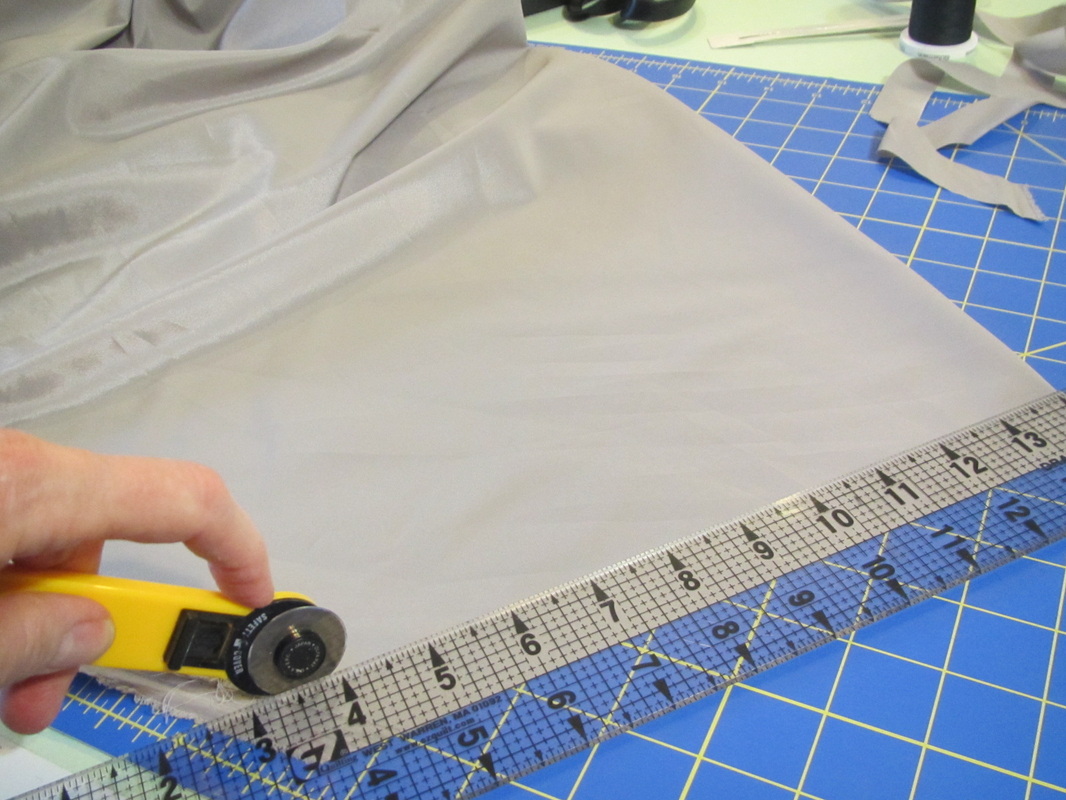
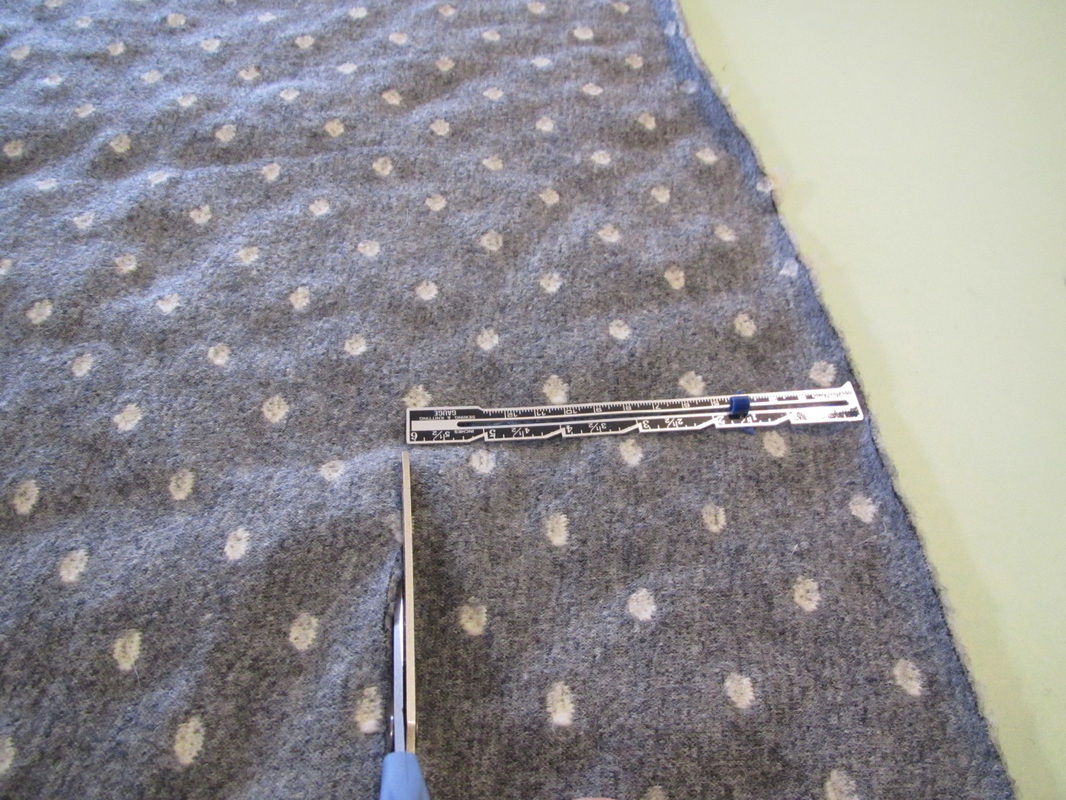
But before doing anything, I measure in 5/8" from the cut edge for the seam allowance and cut off the big white bumps to reduce bulk in the seams. And I need to cut some bias out of a good quality polyester lining fabric.
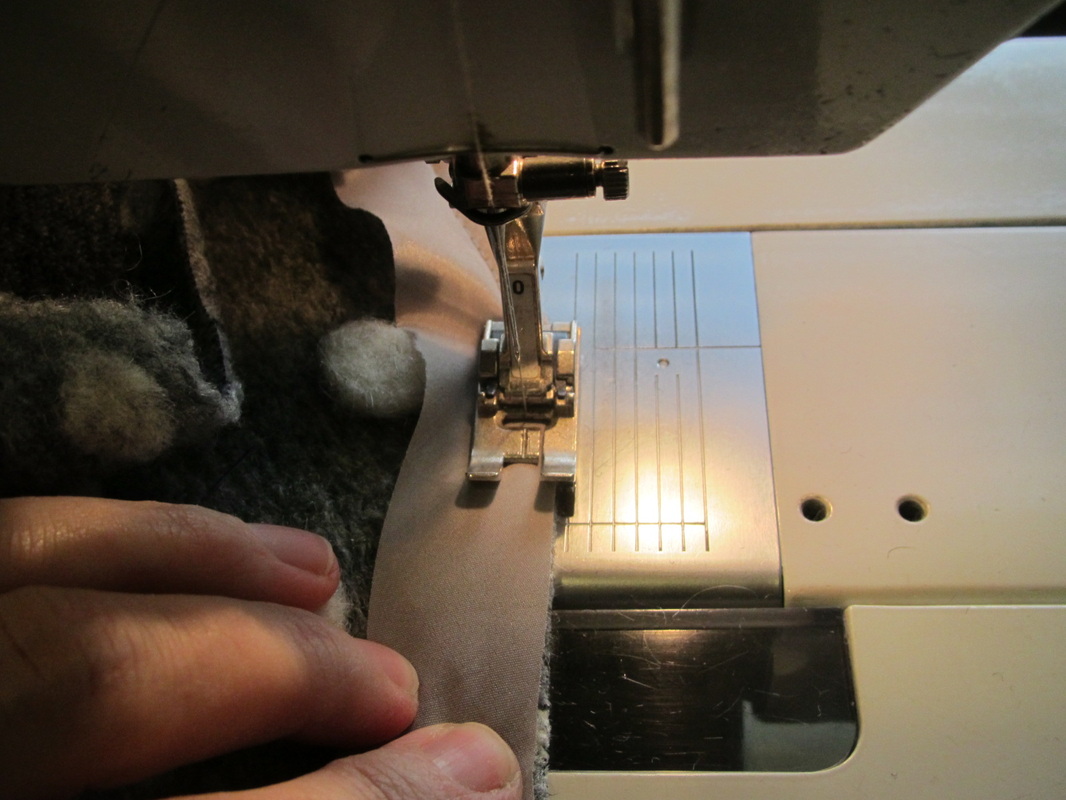
First stitch the 1" bias to the seam edge with 1/4" seam.
I am using rayon seam binding to stabilize the shoulder seam. It is a knit and I don't want it to stretch and then pop the stitches. Also, I used a zipper foot to avoid sewing over the very thick bumps.
| 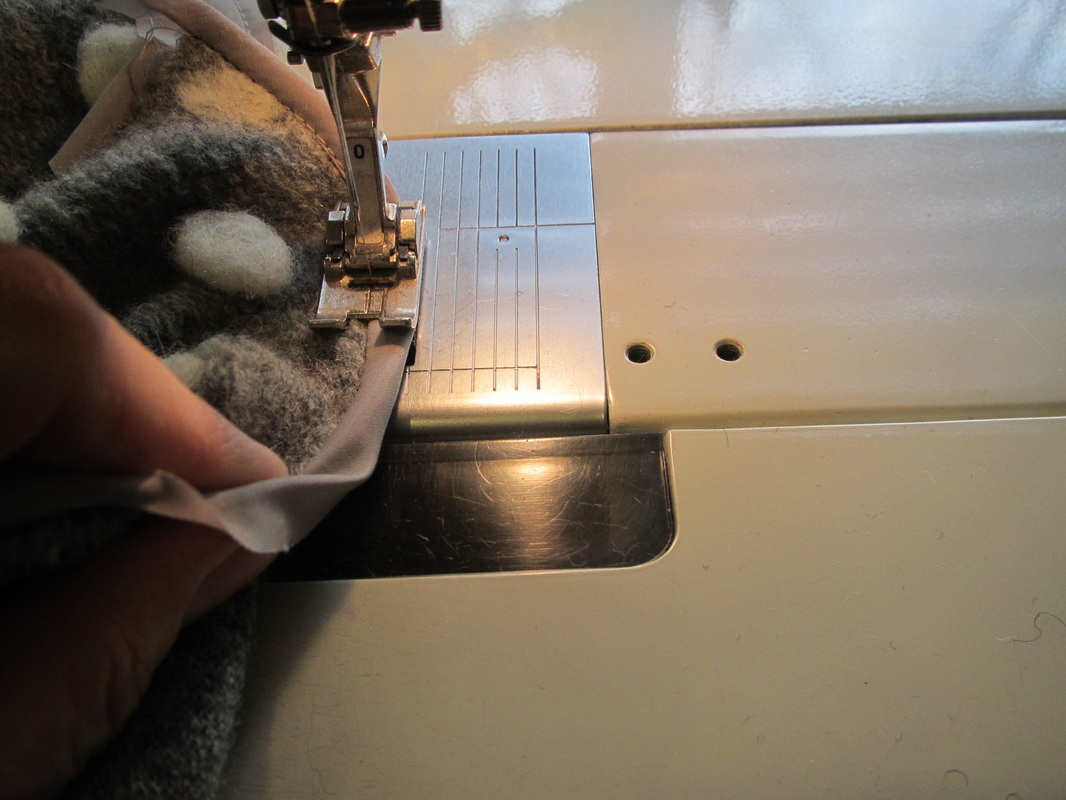
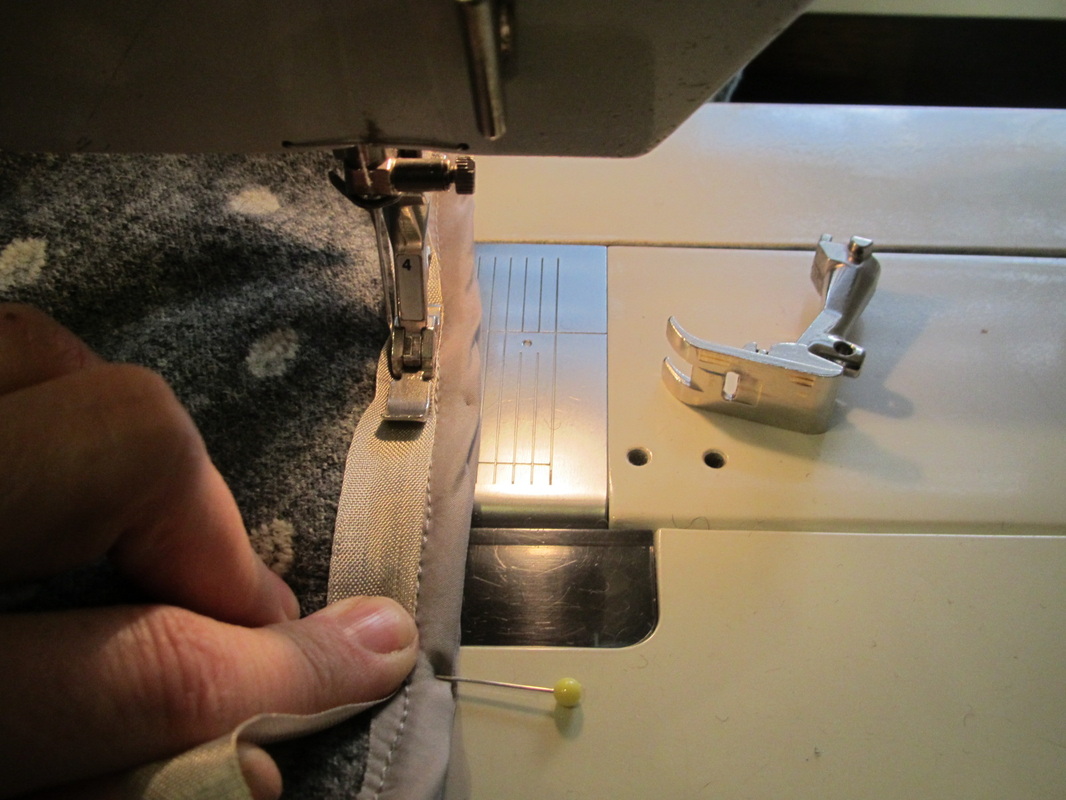
Then roll the rest of the bias to the back and stitch in the ditch.
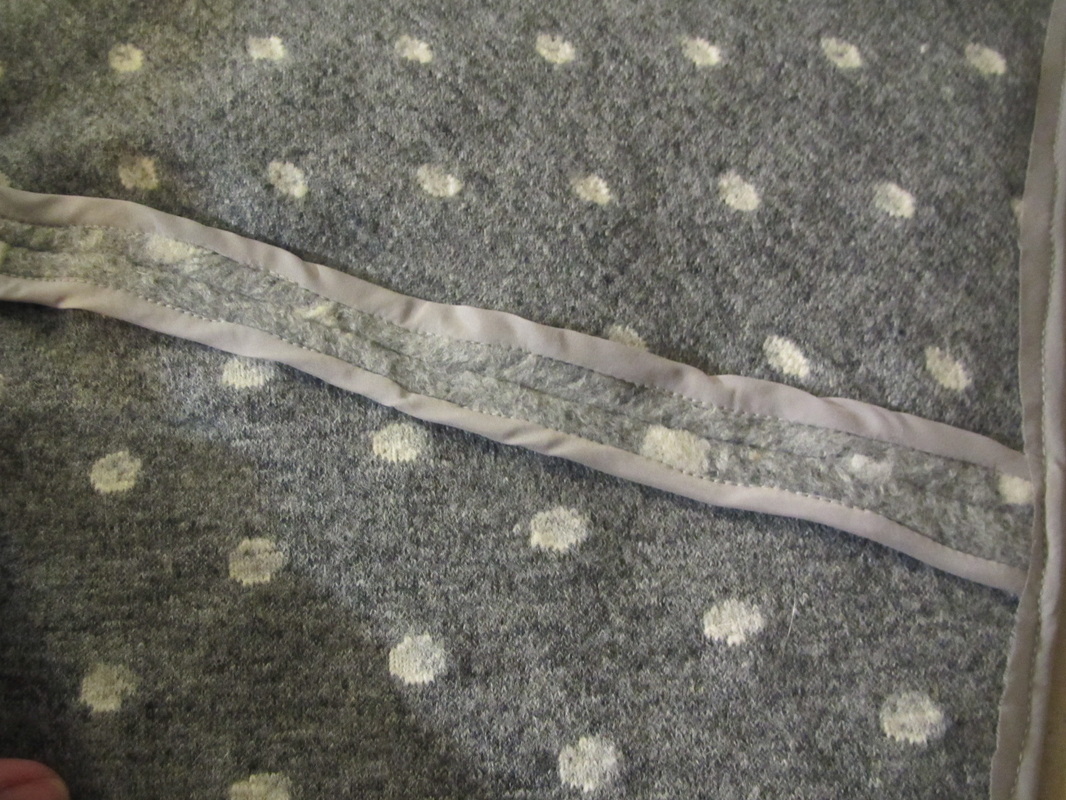
This 100% wool fabric presses so nicely! Not bad looking for the inside.
|
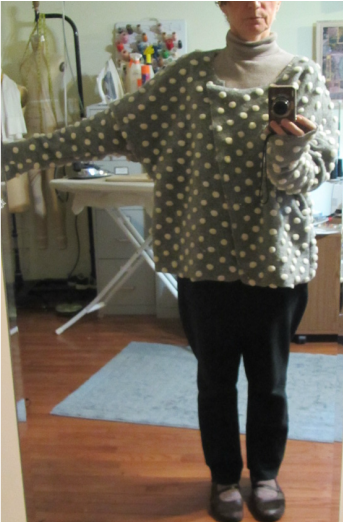
I machine baste the other seams so I can try it on and OH BOY it is WAY TOO BIG! Looks like a tent.
But, this is much better than way too small. I said that I was following my mother's advice to cut things large, if unsure. But the funny thing is I think I will be cutting off what I added on. And even though I moved the sleeve seam up 2 inches from where the pattern had it, it is still too low, in my opinion.
But, this is much better than way too small. I said that I was following my mother's advice to cut things large, if unsure. But the funny thing is I think I will be cutting off what I added on. And even though I moved the sleeve seam up 2 inches from where the pattern had it, it is still too low, in my opinion.

I fold up and pin the sleeve seam.
| 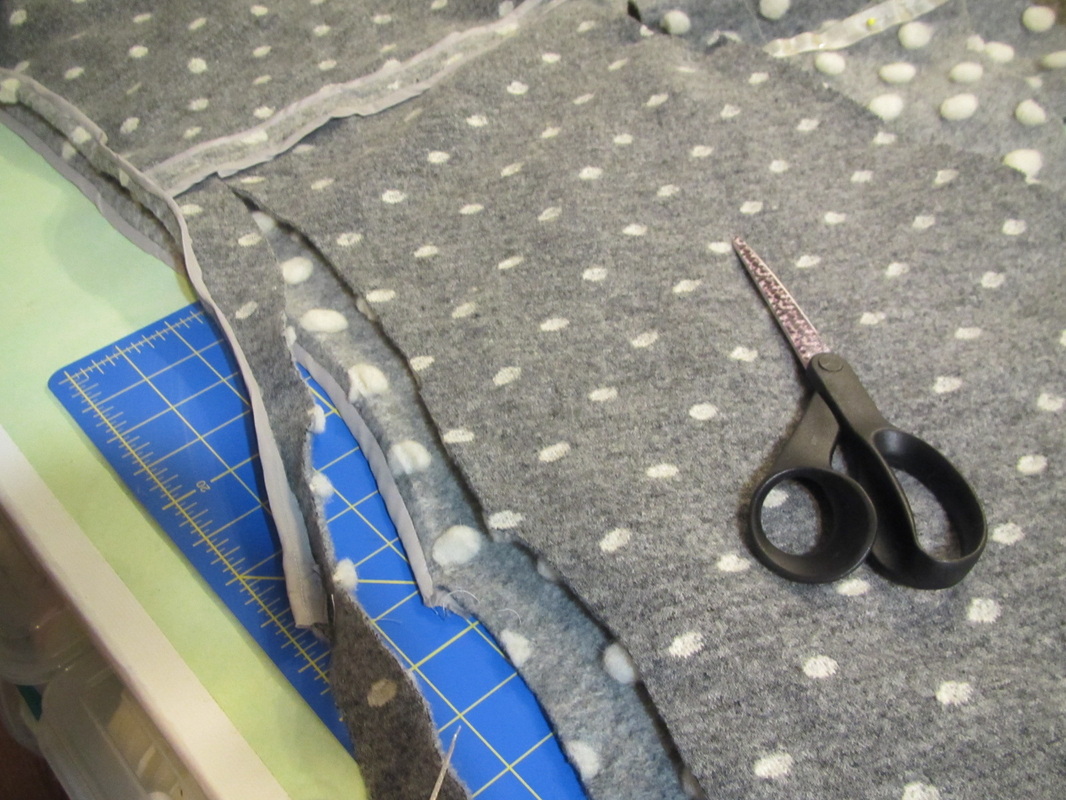
And then cut off the fabric where pinned, remembering to allow for the seams.
|
I baste it up again, try it on and it is STILL too big, so I pin up the shoulder seam one more time and trim it off once more time.
The second time I just trim the sleeve seam a little higher but do not take in the side seam any more.
| 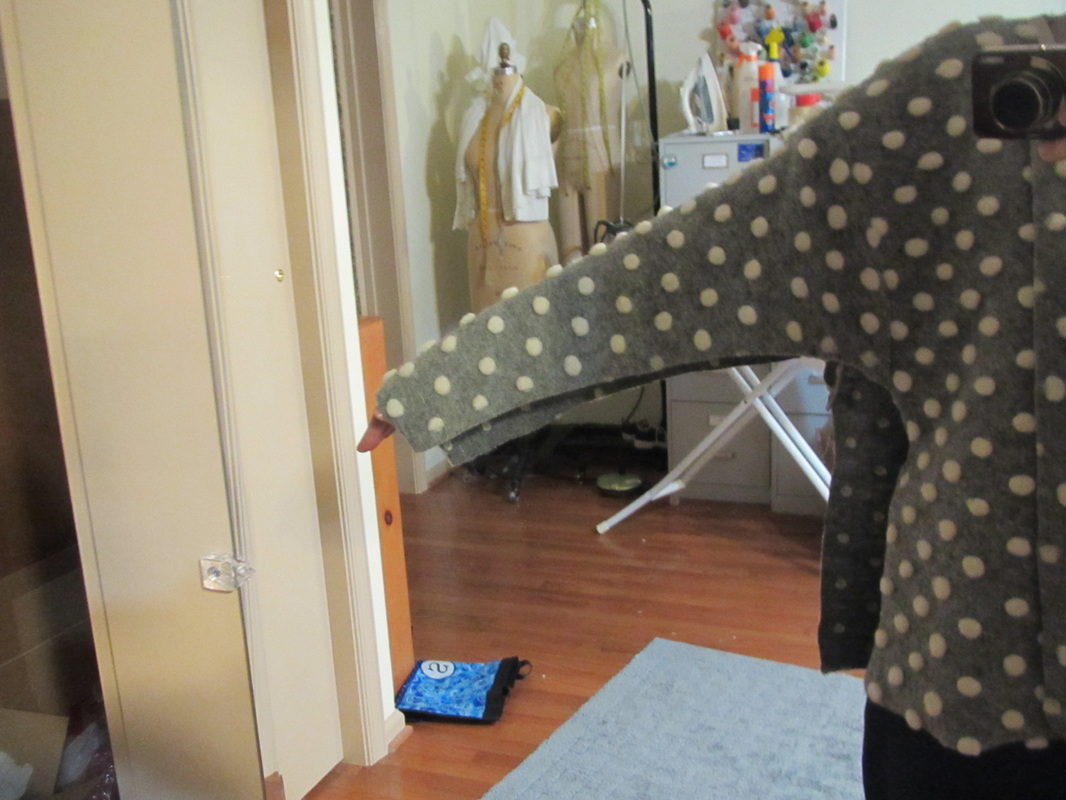
I take a quick check to see if the shoulder seam is where I want it.
|
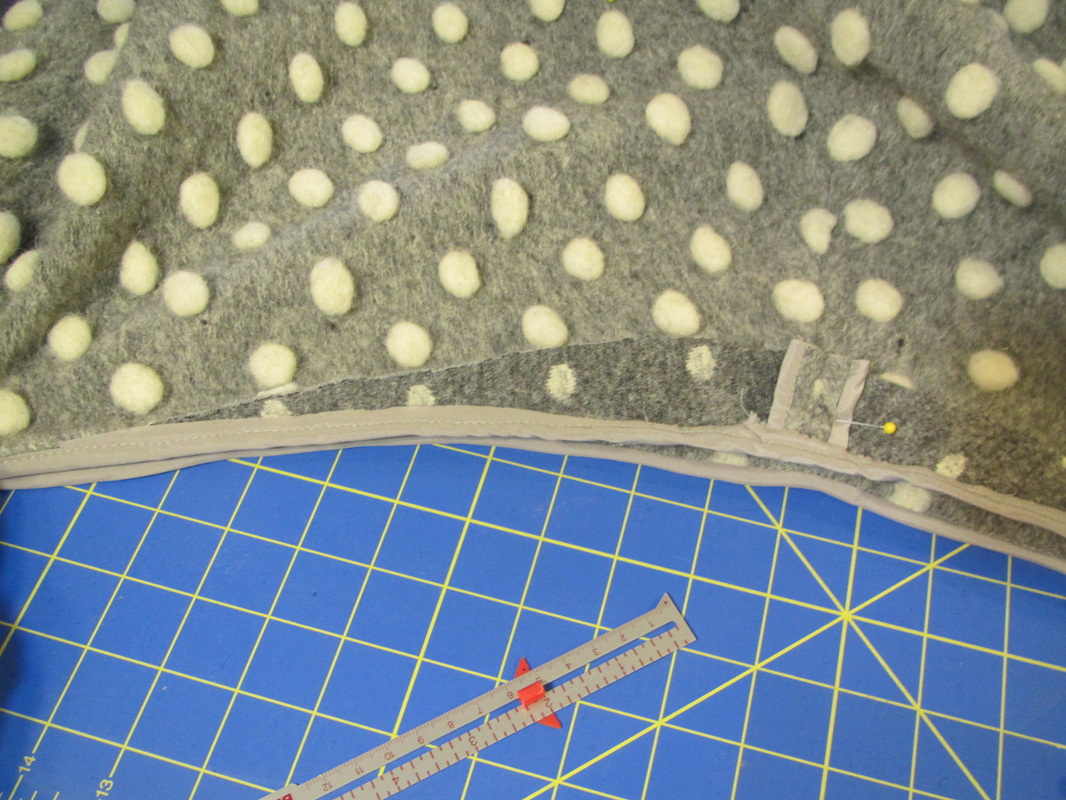
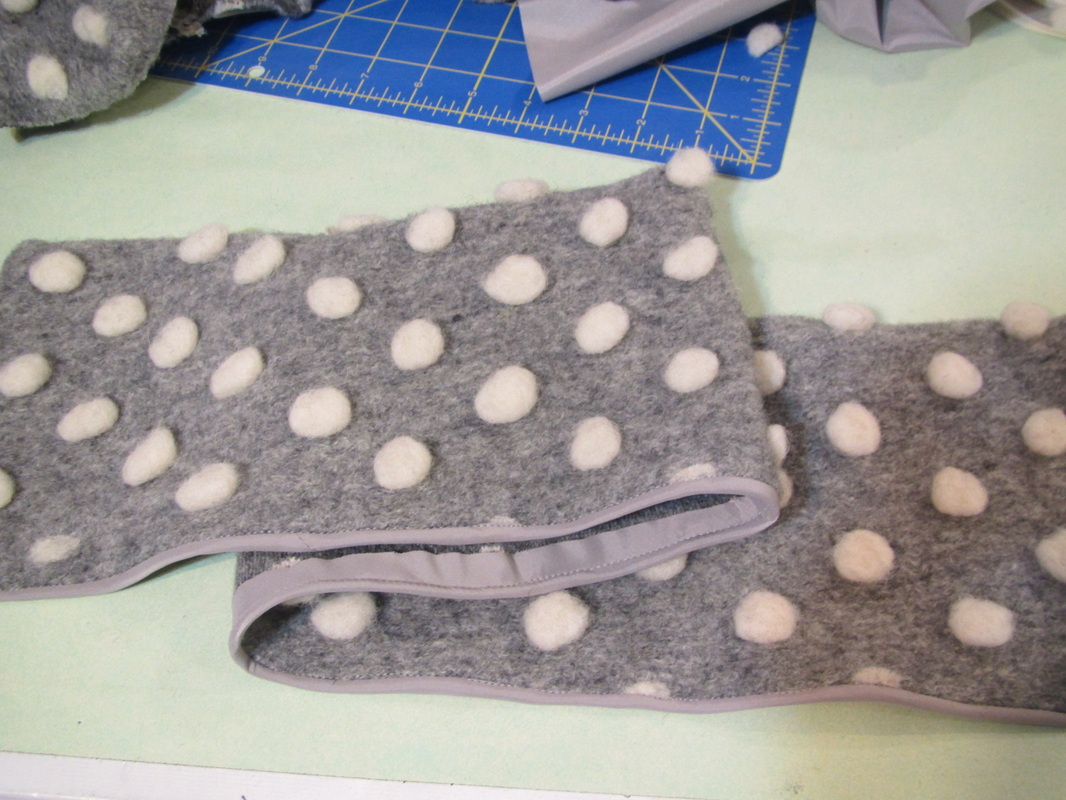
Now its' time for the bottom band. I want a better finish that just a hem at the bottom, so I cut a 6 inch wide strip of fabric and give it a Hong Kong finish along one side. It is a bit shorter than the bottom width of the jacket itself which means I have to stretch it to fit, but I like the look of the body of a knit garment easing into a smaller hip band.
| 
|
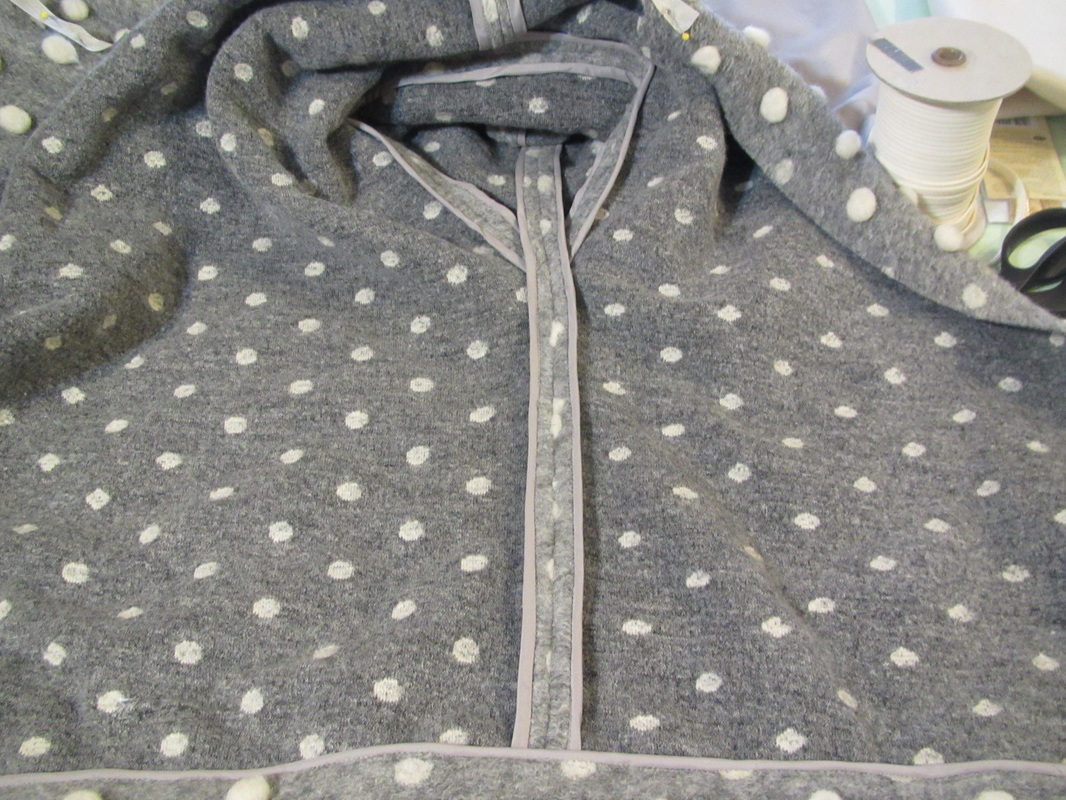
After sewing the band on, I fold it up in half and stitch in the ditch to hold it up. It is now ready for a collar. See photo up at the beginning. And see the photo below for the inside. I love a good Hong Kong finish.
Next time, the collar. I also have to figure out the front closing. I was going to make some special buttons, but maybe a big decorative zipper would be better. Need to think.
 RSS Feed