Andrea Schewe Design
  • Home
  • Costumes
    • Reader's Gallery
    • Fantasy Costumes
    • Theatrical
    • Historic >
      • Easier to make
    • International
    • Costumes for Kid's and Babies
  • Crafts
    • Home Decor >
      • Pillows
    • Fashion Accessories
    • Doll Clothes
    • For Kids and Babies
  • Blog
    • Past Blogs by subject >
      • My patterns by number
      • Sewing basics
      • Personal sewing Projects
      • Fashion History
      • Fun and funny stuff
      • Guest Bloggers
      • Crafts and Home Dec
  • Links
  • Contact

Creating a lining for Simplicity Coat #1320

11/10/2014

10 Comments

 
Picture
Picture
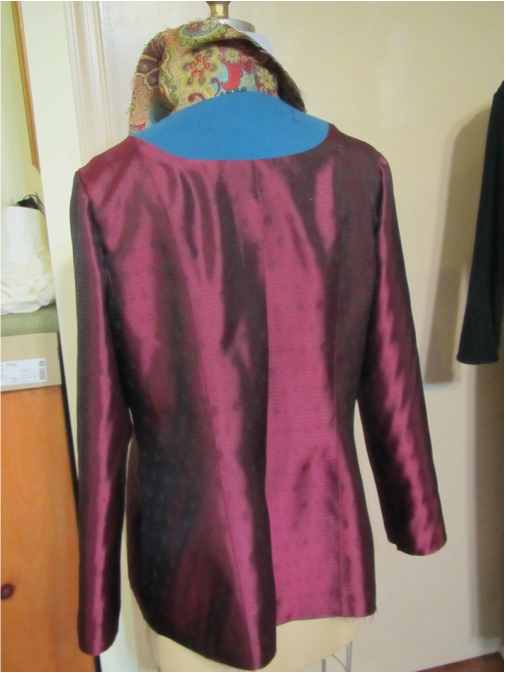
It's not hard to make a lining for any coat or jacket using the main pattern pieces. This is a good thing to know these days, too. Since many patterns don't have linings. 


There are some basic principles that you need to know, though. The main one being ... lining should NEVER fit tightly.
Picture

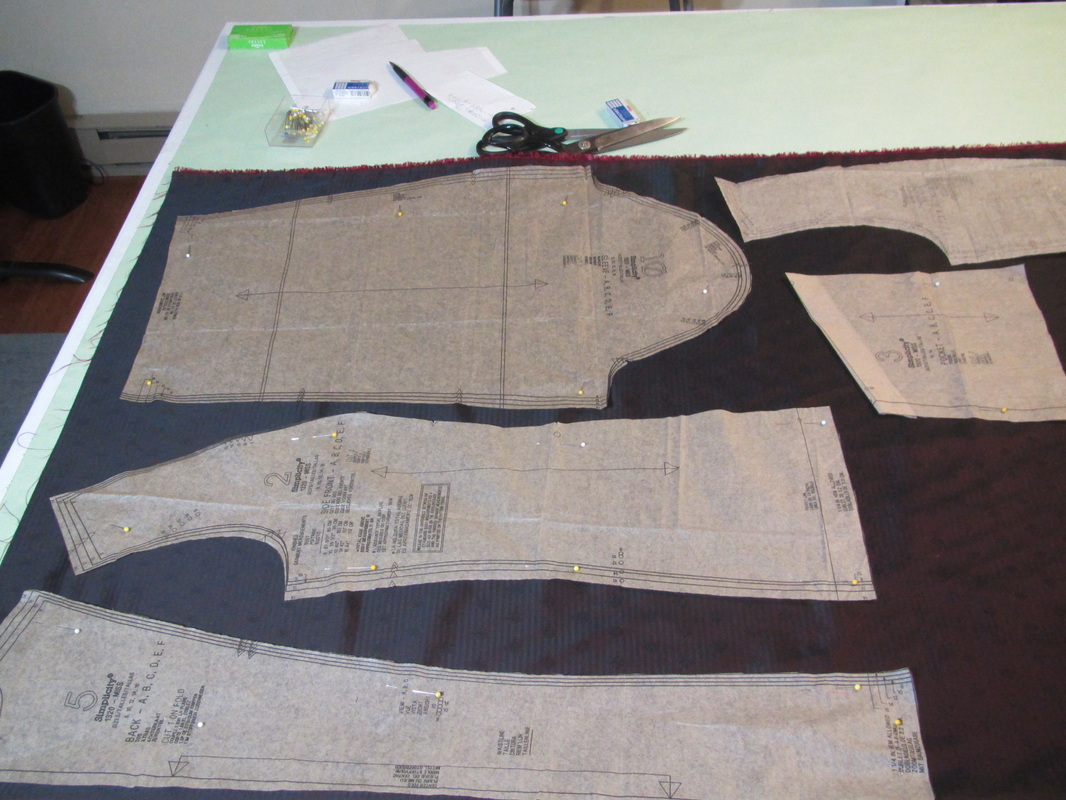
Here I have laid out the pieces I need for my lining.  

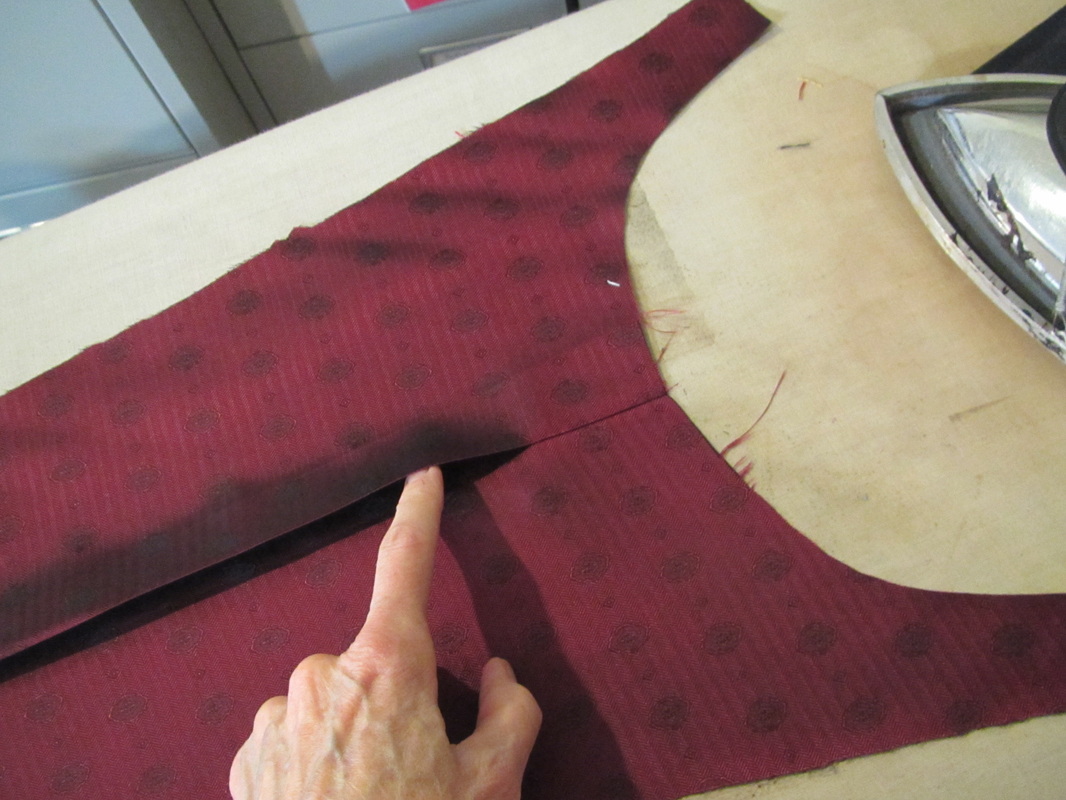
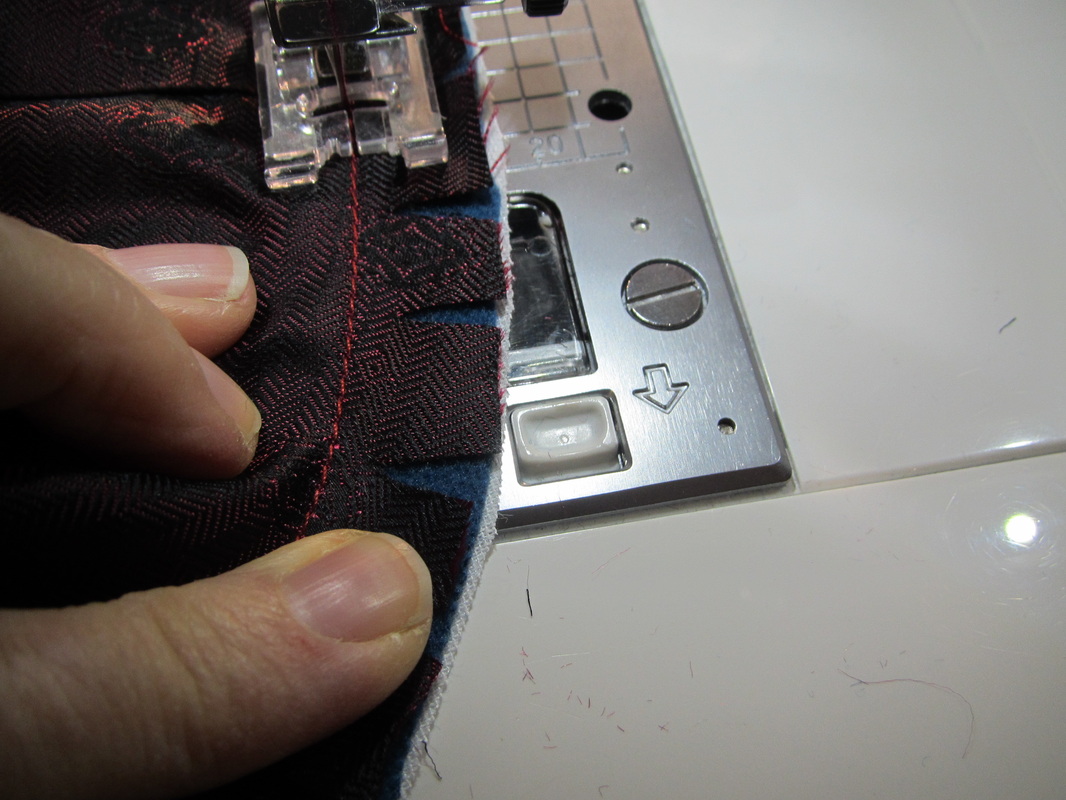
Because most lining fabric has no give in it at all and often a wool or twill weave will stretch a bit, I always sew my lining with 1/2" seams while the outside of the coat is sewn with 5/8" seam. This gives the lining that little bit of ease that is good to have.

Picture
This is the one tricky part. Figuring out how much to cut out of the back (and front for some coats) to allow for the facing.

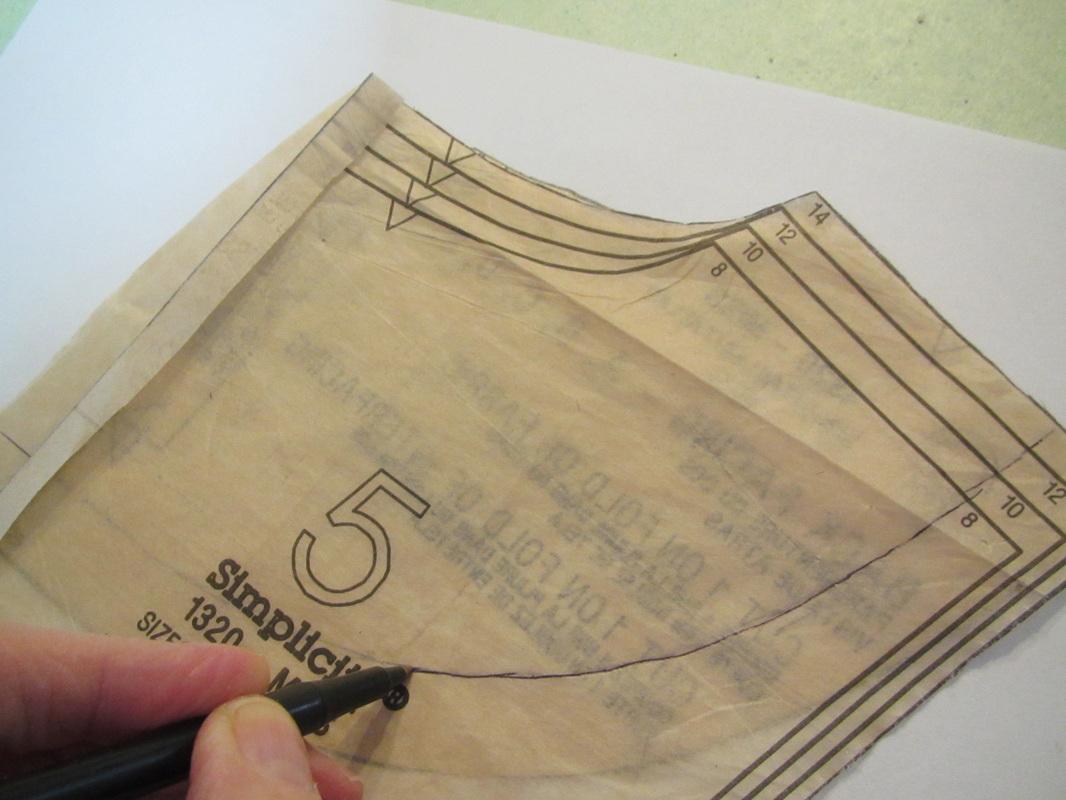
Here is a series of photos showing how I did this.
Picture
These are the back and back facing pieces. At this point, I've cut out the complete back, even though I will be cutting away some of it for the facing.

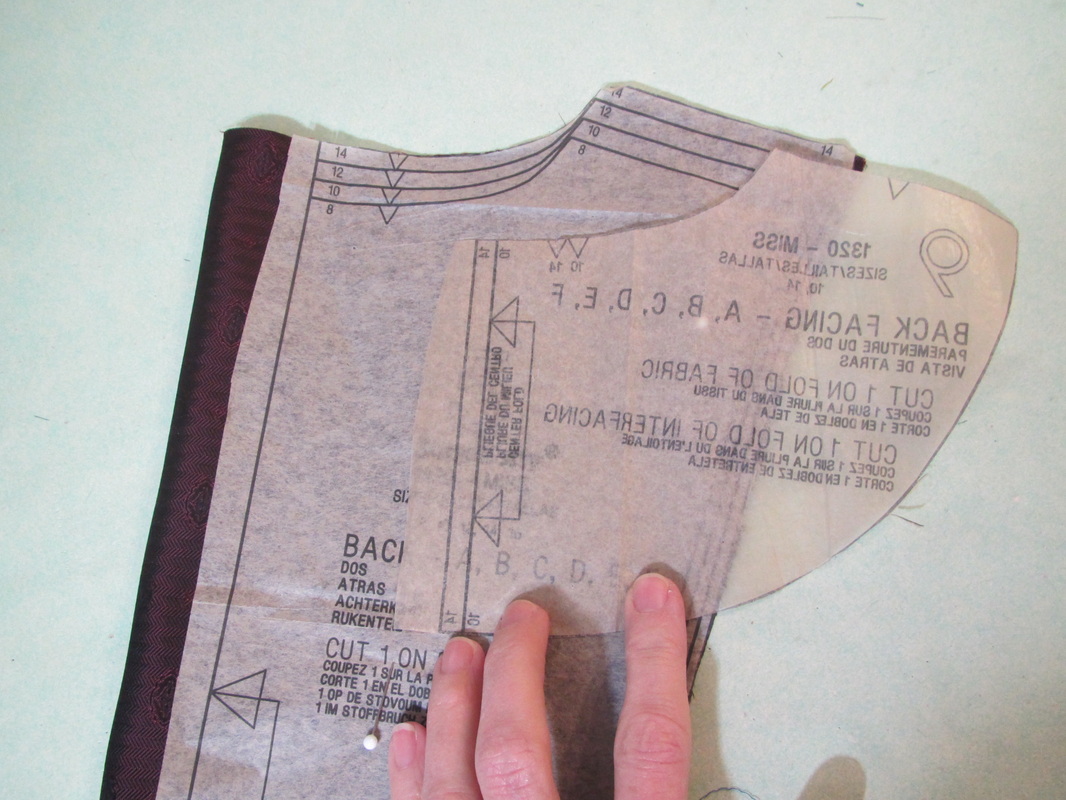
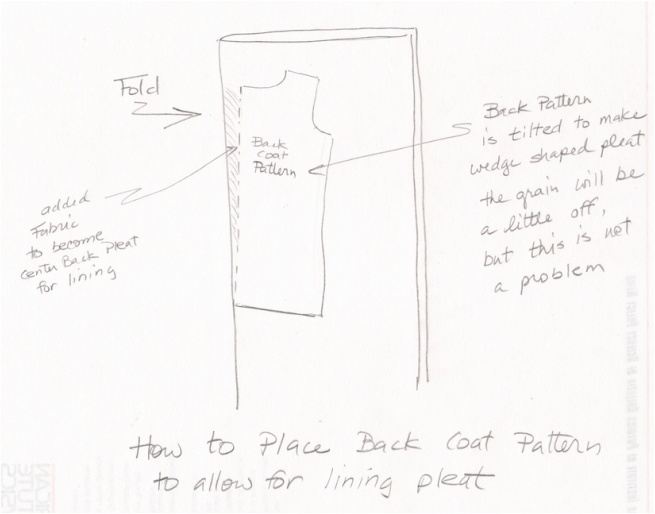
Notice that the fold of the pattern is placed about 1 1/2" away from the fold of the fabric. All good lining patterns have a center back pleat to allow for movement and, again, that little extra that makes for a good fitting lining.
Picture
This pleat is wedge shaped. Meaning it starts from nothing at the hem and is 1 1/2" at the top.
Picture
I have marked the original fold line from the pattern, which is the proper center back of the coat. I will stitch along this line about 2 or 3 inches down from where the facing begins after I cut away the excess fabric.
Picture
To find the new cutting line to fit the facing into the back lining piece, first draw the stitching line on the facing piece. Use a ruler to mark 5/8" away from the cutting line. Note that the pattern is upside down. That is so it will be facing the same way as the actual coat back pattern.

Picture
Slide the facing pattern under the back coat pattern and trace the stitching line you just marked on the facing onto the back pattern.
Picture

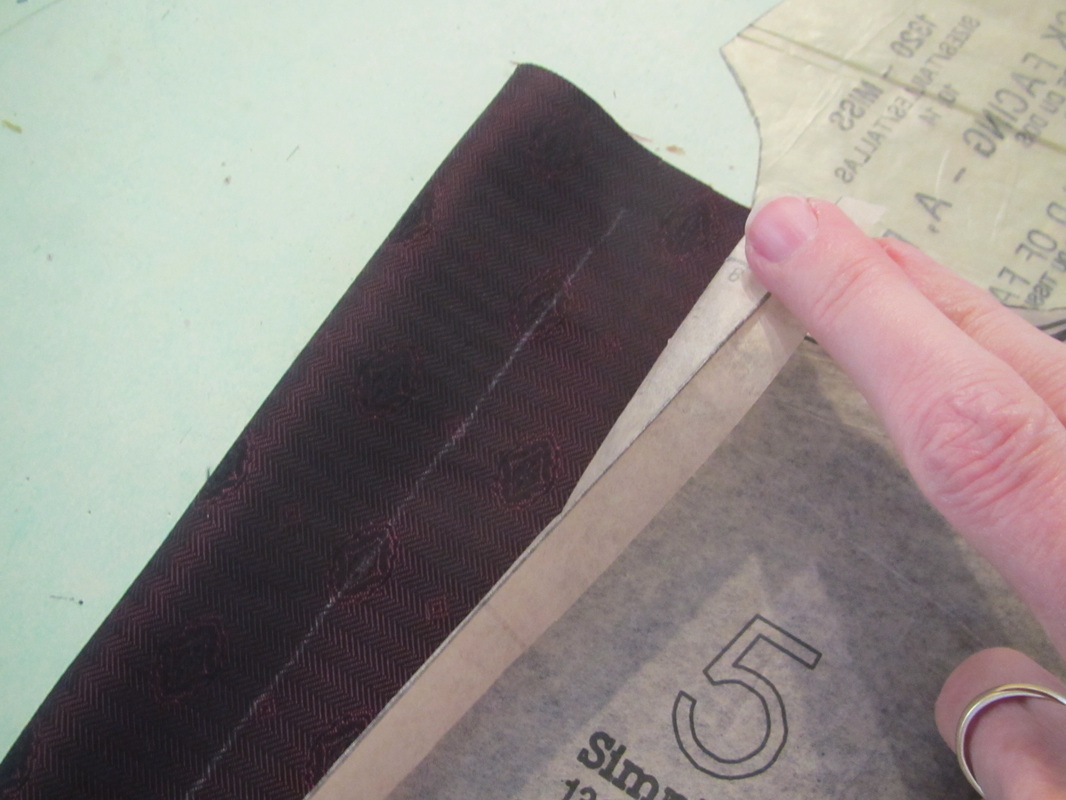
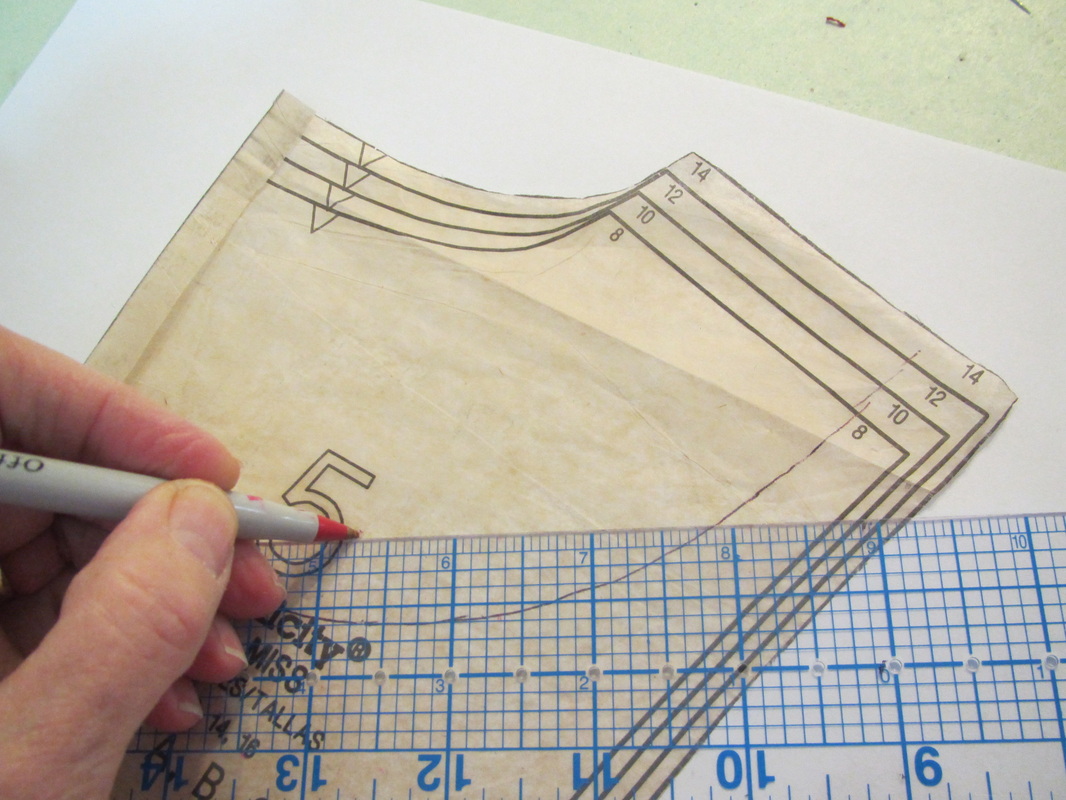
Take your ruler again and mark a new cutting line 5/8" inside that stitching line just marked on the back pattern.

Picture
So now we have in red the cutting line for the LINING only and the stitching line in black.
Picture

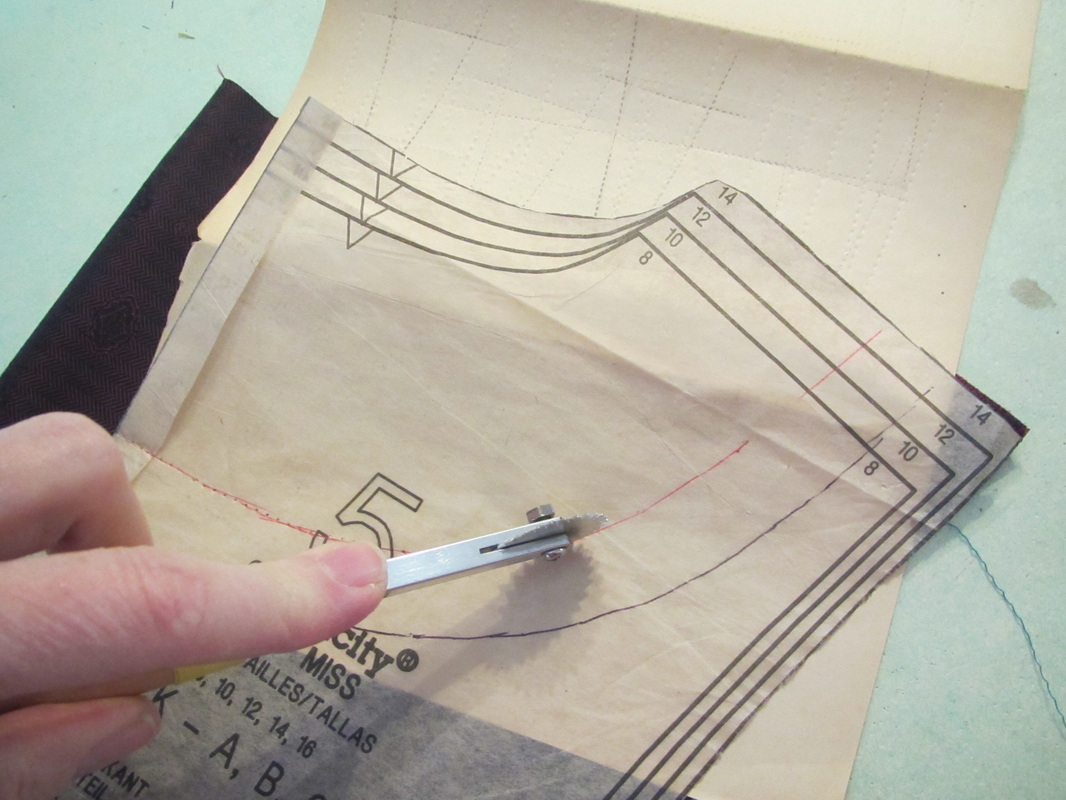
To not damage the back pattern, use a tracing wheel and transfer paper to mark this line onto the lining fabric.

Picture

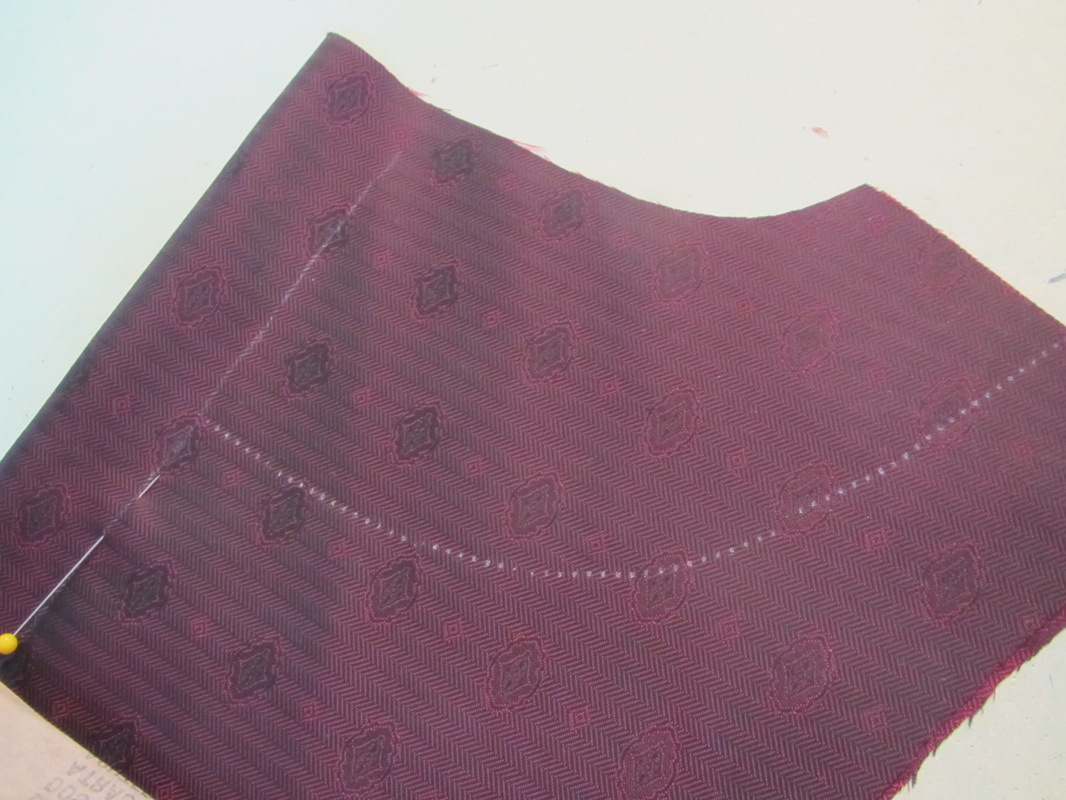
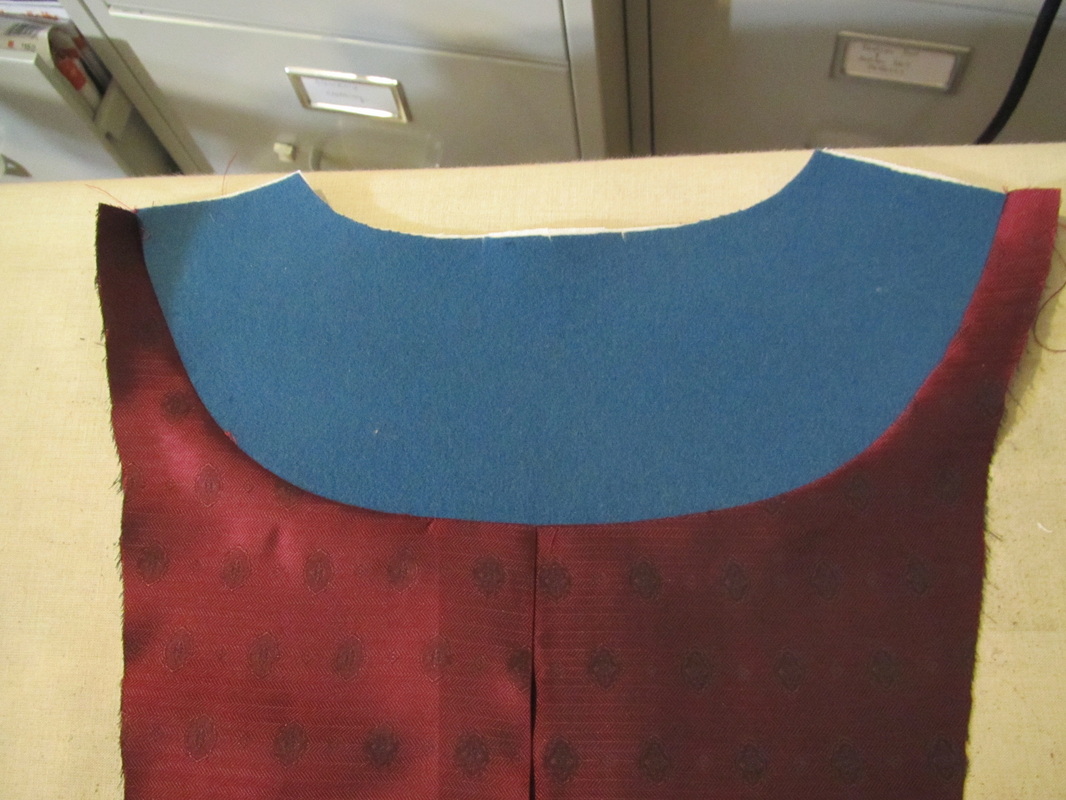
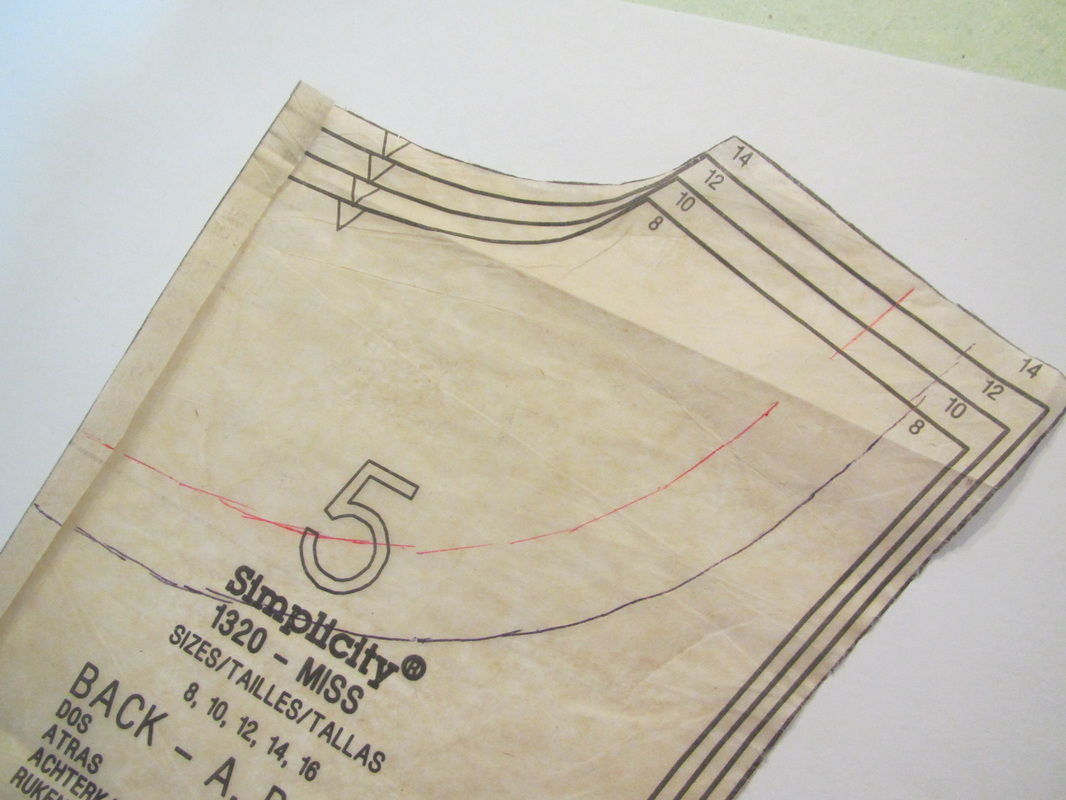
Here is the new cutting line, with the added pleat next to it.  I will be stitching where that pin is for about 3" after that top part is cut away.

Picture
Like this!
Picture
Now the little bit of stitching is done and I've pressed down the pleat. Tapering it to nothing at the bottom (Sorry I didn't get a better photo of that)
Picture

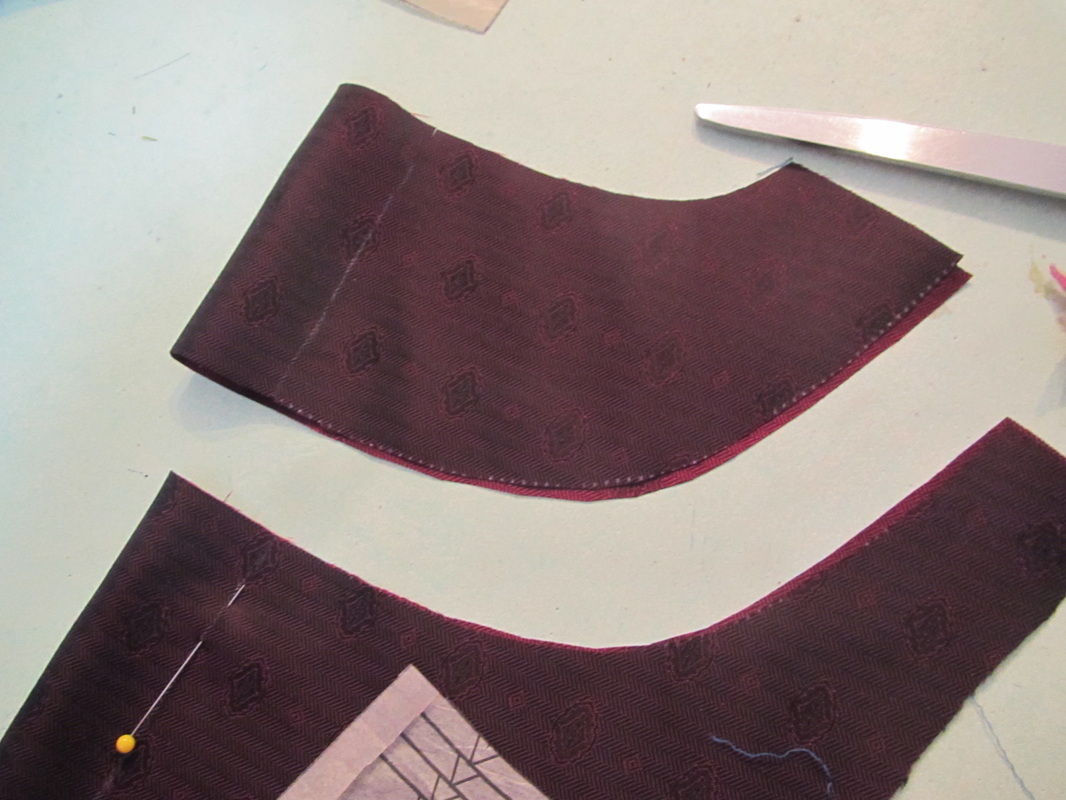
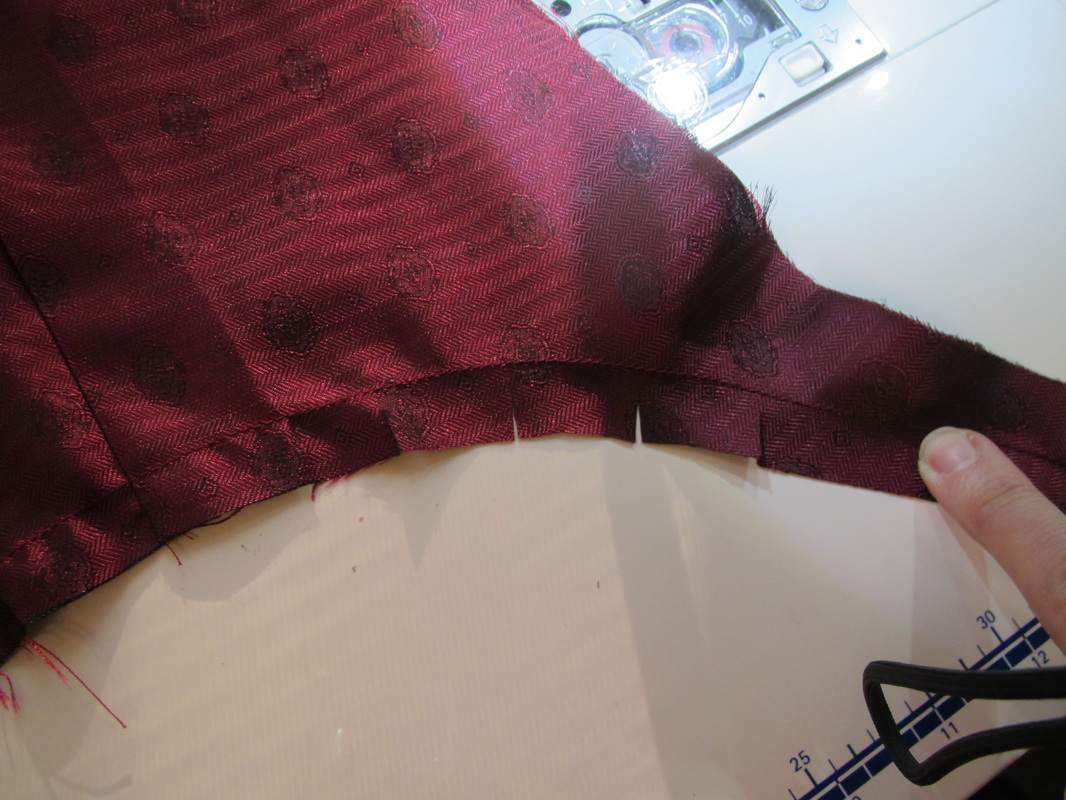
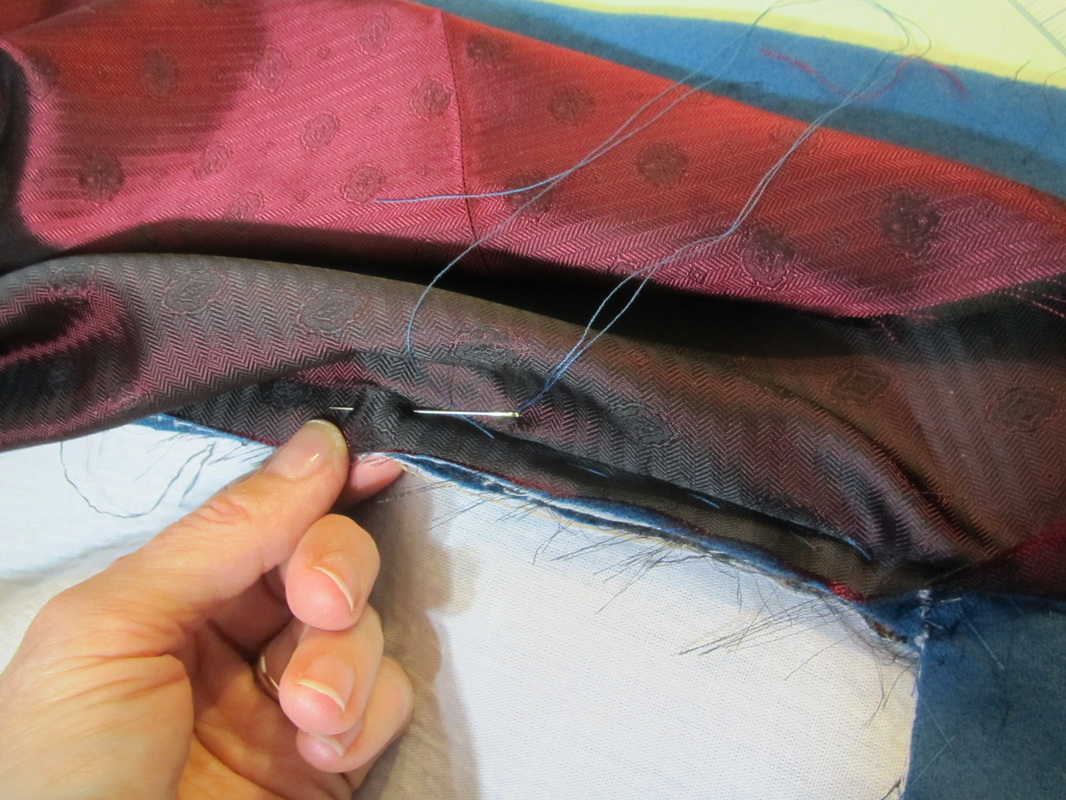
Stay stitch and clip this opening so ...

Picture
it can be opened up so the stitching line will lie flat when sewing it to the back facing.
Picture
Now, I will sew up all the lining pieces, facing pieces and the collar which makes a whole second coat, really.
Picture
I then sew the outside coat to the lining coat all up one front around the collar and down the other front leaving the bottom open.

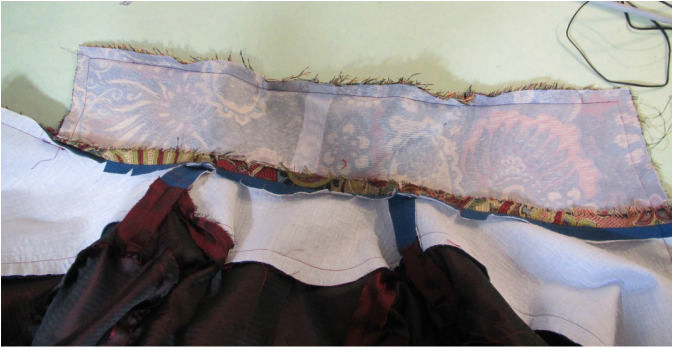
A lot of clipping, trimming and grading of seams needs to be done. And then the coat should be turned right side out and pressed well.
Picture
Now I start to hand tack the lining to the coat in key places starting at the collar seam.  I line up the collar seam of the coat and the collar seam of the lining, matching up shoulder seams and notches and pin.
Picture
Then hand sew the seam allowances together making sure to not pull any of the hand sewing too tight. Keep the seam allowances open which allows the bulk of the seams to be evenly distributed.
Picture

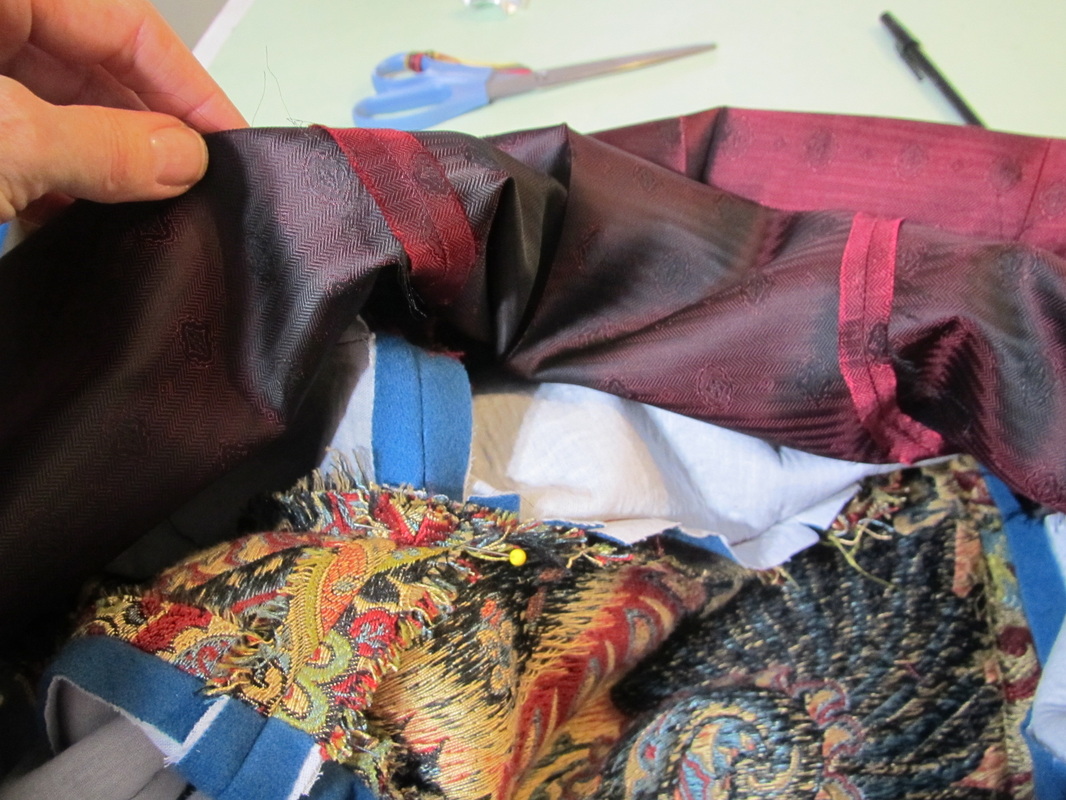
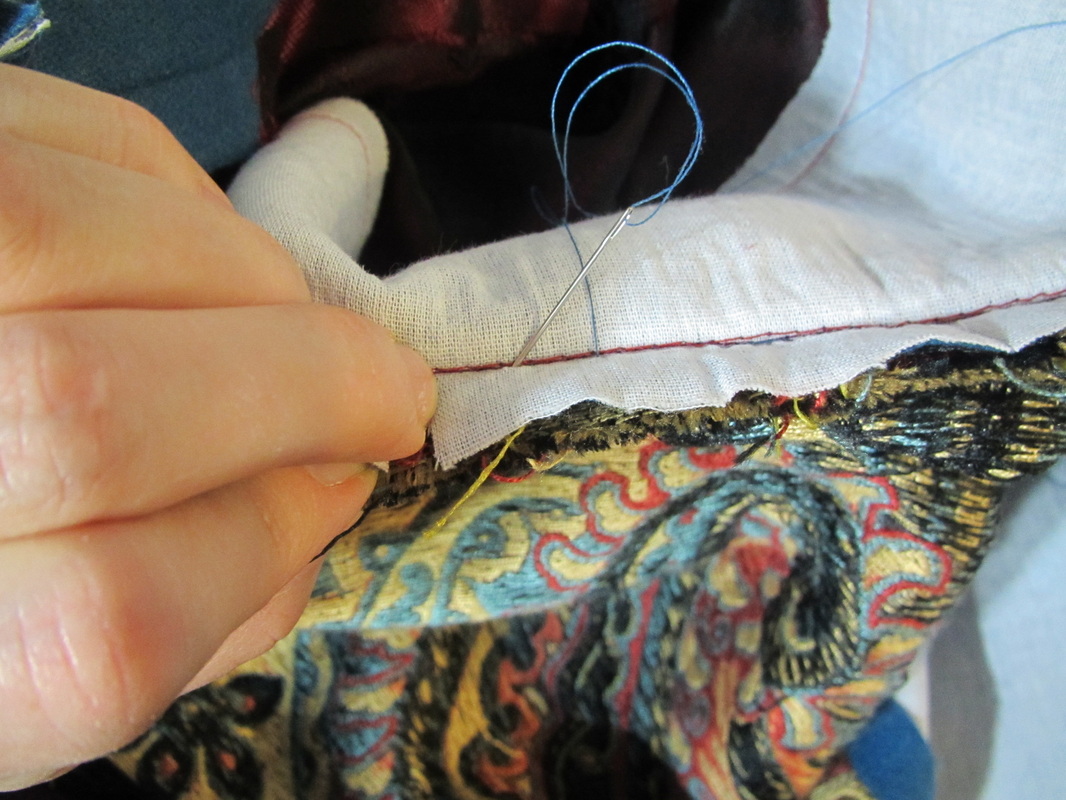
Do the same with the sleeves, sewing the seam allowances at the armhole. This is the only place you DON'T want the seam allowance opened up. The seam allowance from the sleeve and the coat should be pressed outward.  It isn't possible to sew completely around the armhole. Sew as far down each side from the shoulder seam as possible.

Picture

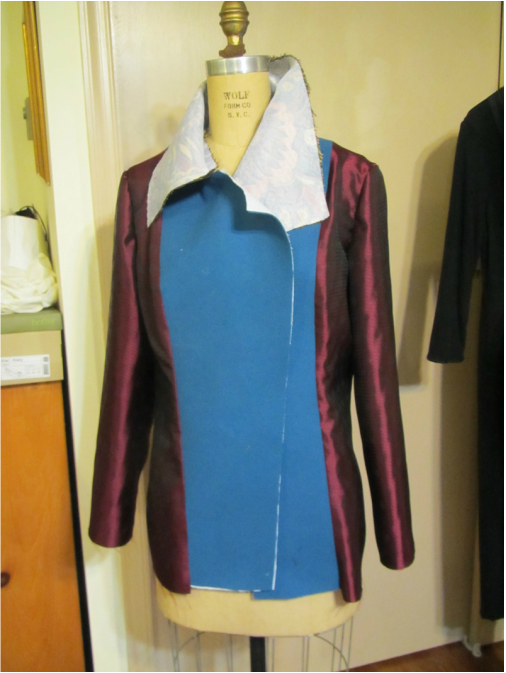
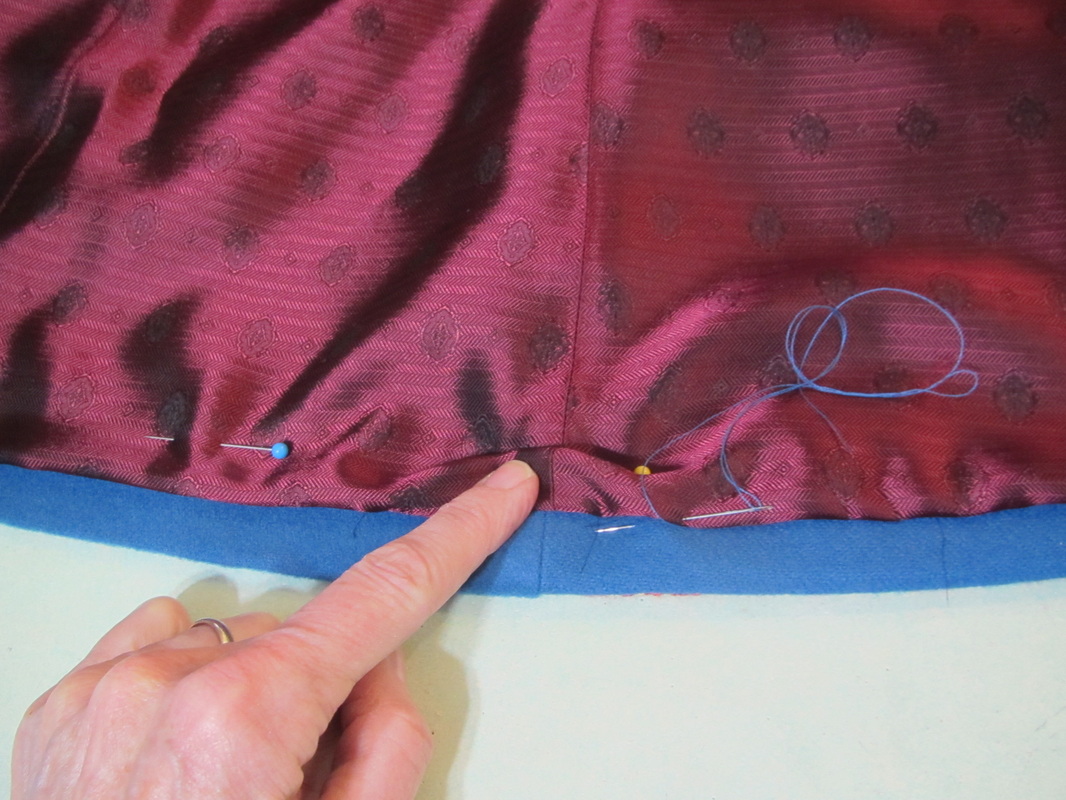
Next, smooth out the front facing, which is in this case is the same pattern as the center front panel of the coat and pin it down.

Picture
Then those seam allowances can be tacked together.
Picture
The last thing to do are the hems, bottom and sleeves. Fold the hem of the lining 1/2" shorter than the coat hem. THEN push it up slightly and run a slip stitch so the stitching is a little bit up and under the fold of the lining. This allows for some more looseness in the lining. Really, you don't want your lining pulling in any way which will show from the outside of your coat.
Picture

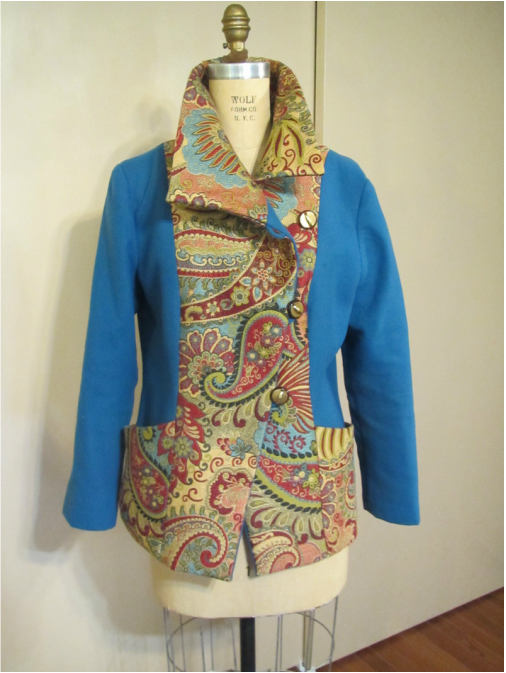
Please let me know if any of this is confusing. I hope that this makes it possible for everyone to make a lining for any coat.

10 Comments
Jenn S
11/11/2014 12:49:05 am

So if the back lining has a 1.5" pleat at the top which tapers to nothing at the hem, then the lining hem is 1.5" wider than the coat, correct? Is that extra just eased along the hem?

Reply
Andrea
11/11/2014 01:07:11 am

There is no extra width added at the hem. That's what I mean by tapered down to nothing. Grrr so sorry I didn't get a photo of that. I will have a to do a sketch and add it to this blog.
But, the pleat is wedge or triangle shaped. wide at the top to nothing at the hem.
Thanks for writing.

Reply
Jenn S
11/11/2014 05:13:01 am

Yes, a sketch or something would be appreciated! I can't wrap my head around it being tapered and still on grain.

Andrea
11/11/2014 09:28:55 pm

Jenn, I've added a diagram in the middle of this blog to explain the back pleat a little more clearly.

Andrea

Reply
Jenn S
11/11/2014 09:54:04 pm

Thank you!

Carina Saraco
11/11/2014 02:18:36 am

I really liked this pattern when I first saw it (I illustrated it!), and I LOVE what you did with it. Love your fabric and color choices- and what a gorgeous result!

Reply
Andrea
11/11/2014 02:57:47 am

THANKS! Carina

Reply
Sallie
11/21/2014 10:21:58 am

This is great information to have, thank you for taking the time to explain it so well!

Reply
Lucy
5/17/2019 02:23:19 pm

Hi, Great Information, I am wanting to make a lining for Simplicity 8467 view C with the hood, is it the same process of the extra in the back as this hood is all in one.Thank you

Reply
Andrea
5/18/2019 10:47:17 am

Yes it would be basically the same process. I would make a facing along the front edge of the hood, so the lining doesn't go all the way to the edge. But you don't need that pleat (extra fabric) in the back. That pleat in the back of the jacket is for movement of the arms, but your head doesn't have arms 😄, So no extra needed. Hope it works out!

Reply

Your comment will be posted after it is approved.


Leave a Reply.

    From Andrea 

    I am a commercial pattern maker who is now "sewing over 50"!
    I love to sew and hope to encourage others to come back to sewing.
    The water is fine!!

    Archives

    May 2019
    April 2019
    March 2019
    August 2017
    July 2017
    June 2017
    May 2017
    April 2017
    March 2017
    February 2017
    July 2016
    June 2016
    May 2016
    April 2016
    March 2016
    February 2016
    January 2016
    December 2015
    November 2015
    October 2015
    September 2015
    August 2015
    July 2015
    June 2015
    May 2015
    April 2015
    March 2015
    February 2015
    January 2015
    December 2014
    November 2014
    October 2014
    September 2014
    August 2014
    July 2014
    June 2014
    May 2014
    April 2014
    March 2014
    February 2014
    January 2014
    December 2013
    November 2013
    October 2013
    September 2013
    August 2013
    July 2013
    June 2013
    May 2013

    Archives by Subject

    To search for blog posts in specific categories, use the drop down menu above by hovering over the word "Blog"

    Enter your email address:

    Delivered by FeedBurner

    RSS Feed

    Andrea Schewe participates in Amazon's associates program.