
So, this is the part of the project where you show the person for whom you are making this dress (and maybe it's you) how much you love them.
These motifs can be done to any level of perfection desired. I'm kind of doing it to the level a loving grandmother would, but if I were the mom without a lot of time, I might do fewer motifs all around the skirt, or only do them in the front. Also, you could simplify the motif a bit. Take away some of the dots, for example.
And you don't have to exactly follow my color scheme. To me, the motifs have a bit of a golden glow so I added some golden color bits, but you should look at images from the movie yourself and decide. Just search "Elsa's Coronation Dress images" and all sorts of stuff will pop up.
By now you should have made all the pattern changes and cut all the pieces out. This is described in yesterday's blog.
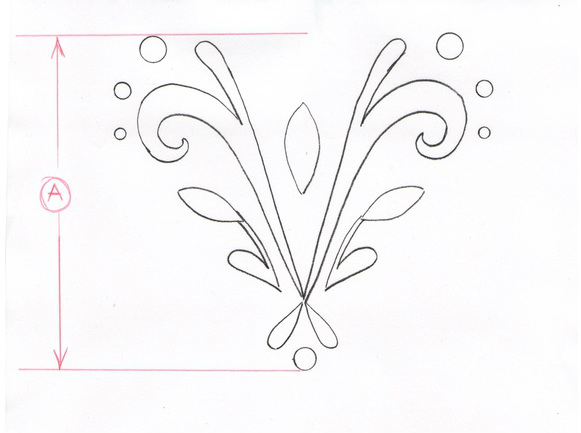
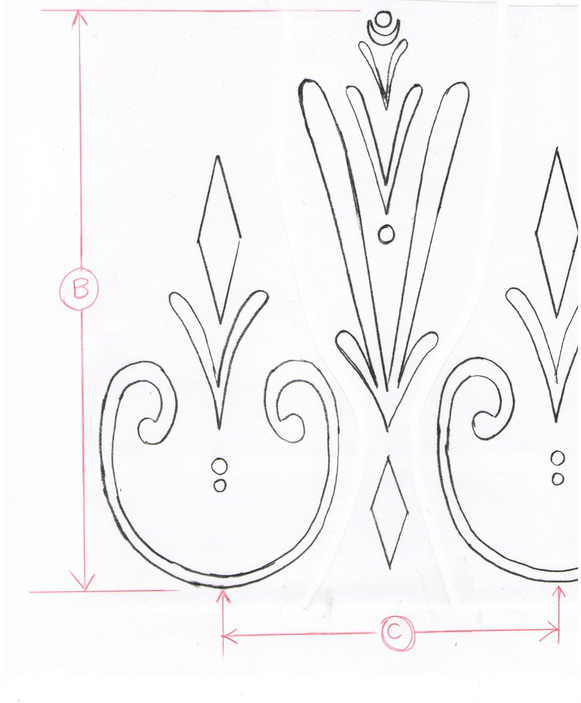
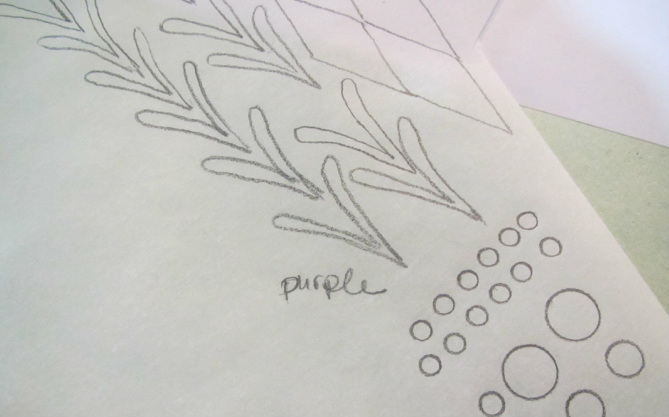
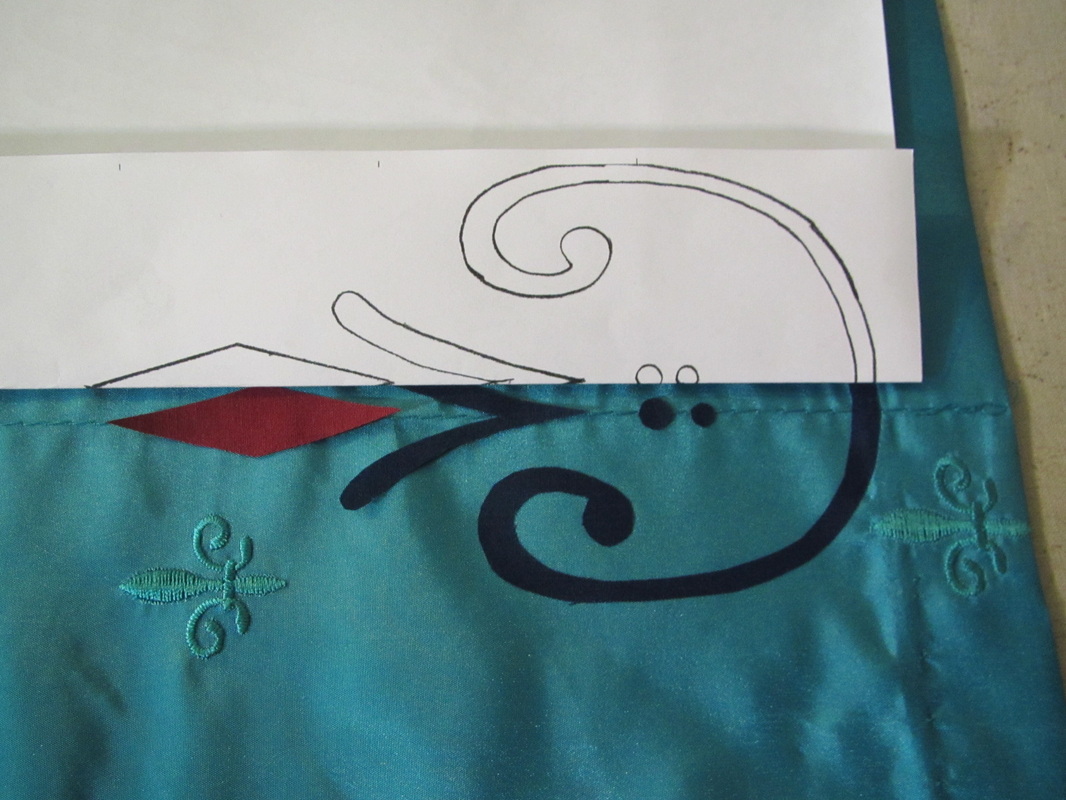
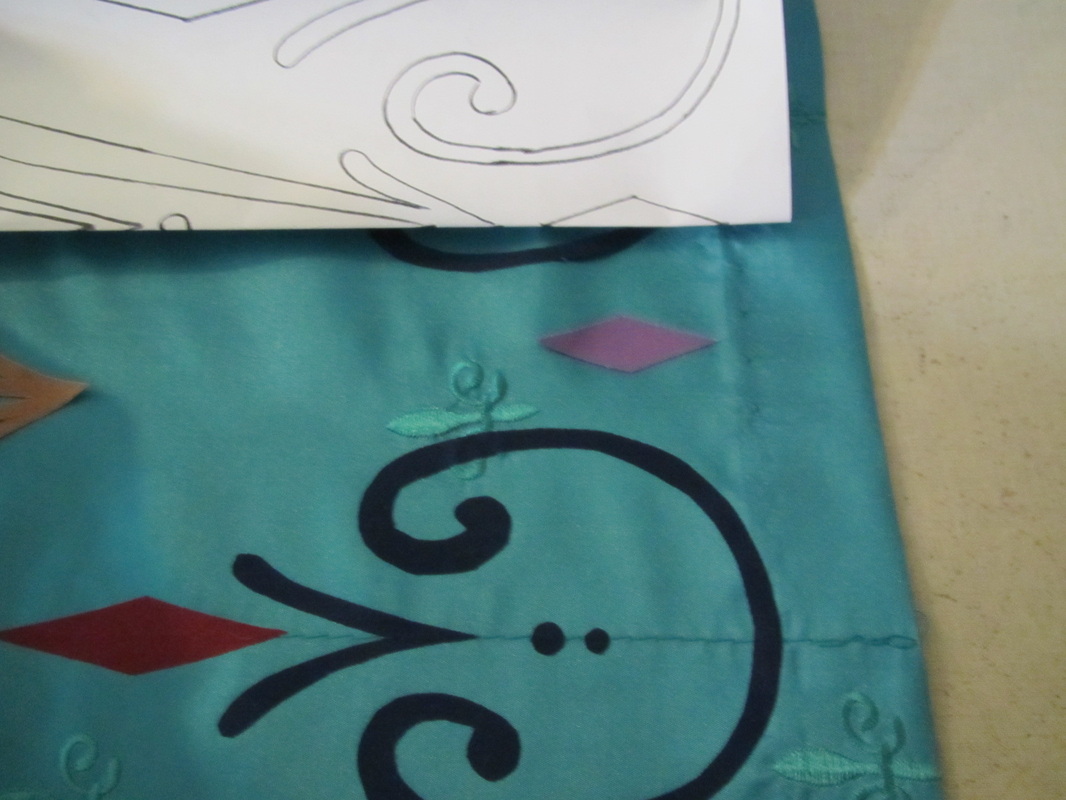
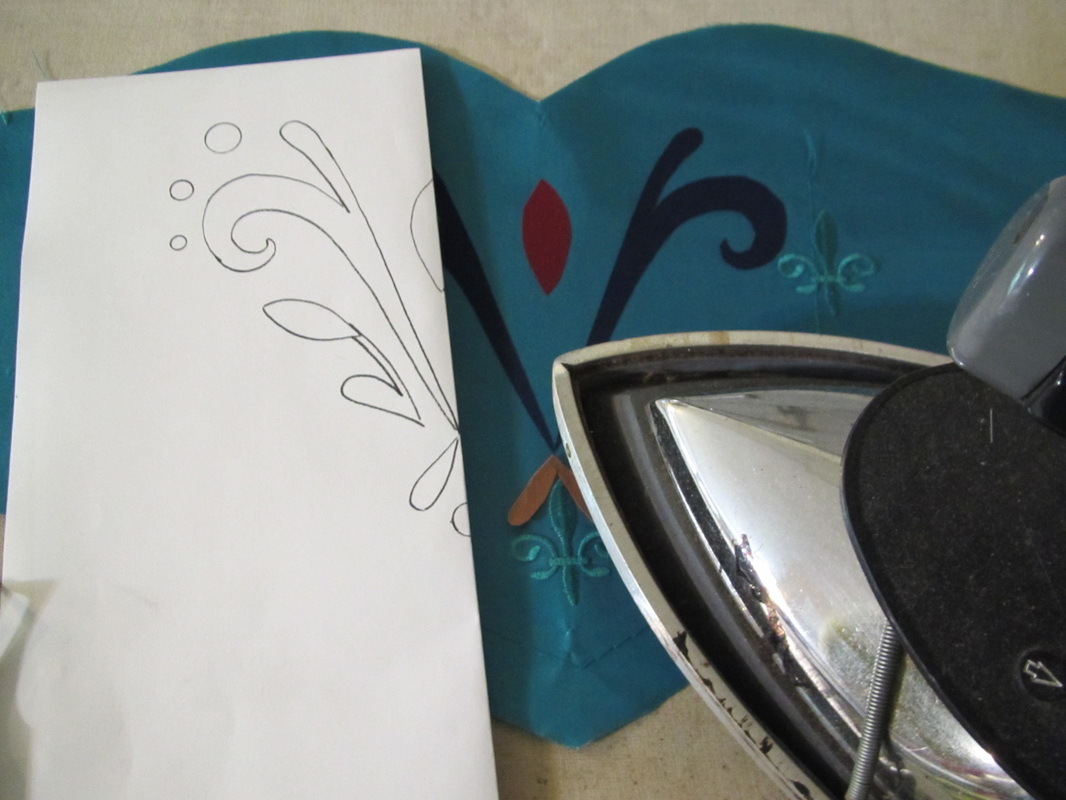
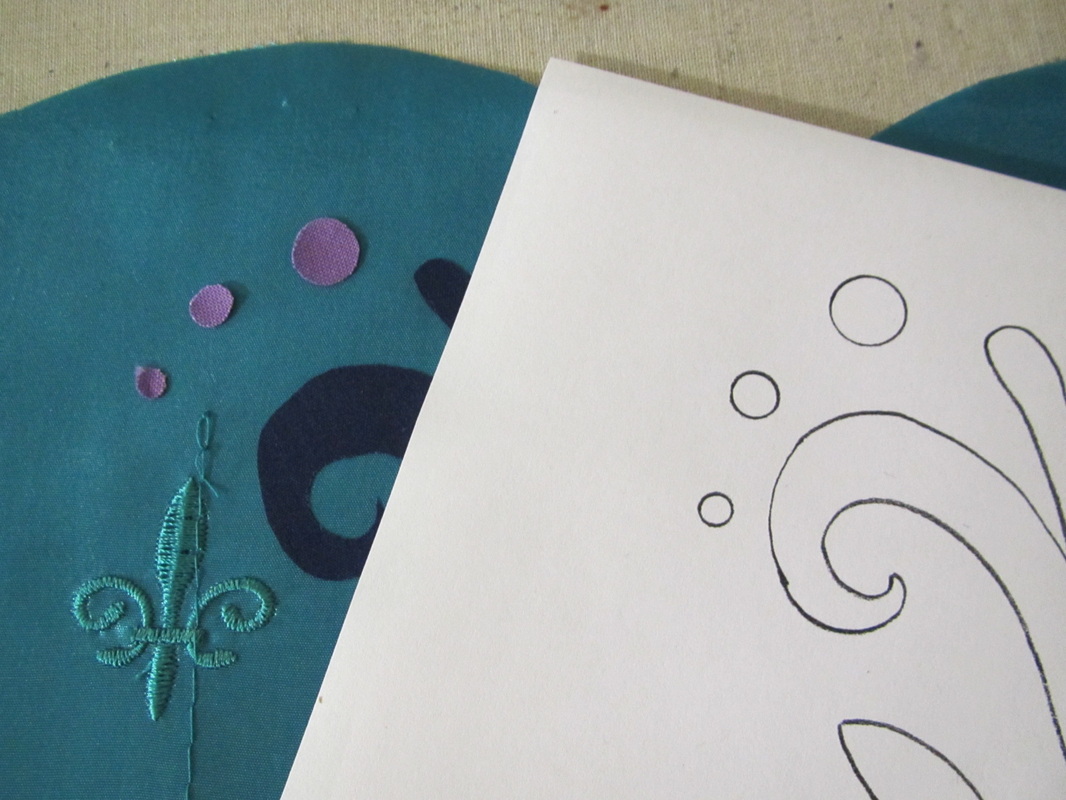
I have made diagrams for the motif that goes on the front of the bodice and the motif that goes all around the skirt. They are both here for you as jpegs that can be copied onto a computer and as word documents. I have never done this before, so if anyone has feed back or advice how I can make it easier to do, please leave comments.
These motifs can be done to any level of perfection desired. I'm kind of doing it to the level a loving grandmother would, but if I were the mom without a lot of time, I might do fewer motifs all around the skirt, or only do them in the front. Also, you could simplify the motif a bit. Take away some of the dots, for example.
And you don't have to exactly follow my color scheme. To me, the motifs have a bit of a golden glow so I added some golden color bits, but you should look at images from the movie yourself and decide. Just search "Elsa's Coronation Dress images" and all sorts of stuff will pop up.
By now you should have made all the pattern changes and cut all the pieces out. This is described in yesterday's blog.
I have made diagrams for the motif that goes on the front of the bodice and the motif that goes all around the skirt. They are both here for you as jpegs that can be copied onto a computer and as word documents. I have never done this before, so if anyone has feed back or advice how I can make it easier to do, please leave comments.
| elsas_bodice_motifs_-_word.docx |
| elsas_skirt_motifs_-_word.docx |
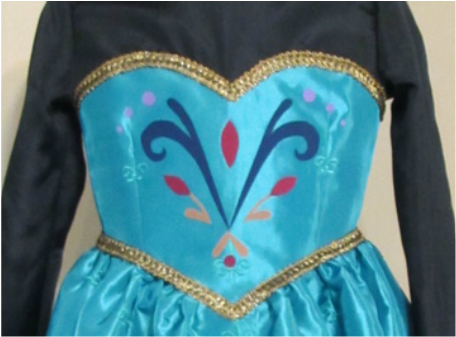
There is one measurement for the bodice motif (A) and two measurements for the skirt motif (B & C). These motifs will most likely need resizing.
These are the measurements I recommend for these dress sizes.
Child 3 - 4: (A) 5", (B) 8.5", (C), 5"
Child 5 - 6: (A) 5", (B) 9.5", (C), 5.5"
Girl 7 - 8: (A) 6", (B) 11.25", (C), 7"
Girl 10 - 14: (A) 7", (B) 13", (C), 7.5"
Adult: (A) 8.5", (B) 14.5", (C), 8.5"
To figure out what percentage to enlarge the motifs. Measure what the A, B, and C are on after the artwork is printed out. Then figure out what size you want those measurements to be and go to this on line Proportion Calculator. There you will find a calculation with 4 boxes.
Fill these boxes in as follows using decimals for any fractions. In the upper left box, put in the size your print out measures, in the box just below fill in the number (100) which stands for one hundred percent. Then in the upper right box, put in the size you want the motif to be. Hit the word "calculate" and the answer will be the percentage amount the artwork needs to be enlarged. This number will probably have to be rounded to remove any decimal points. Enter this number at a copy machine that enlarges and reduces where it asks for percentage to get a copy of the artwork in the size you need.
I am planning to make 12 repetitions of the skirt motif.
It is best to do the skirt first, starting at the back. So, by the time you work your way around to the front and especially when you do the bodice motif, you will be good a this.
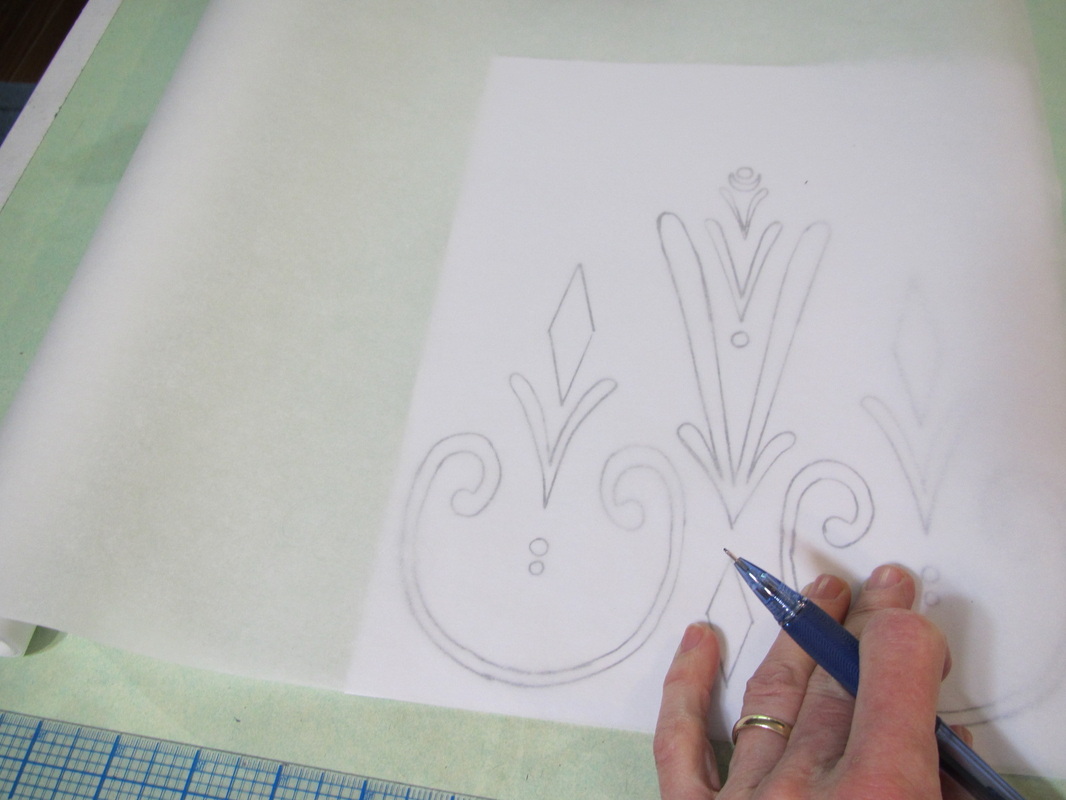
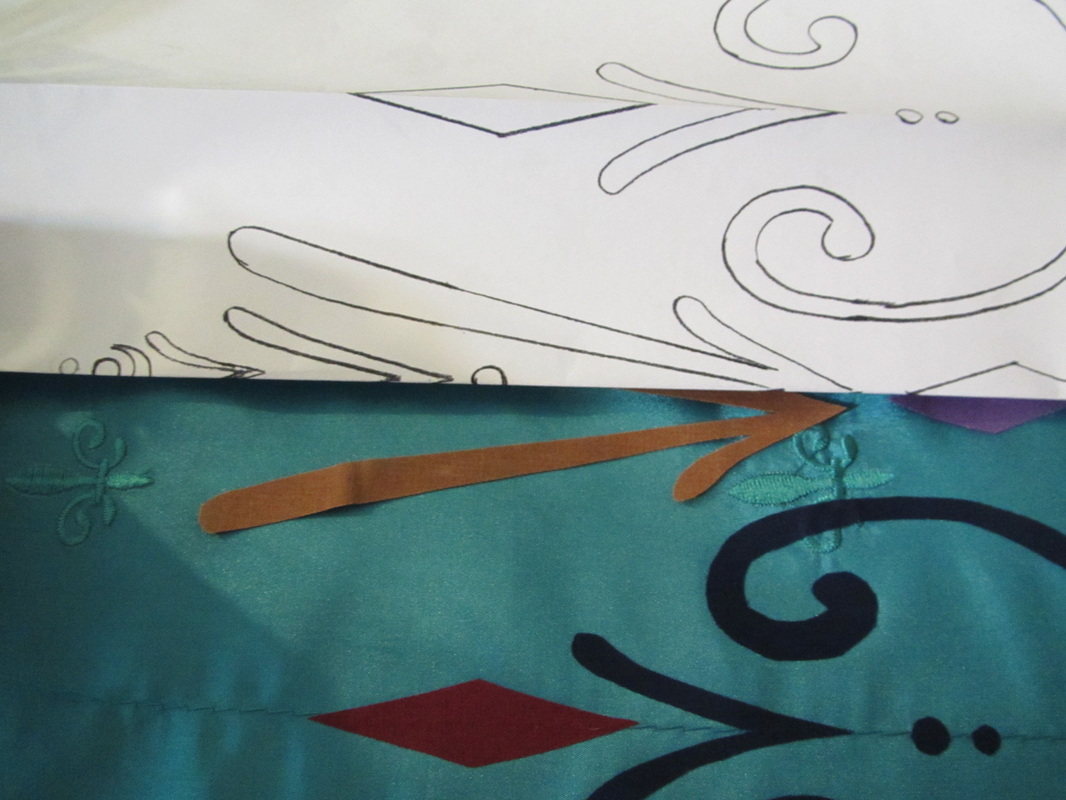
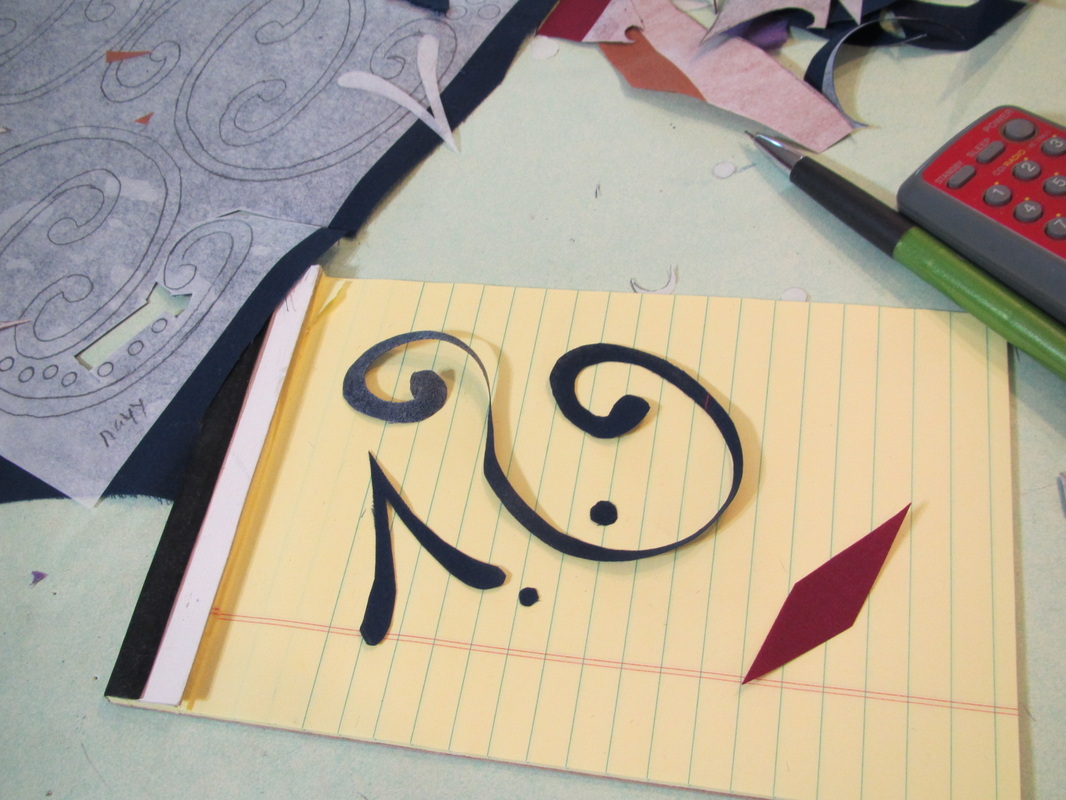
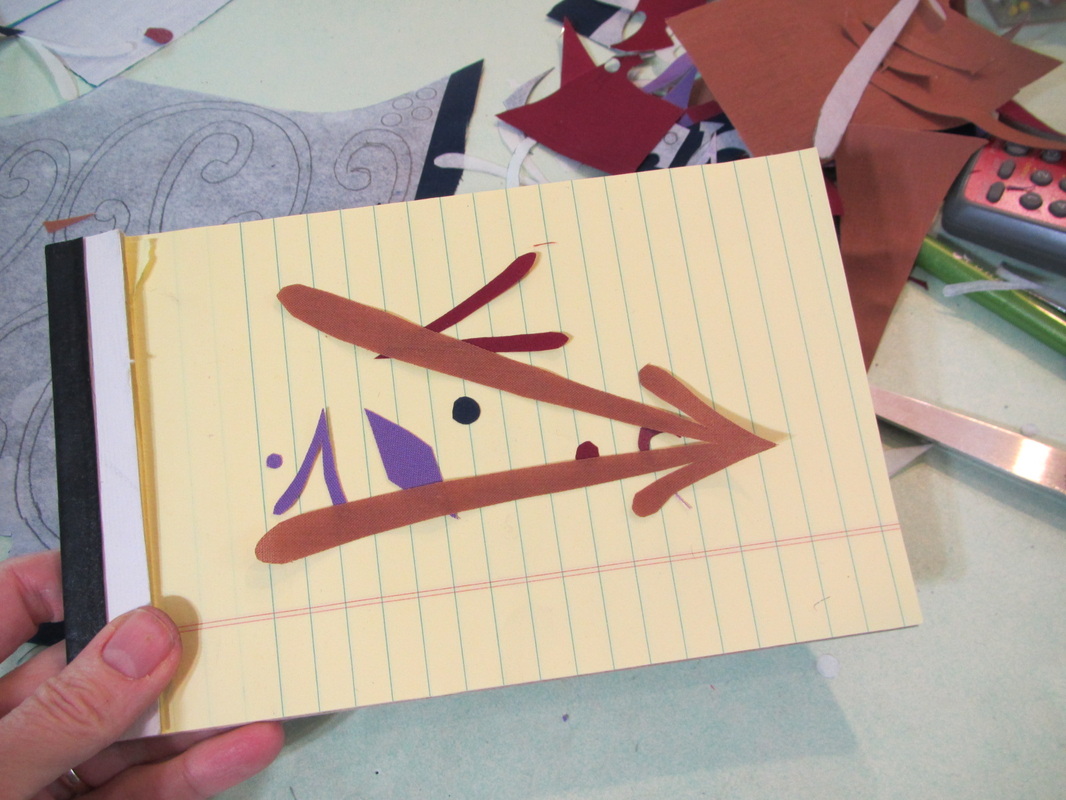
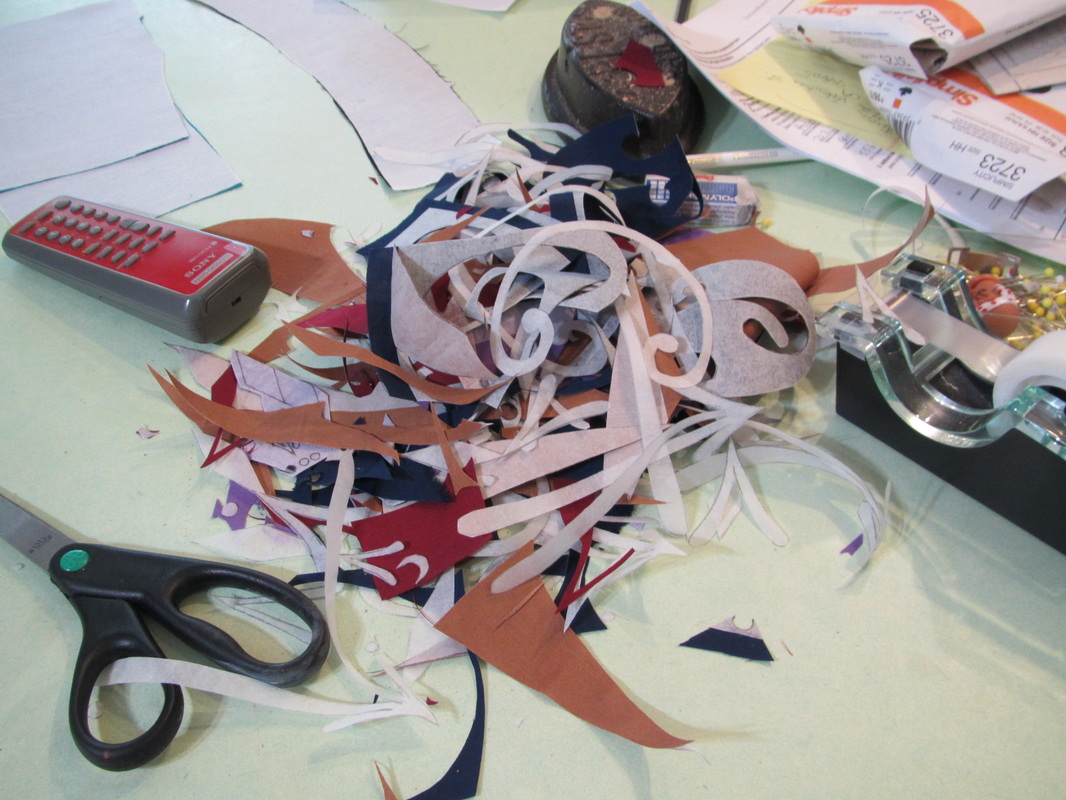
Once the artwork is the size you need it, then lay the paper backed fusible webbing (Heat'n'Bond or Wonder Under) over the artwork and start tracing them, close together, grouping by color. I'm working fast, because there are SO MANY of these to do. My tracings are not perfect, but I cut straighter than I draw, so I will clean them up as I cut.
I even write the name of each color I plan to use on each piece, so I don't get them mixed up. A plastic circle template helps draw better circles, if you have one.
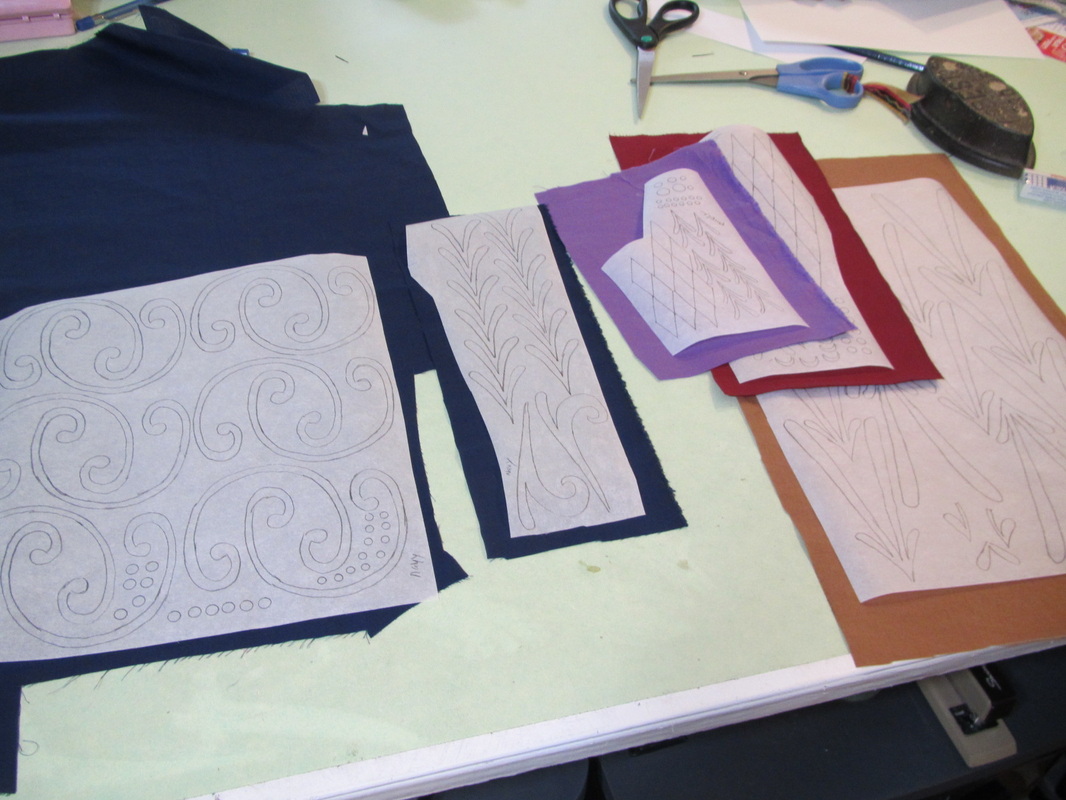
Then cut pieces of the colored broadcloth for each sheet of your tracings and iron them on, following the instructions for the brand of fusible webbing you bought.
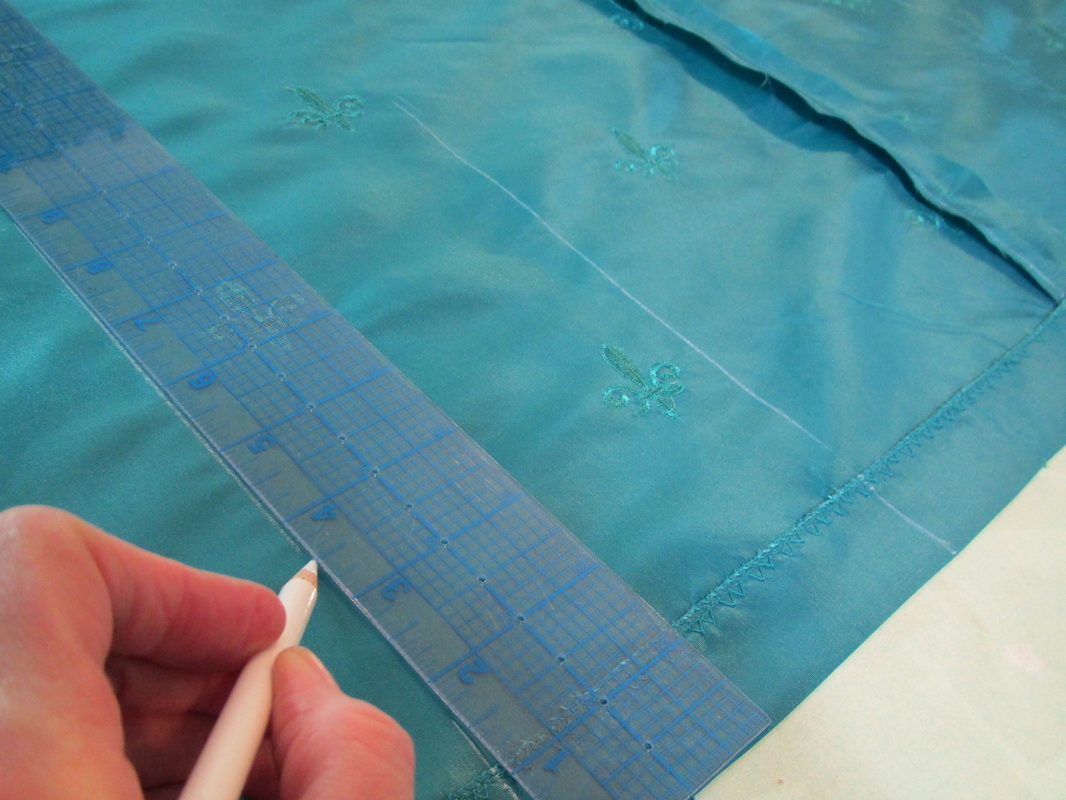
To prepare the skirt for the motifs, assemble the three skirt panels, leaving the back open and then hem the skirt.
On the inside of the skirt draw a vertical line exactly on the center front of the skirt the length of the (B) measurement from your artwork, starting at the hem. Then draw similar parallel lines going both direction at intervals that are the (C) measurement working around to the back. To have 12 repetitions of the motif, 13 of these lines are needed. The two lines on each end are your new center back seam and will be joined later when the dress is being assembled.
SO ... IMPORTANT! There is going to be extra fabric on either end of the skirt. Don't worry. This will be dealt with later.
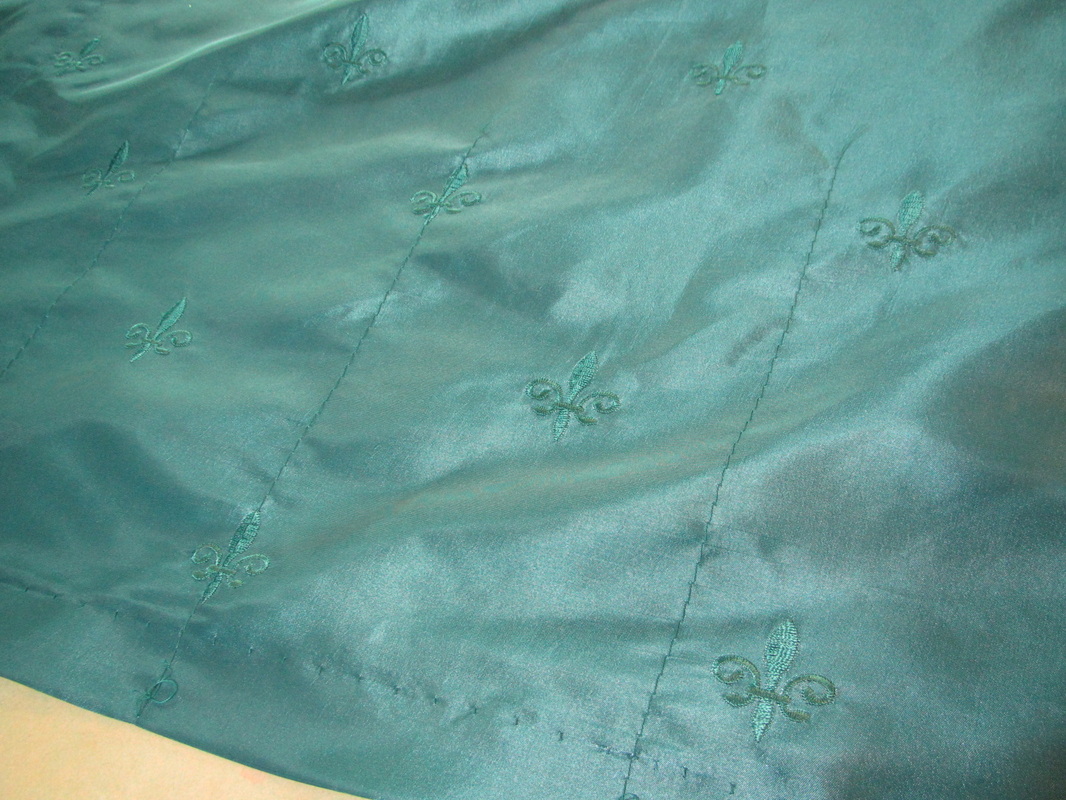
Straight stitch along each of these lines with a long machine stitch. These will be your guides for placing the motifs.
Another .... IMPORTANT!!!
Do not do the very center back 3 motifs (one with curved bottom and two of the taller ones on either side) at this time. They will be done after the dress is finished.
Another .... IMPORTANT!!!
Do not do the very center back 3 motifs (one with curved bottom and two of the taller ones on either side) at this time. They will be done after the dress is finished.
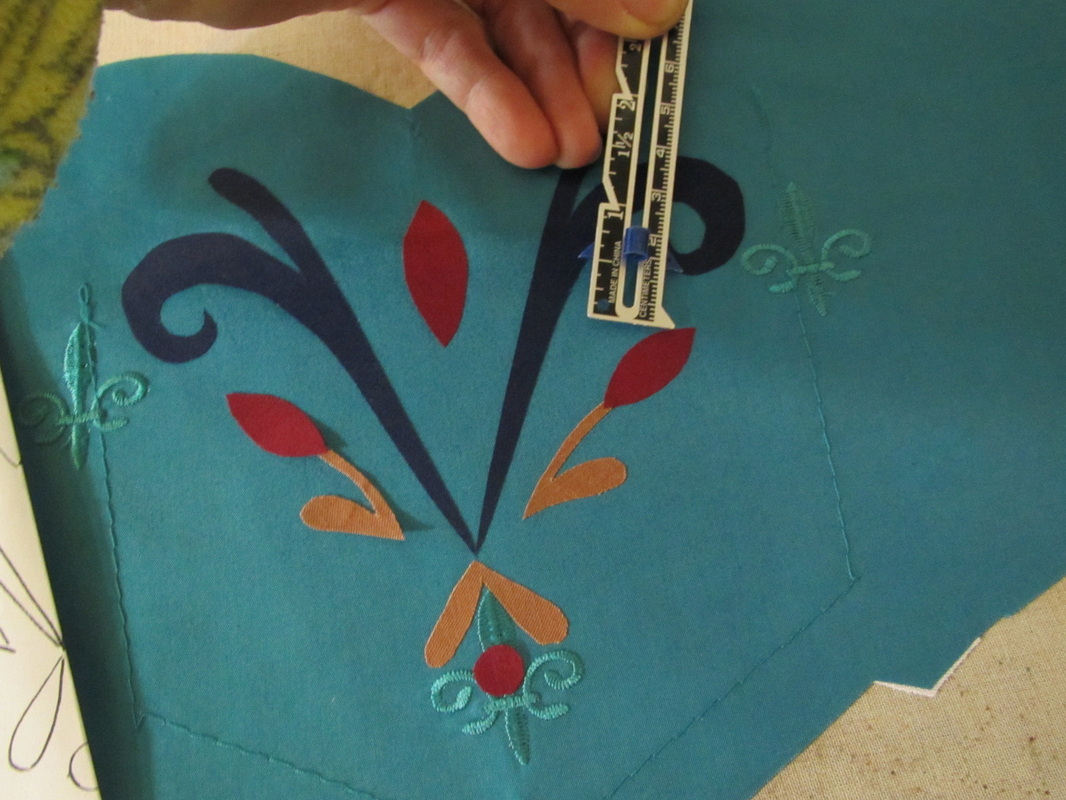
Time to cut out the motifs, through the paper and peel the paper away. Start on one side at the second stitching line from the end. (remember, don't put any motifs on the two machine stitching lines on either end just now) Line up one of the motifs with the curved bottom along the machine stitching. These motifs with the curved bottoms need to be done first. I fold my artwork to get the spacing correct without having to actually mark on the fabric.
Then you can fit the other motifs between.
Again using a folded version of the motif as a guide.
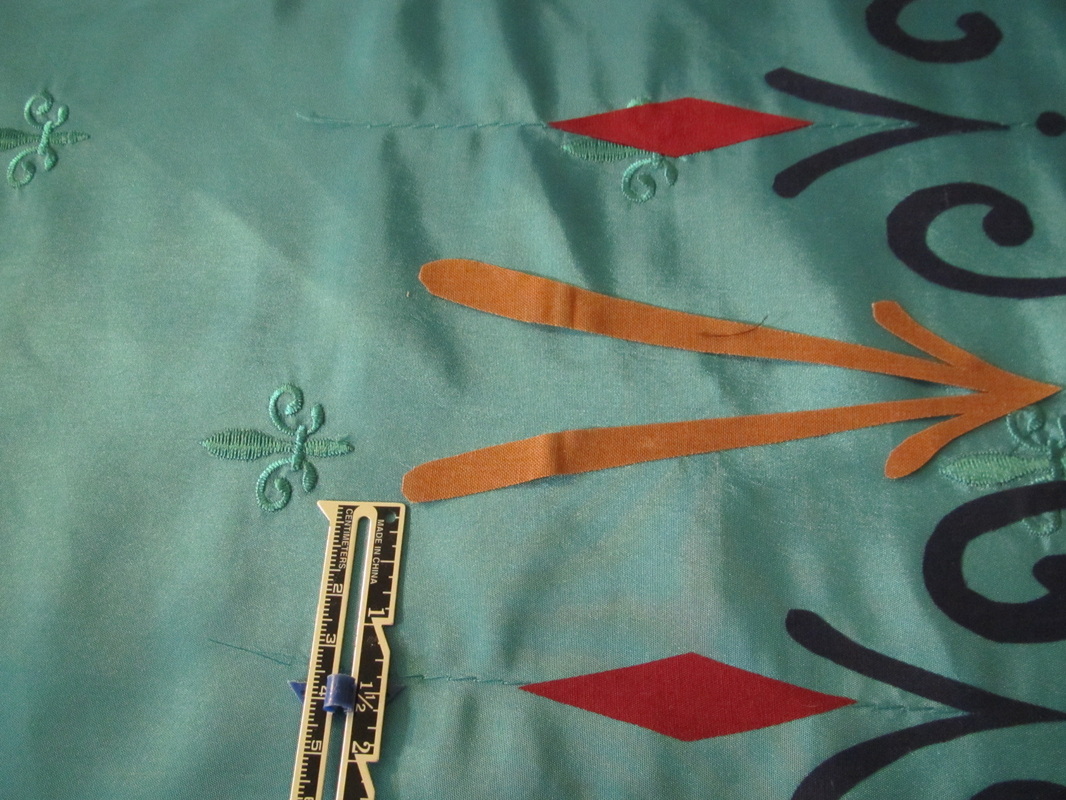
Check spacing with a ruler ...
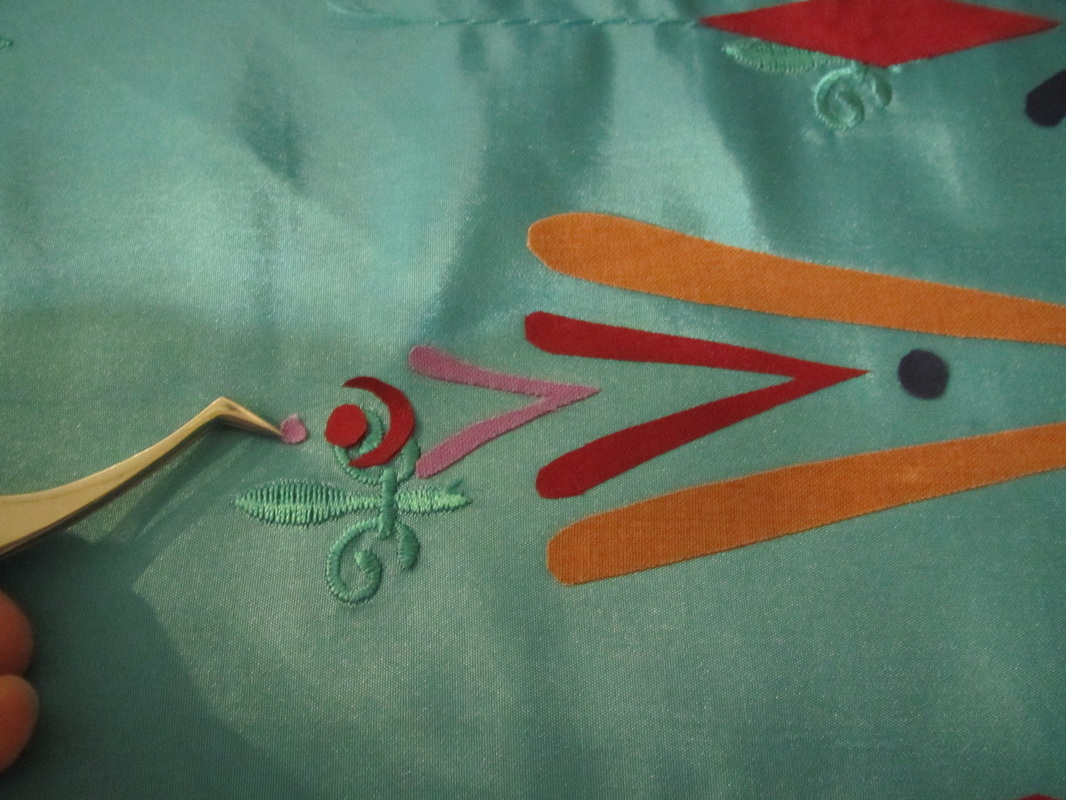
and tweezers REALLY help with the small pieces. Otherwise, they tend to stick to your fingers.
 |  |
I found cutting the pieces for each complete motif one at a time and carrying this over to the ironing board less tedious.
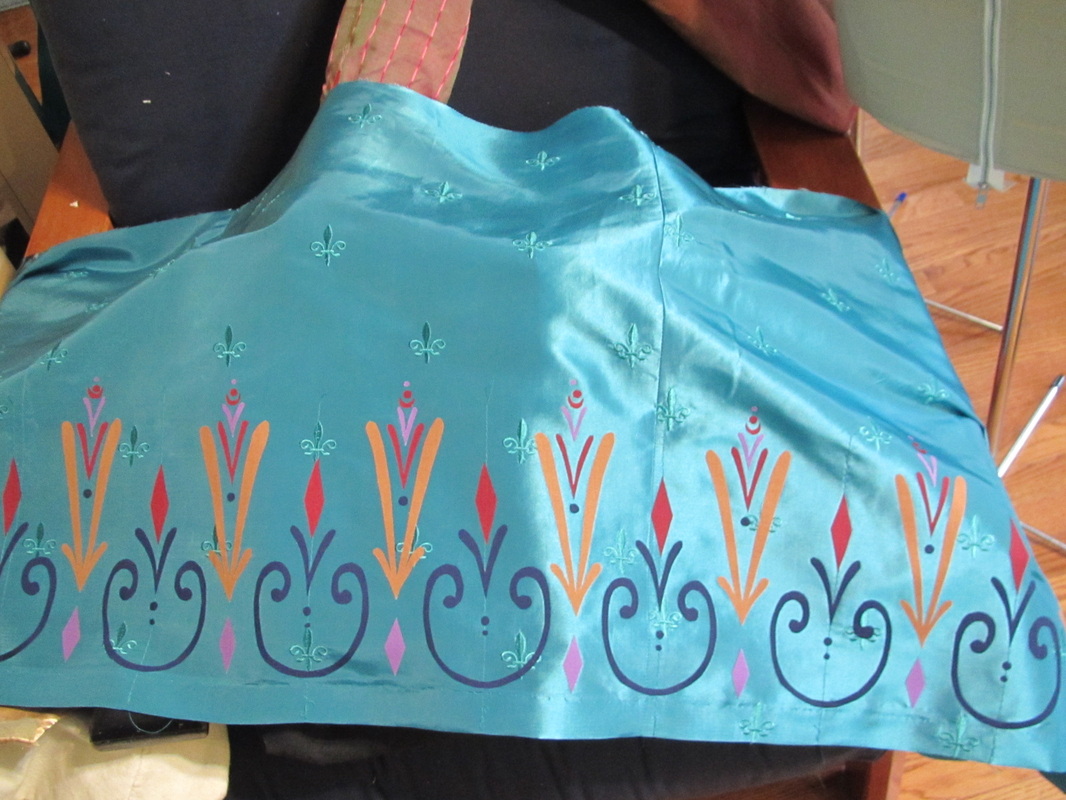
Skirt done! I've gotten better at this and am now ready to tackle the bodice.
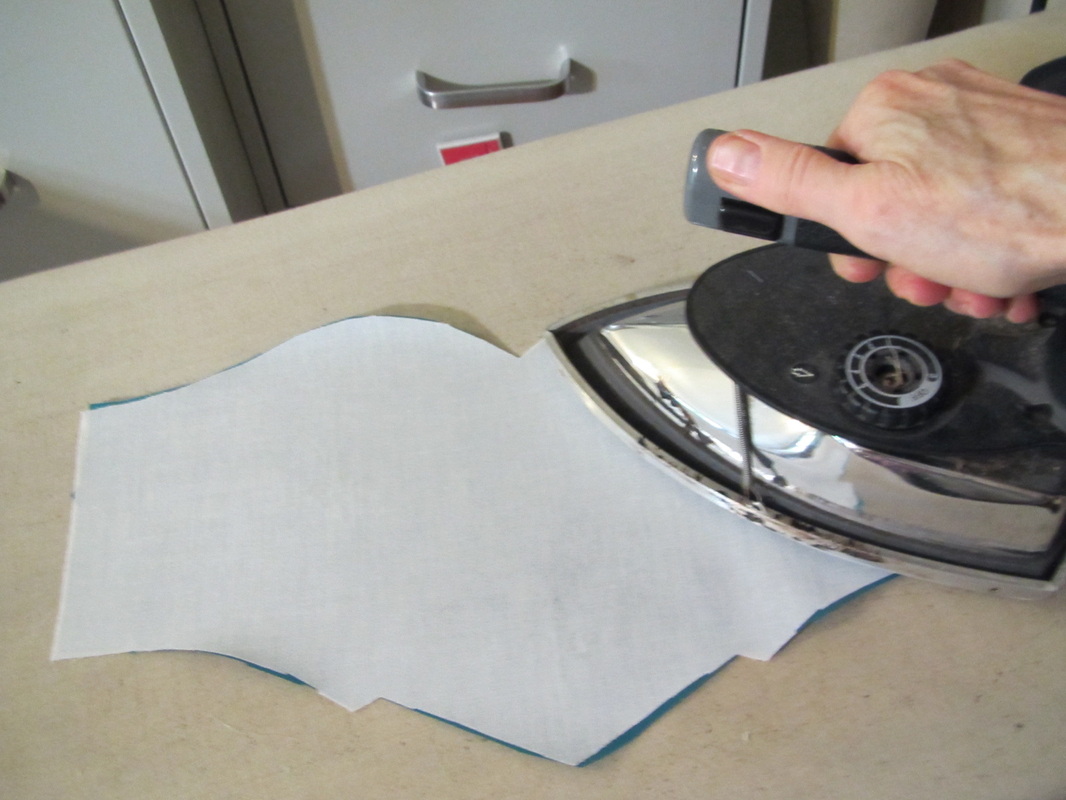 | 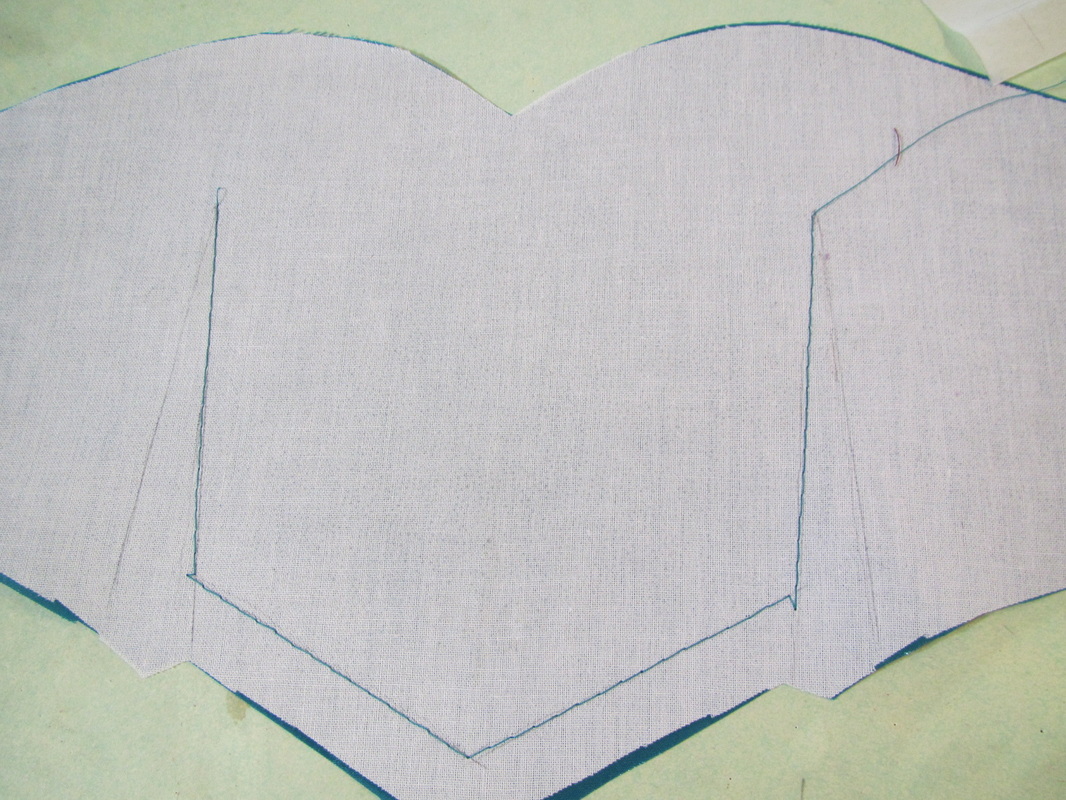 |
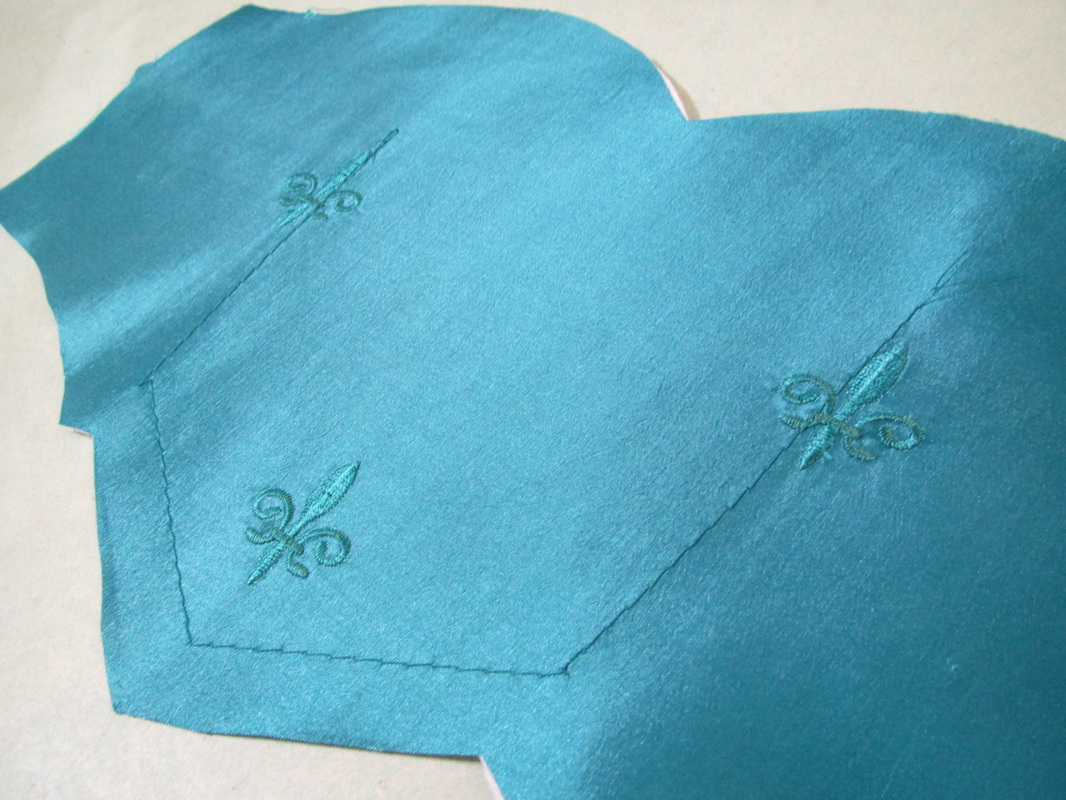
To prepare the front bodice, press on the interfacing (remember to let it cool before moving it at all!). Then mark the darts and stitching line for the waist.
Machine stitch along the inner line of the dart and waist seam between the darts. This will make sure no motif bits end up in the darts or waist seam. There is no seam allowance at the top.
Use all the same techniques as for the skirt motifs.
Since this will be the focal point triple check all the pieces are symmetrical.
To avoid the dart, I had to spread the purple dots out farther than the artwork show. You may encounter similar problems. Possibly, for the woman's version some, of the motif pieces might have to go over a sewn dart. In that case, I would do as much as possible with the dart open, THEN sew the dart and complete the motif.
After this, the sewing will be easy!! And that is for tomorrow.
After this, the sewing will be easy!! And that is for tomorrow.
 RSS Feed