
Since I talked about zippers yesterday, I thought I would show you how I set in a zipper. I developed this method years ago on my own and have never seen anyone do it this way. But, as I'm writing this I am going to do a little research on line to see if there is another person or two doing it the same way. REALLY ... the world is pretty huge and there are lots of people who sew ... so ...
WELL, OK, after some searching around, I think I might be the only one doing it exactly this way. hmm
And, this will be a spotty tutorial, since I didn't think I was the only one! HA. Let me know if you want a more detailed one and I will do that.
The big difference in the way I set in a zipper is the seam stays open the entire time. I never baste it closed and every other tutorial I saw on line bastes the seam up. That is how I was taught to do it and I found it very confusing as a kid.
My way works best for a lapped zipper.
Basically, I hate to put a centered zipper in.
I find no matter how much I tape or baste or whatever, it is so hard to get the left and right lap sewn the exact same size.
But, if you want or need to do it that way. Try this tutorial out at Sew Mama Sew.
I find no matter how much I tape or baste or whatever, it is so hard to get the left and right lap sewn the exact same size.
But, if you want or need to do it that way. Try this tutorial out at Sew Mama Sew.
So, here is a brief description of my zipper technique.
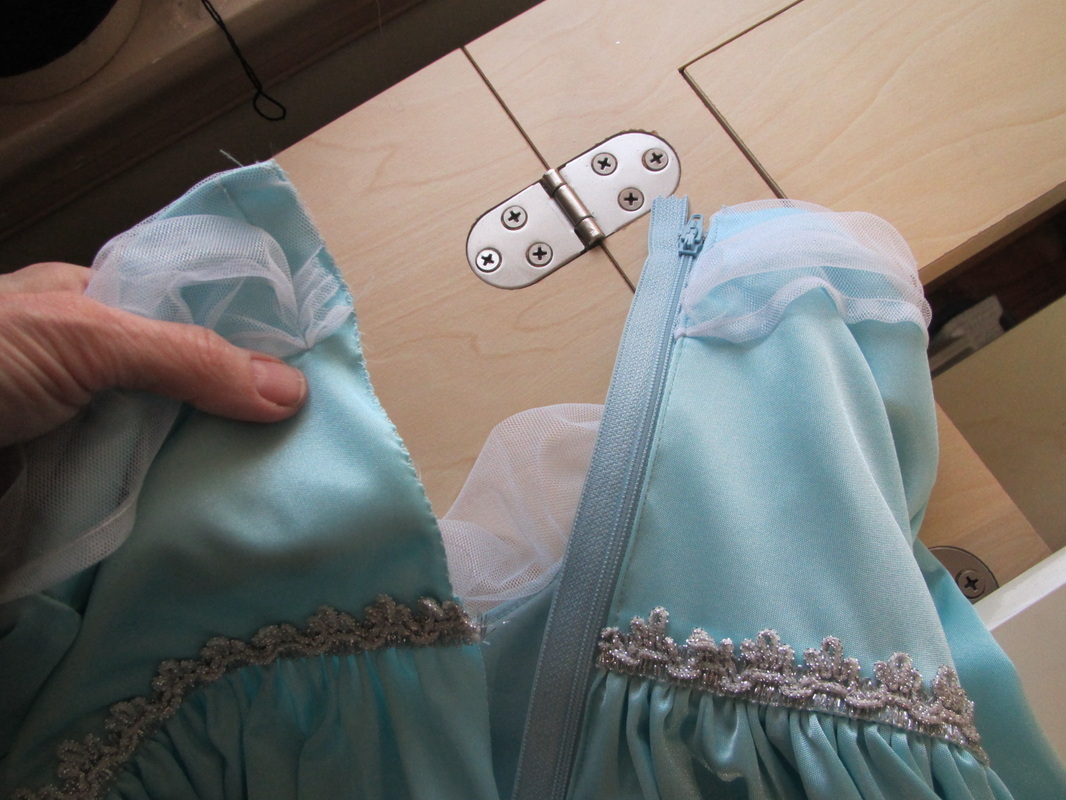
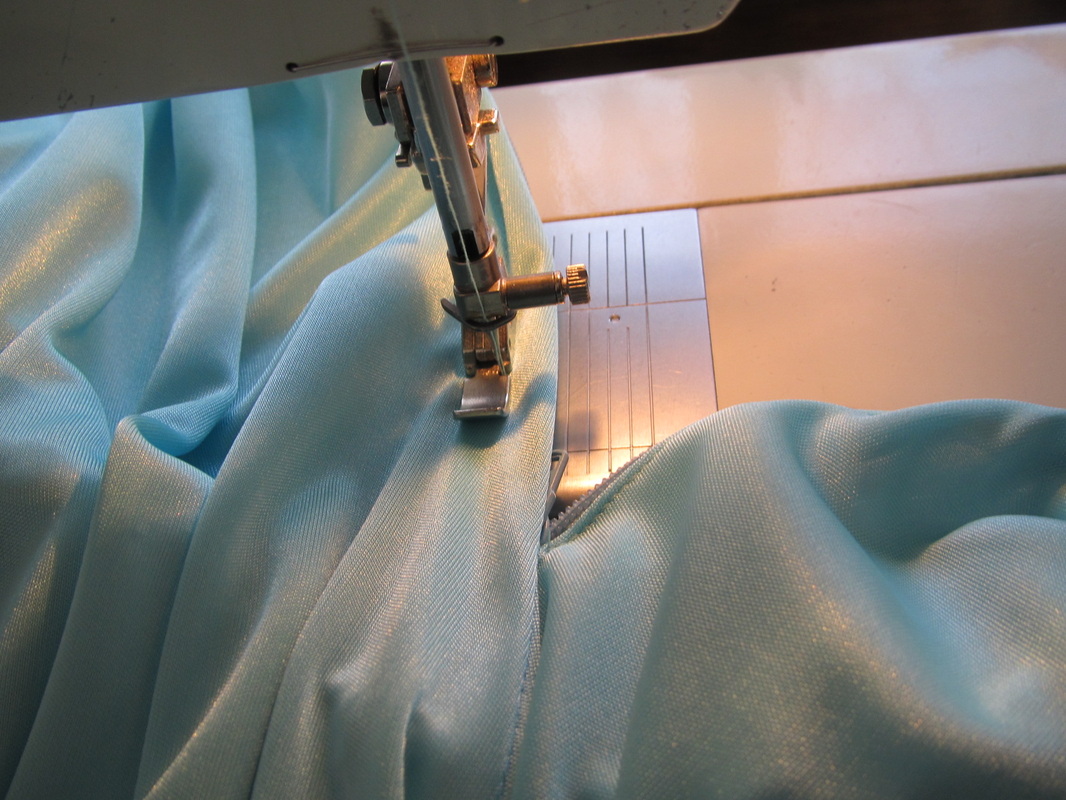
First (see first photo), finger press or press with an iron the seam allowance on the right side of the seam back 5/8". Pin the zipper exactly next to the pressed fold and edge stitch in place.
Next, press the seam allowance on the left side back. Here I often press 3/4" instead of the usual 5/8" to make sure the fold is large enough.
Then I start to pin the left side in place starting with any seams, trims or collars that need to be matched up.
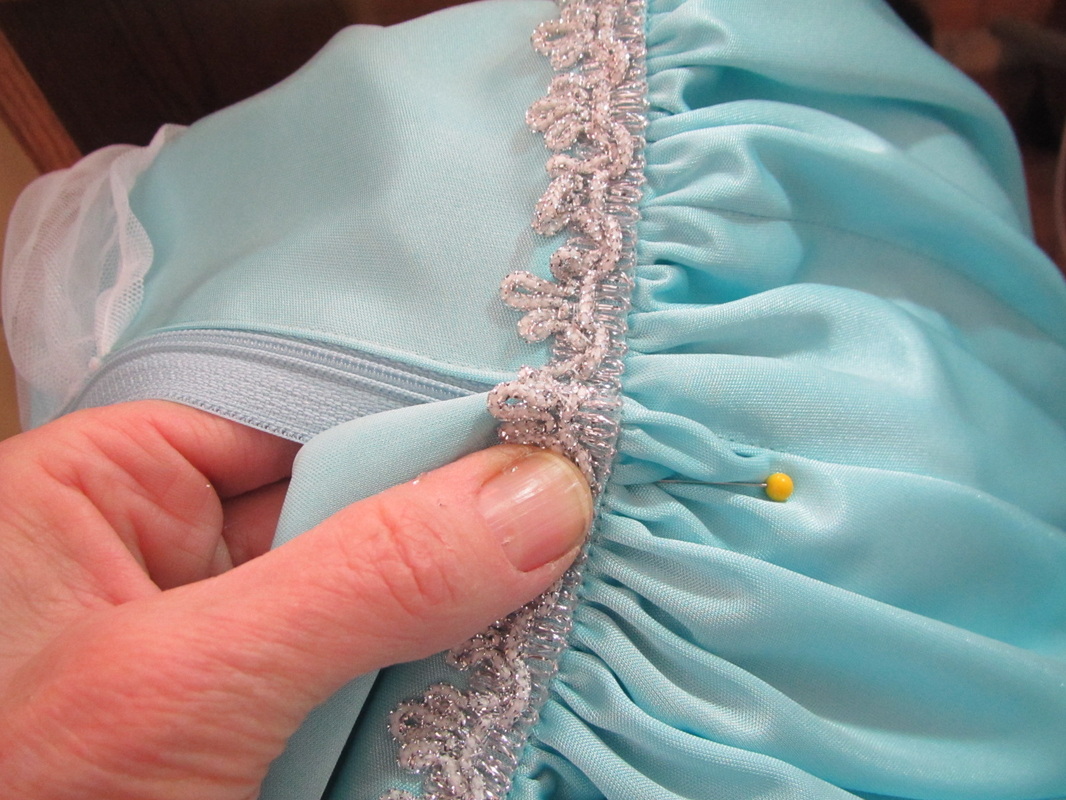
I pin it so the fold of the left side JUST covers the stitching line of the right side.
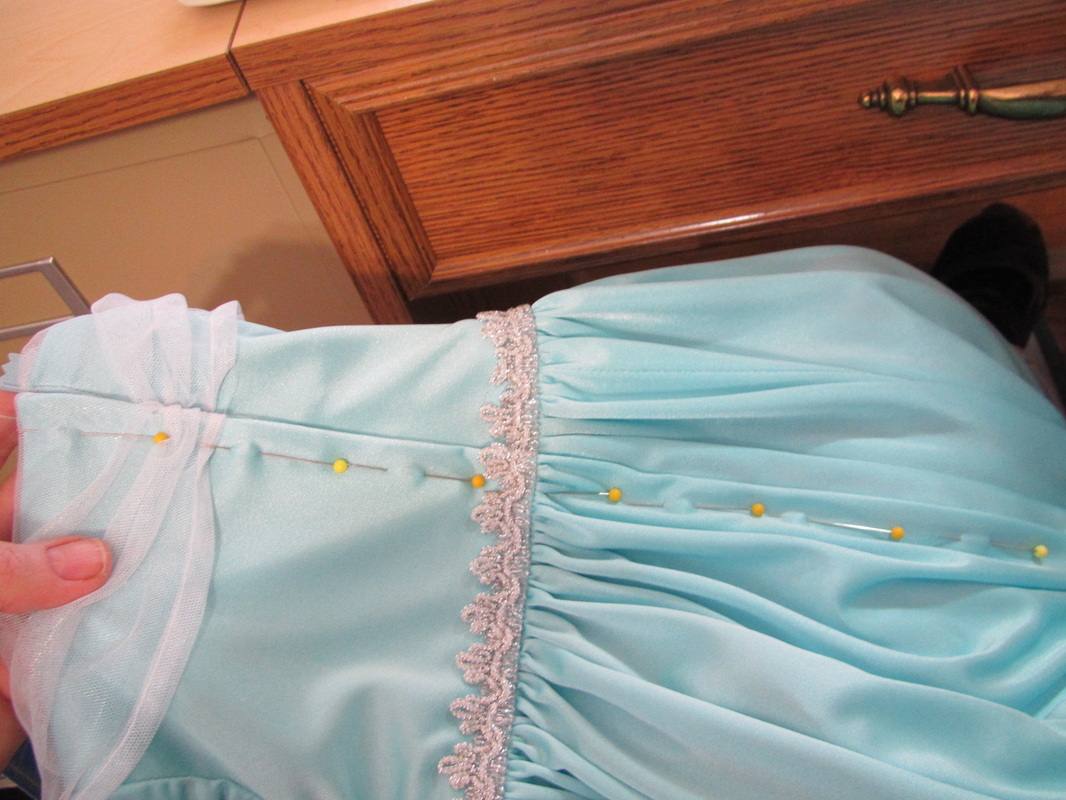
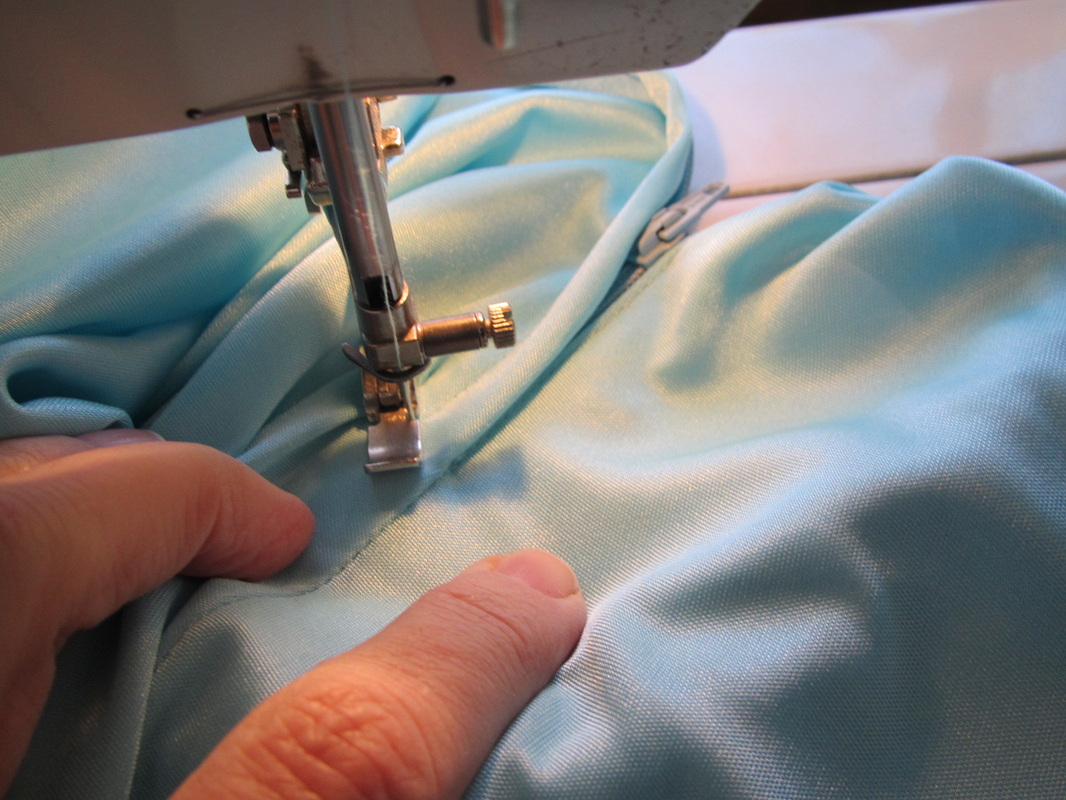
Here is the left side all ready to be sewn.
Here is the left side all ready to be sewn.
Now, I found a tutorial that was the same up to this point. This other tutorial asks you to stitch the zipper just like this, but I find it very hard to stitch an even lap this way. I figured out, if the zipper is UNZIPPED then the little seam allowance lines on your sewing machine's throat plate can help you stitch a straight line!

When you reach the bottom there is a little trick.
Leave the needle down in the fabric, lift the presser foot and close the zipper a few inches.
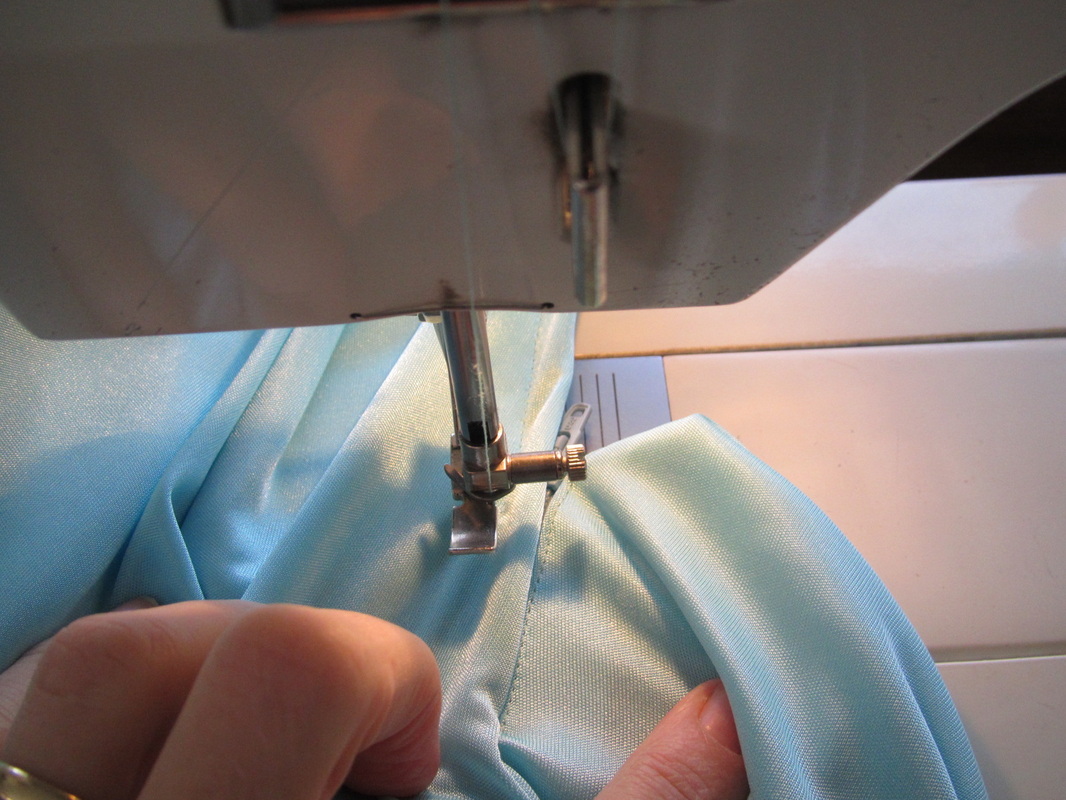
Finish stitching the zipper and then stitch across the bottom. I usually stitch the bottom at an angle ... just think it looks more professional than straight across.
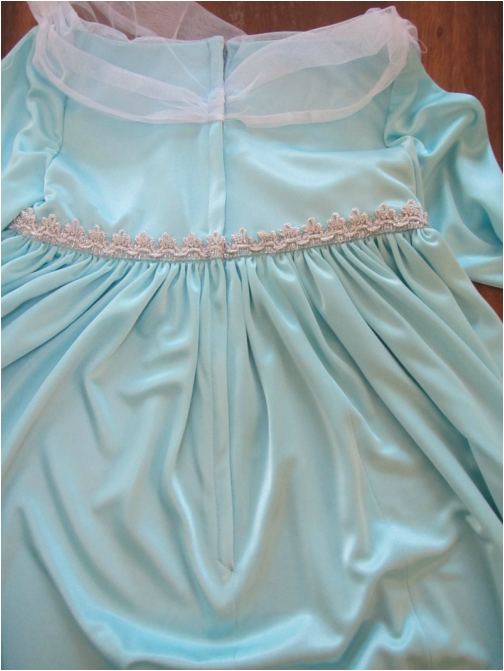
Here are the results.
If you want to know almost everything there is about sewing zippers, check out this site sew4home.
Personally, I almost always use an invisible zipper for my own projects. I will write about them next week.
Personally, I almost always use an invisible zipper for my own projects. I will write about them next week.
 RSS Feed