Andrea Schewe Design
  • Home
  • Costumes
    • Reader's Gallery
    • Fantasy Costumes
    • Theatrical
    • Historic >
      • Easier to make
    • International
    • Costumes for Kid's and Babies
  • Crafts
    • Home Decor >
      • Pillows
    • Fashion Accessories
    • Doll Clothes
    • For Kids and Babies
  • Blog
    • Past Blogs by subject >
      • My patterns by number
      • Sewing basics
      • Personal sewing Projects
      • Fashion History
      • Fun and funny stuff
      • Guest Bloggers
      • Crafts and Home Dec
  • Links
  • Contact

New Pattern #1427 - tulle skirt - trickier than it looks!

2/27/2014

27 Comments

 
Picture
Story time ...

When I was asked to do these skirts, I thought "WOO HOO! ... a FASHION pattern and SO easy, just gathered tulle, I've done gathered tulle a million times."
Picture
Picture
Picture
Picture
How hard could it be??? Well, let me tell you.

First of all, it is going to be a garment worn as clothes, not costume, so it needed a sewn in under skirt.  I decided that it needed to be circular cut for fullness at the bottom without bulk at the waist.

So I made my circle skirt pattern the way Martha McCain taught me when we were working in the New York costume shops back in the day.
Picture
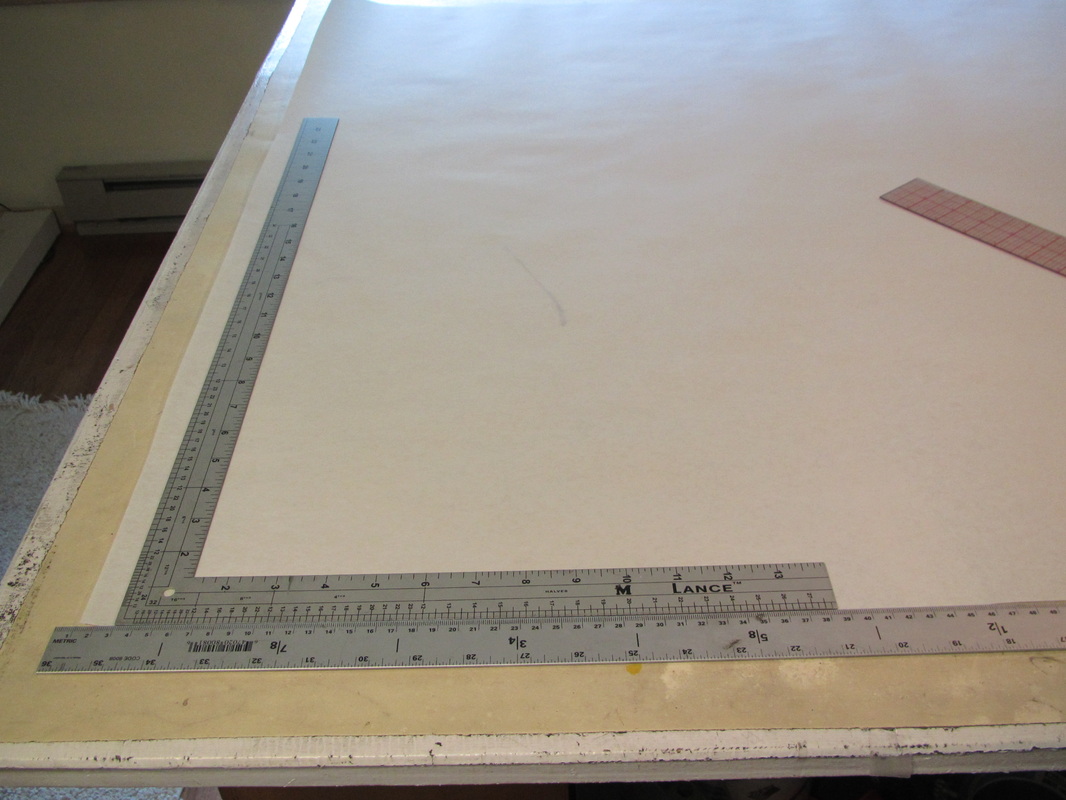
Some math an L-square and ruler to get started.
Picture
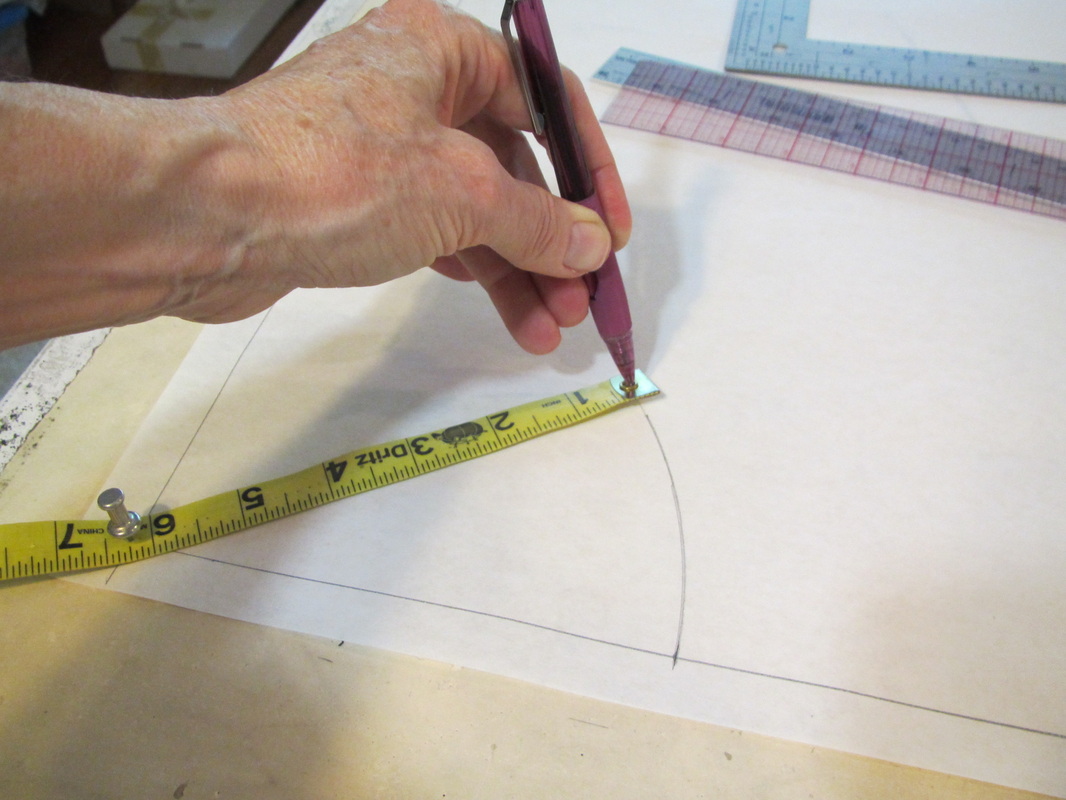
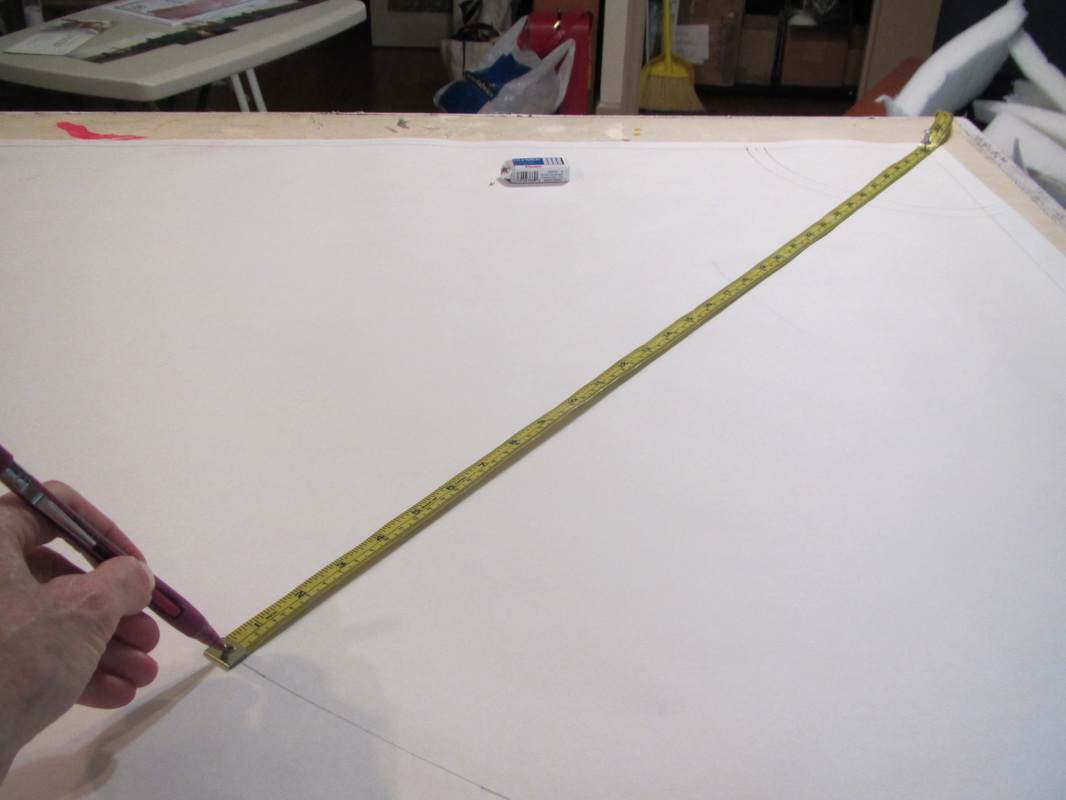
And do you know the the REAL reason tape measures have that little hole at end? Well, I don't know if this is the real reason, but it sure is great for drawing circles, but you do need a table you can poke a pin into.
Picture
And here are my first two mock ups.
Picture
Picture
Clearly too skimpy.  It is tricky striking the perfect compromise ... keeping sewing and cutting not too hard AND having the finished product look right.

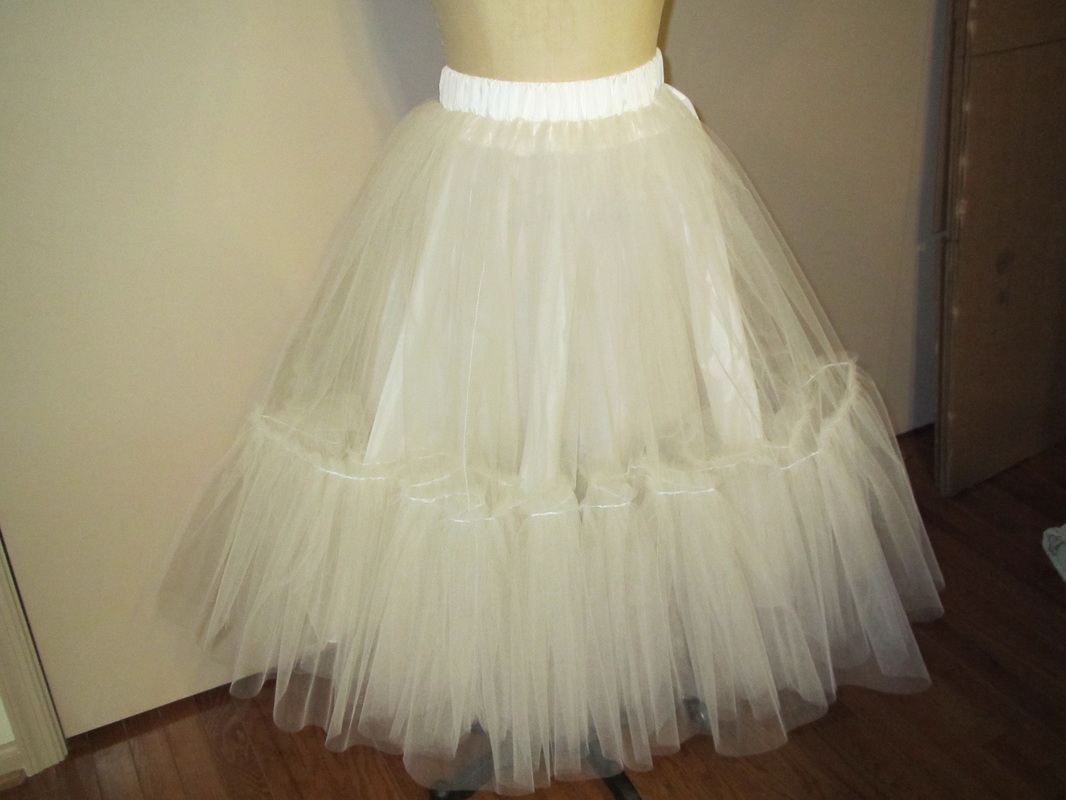
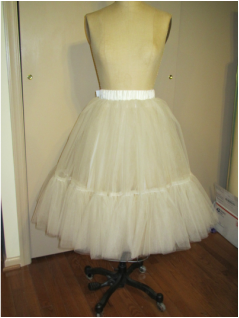
This first white sample is two layers with 4 to 1 flounce ruffles on each layer. The black/pink one is 3 layers, 2 pink and one black on top.  The layers for both skirts are 4 - 54" panels of tulle.  This I kept constant.  I found a 4 panel layer of tulle the most I could manage without loosing my mind.

On to the second set ...
Picture
Picture
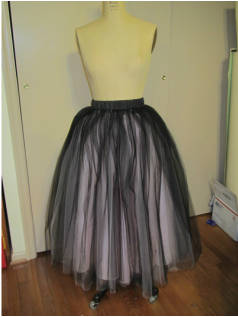
The short one is still a two layer skirt, but it is now a bit shorter and the outer layer is sewn double as are the ruffles on both layers to make it more opaque. The black/pink one now has a doubled outer black layer. 

I thought I'd gotten it perfect this time, but ... NO!  The folks in the fashion department along with Abbie Small, who is now the #1 person at Simplicity sent them back again with more instruction.

And here is the third set ... 
Picture
Picture
Here are the notes I sent along with these samples.


Tulle Skirts - Third pass

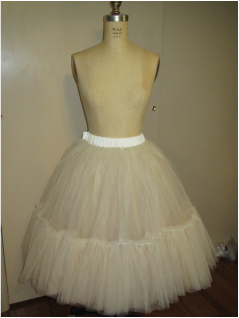
This skirt (off white one) is now 7 layers and will require 35 yards of 54” tulle.

It’s a little tedious to sew, but I think it looks pretty good.


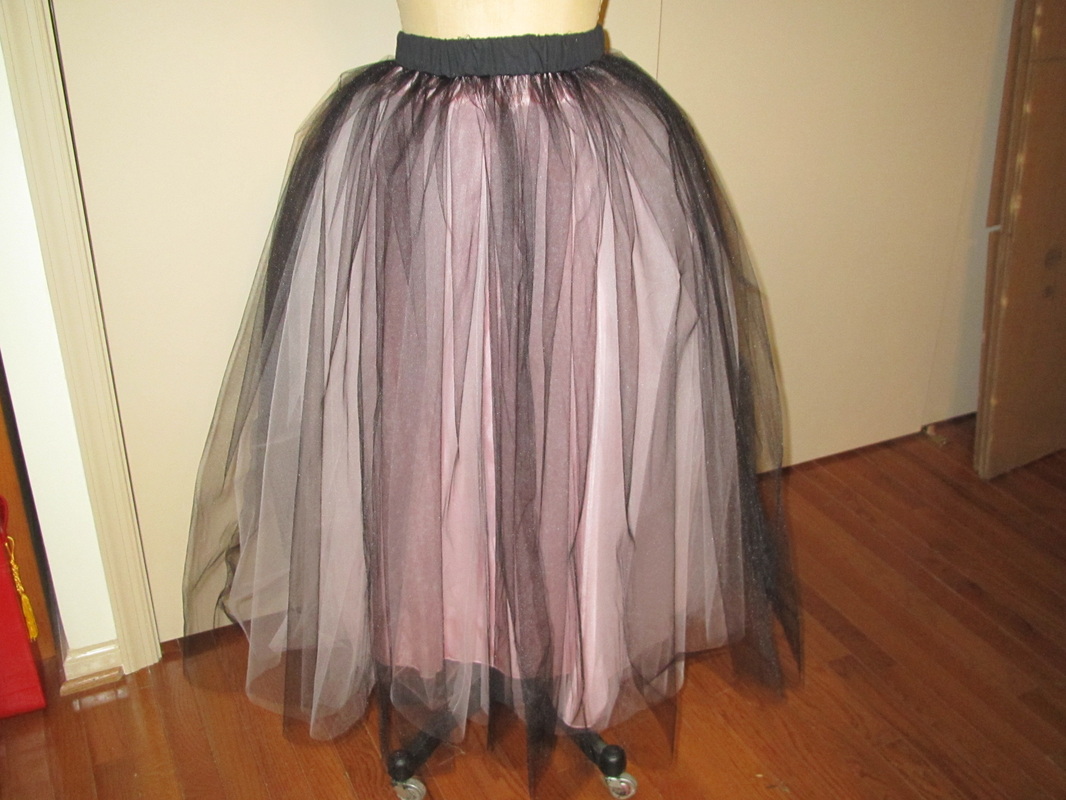
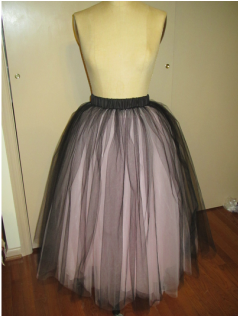
This skirt (black/pink one) is now 4 layers all gathered separately. 


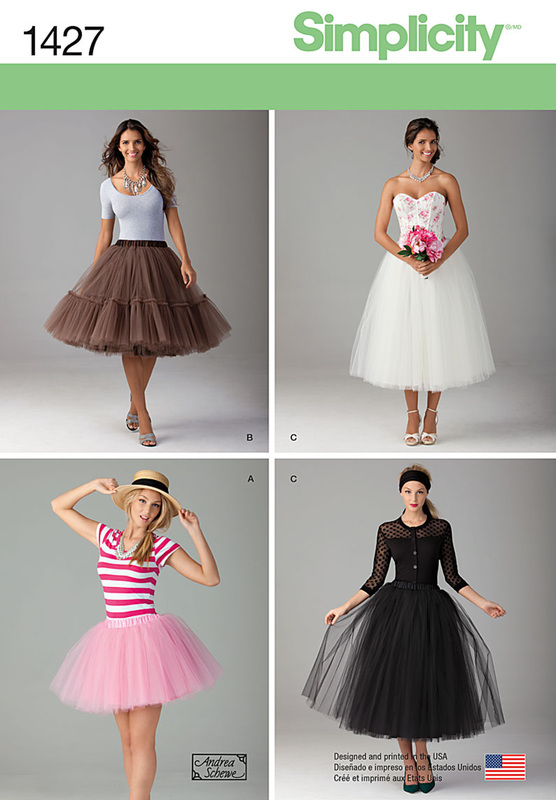
They were approved, but the two color scheme was nixed, as you can see on the envelope above.


The two outer layers of the off white one have flounce ruffles sewn to them.  Needless to say ... IT WAS A LOT!!! OF TULLE AND A LOT!! OF GATHERING.


Tomorrow I will share and show the sewing process with a few tips to, hopefully, make doing this easier.


27 Comments
Ann Wass
2/27/2014 07:22:35 am

Thanks for the hint on the tape measure "compass."
Love the skirts, but how many people are going to look at the 35 yards in the envelope and say NO WAY!?

Reply
Maureen R.
2/27/2014 10:40:06 am

My serger does gathers - that's why I bought that model - but do you think it would work with tulle? (I've only gathered cotton or muslin.)

Reply
Andrea Schewe
2/27/2014 10:33:08 pm

No. There is too much to gather

Reply
Andrea Fenise link
4/21/2014 10:24:33 pm

Hello! I love this pattern. However, it is a tad bit trickier than it appears. On step 3 of the pattern sewing skirt c it states pin wrong side of one skirt to right side of the other are those the front and back sections of the top layer?

Reply
Andrea
4/22/2014 01:15:44 am

I don't have a copy of the official instructions, so can't comment, I'm afraid, but basically a couple layers get sewn into where the waist band is attached and a couple layers are sewn to the bottom of the inside fabric yoke. This was too prevent too many layers of tulle being in the waist seam which would be too thick.

Reply
Renee Adams link
5/7/2014 03:03:21 pm

I LOVE the tip about using that little hole in the top of your tape measure!!! The skirts are adorable and congratulations on being in the Fashion section :)

Reply
Renee Adams link
5/7/2014 03:03:40 pm

I LOVE the tip about using that little hole in the top of your tape measure!!! The skirts are adorable and congratulations on being in the Fashion section :)
http://www.etsy.com/shop/DollhouseDesigns

Reply
Renee Adams link
5/7/2014 03:03:57 pm

I LOVE the tip about using that little hole in the top of your tape measure!!! The skirts are adorable and congratulations on being in the Fashion section :)
http://www.etsy.com/shop/DollhouseDesigns

Reply
Monica link
6/11/2014 10:04:38 pm

I tried the skirt using the black pattern. It was difficult for a first time sewer but I got it towards thr end. I didn't cut un layers just kept all the fabric intact and sewed and gathered in sections. I love the results!!!! Thanks for your tips!

Reply
Luanne
10/27/2014 12:36:07 pm

Thanks for documenting the process - it is great to see what went into the end result. You say (for the black skirt) each layer was gathered separately. That is how I found your blog - I have a skirt w/underlining, a layer of organza, two layers of white tulle and a final layer of glittered (with spray glue) tulle - so it is a bit stiffer. The tulle and organza all get cut & gathered the same. I was thinking I could gather them at the same time, but your note above says otherwise. That is where I am heading - but I am curious, without actually taking the time to make this mistake - what happens if you gather them all at the same time? Why not do this? Thanks for your learning!

Reply
Andrea
10/27/2014 09:54:04 pm

If you gather the fabric for more than one layer together, it just becomes one think layer. All the gathering folds together and you don't get the benefit and loftiness of a multi layered skirt. I know because I've tried it both ways.
It is quicker though.

Reply
Luanne
12/5/2014 02:16:25 am

Thanks! I guessed that might be the case and gathered all the tulle and organza layers separately. I then did a petticoat using a heavy cancan net gathered on a crinoline a-line slip. It worked well for the Quinceaneara dress it had to support. The instructions I went with had the net folded in half and gathered along the fold. I found I could get extra fullness by manually separating the two layers up to the fold (after it was attached to the slip), but eventually they fell back into one thick layer. I also sewed the seam such that the net folded back down over the seam - it gave it added lift but was a nightmare to sew.

Michelle G
12/5/2014 12:43:29 am

How many yards did you use for the black skirt in the end? I want to make matching tulle skirts for me and my sister for Christmas...

Reply
Andrea
12/5/2014 12:52:28 am

Well, I hope you will buy my pattern. I'm only paid by how many pattern are sold! But, you can also go to the Simplicity website and look at the back of the envelope there to see what the yardage is.

Reply
Janis Arntz
12/7/2014 09:20:57 am

My daughter wanted a prom dress with a lace top and tulle skirt, but she didn't want a bulky, poofy waist, so I cut the tulle on folds in a pie shape so that when unfolded it would be a full circle. At the top of each "pie piece" I cut a small arc that would create a circle the size of her waist when unfolded.I created 10 of these full circles, and loosely zig-zagged the raw edges of each circle together, then layered the 10 pieces on top of each other and connected them to the lace bodice of the dress. It turned out beautiful! There was no bulky poof at the waist, and it draped beautifully down to a full, floaty bottom over a circle cut under skirt. It was a lot of work to cut the tulle smoothly, but the sewing was minimal. The dress was in ivory with a dark red 2" double sided satin ribbon at the waist and she wore red patent leather 2" skinny heal pumps. She said she felt like a princess the whole evening... :)

Reply
Mary Rotrekl
3/9/2015 04:51:41 pm

Why do you say that "a 4 panel layer of tulle the most I could manage without losing my mind" ? Is it so you could use the seams as markers so that you could have equal gathering all the way around? Or another reason? Just curious.

Reply
Andrea
3/11/2015 03:14:37 am

Yes, using 4 panels is convenient for dividing up sections, but mostly the sheer amount of fabric is what I'm referring, too. But, put it more if you like!

Andrea

Reply
Marie link
6/20/2015 04:04:01 am

I am SO glad, I found your blog! It is really interesting to see the steps it takes to complete a commercial pattern. And what a pleasant surprise was the Sailor Moon pattern!

One question though regarding tulle and pulling. Why didn't you use circle skirts rather than rectangles? Does tulle pull unevenly when a ruffle is added? I think there would be less bulk around the waist and less fabric to purchase.

I'd really appreciate a reply :)

Reply
Andrea
6/20/2015 04:27:47 am

What you are saying is good for regular woven fabric. Tulle is really insubstantial. It takes LOTS to make it really poof up. (tulle is super cheap, I can buy a 40 yard bolt for less than $15, if I remember correctly) I WANT all that compressed tulle around the waist and hips. Also, it is much easier to work with tulle in rectangular strips. They can be cut as the folded fabric comes off the bolt. In order to cut circles or any other shaped piece, the fabric would need to be opened up and many layers would have to be cut, because tulle is so transparent. The tulle is difficult to lay out in single layers. It sticks to itself, etc.
So ... that is why I did what I did.
Happy you found my blog!
Andrea

Reply
Cristal link
2/13/2016 09:45:37 am

Wow, never knew what that hole in the tape measure was for. Thanks for the tip! Love the skirts. Looks similar to an outfit Taylor Swift wore.

Reply
Marine
3/31/2016 11:44:46 pm

Hi Andrea,
Wonderful blog. I'm a relatively beginner sewer but I'm really eager to learn, so your blog is really helpful in demystifying this for me. I have a question regarding one of your comments. Where can we buy your patterns?
Thank you and all the best with your passion.

Reply
Andrea
4/30/2016 02:43:23 pm

Thank you, you can buy my patterns at Joann's fabrics. Walmart. online at Simplicity.com, although they are having problems with their website right now. Amazon has a lot of my patterns, too.

Andrea

Reply
Emma
11/29/2016 07:22:37 pm

Hi Andrea! Your blog is saving me... thank you so much for sharing your wisdom and insight.

I do have a question. I may be splitting hairs, but, regarding the gathering, is it better to gather each layer flat, and then close the circle forming the skirt? Or should I close the skirt and then gather each layer?

Reply
Emma
11/29/2016 07:22:45 pm

Hi Andrea! Your blog is saving me... thank you so much for sharing your wisdom and insight.

I do have a question. I may be splitting hairs, but, regarding the gathering, is it better to gather each layer flat, and then close the circle forming the skirt? Or should I close the skirt and then gather each layer?

Reply
Wholesale Tulle link
2/15/2017 12:37:02 am

Nice explanation. Tutorial is useful for all the craft and dress makers using Tulle fabric. Thank you

Reply
Tracy
3/2/2019 07:44:22 pm

I have the pattern, and I’ve been helping a friend of mine lean to sew. She has always wanted a tulle skirt. I also have a naughty Chihuahua who decided she would “help” me by chewing the middle of the second page of instructions...now part of step 15 is missing and is no longer readable.

Reply
Mary R
3/30/2019 07:41:58 am

15. TIP: Before pinning casing to yoke, use some ribbon or binding and tie the skirt and underskirt together close to the lower edges. Having these sections tied together will make it easier to work with the overlay sections.
With RIGHT sides together, pin casing to upper edge of yoke, (over overskirt) matching centers, notches and side seams. Baste. Stitch through all thicknesses.

Reply

Your comment will be posted after it is approved.


Leave a Reply.

    From Andrea 

    I am a commercial pattern maker who is now "sewing over 50"!
    I love to sew and hope to encourage others to come back to sewing.
    The water is fine!!

    Archives

    August 2019
    July 2019
    June 2019
    May 2019
    April 2019
    March 2019
    August 2017
    July 2017
    June 2017
    May 2017
    April 2017
    March 2017
    February 2017
    July 2016
    June 2016
    May 2016
    April 2016
    March 2016
    February 2016
    January 2016
    December 2015
    November 2015
    October 2015
    September 2015
    August 2015
    July 2015
    June 2015
    May 2015
    April 2015
    March 2015
    February 2015
    January 2015
    December 2014
    November 2014
    October 2014
    September 2014
    August 2014
    July 2014
    June 2014
    May 2014
    April 2014
    March 2014
    February 2014
    January 2014
    December 2013
    November 2013
    October 2013
    September 2013
    August 2013
    July 2013
    June 2013
    May 2013

    Archives by Subject

    To search for blog posts in specific categories, use the drop down menu above by hovering over the word "Blog"

    Enter your email address:

    Delivered by FeedBurner

    RSS Feed

    Andrea Schewe participates in Amazon's associates program.