Andrea Schewe Design
  • Home
  • Costumes
    • Reader's Gallery
    • Fantasy Costumes
    • Theatrical
    • Historic >
      • Easier to make
    • International
    • Costumes for Kid's and Babies
  • Crafts
    • Home Decor >
      • Pillows
    • Fashion Accessories
    • Doll Clothes
    • For Kids and Babies
  • Blog
    • Past Blogs by subject >
      • My patterns by number
      • Sewing basics
      • Personal sewing Projects
      • Fashion History
      • Fun and funny stuff
      • Guest Bloggers
      • Crafts and Home Dec
  • Links
  • Contact

Working with Fur - Fun fantasy for men - Pattern #1552

8/8/2013

9 Comments

 
Picture
View C in this pattern uses long fake fur, which can be tricky to work with the first time. I am going to share some of the techniques I use to, I hope, make life a little easier for you!
Picture
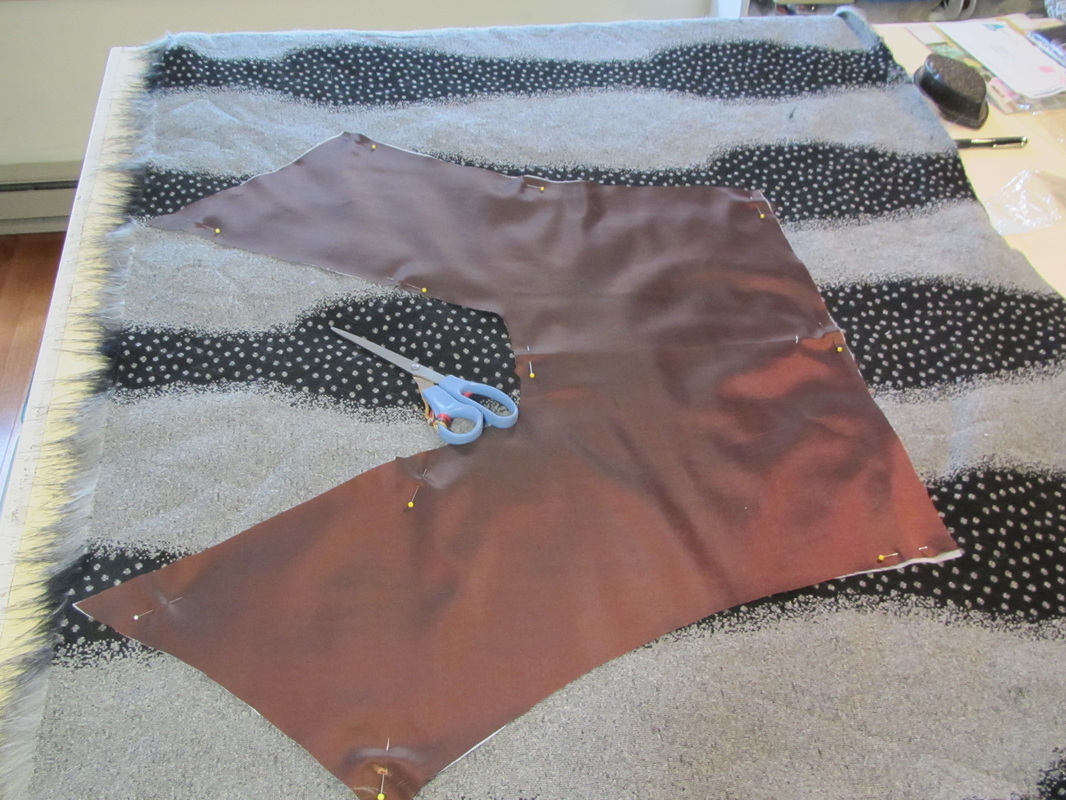
Fur can be very heavy and a tissue pattern will tear when pinned to it, so if that piece is cut from another fabric, too, that fabric piece can be used as the pattern.
Picture
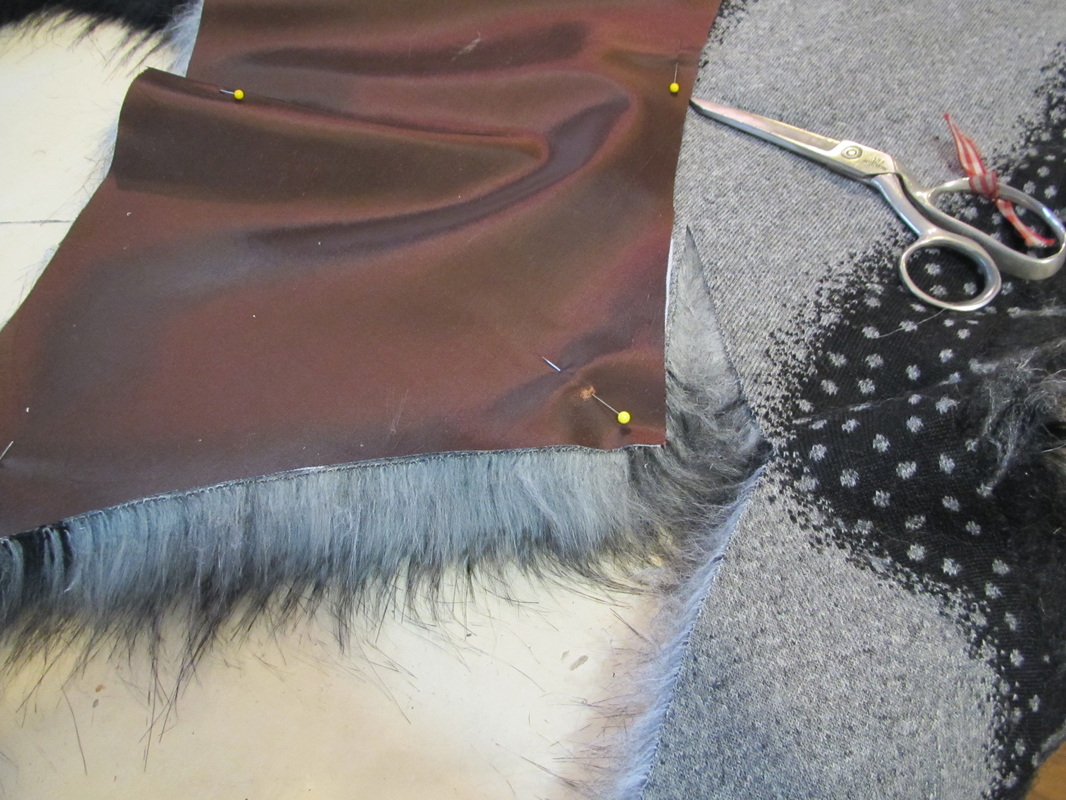
This is what it should look like when you pull the piece away from the rest of the fur.
Picture
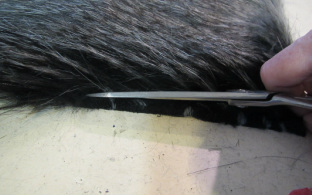
But first, trim the fur away as short as possible in the seam allowance area.
Picture
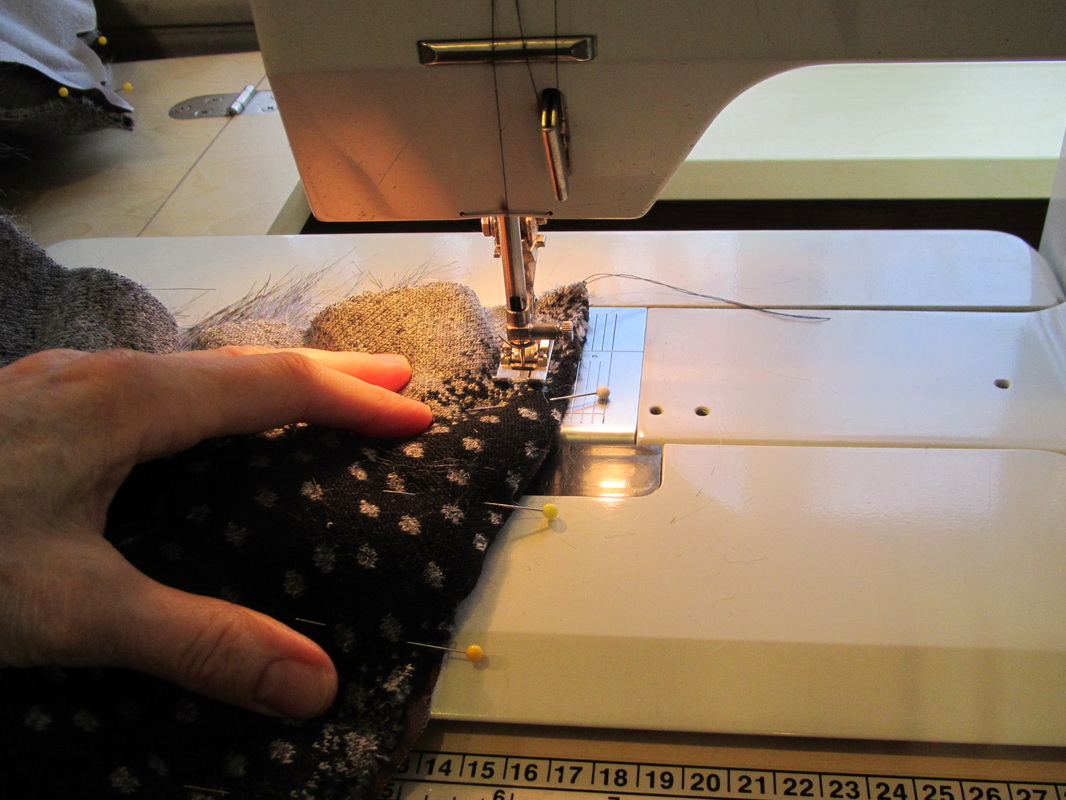
Stitch as you would any other seam, pulling pins as you go.
Picture
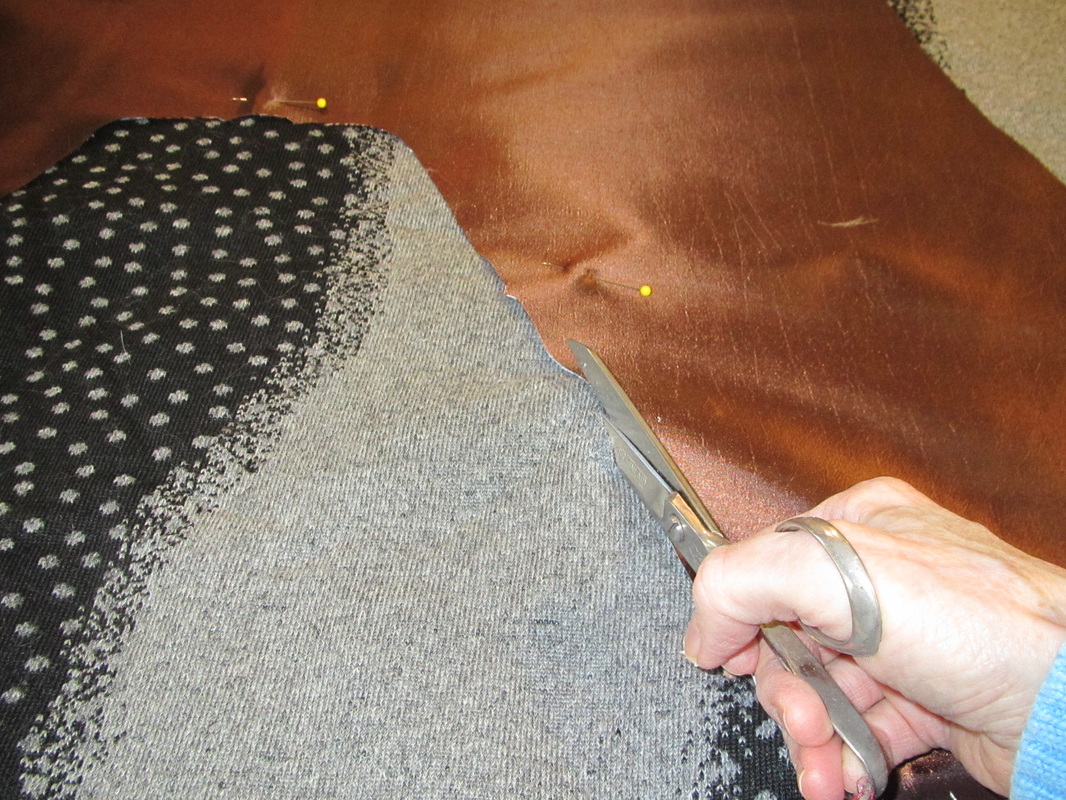
To cut, slide the tip of a pointy pair of scissors just under the back of the fur trying to only cut the backing not the fur.
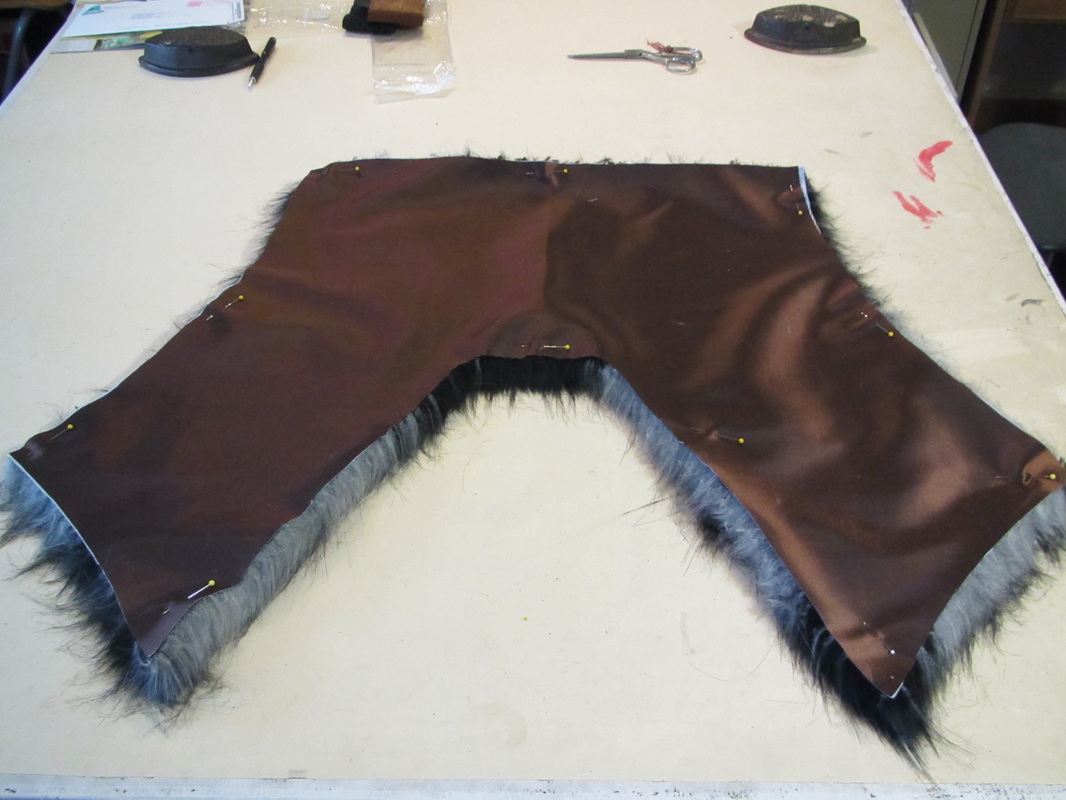
Picture
Here is the collar all ready to go.
Picture
The goal is to not get any fur caught in the seams, so as you pin the pieces together, tuck the fur inside the pieces being pinned.
Picture
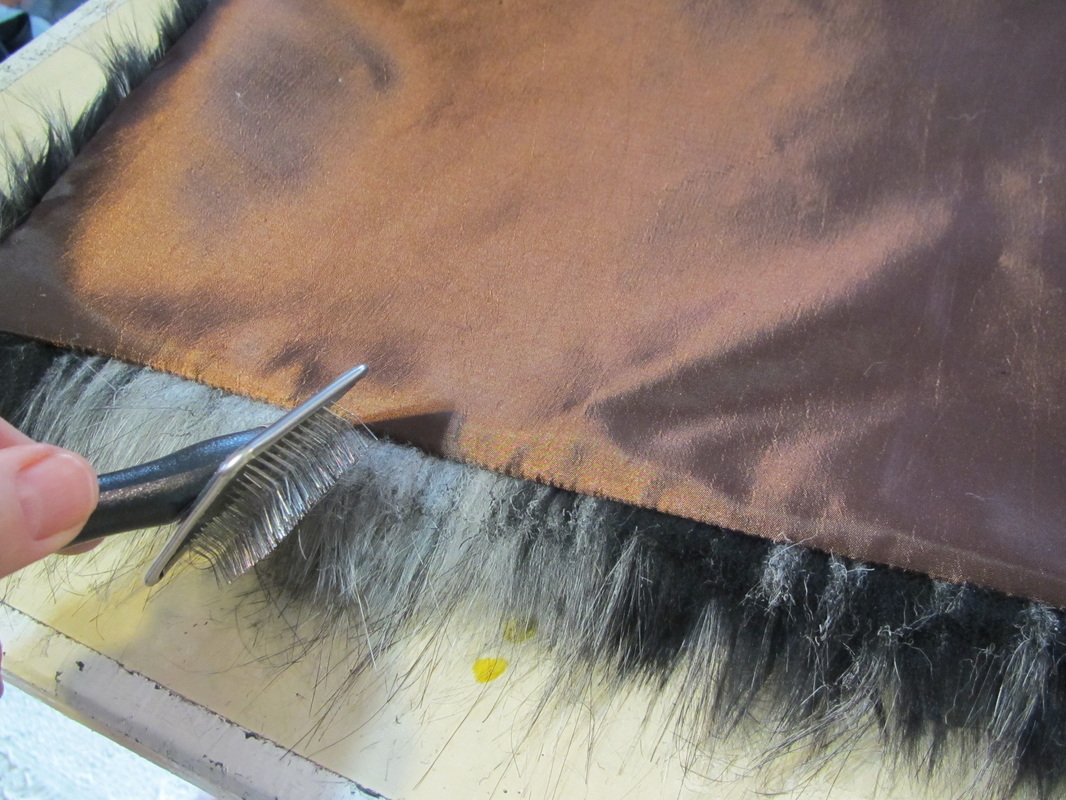
No matter how hard I try though, some fur does get caught, so I brush it out with a cat brush.
Short fur is easier to work with, but you should use the same techniques.  Here are a few more tips for sewing with fur.
Picture
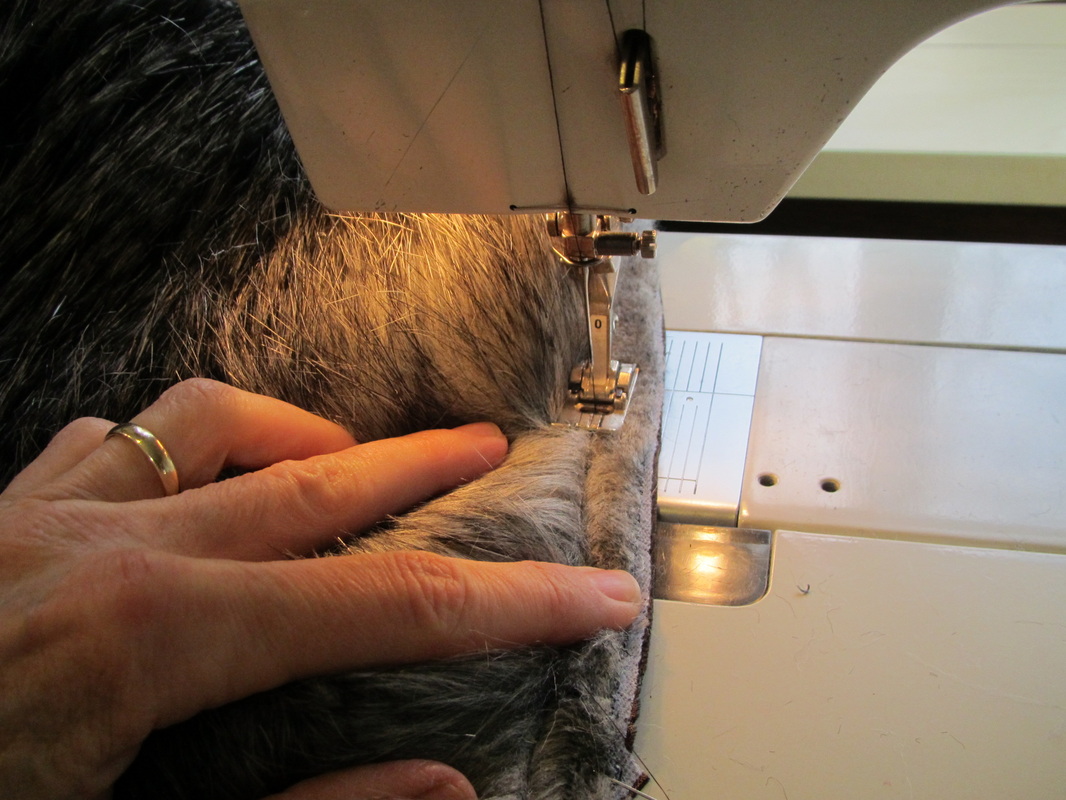
Always push the fur away from the cut edge when sewing, whether sewing on top of the fur, or if it's inside a seam.
Picture
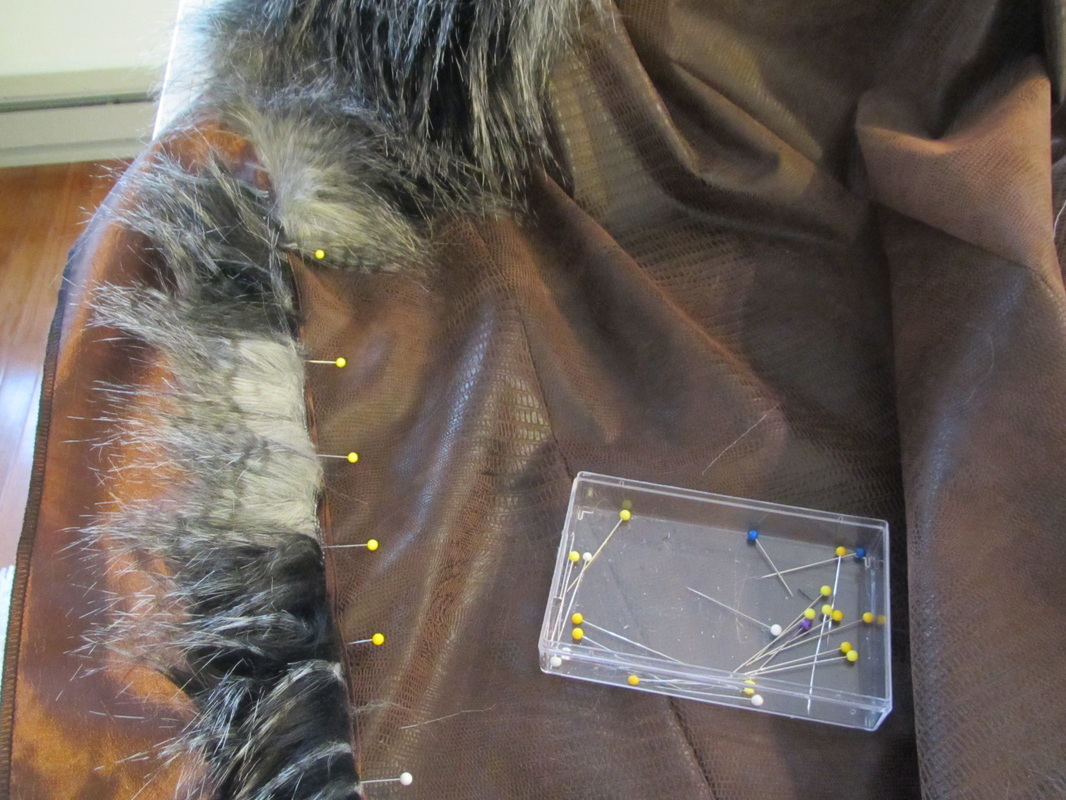
Use long pins with brightly colored heads. It's easier to find them if they fall off. A lost pin inside some fur can be painful!
Picture
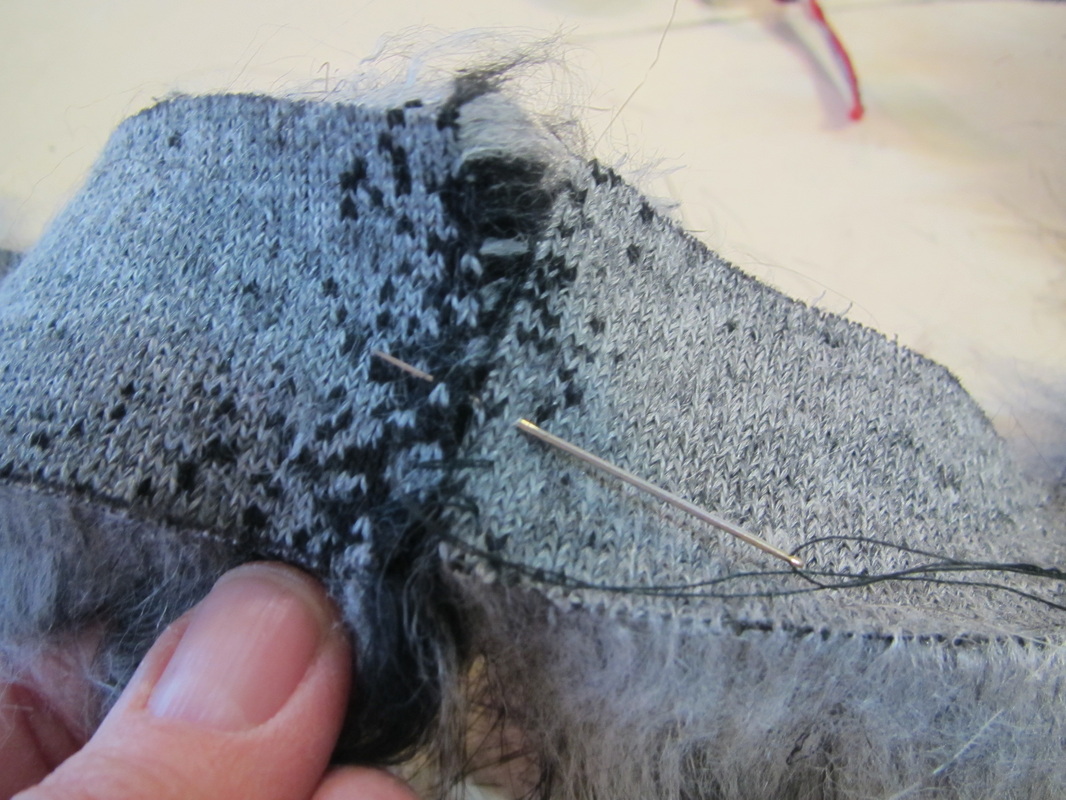
Fur can be invisibly pieced by butting two cut edges together and whip stitching from the back. You really can't tell from the front. The fur will completely hide the join.
Fake fur can make a garment, costume or craft item look very lush.  I hope you will try it.
9 Comments
Beth Klimek link
8/8/2013 01:25:07 am

This could not have come at a better time! I'm about to make a replica coronation robe for a friend, complete with faux ermine. Thank you for the tips!

Reply
Val LaBore link
8/14/2013 03:13:16 am

I'm not making any manly stuff but just bought some faux fur to make a long tube-like fur stole for an Edwardian outfit. I didn't have a clue how to sew fur. Thanks Andrea!
Val

Reply
Sarah Strong
8/19/2013 02:53:37 am

when cutting out fur, I use a pair of little snips, the kind I usually keep tied to the sewing machine for cutting thread. That helps stop me from accidentally taking long cuts with the scissors, like I usually do on regular fabric.

Reply
Andrea Schewe
8/19/2013 01:18:35 pm

Smart tip.

Reply
Crystal
3/1/2014 12:38:34 pm

I have used both fake and real fur and the best trick I learned was after I marked the cut lines was to use a scalpel or an "exacto" blade, to gently open the fabric using a gentle downward pressure - to cut and separate your material with less stress all round.

Reply
Andrea
3/2/2014 02:25:17 am

That is a good technique, but the blade does need to be sharp!

Reply
Rachel McCrafty link
8/14/2014 03:05:45 am

The best way I have ever cut fake fur was with a laser cutter. Placing the fur side down on the laser bed set the cutting speed and power to just cut through the back layer... and while cutting it will "melt" the edge slightly drastically reducing any shed! The only downer is that you are limited by the size of the laser bed.

Reply
Marie
3/9/2015 10:27:18 pm

Thank You for the tips.
I am trying to make the same pattern type C.
Can you help me I am a little confused on how to attach the collar to the cloak. I have read the directions and they are not very good for a beginning sewer like me.
Thank you

Reply
Andrea
3/11/2015 03:18:35 am

After the collar is prepared (sewn together with the lining) it is then sewn to the neck opening of the coat, THEN the facing is sewn over that. BUT, I can't explain it any better than the instructions do, They have illustrations, too. Perhaps you can find someone who lives near you to help.

Andrea

Reply

Your comment will be posted after it is approved.


Leave a Reply.

    From Andrea 

    I am a commercial pattern maker who is now "sewing over 50"!
    I love to sew and hope to encourage others to come back to sewing.
    The water is fine!!

    Archives

    May 2019
    April 2019
    March 2019
    August 2017
    July 2017
    June 2017
    May 2017
    April 2017
    March 2017
    February 2017
    July 2016
    June 2016
    May 2016
    April 2016
    March 2016
    February 2016
    January 2016
    December 2015
    November 2015
    October 2015
    September 2015
    August 2015
    July 2015
    June 2015
    May 2015
    April 2015
    March 2015
    February 2015
    January 2015
    December 2014
    November 2014
    October 2014
    September 2014
    August 2014
    July 2014
    June 2014
    May 2014
    April 2014
    March 2014
    February 2014
    January 2014
    December 2013
    November 2013
    October 2013
    September 2013
    August 2013
    July 2013
    June 2013
    May 2013

    Archives by Subject

    To search for blog posts in specific categories, use the drop down menu above by hovering over the word "Blog"

    Enter your email address:

    Delivered by FeedBurner

    RSS Feed

    Andrea Schewe participates in Amazon's associates program.