
Back in March, I spent about two weeks writing about corsets. Once I got started I just keep finding more things that needed to say. Here are links to all those blog posts. You might want to check them out, or even re-read them.
Corsets and fashion silhouette
Corset history 1500-1900
Corset history 1900-present
Corset making - fabrics and bones
Corset making - other stuff
Corset making - bone tape
Corset - mock up fitting
Corset wearing
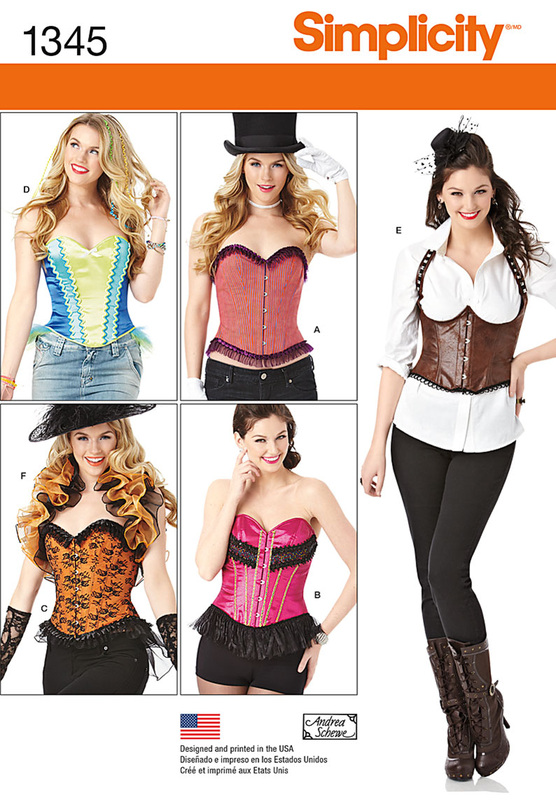
Today, I am going to to share some photos I made while sewing the corsets for this new pattern.
Corsets and fashion silhouette
Corset history 1500-1900
Corset history 1900-present
Corset making - fabrics and bones
Corset making - other stuff
Corset making - bone tape
Corset - mock up fitting
Corset wearing
Today, I am going to to share some photos I made while sewing the corsets for this new pattern.
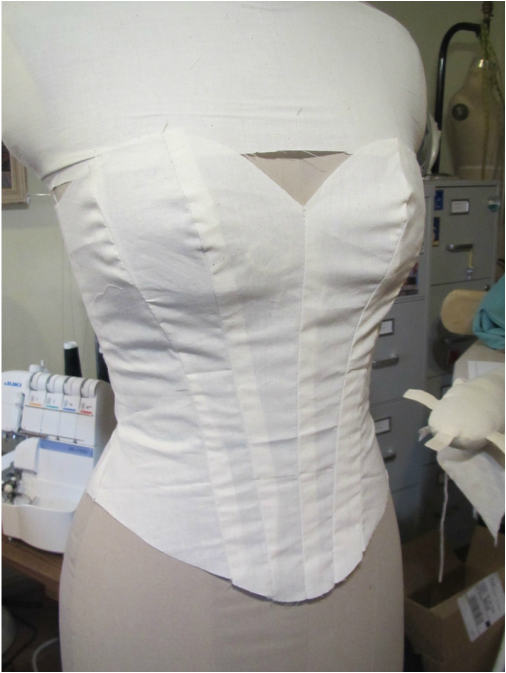
Here is my final muslin I made for seams and balance of the shapes of the front panels. This is a very basic corset. Not from any history period.
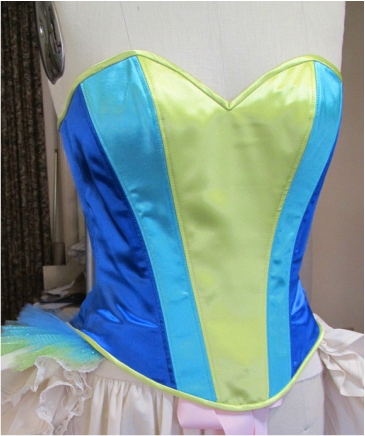
I took the pattern for a good fitting corset and rearranged all the seams so there could be three color breaks for the design of the rainbow corset.
This corset is sewn together with no boning yet, the front busk and back lacing in place for fitting. Ideally a muslin version has been fit before sewing up the real fabric. (read blog about fitting - link above) Corsets aren't really that hard to sew. As you can see it is just a bunch of parallel panels and seams. But a few of the seams are curvy and need clipping. Sometimes BEFORE the seam is sewn, so the two pieces can fit together better.
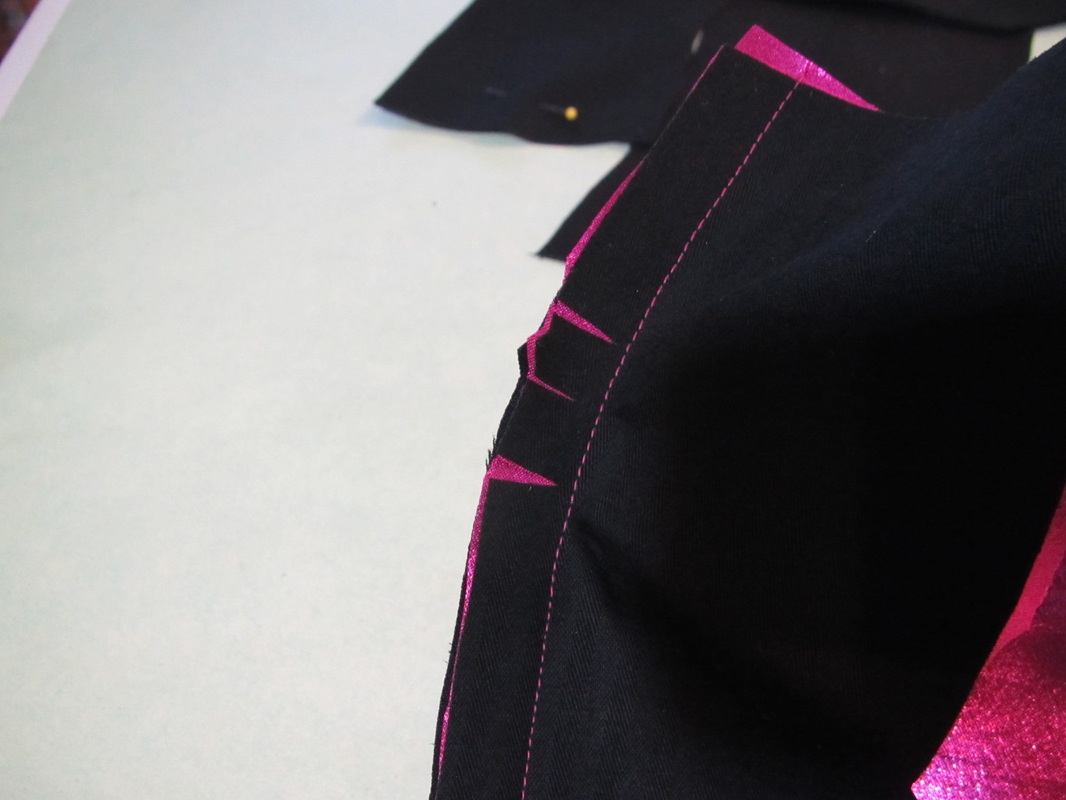
Remember pattern piece should match in length along the stitching line, not the cutting line. This means that if the sides of the piece are very curvy, the cutting line and the stitching line can have different lengths and clipping into towards the stitching line allows the outer edges of the pieces to stretch which makes sewing the seams easier.
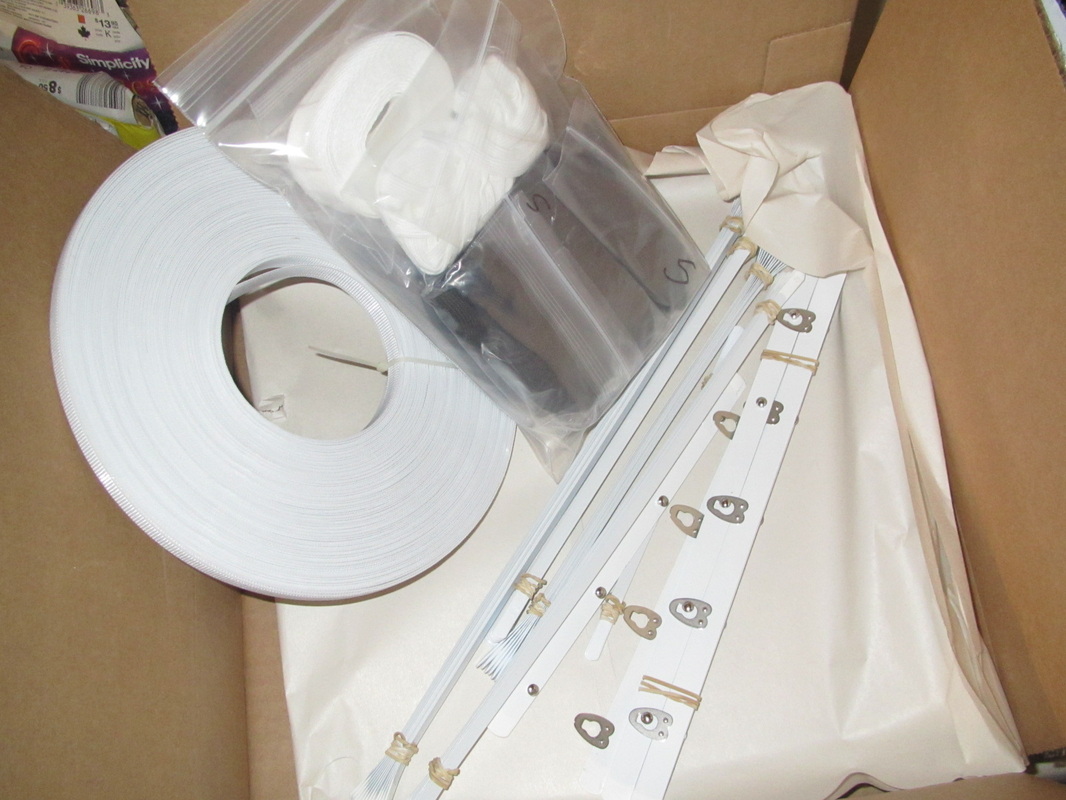
Here is the box of supplies I ordered from CorsetMaking.com. There are links to other suppliers in corset blogs I wrote. (links above) The roll of white stuff on the left is Rigilene that I've purchased just to have on hand for future work.
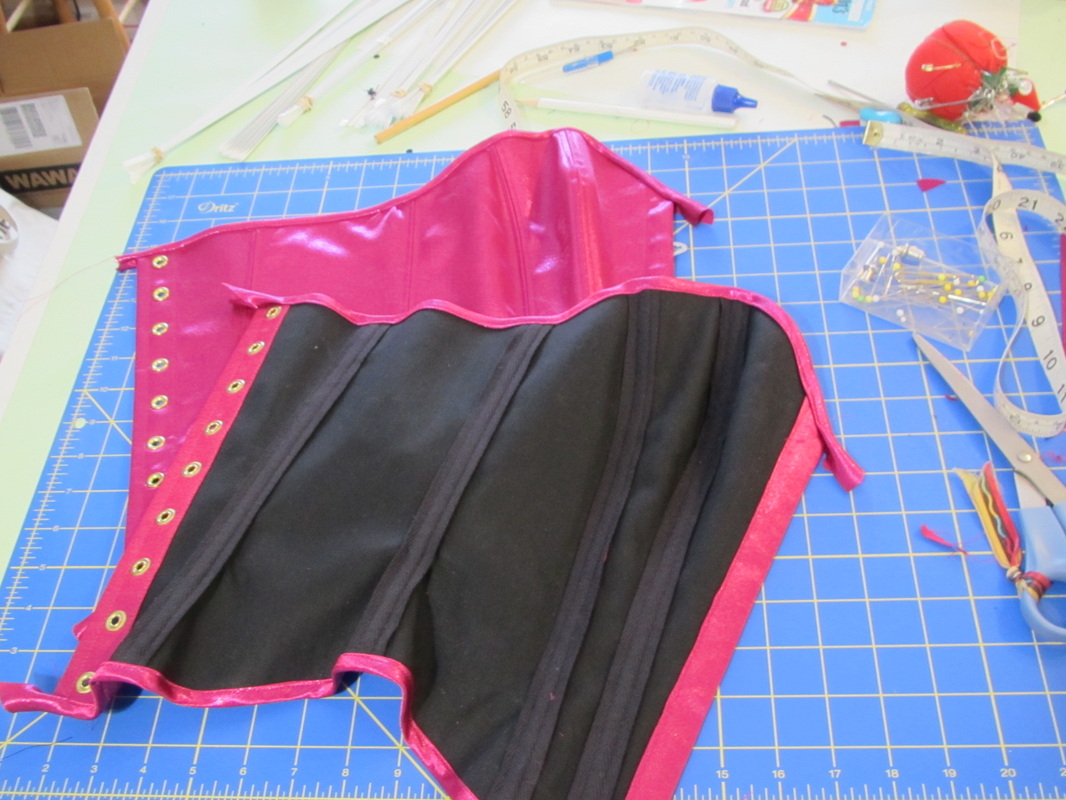
This set of corsets is being made with all the recommended materials for a strong durable corset. I'm using coutil for the interlining and steel boning with bone tape for support, and official front busk closures.
This set of corsets is being made with all the recommended materials for a strong durable corset. I'm using coutil for the interlining and steel boning with bone tape for support, and official front busk closures.
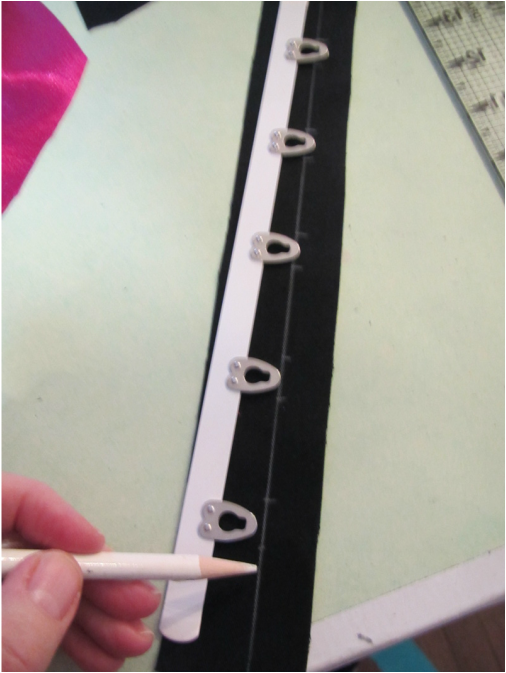
Inserting a front busk closure is very straight forward. I guess that's a joke ... ; )
Anyway, first mark the spacing for the clasps on the front facing piece.
Anyway, first mark the spacing for the clasps on the front facing piece.
Sew the facing to the front, skipping over the spaces marked for the clasps. Be sure to back stitch at each point.
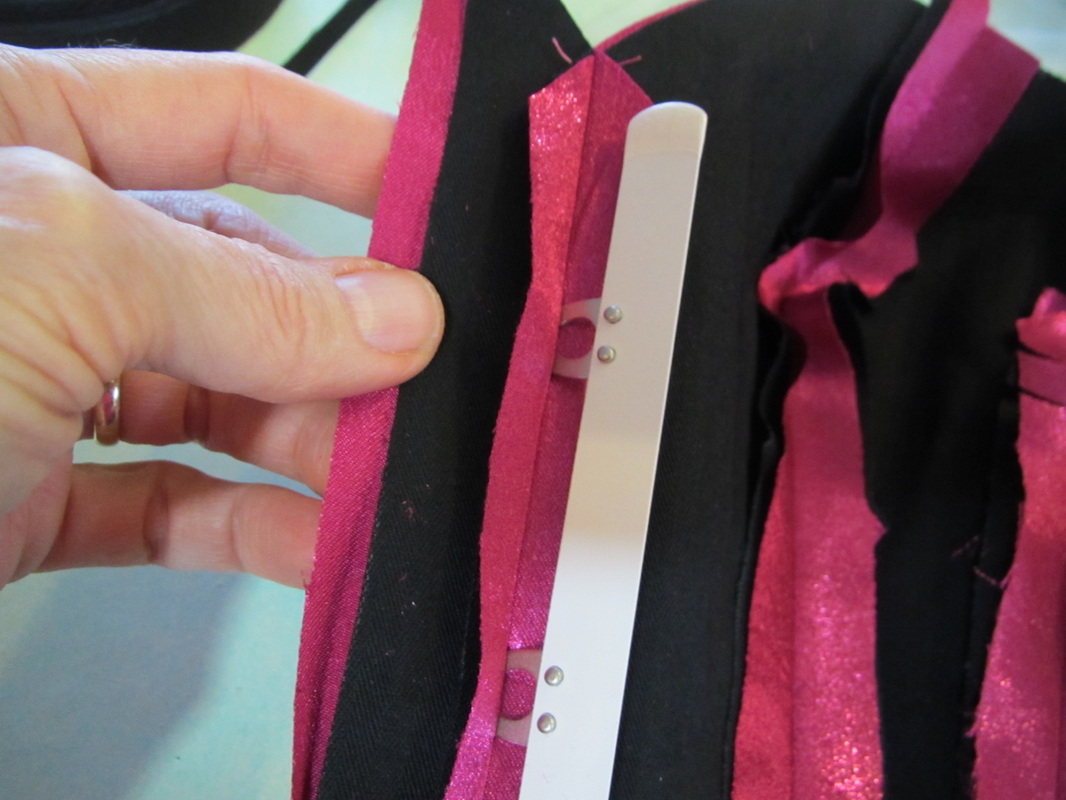
Slip the clasps into the slots.
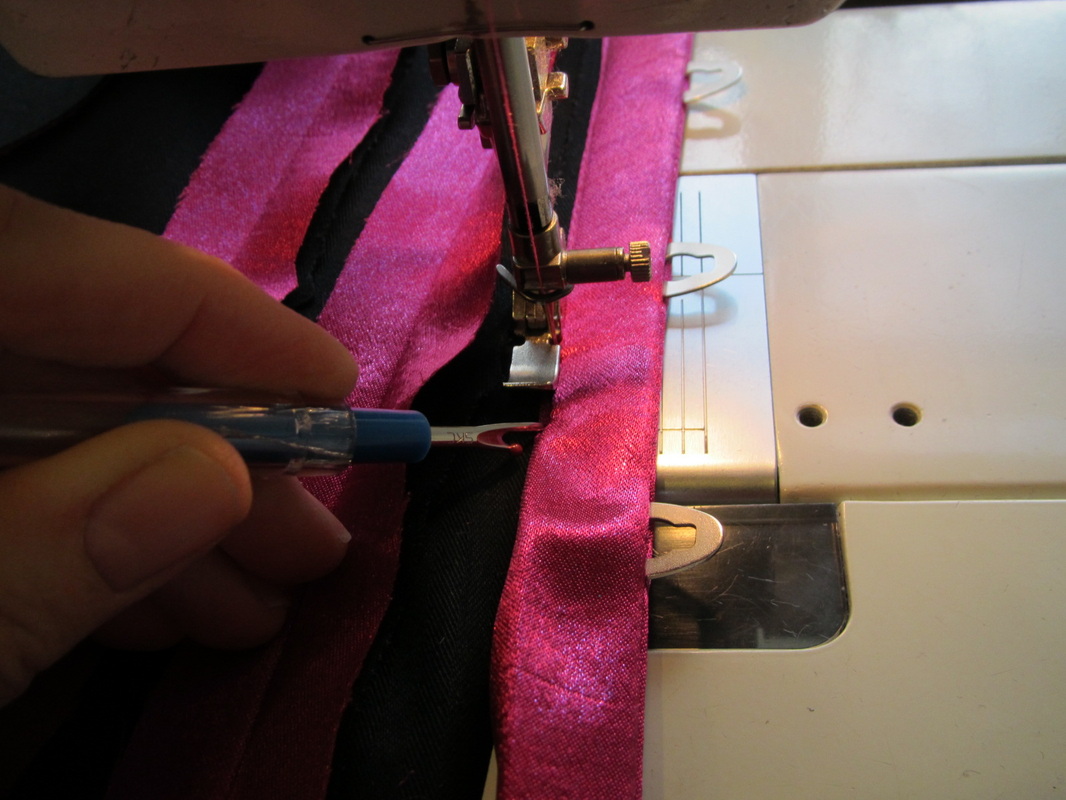
And edge stitch the facing down. A zipper foot is needed to get close to the busk.
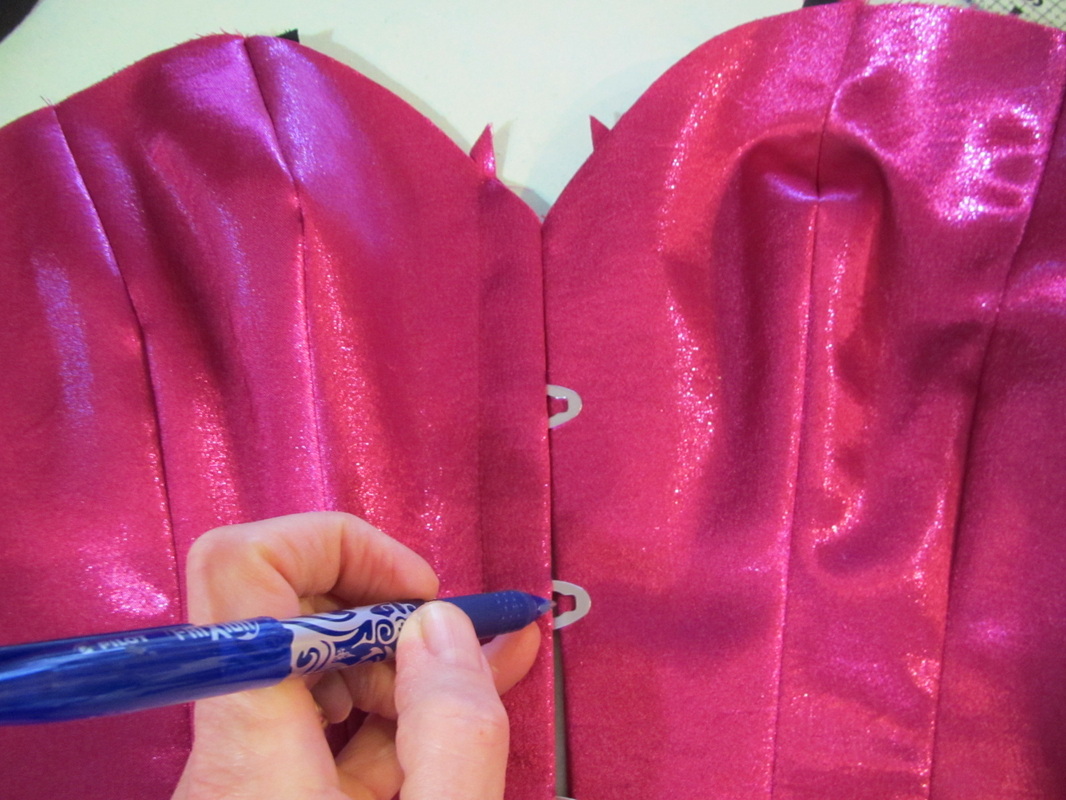
For the knobs on the corresponding busk piece, match up the two fronts and make a dot in the opening of each clasp.
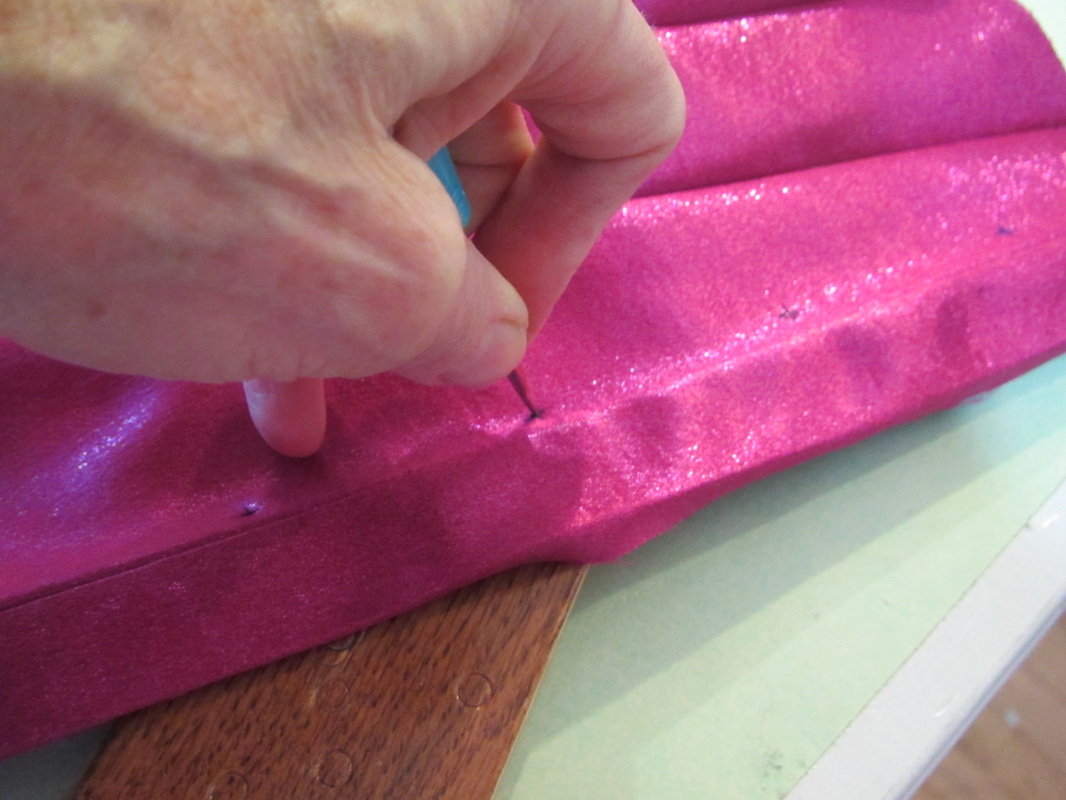
Then use an awl to poke a hole through all layers at each marked dot. Using an official awl makes all the difference. It doesn't break the threads of the fabric, but simply pushes them aside. AND it creates the exact size hole needed to work that little knob through.
Totally worth the investment. Here is the link to Wawak where you can buy one for $2.25.
Totally worth the investment. Here is the link to Wawak where you can buy one for $2.25.

Depending on the fabric you are using and how many layers, working the busk knob through the holes made with the awl can be easy or hard. But, no matter how hard it may seem, it will go through. Full disclosure though ... I have broken one or two nails doing this.
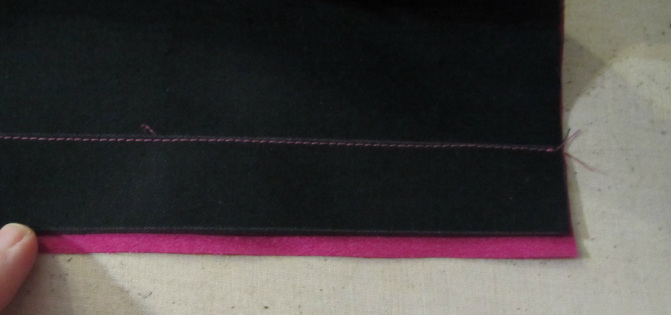
This is the fold-back at the center back which makes the casing for the back boning. This place does not need bone tape because the bone casing will be created by folding back the fabrics and stitching the casing line.
Note that I have first run a line of stitching on the fold line that will keep the fabrics together when they are folded. Also, see how I've trimmed back the coutil interlining.
Note that I have first run a line of stitching on the fold line that will keep the fabrics together when they are folded. Also, see how I've trimmed back the coutil interlining.
Coutil is very stiff fabric, so for the 1/4" hem fold, I like to trim it back so the outer fabric can fold around it. Then I stitch the hem through that.
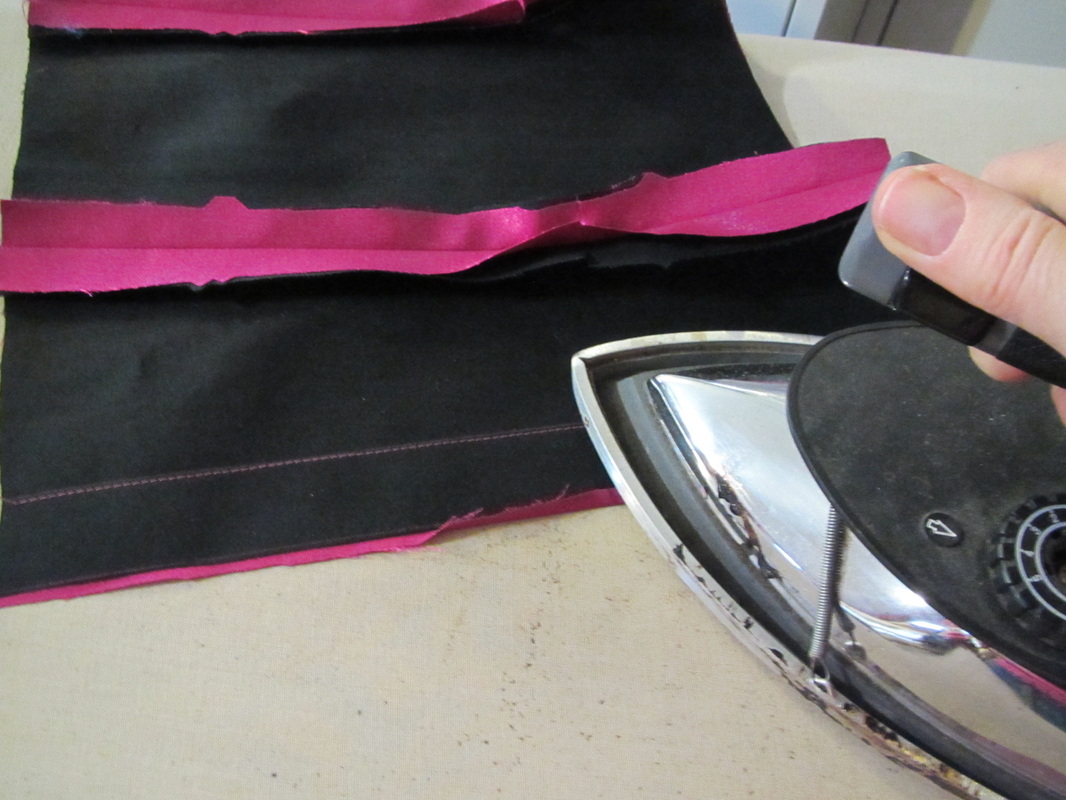
If you look back up at the photo where I am slipping the busk piece with the clasps into place, you can see I've trimmed back the coutil for the facing piece in the same way.
If you look back up at the photo where I am slipping the busk piece with the clasps into place, you can see I've trimmed back the coutil for the facing piece in the same way.
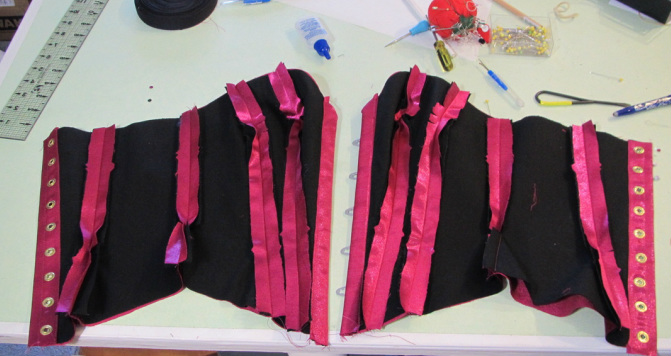
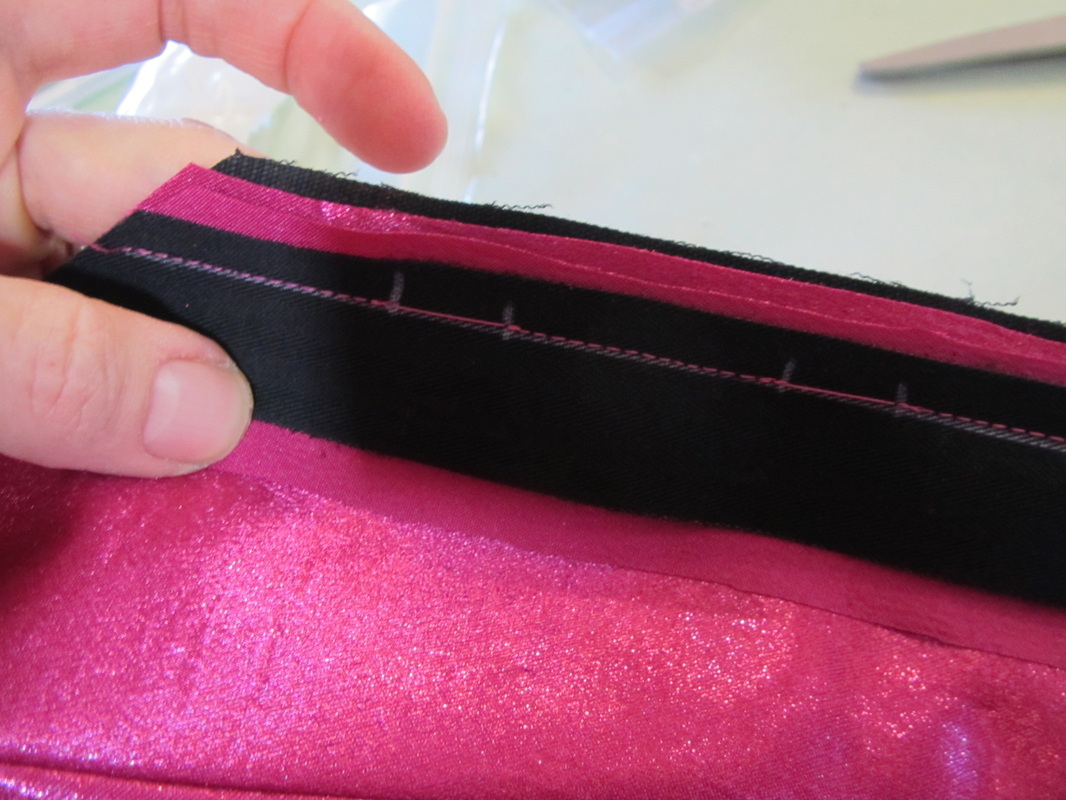
After the final fitting and all adjustments are made, the seams all need to be trimmed back to 1/4" so the boning tape can be sewn over them and the boning inserted. Then the top and bottom edges are finished with bias binding. I still need to finish the ends of the bias tape on this one.
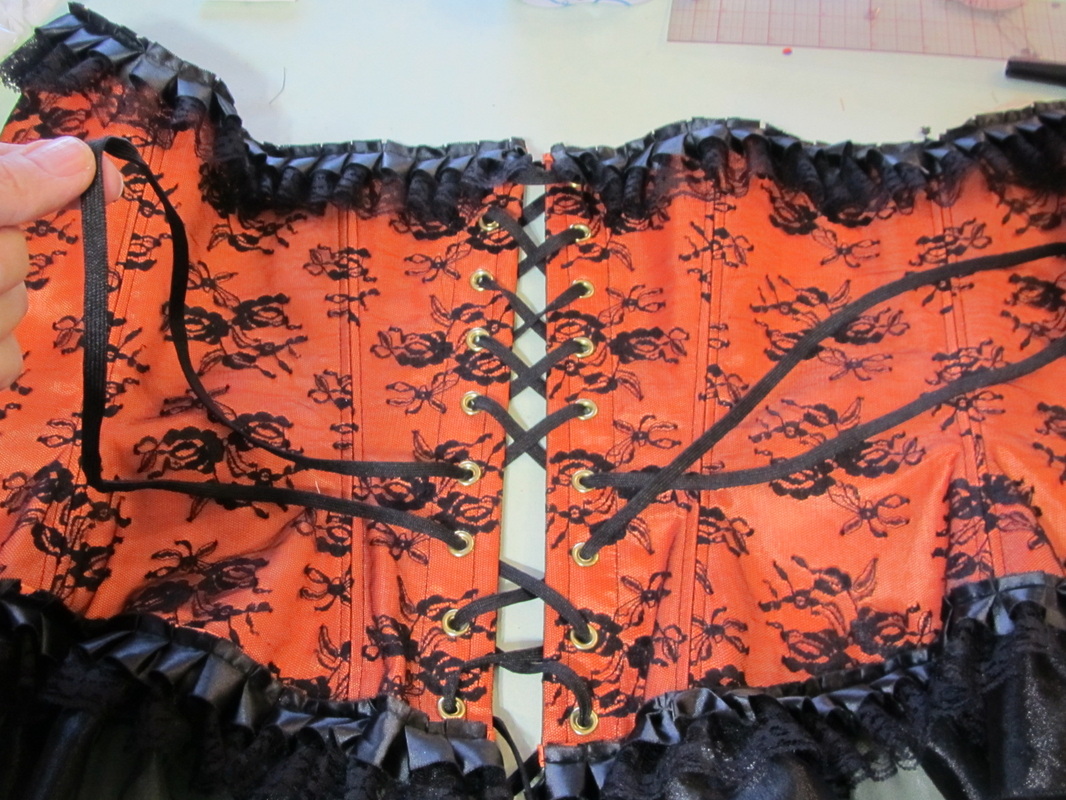
Now, a word on lacing. If you really want to cinch in the waist of a corset tightly, the best way to prepare the lacing is like this. Allow long loops to come out at the waistline.
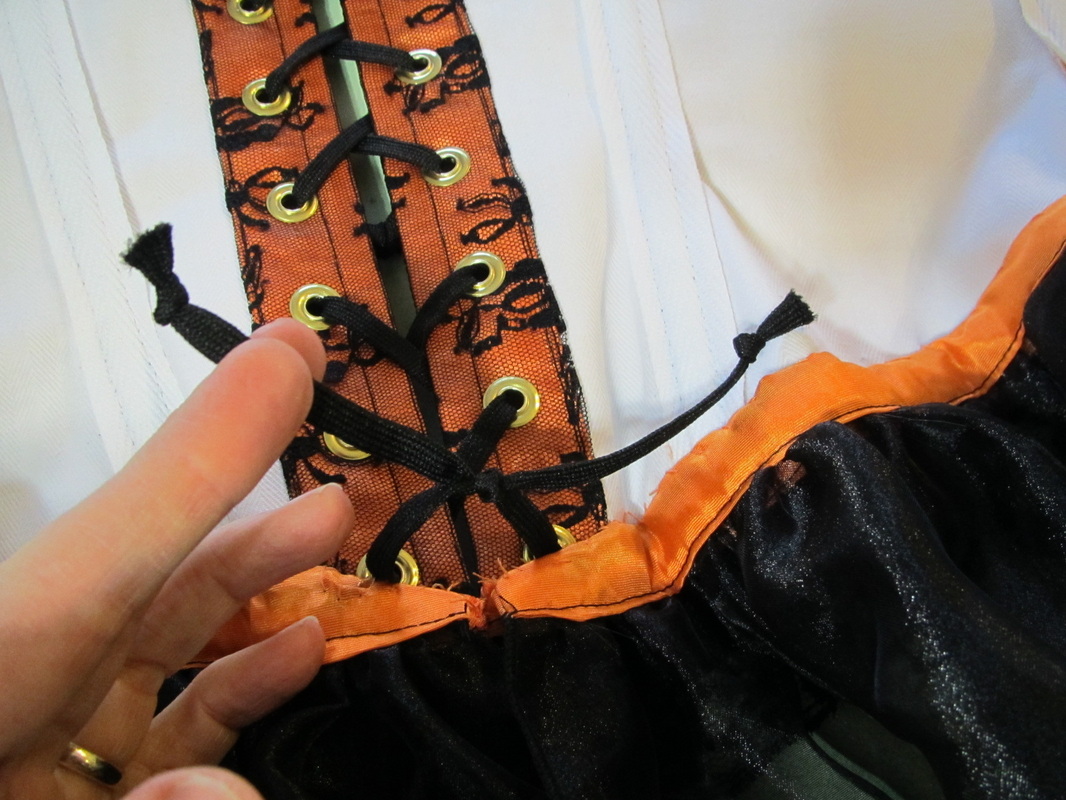
This means the the lacing needs to be tied with a small knot like this at the bottom on the inside.
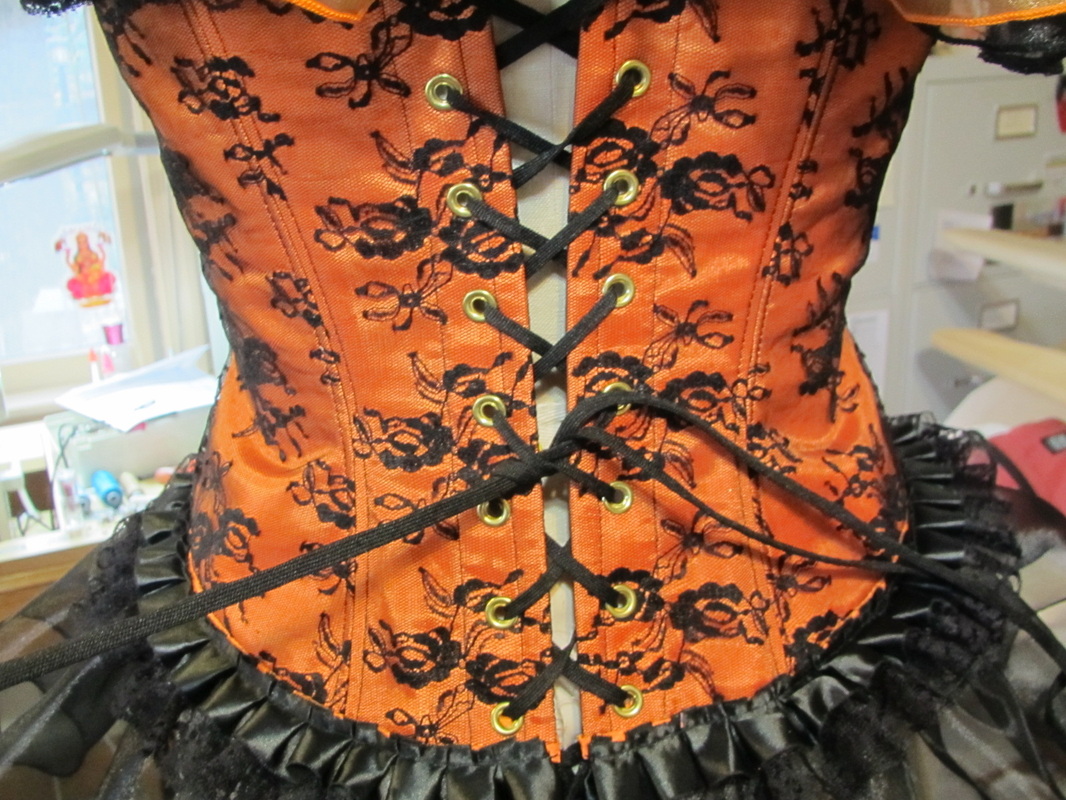
Next ... pull tight! Tell the wearer to breathe in!
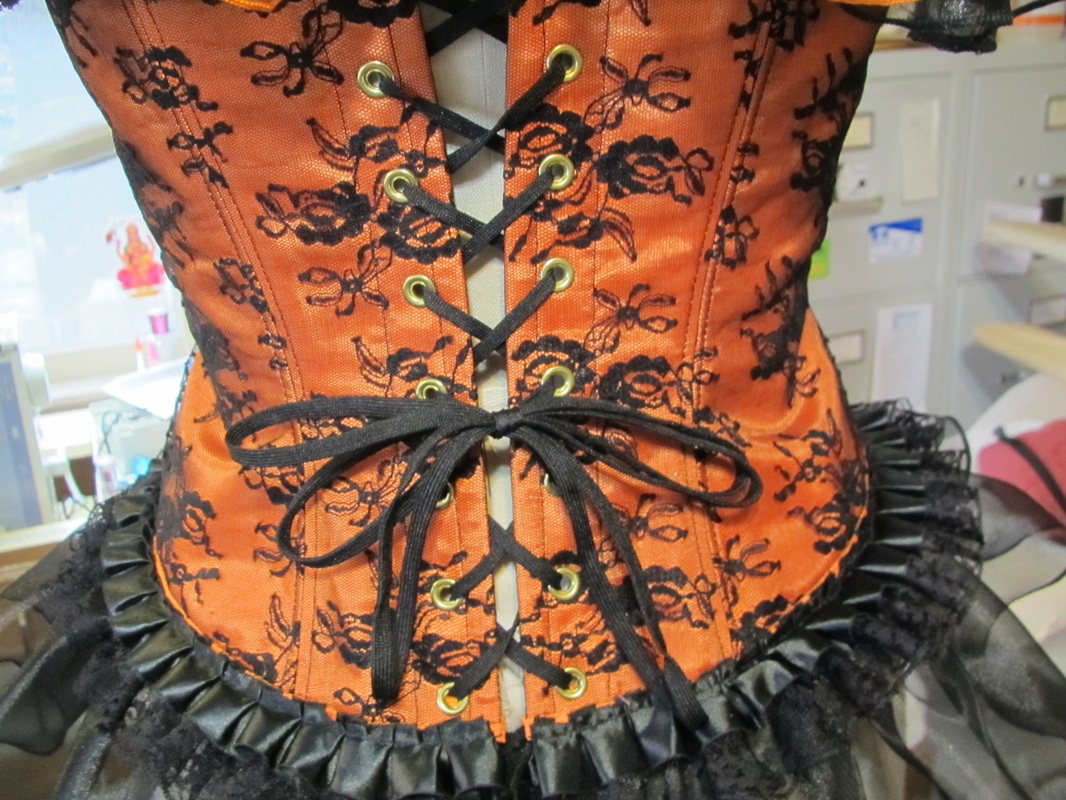
And tie. I actually like the look of a bow made with double looped lacing.

I laced up all these corsets like that.
I hope you have fun with this corset pattern and don't feel as if you need to copy any of my versions ... let your imagination run wild!
I hope you have fun with this corset pattern and don't feel as if you need to copy any of my versions ... let your imagination run wild!
 RSS Feed