
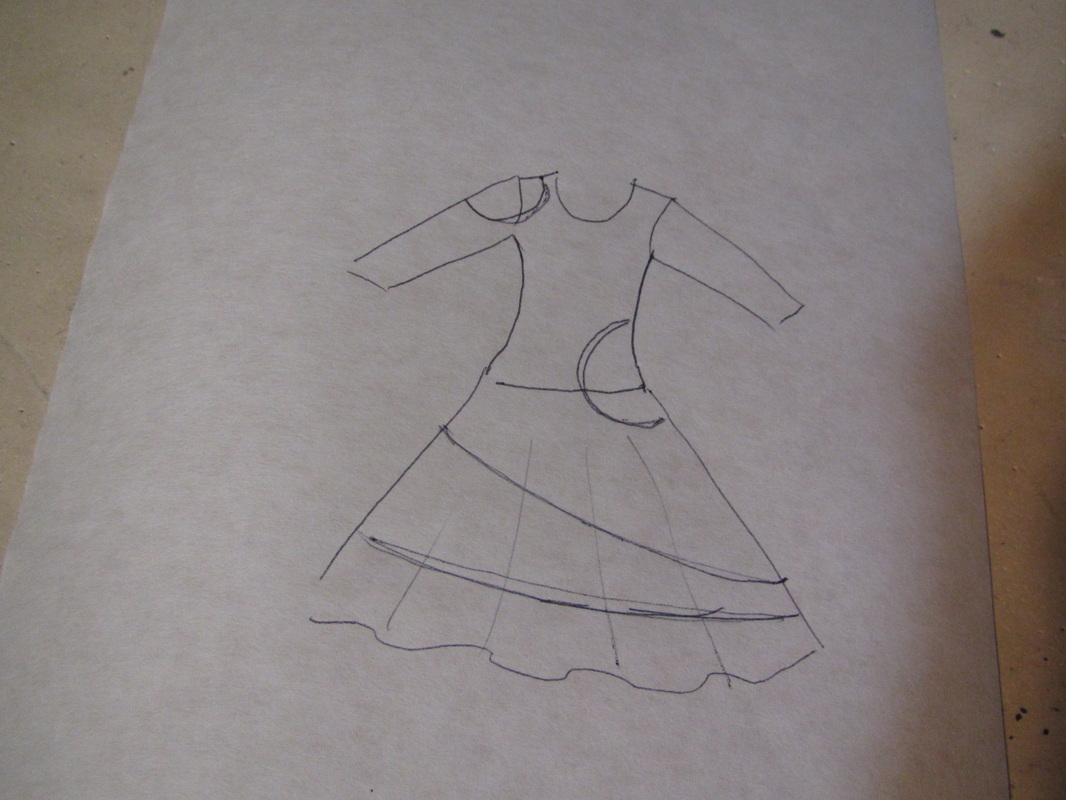
I saw some really nice tie dye dresses in a store recently. I liked one of them so much, I nearly bought it. But it was $170, which seemed high. Plus, now I can try to make one myself and share the results with you.
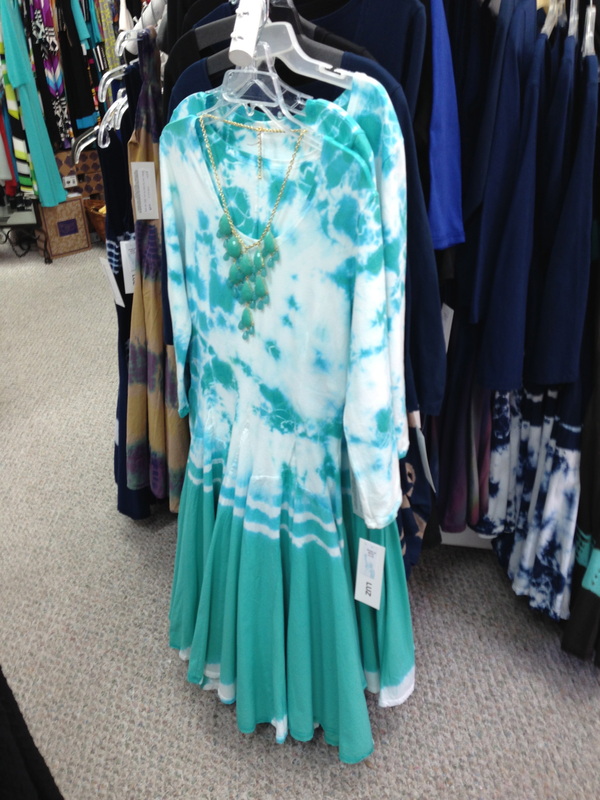
This was my favorite.
But I liked the 3/4 sleeve on this one.
| 
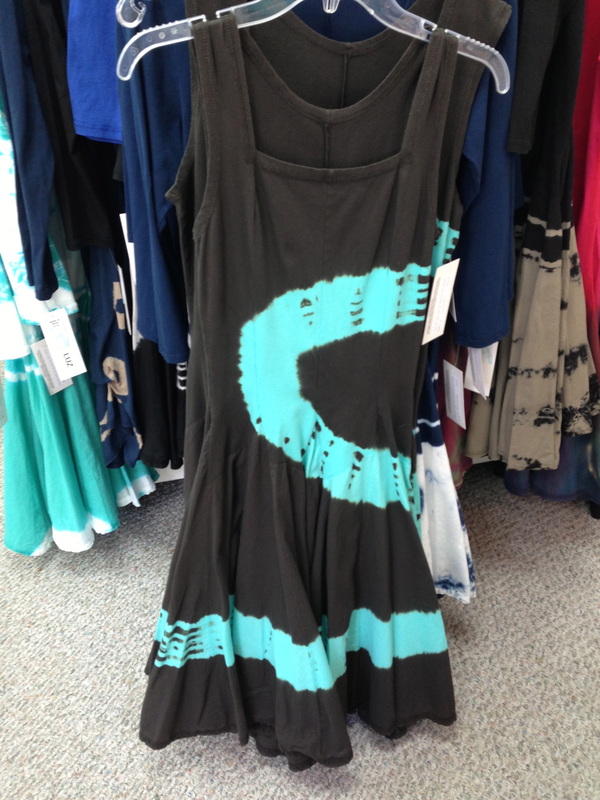
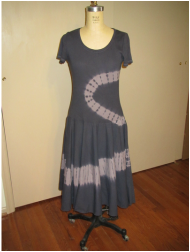
The tie dye pattern is striking on this one.
|
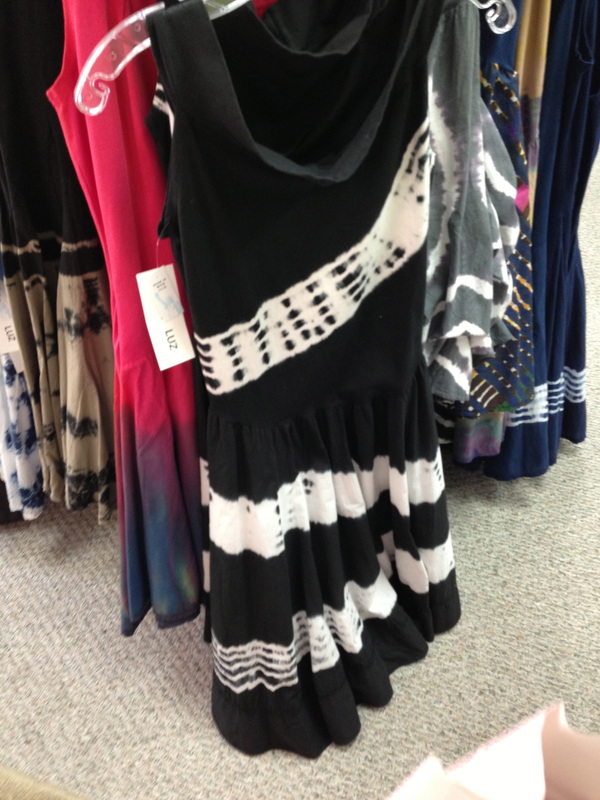
The interesting thing about these dresses is that the bodice is a knit and the skirt is a woven fabric. It was quite difficult to tell that two different fabrics had been used until I looked very closely.
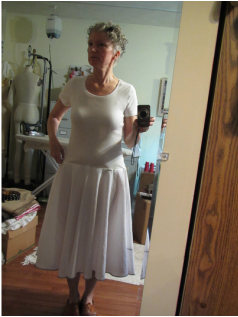
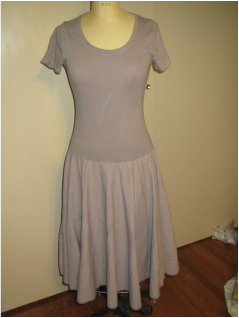
This my second attempt. I will show you how I did the first one and the lessons I learned to make a better second one.
To speed along this project, I thought I would sew a woven skirt onto a purchased knit top. It is VERY important the fiber content be exactly the same for both fabrics so the dye color comes out the same. The safest choice is 100% cotton, no trace of polyester or any spandex at all. And I had to look pretty hard to find a top like that. I did at Target ... for $8! I wanted 3/4 sleeves but had to settle for short sleeves.
******************************************************************
This is my first attempt. Here are the things I don't like about it.
1. The color ... I tried for taupe and black, but it's hard to get dark colors with dyes made for home use AND (very important!) the two colors chosen need to be able to bleed together and not turn into an unattractive color, because they will bleed!
2. The shapes are bad and the tying is too tight and close together.
Otherwise the basic construction is good.
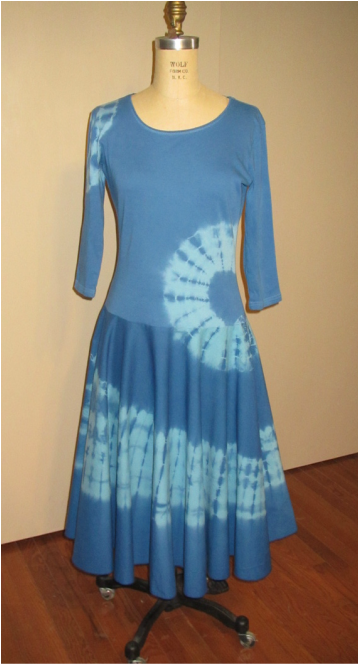
For my second, blue, dress I found a 3/4 sleeve (which is what I wanted anyway) 100% cotton top at Macy's for $11 and I used heavier cotton for the skirt, but I used my 50% off coupon!
This tutorial is mostly about this first dress ... all comments about the second dress will be in red.
***********************************************************************************************
So, back to the tutorial ....
I looked through my stash at home to see if I had a large enough piece of white 100% cotton.
This is my first attempt. Here are the things I don't like about it.
1. The color ... I tried for taupe and black, but it's hard to get dark colors with dyes made for home use AND (very important!) the two colors chosen need to be able to bleed together and not turn into an unattractive color, because they will bleed!
2. The shapes are bad and the tying is too tight and close together.
Otherwise the basic construction is good.
For my second, blue, dress I found a 3/4 sleeve (which is what I wanted anyway) 100% cotton top at Macy's for $11 and I used heavier cotton for the skirt, but I used my 50% off coupon!
This tutorial is mostly about this first dress ... all comments about the second dress will be in red.
***********************************************************************************************
So, back to the tutorial ....
I looked through my stash at home to see if I had a large enough piece of white 100% cotton.
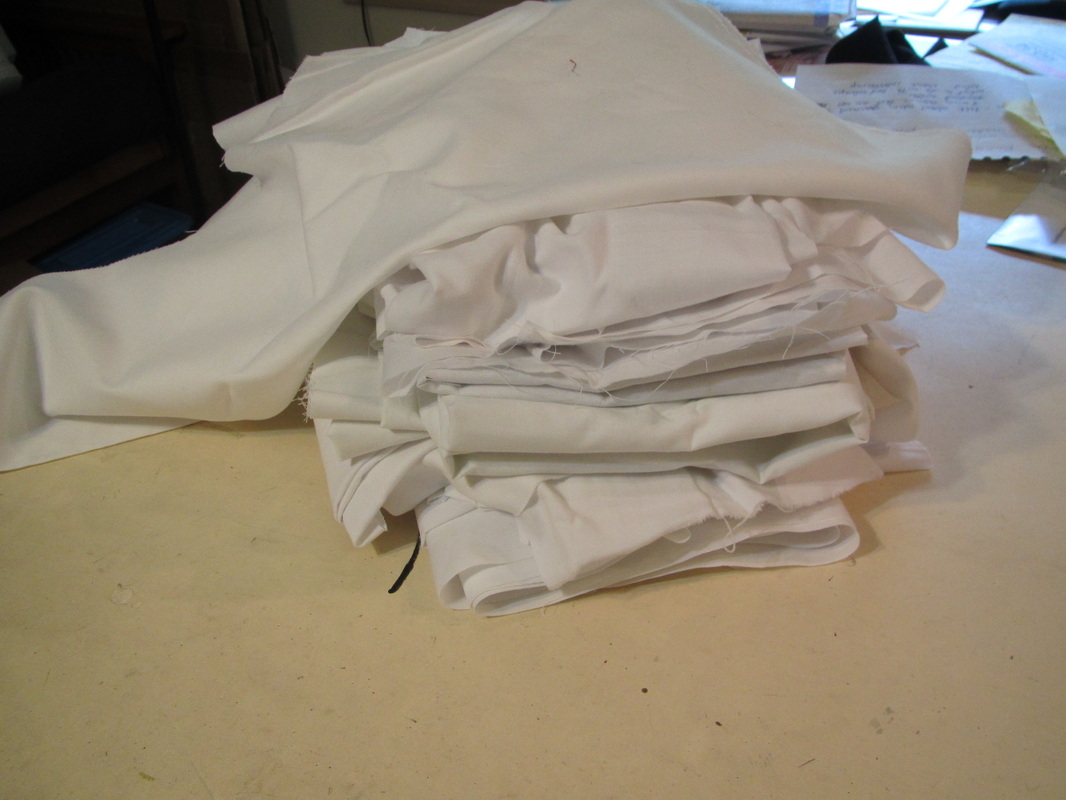
I had some large pieces but ...
| 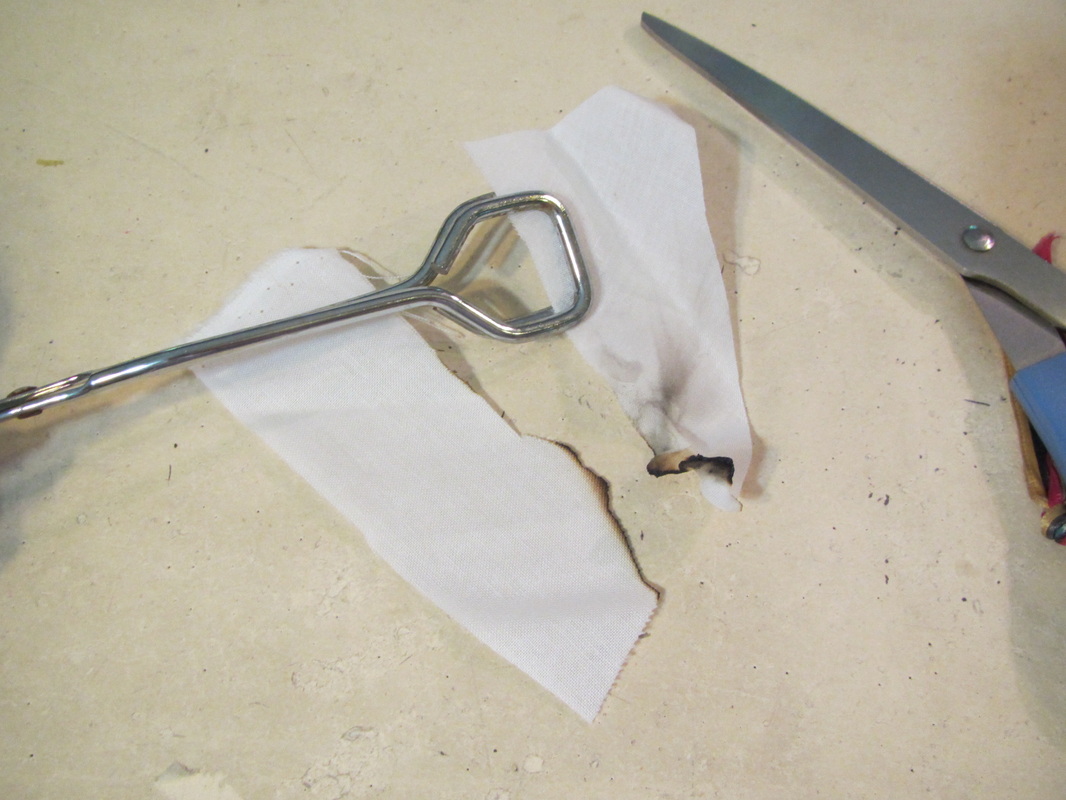
Burn tests told me that all my large pieces had some polyester in them ... RATS ... polyester makes a hard black bead, cotton burns away to ash.
|
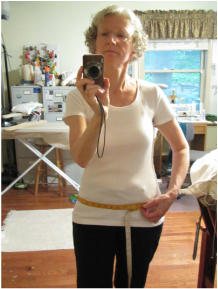
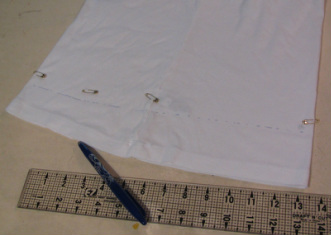
I try on the shirt and put a tape measure around my hips at the point I want the skirt to be attached.
| 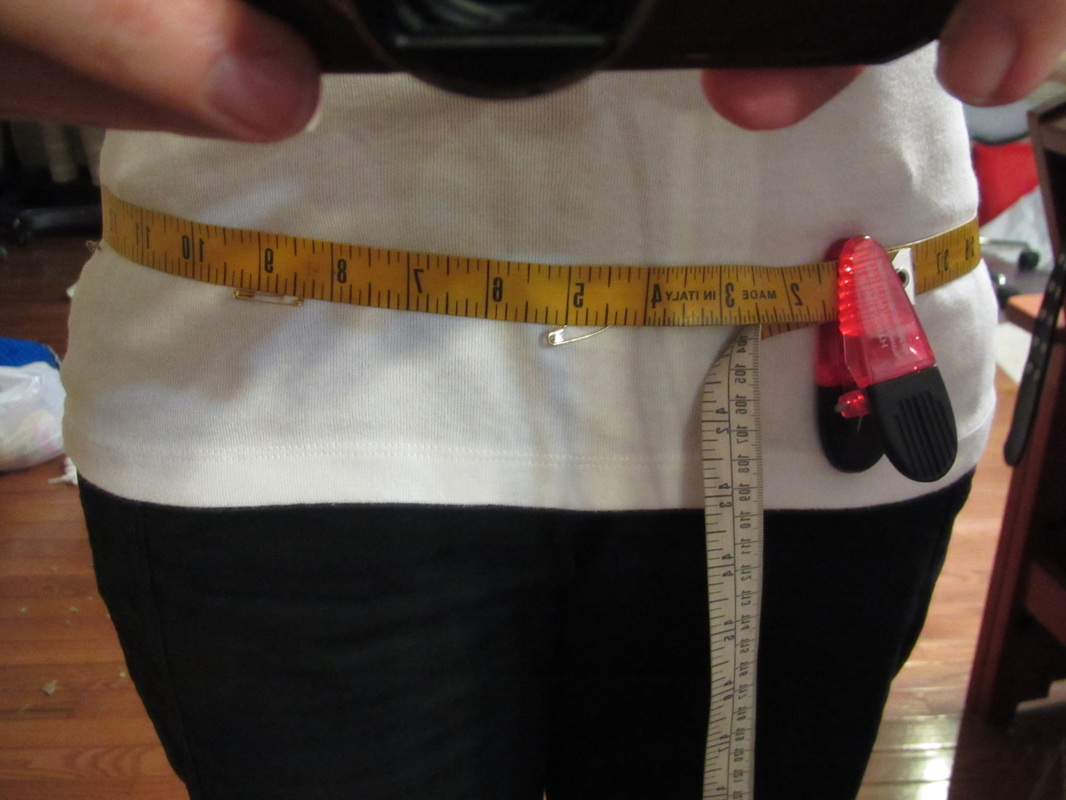
I hold the tape measure where it overlaps with a clip, so I can pin safety pins in several places along the bottom edge of the tape measure. Now I have my skirt placement and measurement for the waist of the skirt.
|
I went shopping. The 100% quilting cottons are pretty expensive when they are not on sale ... between 5 and 8 dollars a yard, but I want white and I didn't want it too heavy so I went over to the muslin section and got 3 yd. of 36" white muslin for $1.99 a yd! For the second dress I got 3 1/2 yd. quilting cotton for $3 a yard with 50% off coupon.
So that the dye will take well and to pre-shrink the fabric, I throw the top and fabric into the washing machine with detergent to get any sizing out ... making sure to zig-zag or serge the edges of the fabric first to keep it from becoming too stringy in the wash.
So that the dye will take well and to pre-shrink the fabric, I throw the top and fabric into the washing machine with detergent to get any sizing out ... making sure to zig-zag or serge the edges of the fabric first to keep it from becoming too stringy in the wash.
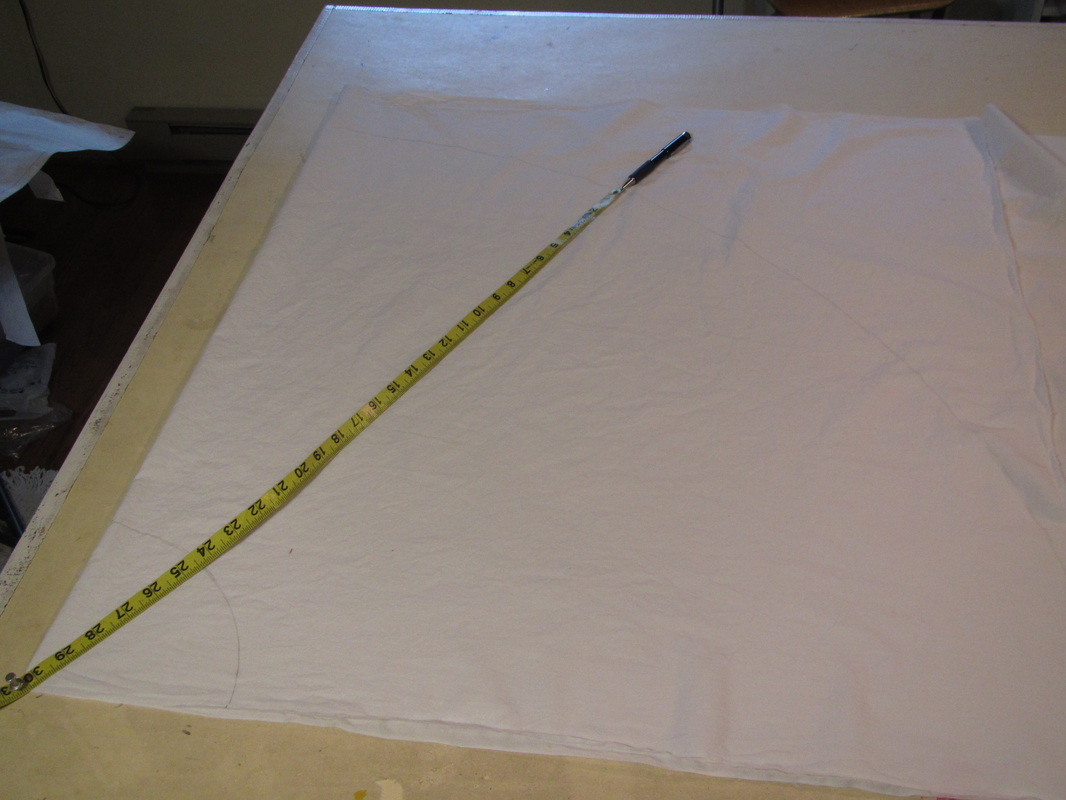
The skirts on these dresses were very full and seemed to have a lot of gussets, but I want to make things simple so my dress will have a circle skirt. I added about 2" to my hip measurement for wearing ease for the waist (really hip) circumference. So to make a circle skirt, cut 2 half circles. Fold the fabric on the cross grain and draw a big circle by pushing a thumb tack through a tape measure and putting your pencil into the hole at the end to draw the circle. The waist for each quadrant of the skirt should be 1/4 of your finished hip measurement then add a seam allowance.
If you don't have a table you can poke a hole into like I do, have a second person help. They can push the thumb tack into a small piece of wood or cardboard and hold it steady while you draw the circle OR use a circle skirt pattern and just adjust the waist and length to fit. Probably the easiest choice!
If you don't have a table you can poke a hole into like I do, have a second person help. They can push the thumb tack into a small piece of wood or cardboard and hold it steady while you draw the circle OR use a circle skirt pattern and just adjust the waist and length to fit. Probably the easiest choice!
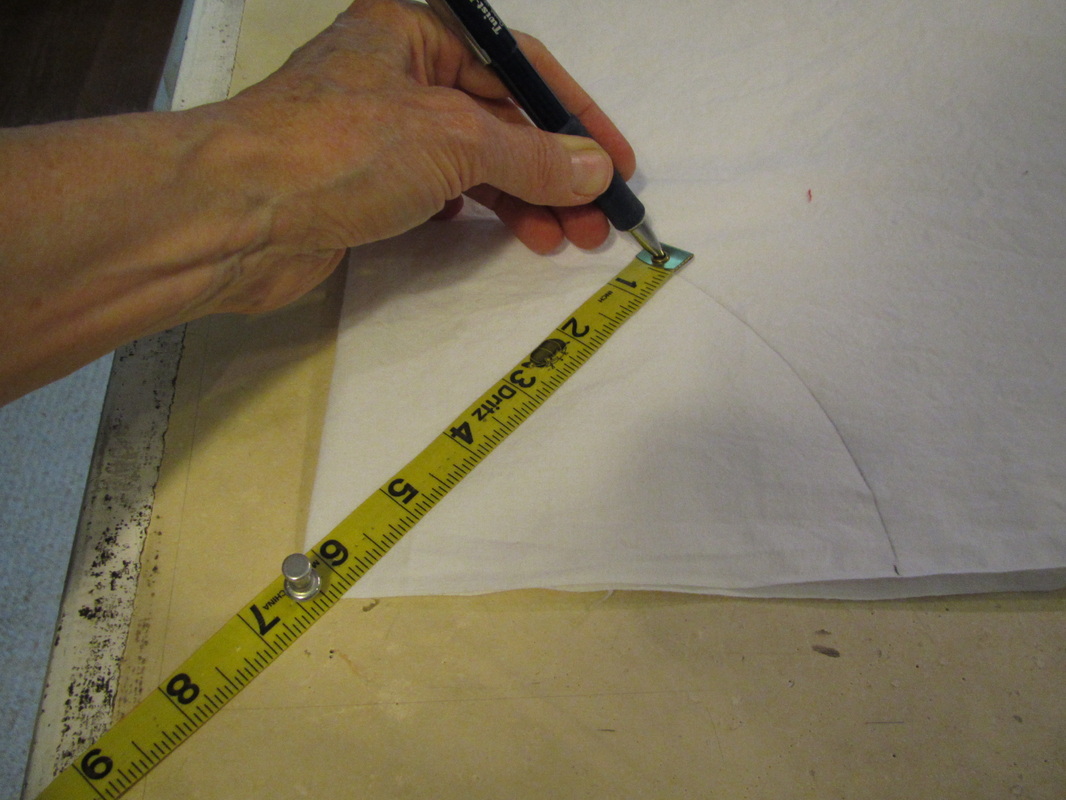
For a finished hip of about 40" the radius of the circle should be 6 1/8". This is the cutting line that allows for a 5/8" seam.
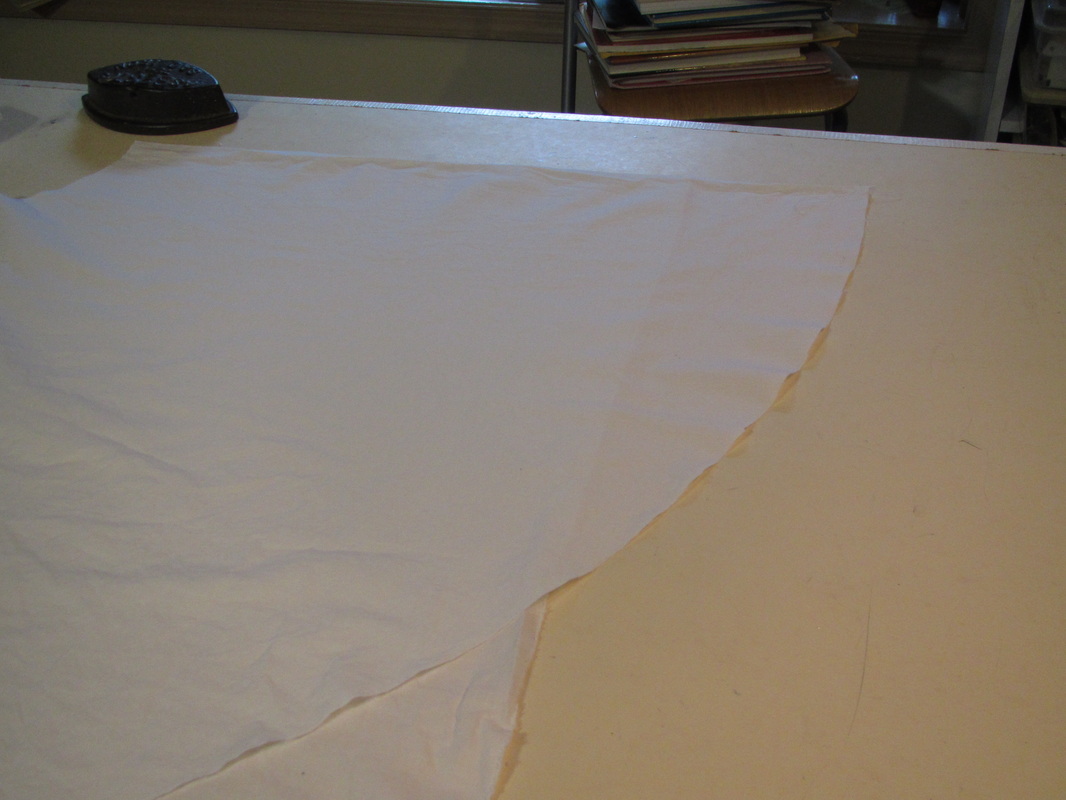
I used the first piece as a pattern to cut the second piece but GASP ... I'm about 6" short.
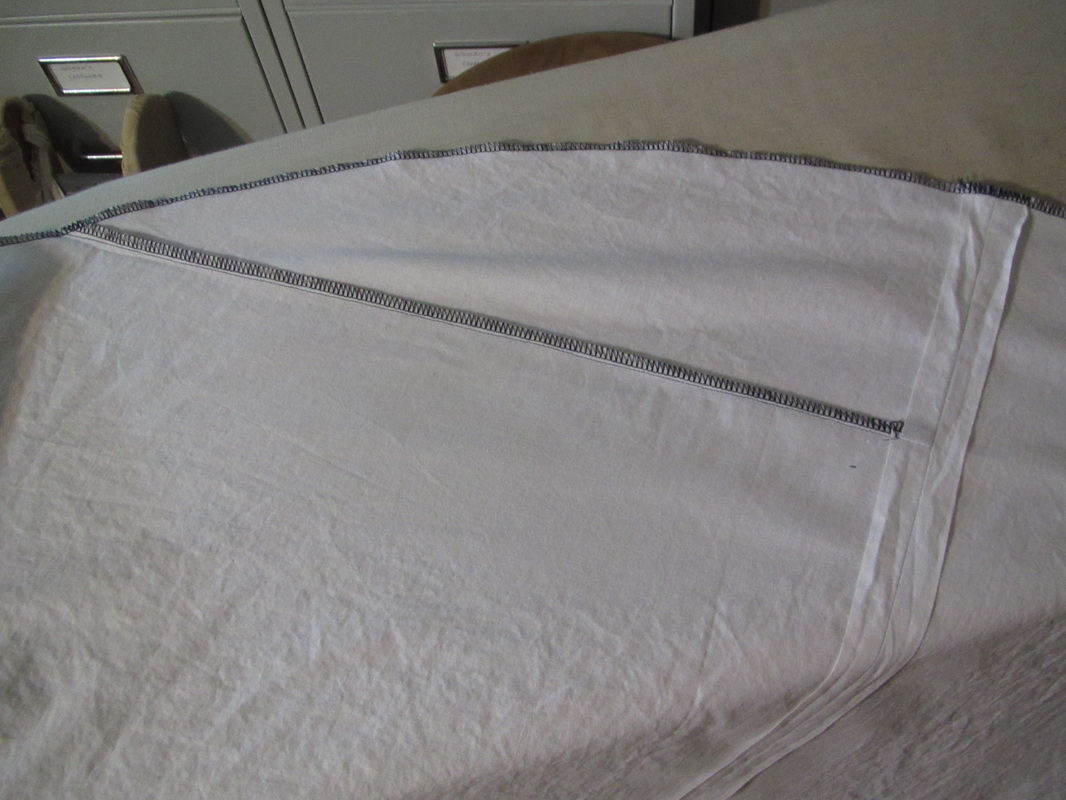
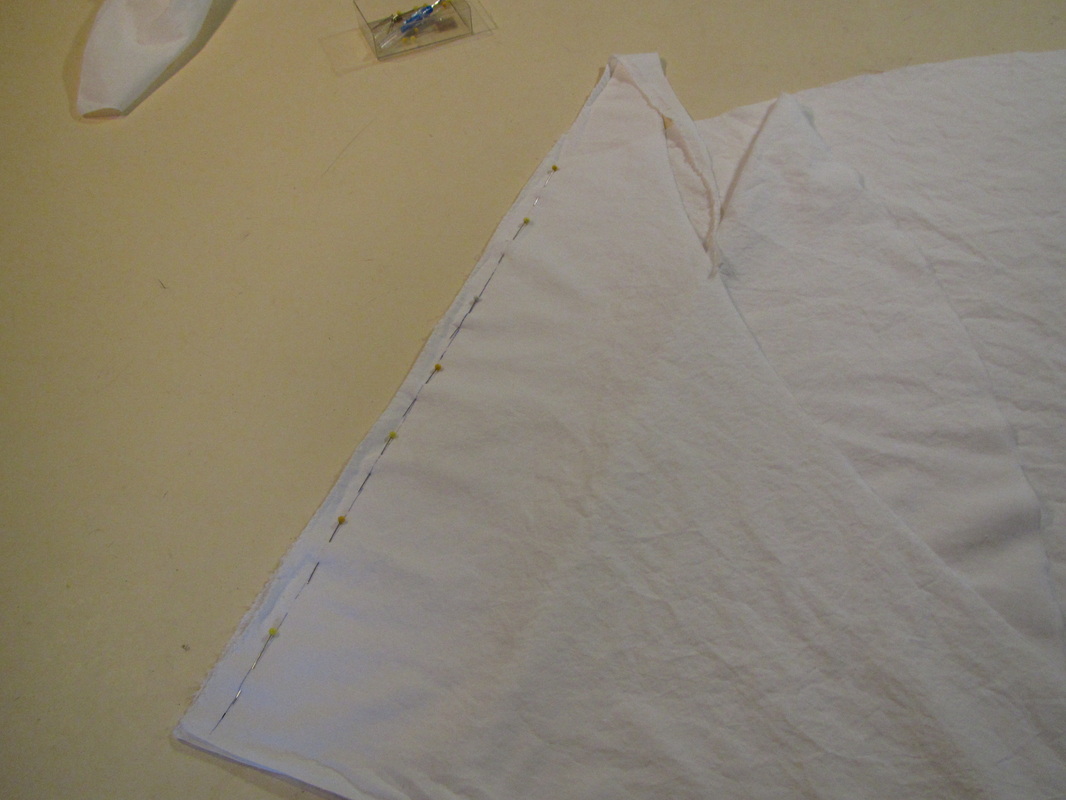
I have now stitched the side seams of the skirt together showing the pieced place. This is the inside. I used black thread since my polyester thread will not take the dye. I don't want to end up with a black skirt with white thread. You could also use 100% cotton thread, but that is hard to find.
I fold the top along the center front and back so the two sides would be the same and draw a line 5/8" below where the pins are for my seam allowance. The pin in the back is significantly higher than the front pin, but I was always told "trust your fitting". So, I'm cutting it following those pins. I then sew the skirt to the top, but don't finish the seams yet.
| 
Measure the length you want and draw a really large circle for the bottom of the skirt. Use a water soluble marker in case of mistakes.
Sigh ... my cheapness gets me again. I should have purchased more fabric. No worries, an added piece solves that problem.
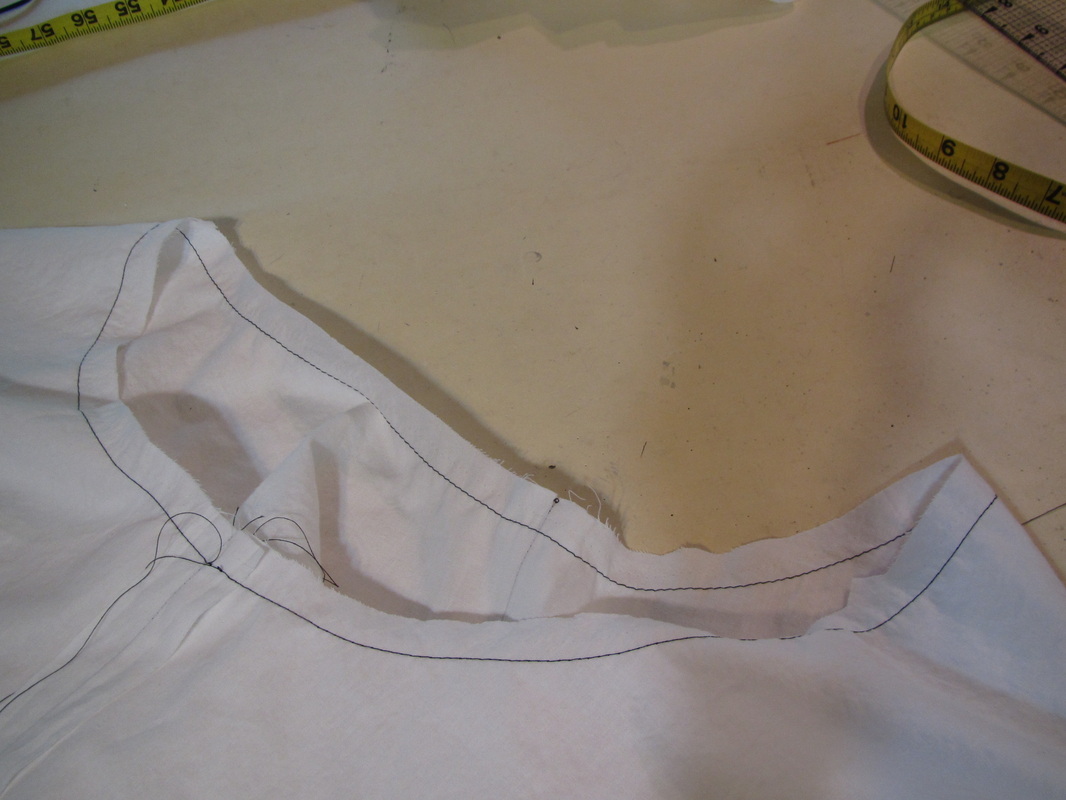
It's important to stay stitch the waist. The stay stitching needs to be the exact finished hip measurement since the top is knit and needs to be stretched to fit the woven skirt. The stay stitching can be pulled in if it is a little large. If it is too large, bring in the side seams. If too small cut the circle a bit larger.
When I tried it on, the weight of the skirt had pulled down the knit top and I had to fold up and pin it 2" higher. So, I then removed the skirt, trimmed the top shorter by 2" and reattached the skirt.
|
Now to start the dying. I want this to be taupe and black, so I plan to dye to entire dress taupe first. This was my biggest mistake ... for the second dress I chose aquamarine and royal blue. Two colors that will look OK when the colors run into each other.To do this, I need a very large pot (an enamel lobster pot I use only for dying), a box of dye, a cup of salt, rubber gloves and a wooden spoon.
It is very important to follow the instructions for what ever kind of dye you are using.
It is very important to follow the instructions for what ever kind of dye you are using.
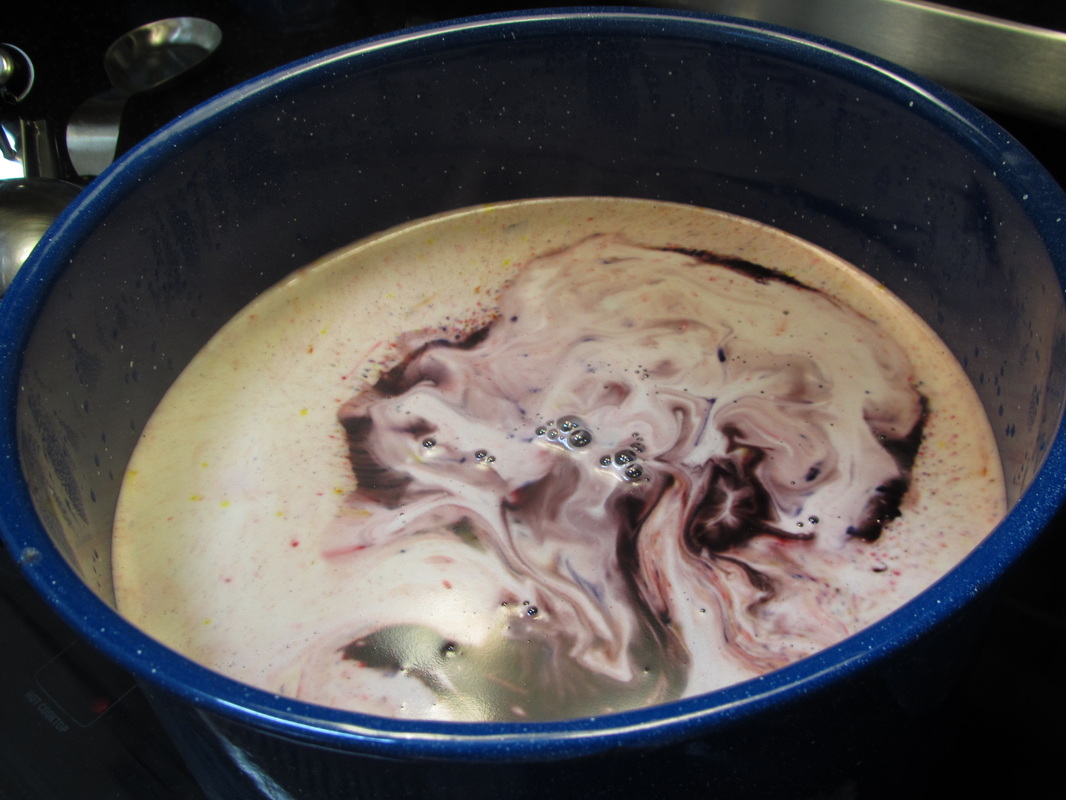
Completely dissolve the dye in the hot water.

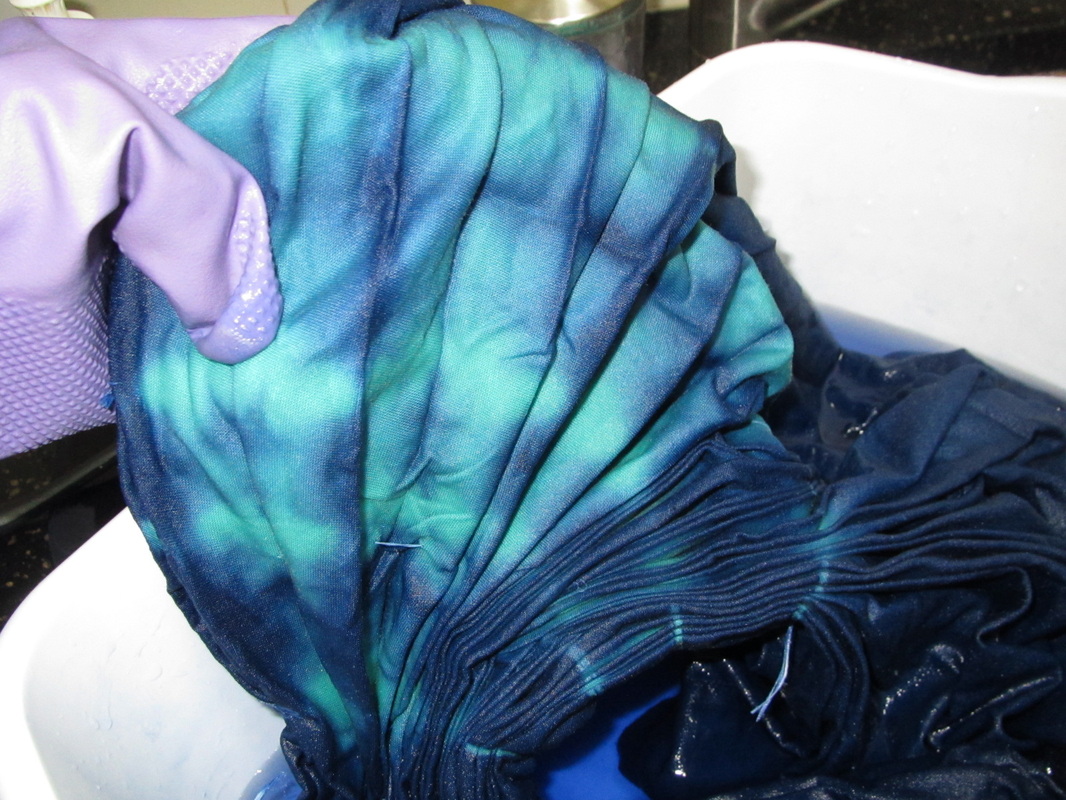
Open the garment out a bit, so the layers are not sticking together too much, then ball it up and gently lower it into the dye.
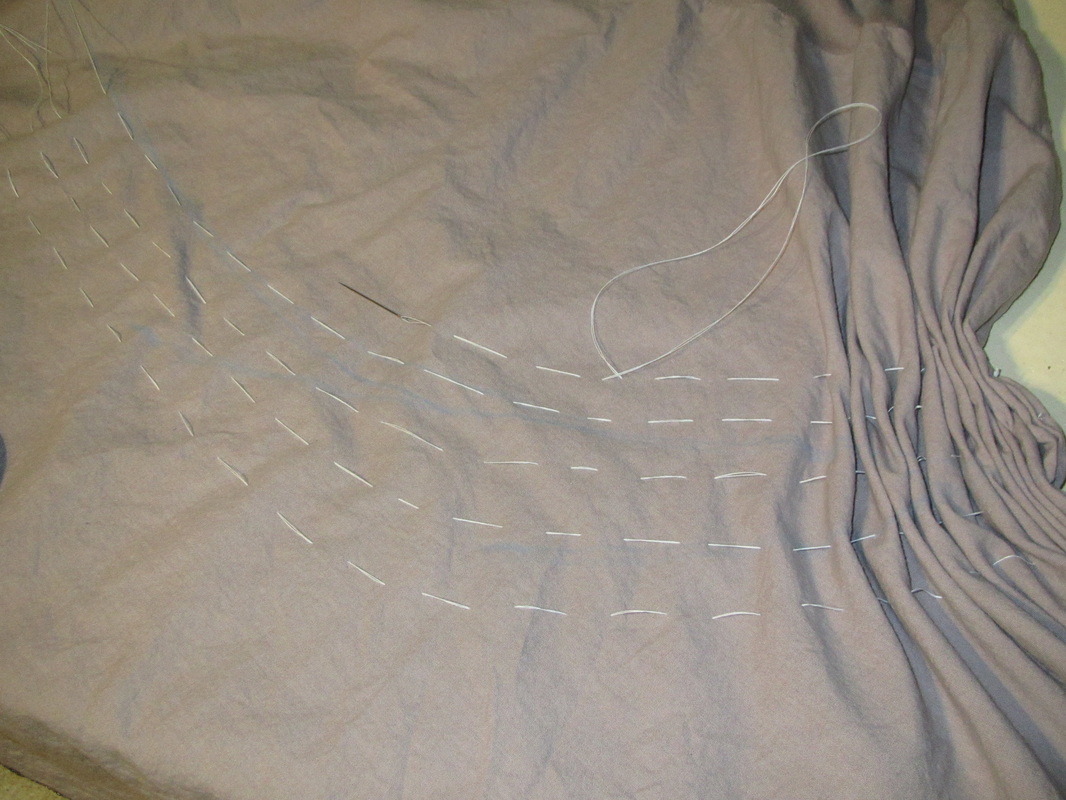
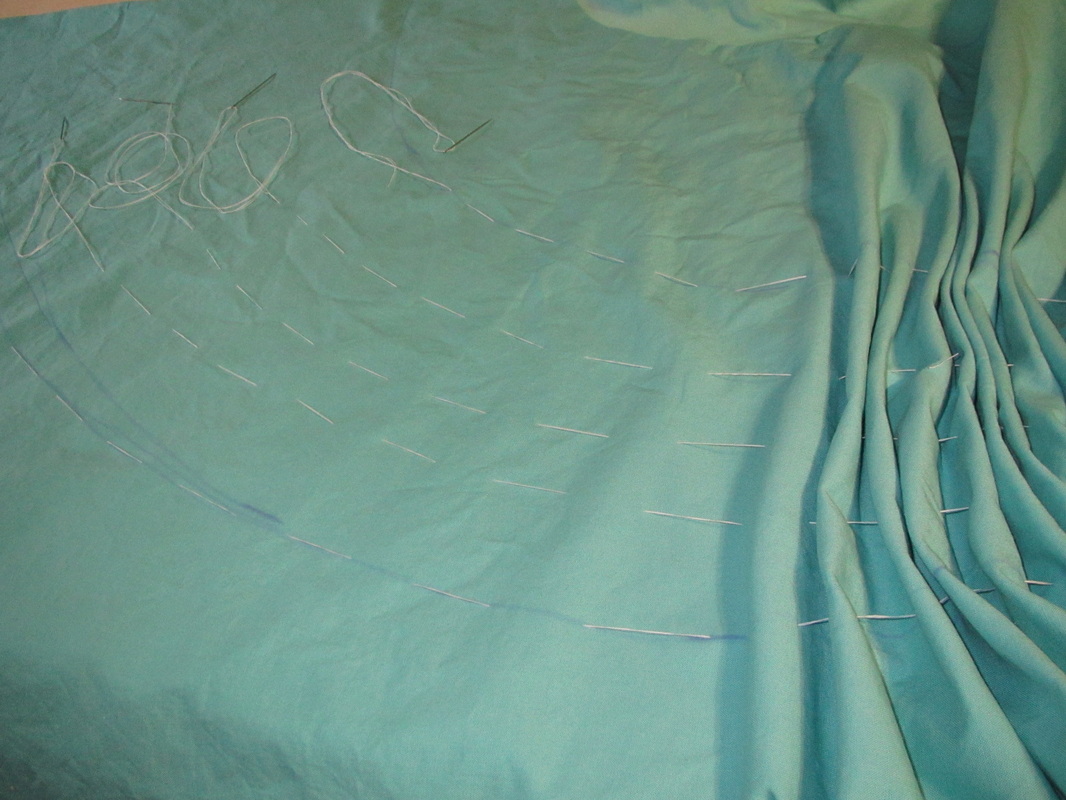
For the skirt band I ran 5 rows of parallel stitches so when it was pulled up it would form organized pleats.
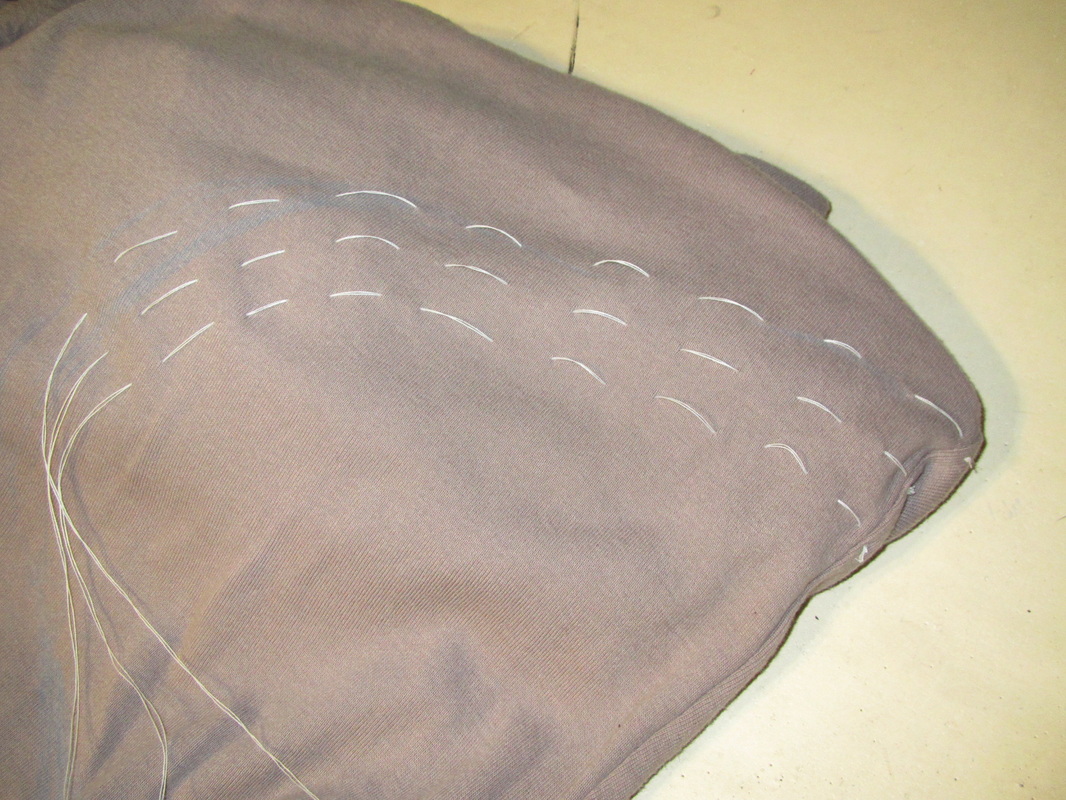
For the circle on the top, I use 3 rows of stitches.

Into the dye it goes again for 20 minutes.
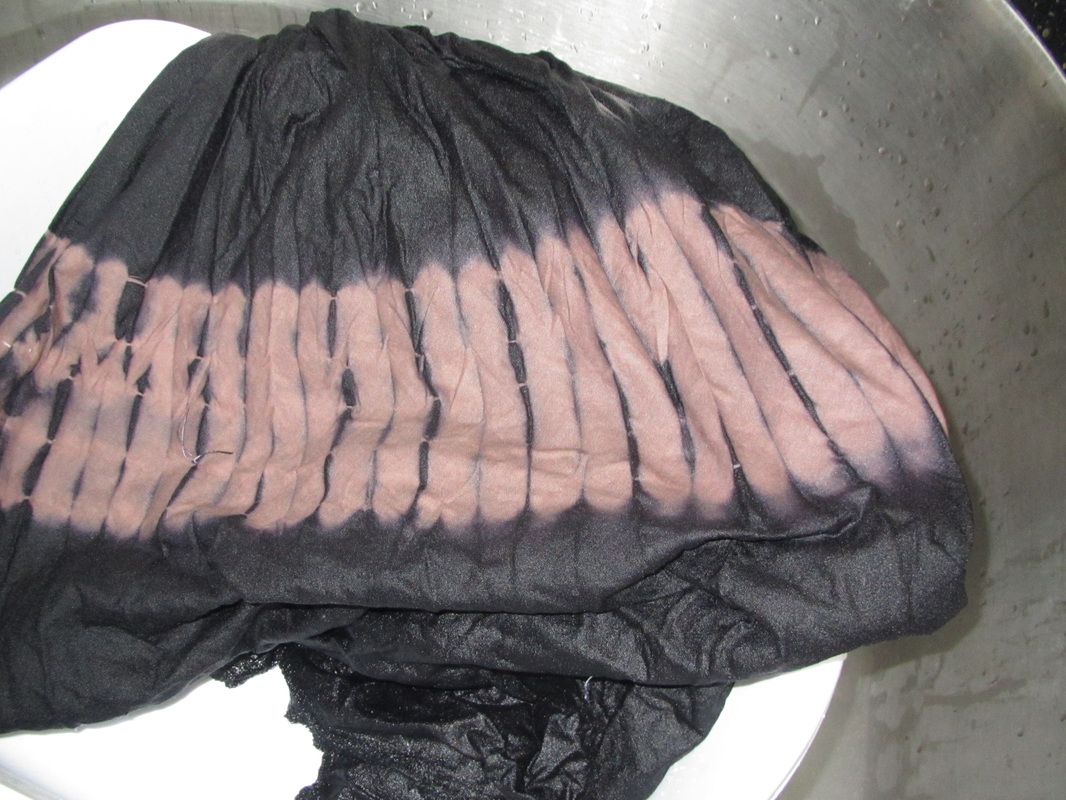
Well, the tie effect is pretty good ...
| 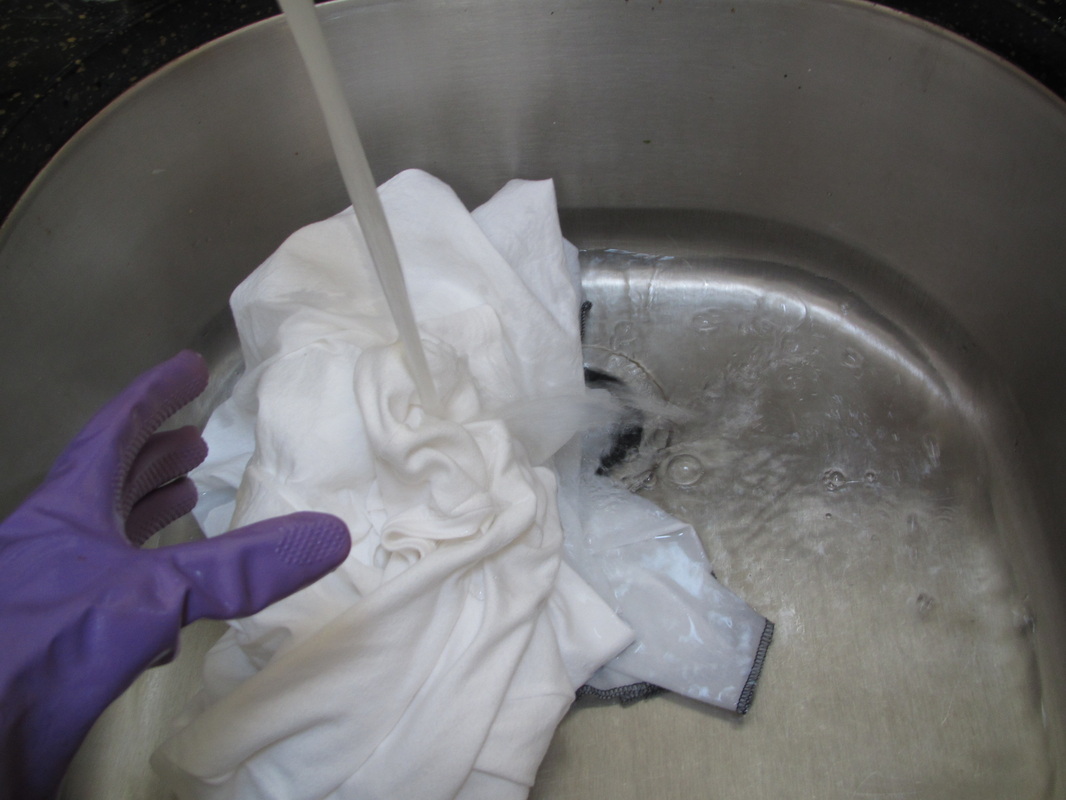
Wet the garment. The dye blends into the fabric better if it is wet first.
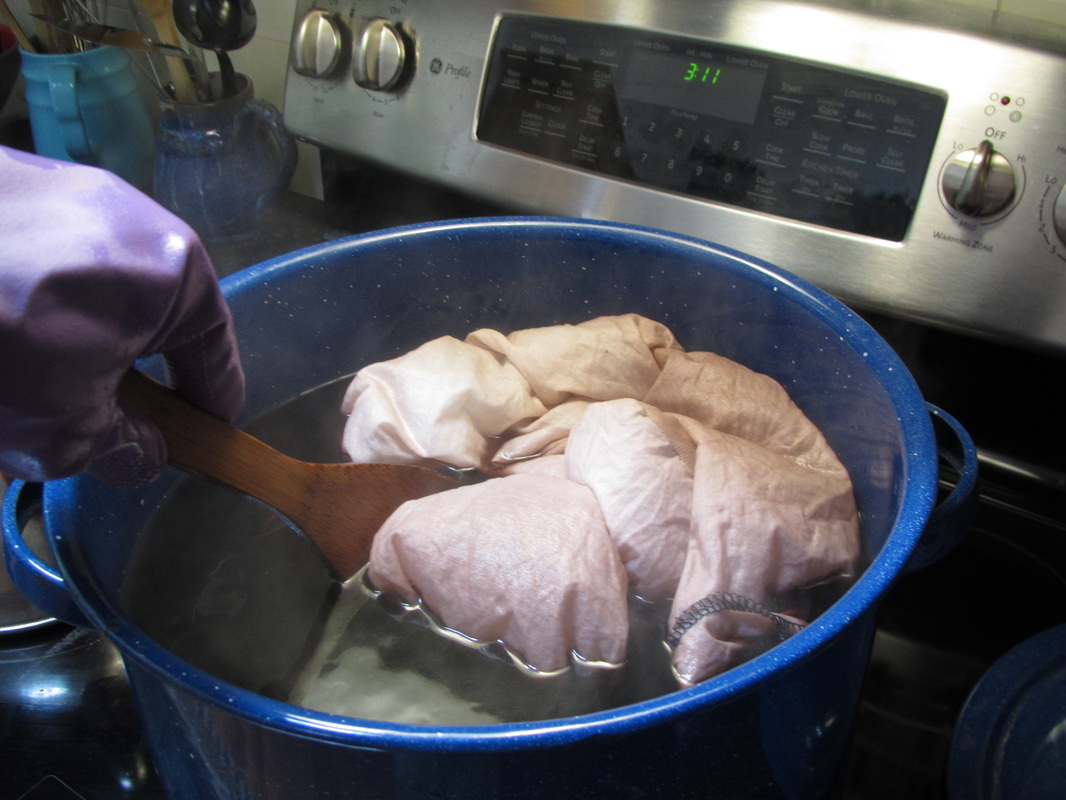
Then stir and stir and stir. The box says up to 30 minutes. I did 20.
So, I now have a taupe dress ... I mark a circle on the side of the top and a slanting line around the skirt to help guide the hand sewing stitches. For the second dress I used pot lids to make true circles and I made a plan. To prepare a garment for tie dye, you pleat it yeup, wrap and tie tightly the parts of the fabric you don’t want dyed. It has to be so tight that water or the dye bath won’t seep into those areas. 
I then wrapped and securely tied off each of the 5 lengths of thread.
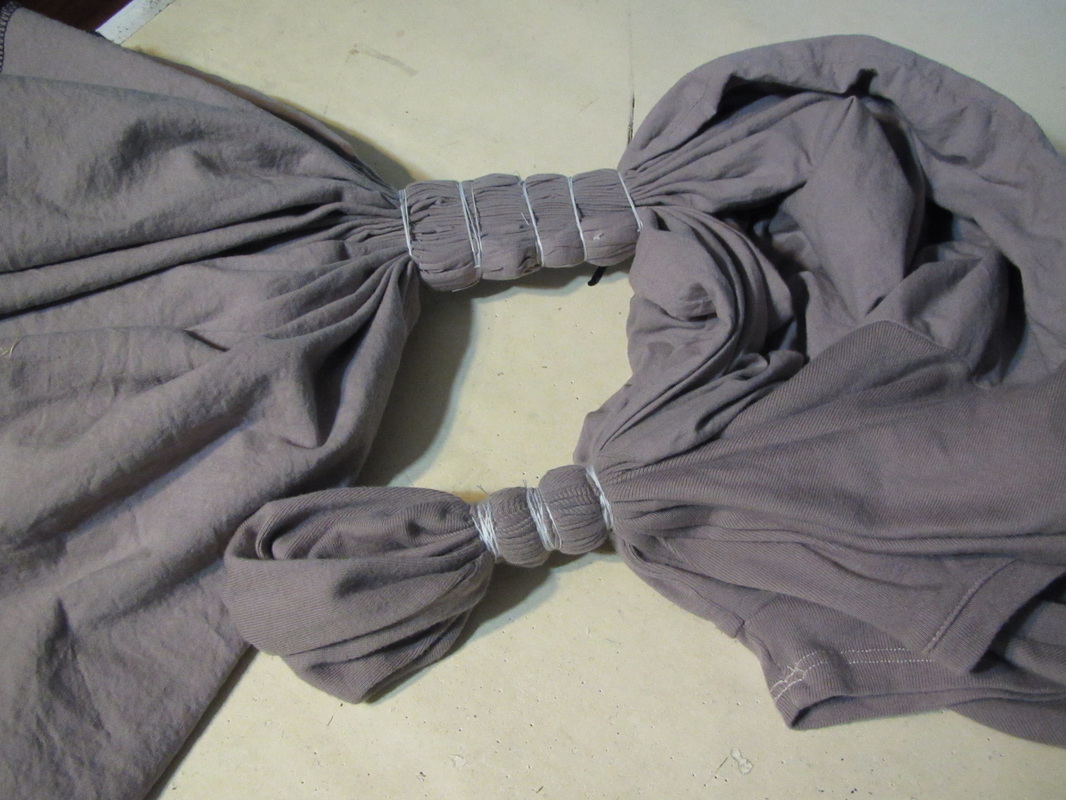
Here are the two areas ready to go into the dye.
It's boring stirring a pot for a long time, so I try to read.
|
But ... I am disappointed with the finish dress. The photos below will show you how I did the second dress differently.
First, I made a plan. It's a very simple plan, but a plan helps to place the tied parts better.
Third, I made my stitches larger and the rows father apart.
| 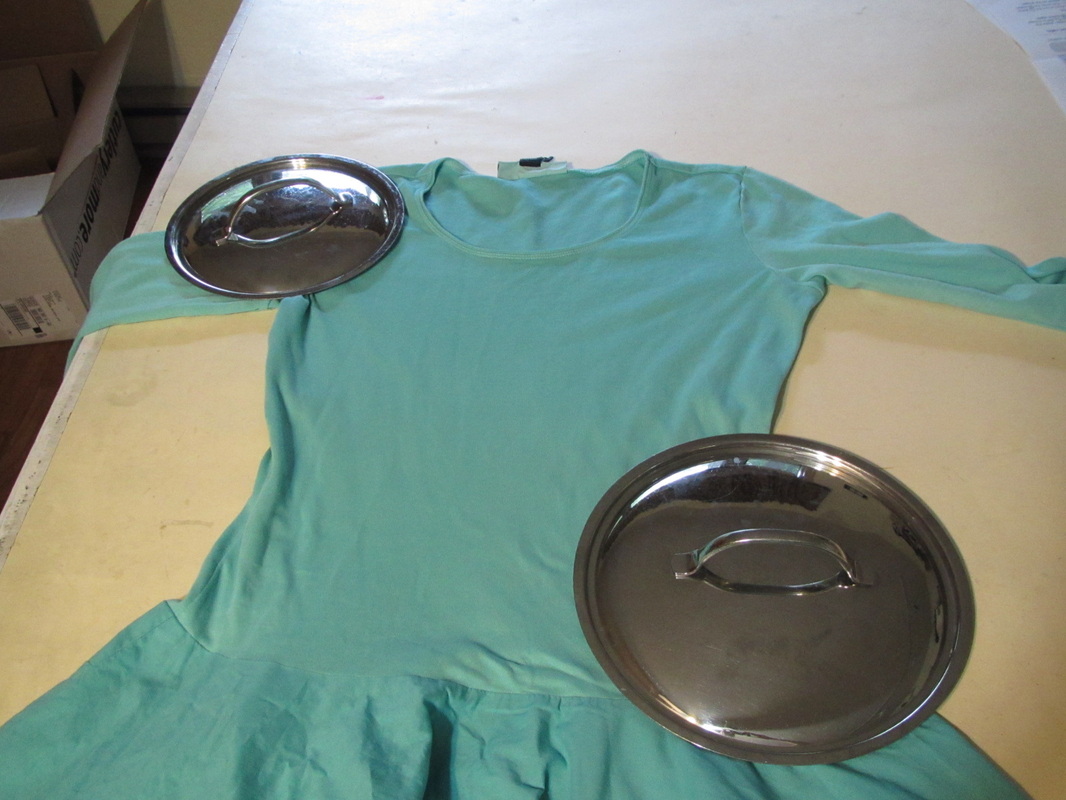
Second, I used pan lids to draw circles instead of freehand oval things.
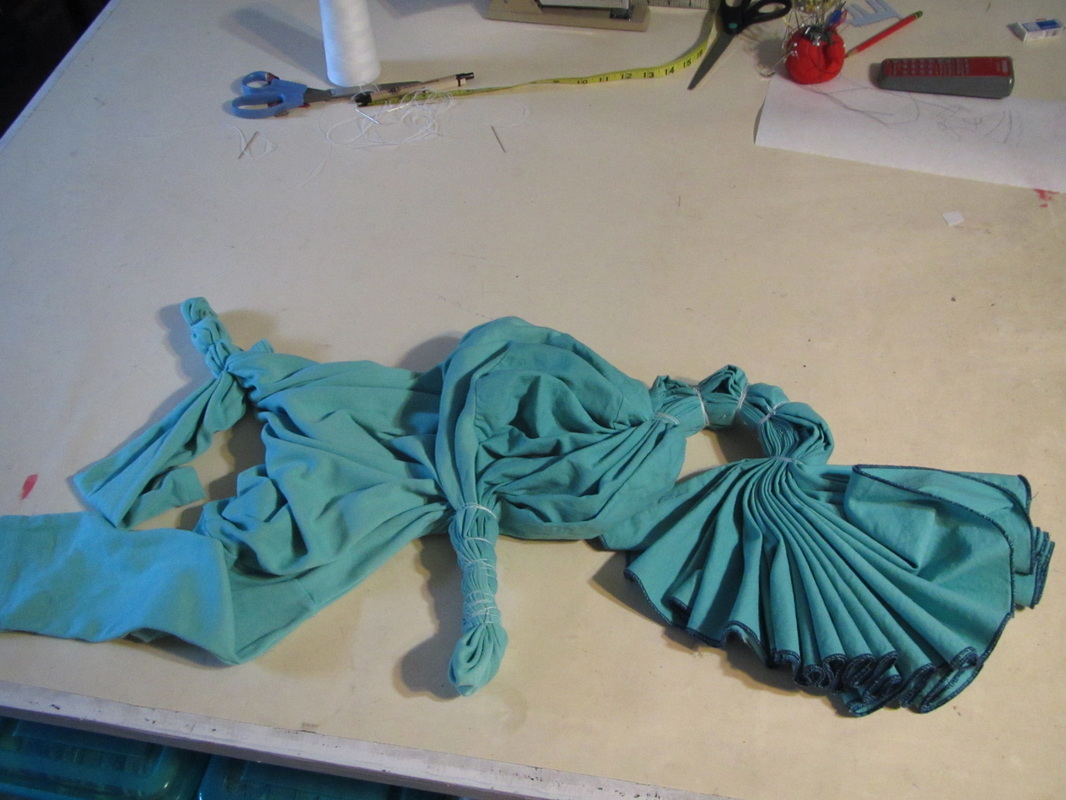
This is what it looked like after tying, before dying.
|
These 2 colors work so much better. So, other combinations I would try are orange and red, pink and maroon, yellow and green or yellow and orange for something bright. You could always skip the first dying and have white and any color.
HAPPY DYING ... AND GOOD LUCK!
 RSS Feed