
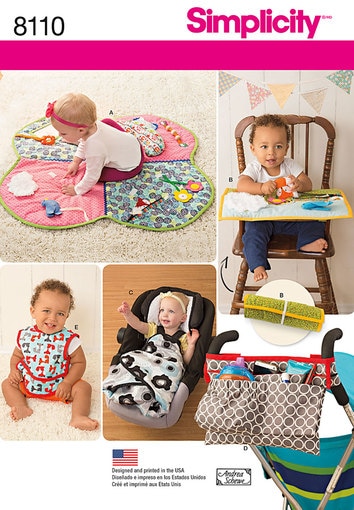
I don't know how many of you know this, but I spent some of my formative working years as a designer and sample maker for the toy industry. Alas, nearly all that work has gone overseas, so I don't get to make things for kids too often, But I love it when I do.
This is also a REAL, REAL catch up blog. I wrote the first blog for this pattern almost exactly a year ago ... phew! Where did that year go! Click here to read it.
That blog was kind of an overview. Today, I'm sharing pictures of some of the actual sewing. I did my best to make these pieces manageable for most people to make. You can't believe how intricate the patterning can get for a factory made toy. But, those machine operators do one operation over and over and get really good at sewing teeny tiny things.
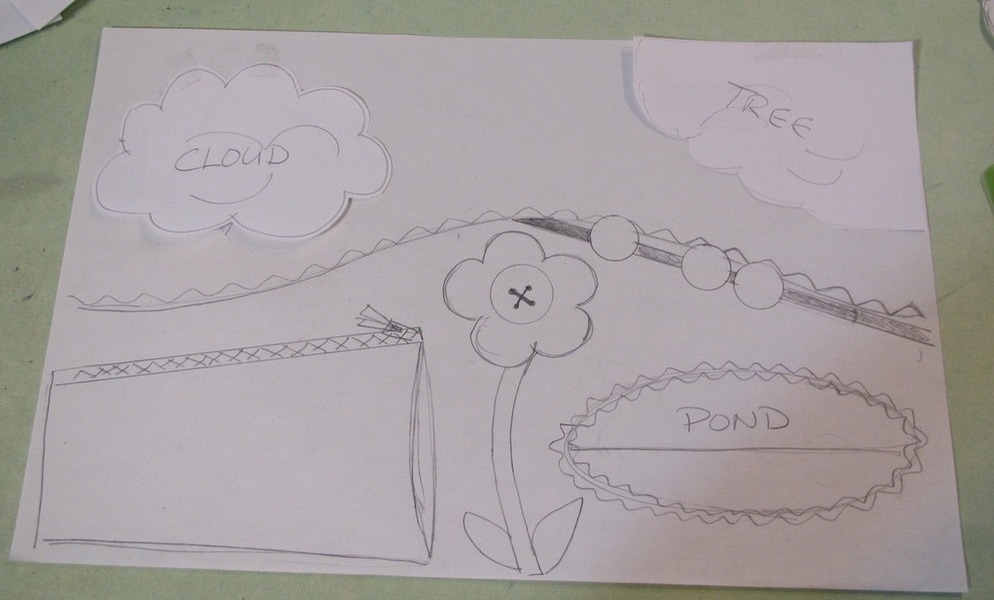
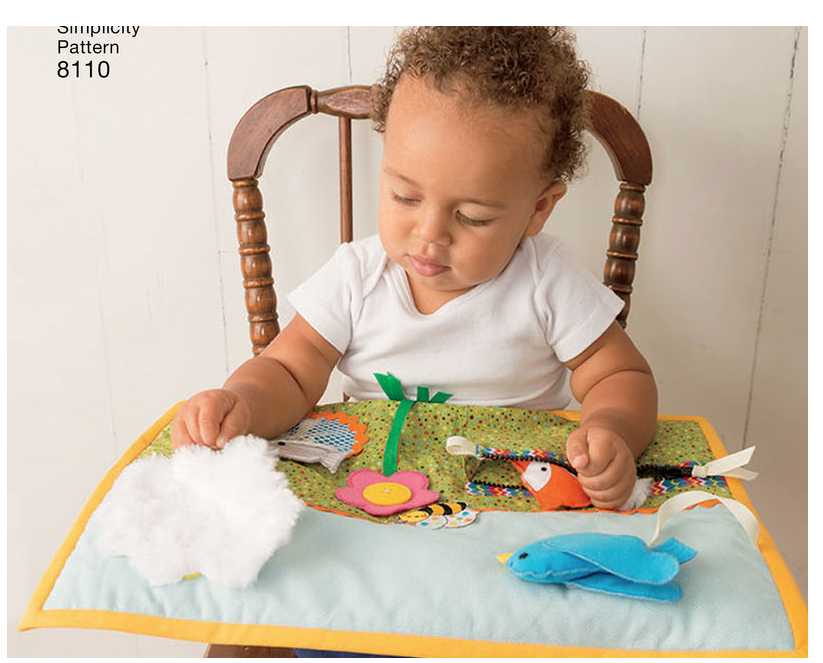
Here is the sketch I made to work out the travel activity mat. I was trying to squeeze as much play as possible and still have it small and portable.
This is the same sketch with all the activities out. I think the wooden beads were eliminated during Simpicity's production process. They probably thought the beads would be hard to find or might be unsafe ... not sure.
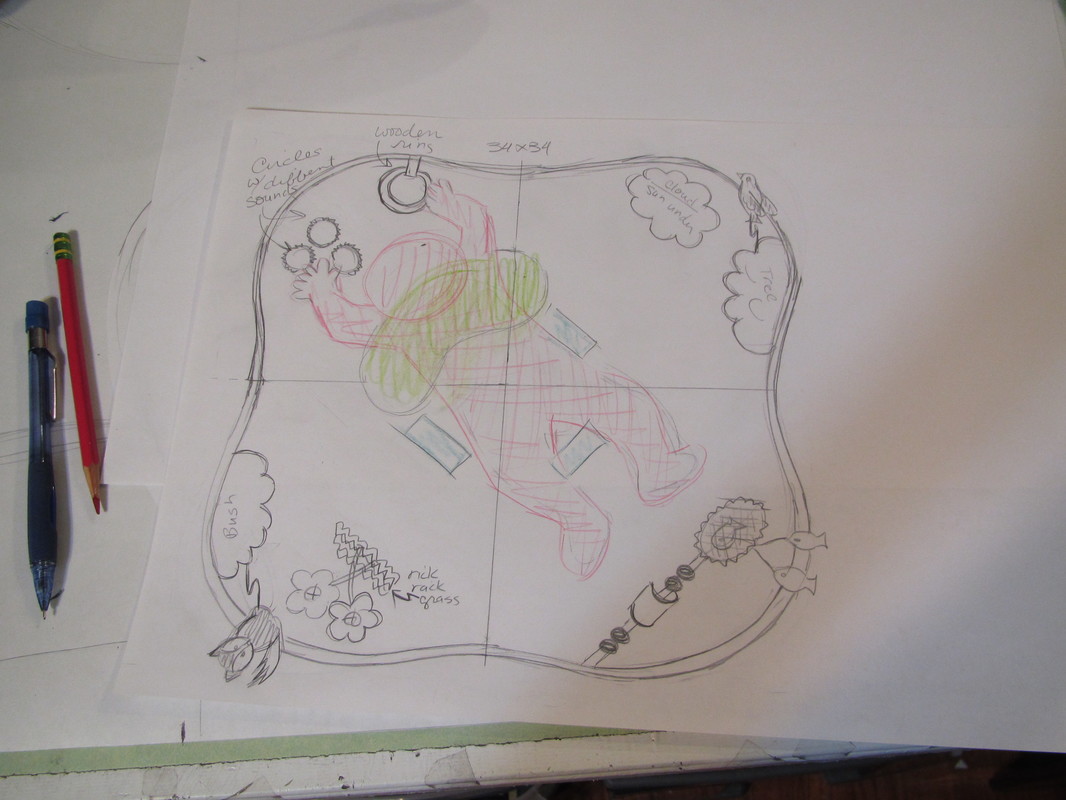
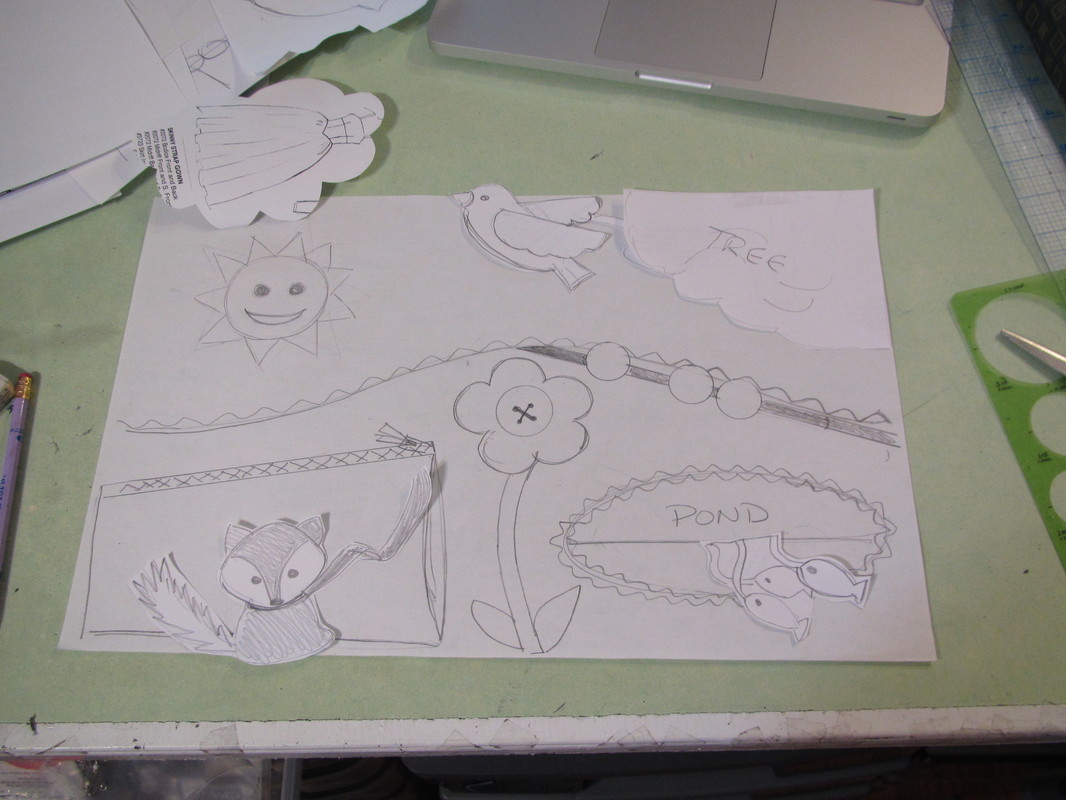
And because the challenge when designing a pattern and instructions that need to fit into a little envelope, the floor play mat uses all the same activities with a few more added.
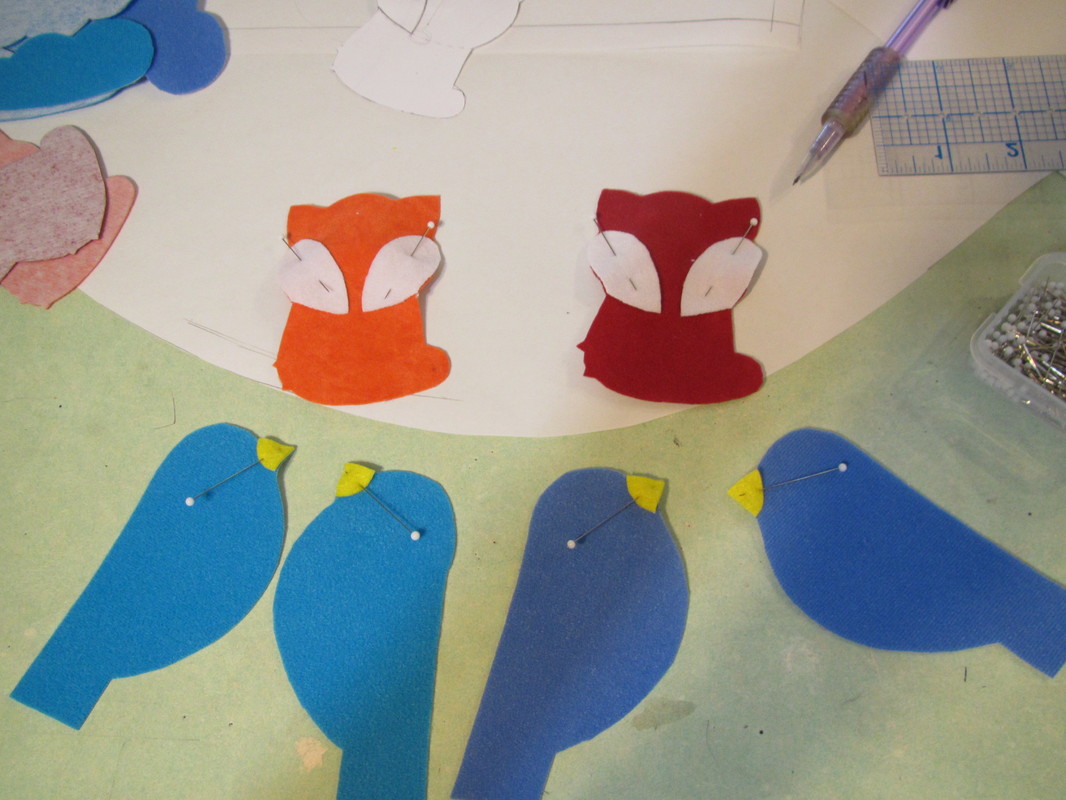
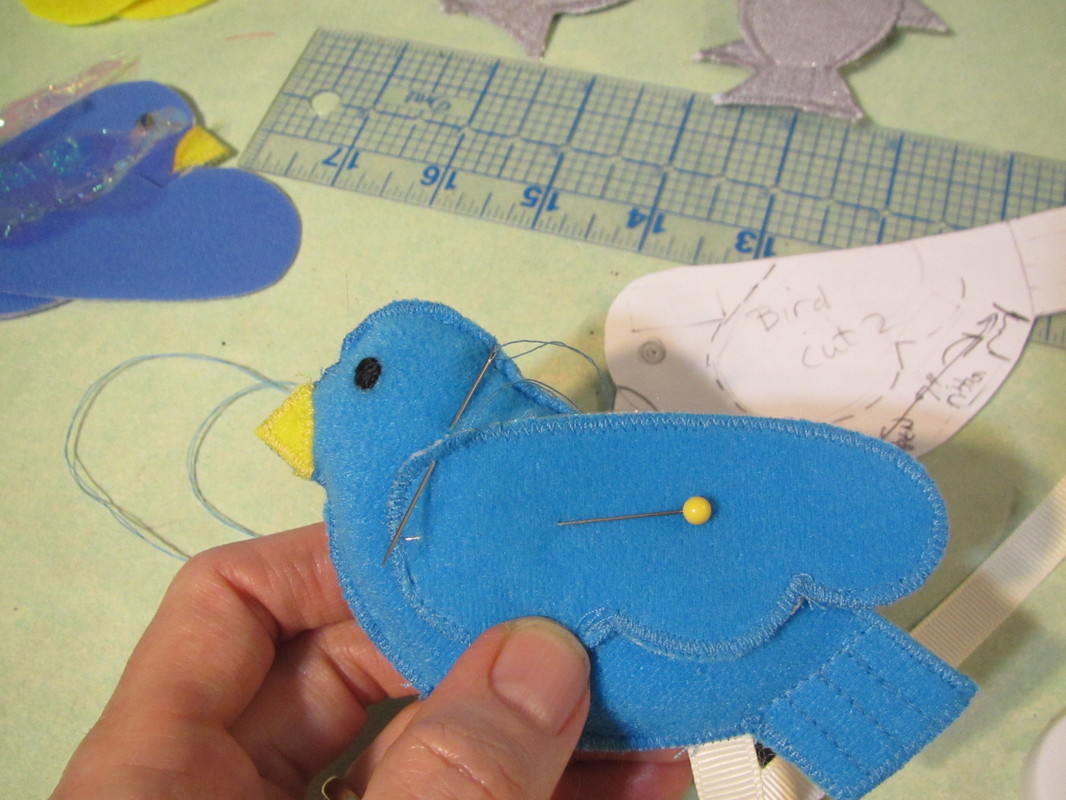
There are a lot of tiny pieces in this pattern. I did my best to make it not too tedious to make like I would have done with a toy design destine to be made in a factory. So, the animals are flat two piece shapes with added details like the bird beaks and fox cheeks.
I call this photo beaks and cheeks!
I call this photo beaks and cheeks!
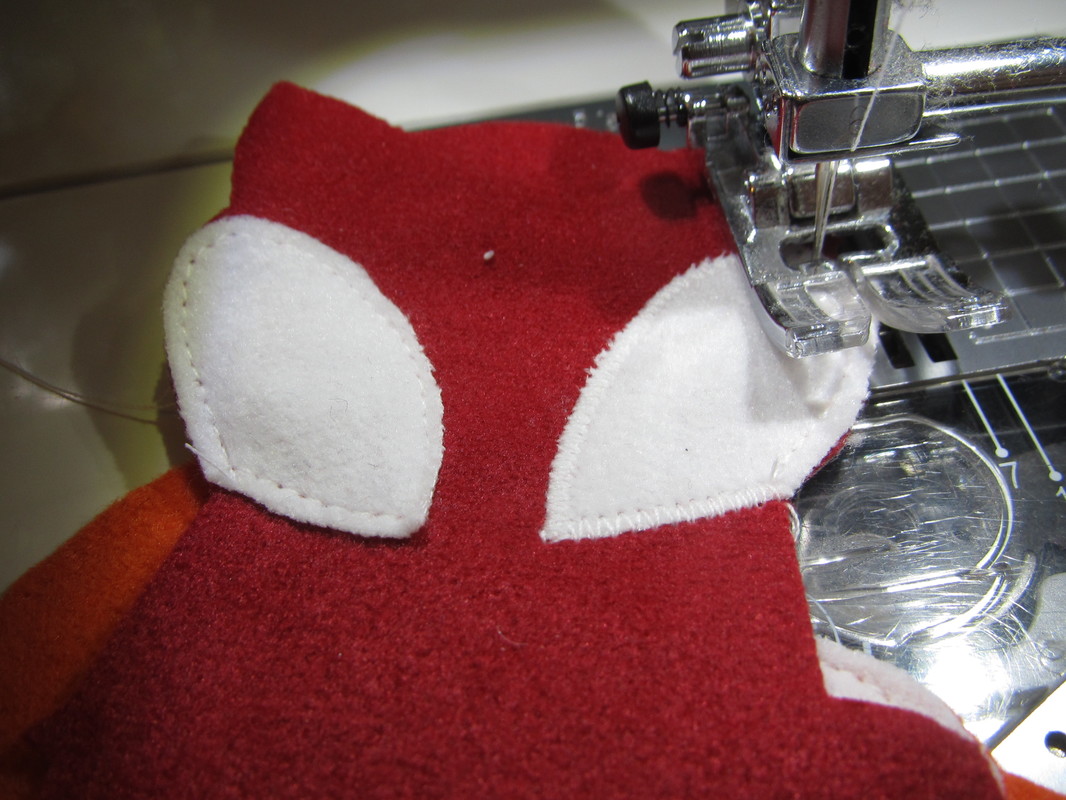
I first straight stitch the piece in place along the edge then a zig-zag appliqué stitch over.

The eyes and nose are hand embroidered. We don't want any small buttons that could be swallowed or choked on.
|
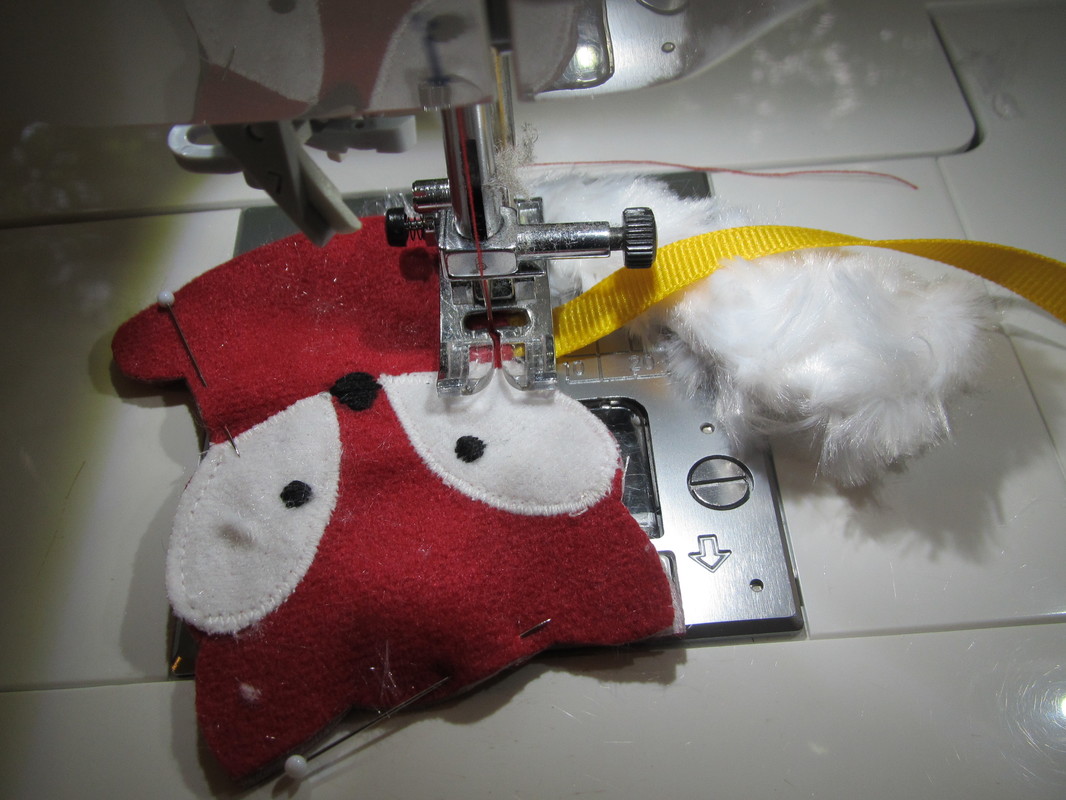
All the small activity items are made out of felt or "Alova", a brand name for brushed tricot, which is used a lot in the toy industry. Like felt, the cut edges don't ravel, but it holds up better and, I think, looks better. But, can be hard to find.
Since the fabrics used do not fray all these small items are sewn with tiny (1/8") seams to the outside. This gives more defined shapes and is WAY easier ... no turning. It is important to sew the tail and the ribbon tether back and forth several times to make it not come apart with possible rough play. |
An opening needs to be left for stuffing and for a small squeaker. These ones from Amazon are the right size.
|
|
The bird eyes are also embroidered. The wings need to be sewn by hand because there is a rattle in the body and crinkle paper in the wings.
This one from Amazon should fit. Etsy.com is also a great place for hard to find crafting supplies. |
|
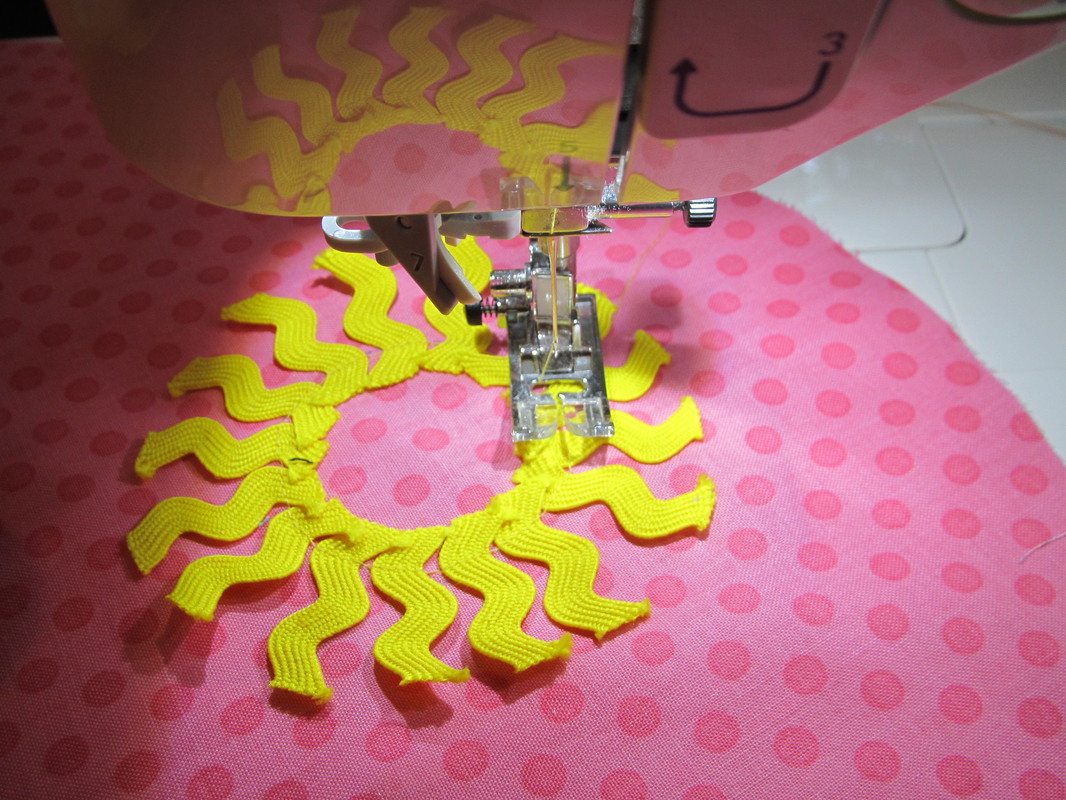
Babies love texture. So I thought a circle of cut rick rack would make good looking and nice to touch sunbeams.
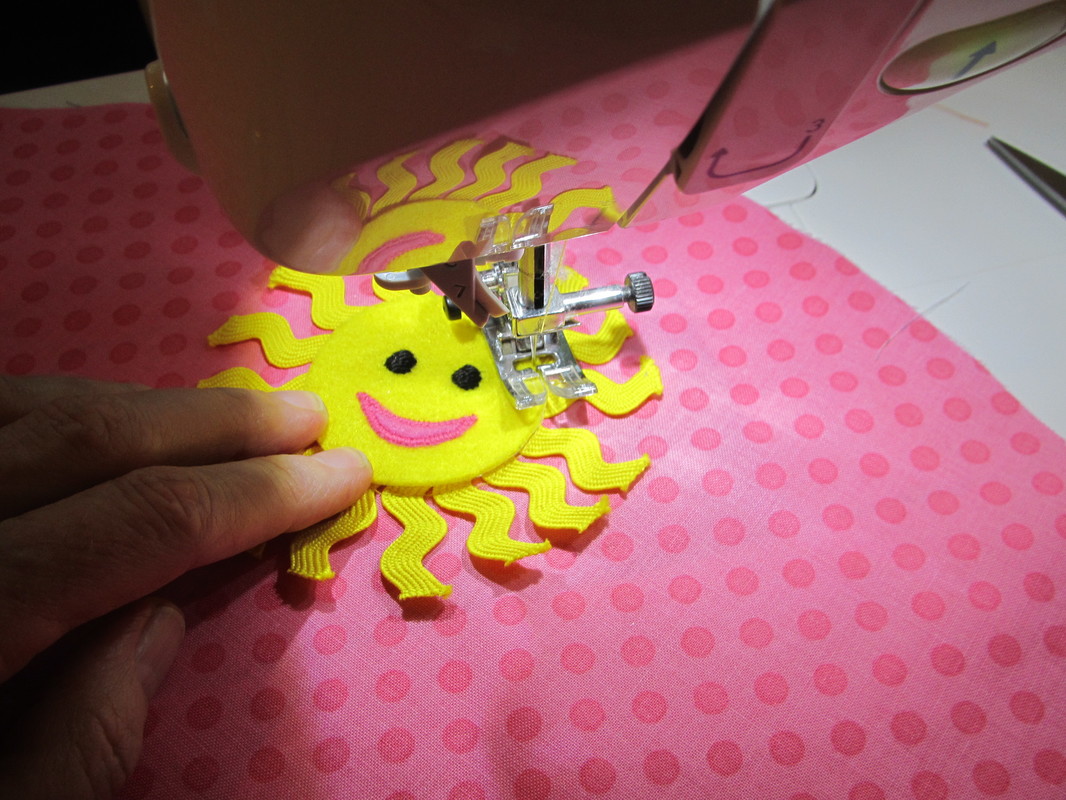
Simply plop the sun in the middle.
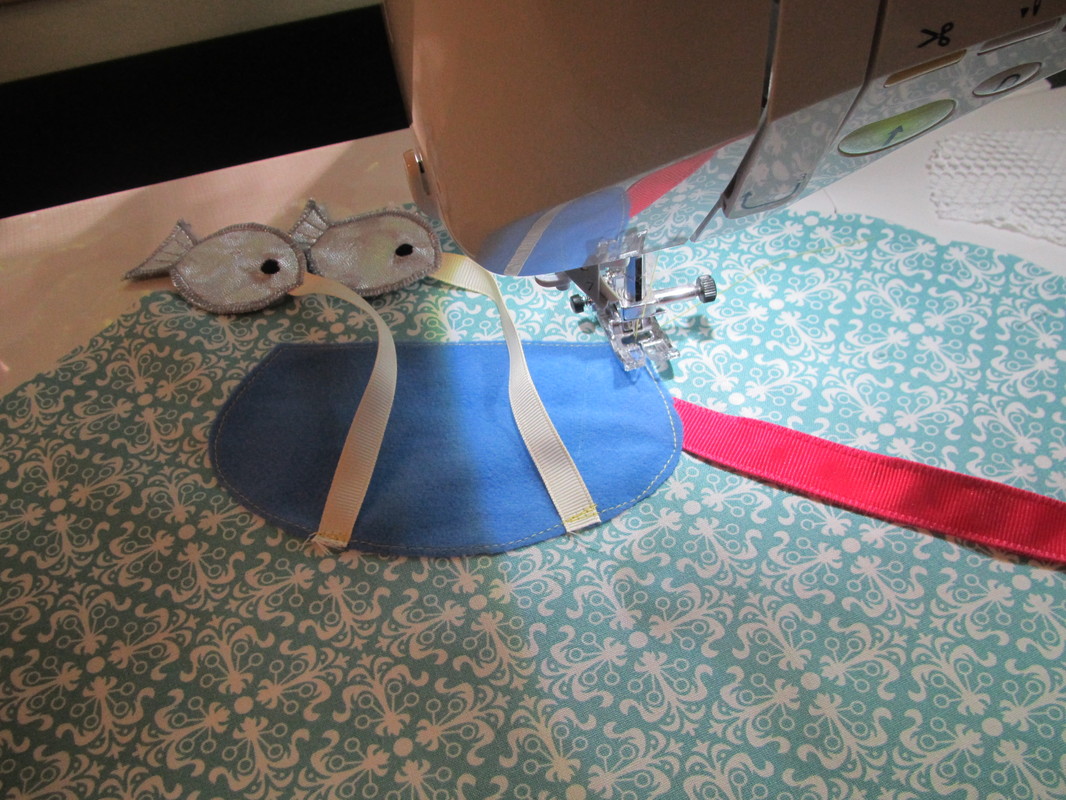
Here are two little flat fishes getting their ribbon tethers securely stitched to the bottom of their water.
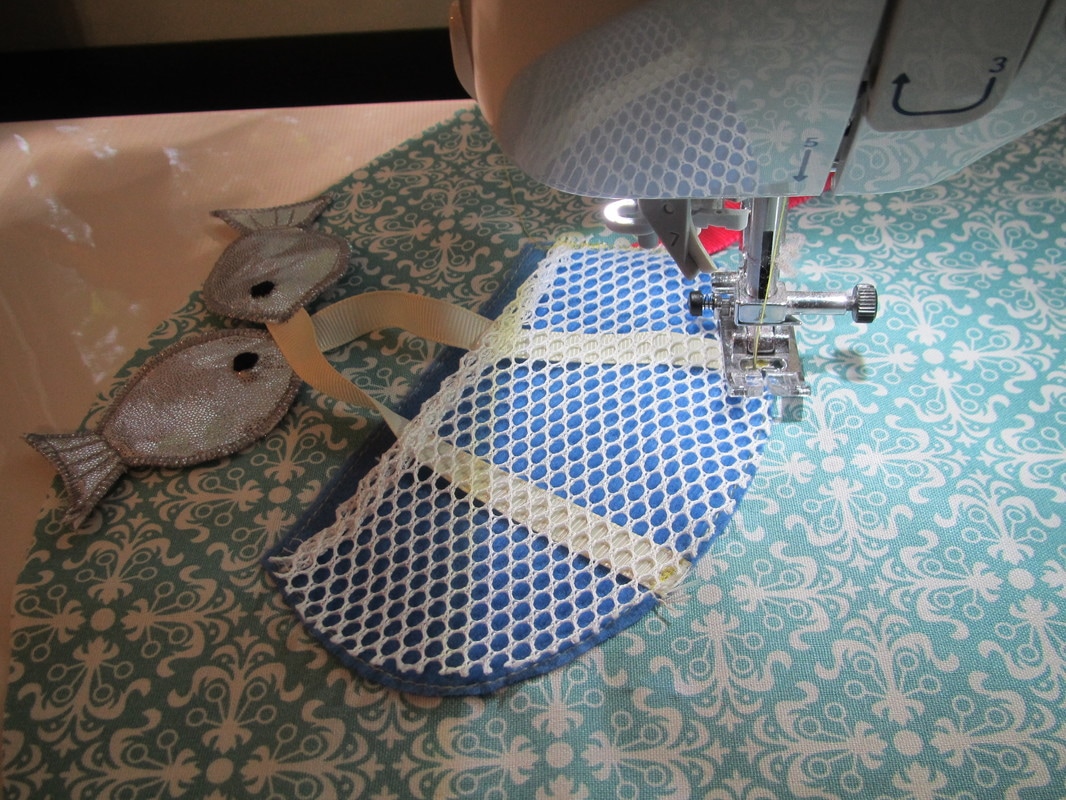
Then a little mesh on top for a fish bowl.

This picture shows how I reinforce any bits that might get pulled of with rough play.

It's hard to see, but I stitched a box with an "X" through it to hold this ribbon with beads on strongly.

All the play elements are now in place!
|
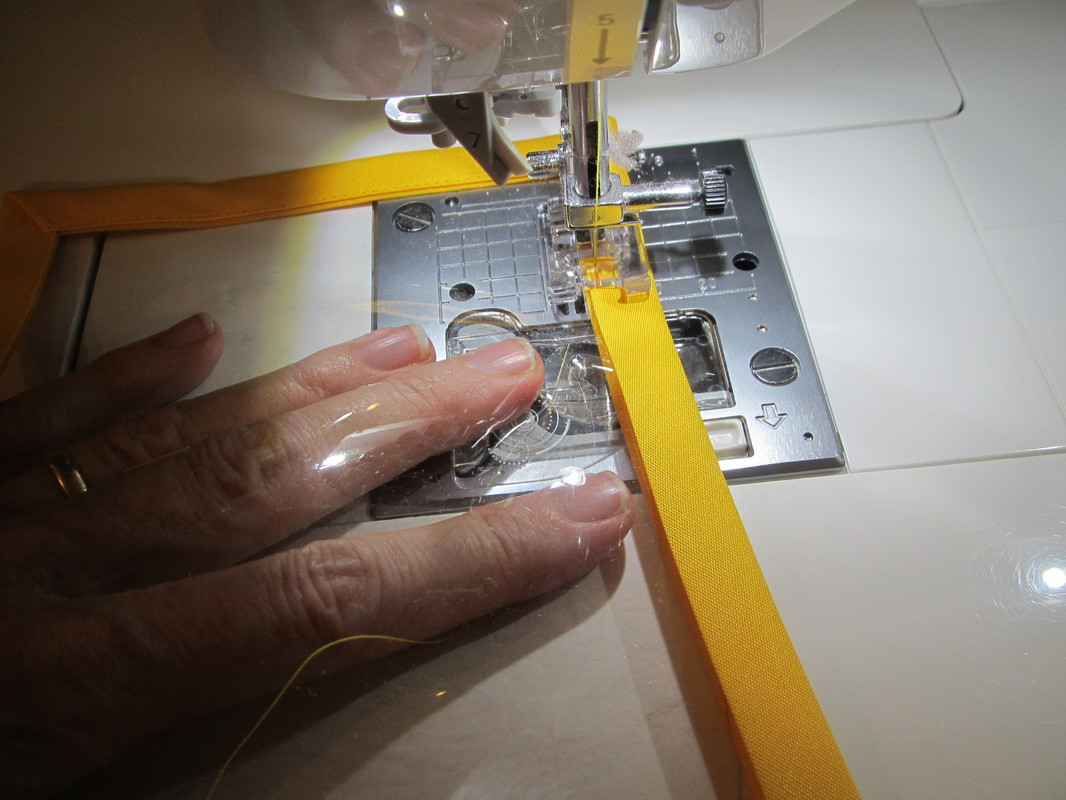
And for a little extra thing. I want to show how I miter a corner when sewing double fold bias tape . The is the clear vinyl pocket on the floor mat that you can put a safety mirror in.
A 4 x 6 safety mirror like this one, will fit in this pocket. Also 4 x 6 photographs will fit. |
|

Because this bias is going on vinyl, it really needs to go on in one operation. You can't stitch it over twice or make it nice with a slip stitch on the back.
So ... to get a clean miter, sew to the end, pick up the needle and the presser foot.
So ... to get a clean miter, sew to the end, pick up the needle and the presser foot.

Turn the piece, open the bias tape up and fold it like this.
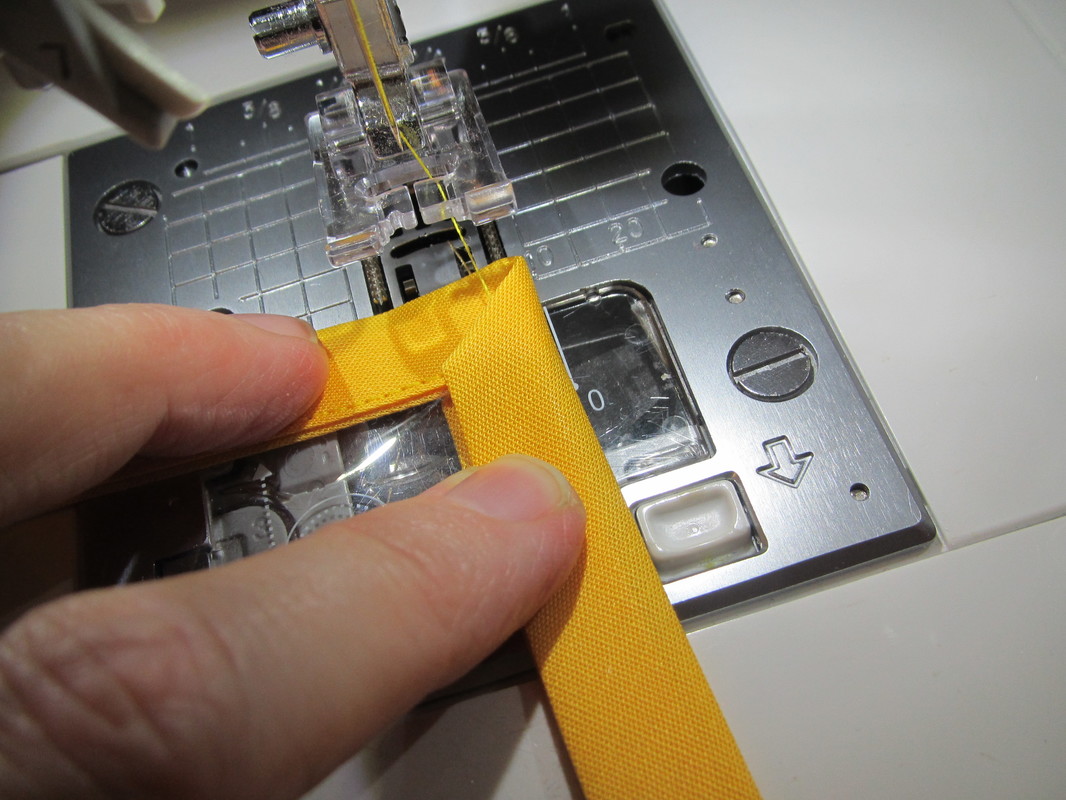
Fold it back to make the miter and then insert the machine needle where the other stitching stopped and keep going.
It really works!
It really works!
 RSS Feed