
Here's a pattern I should have written about a few months ago ... but ... better late than never.
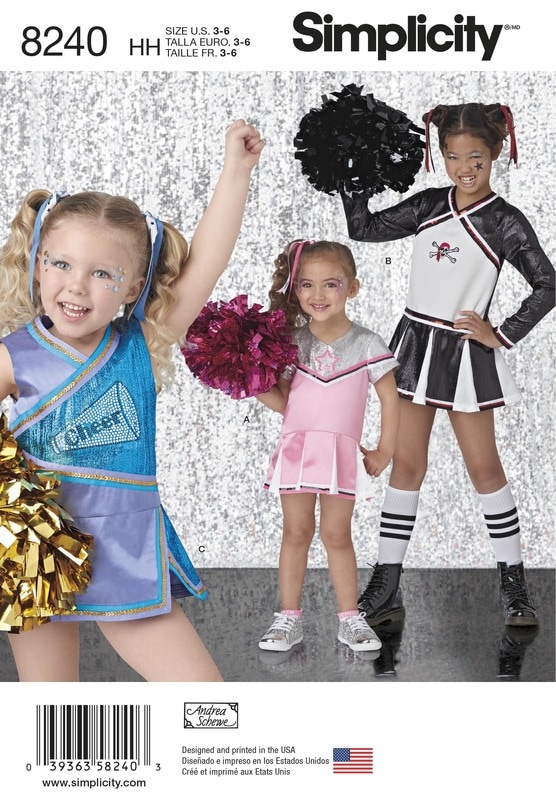
Sparkly cheerleader dresses for little girls. I thought little girls would do better in a one piece dress rather than a top and skirt that would be sliding all over the place.
Sparkly cheerleader dresses for little girls. I thought little girls would do better in a one piece dress rather than a top and skirt that would be sliding all over the place.
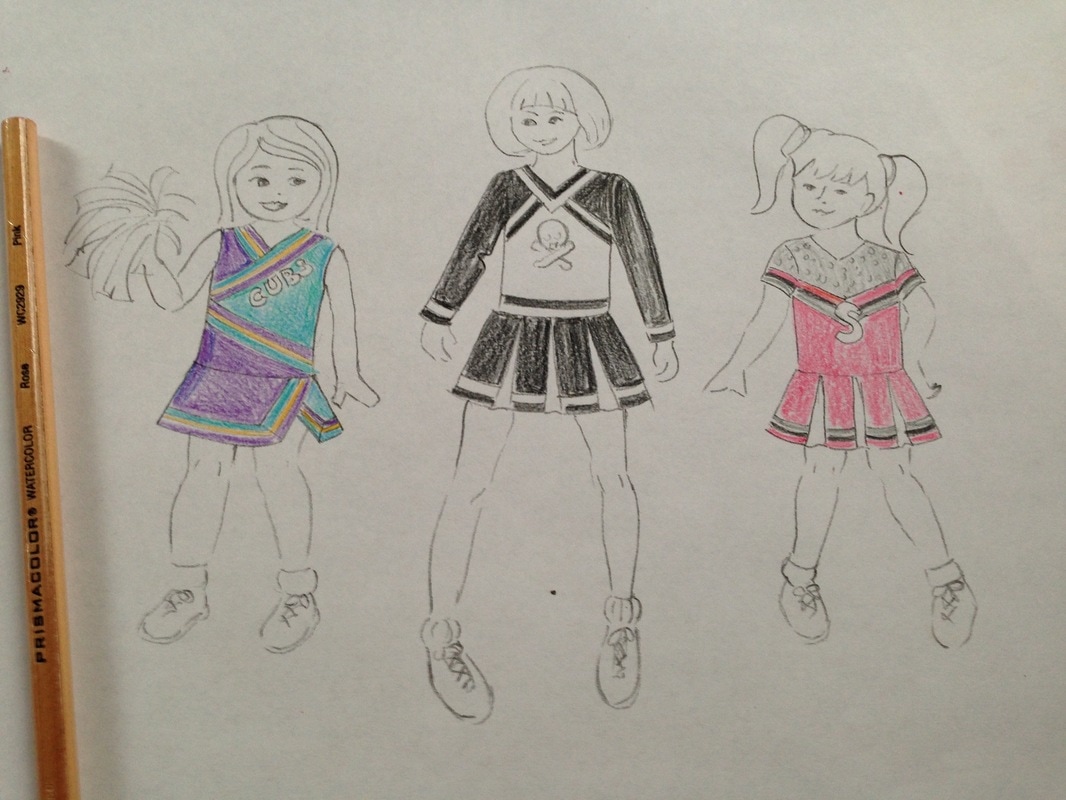
I was given this assignment last year while I was living in Santa Barbara. Here is the sketch I sent in to get started.
|

|
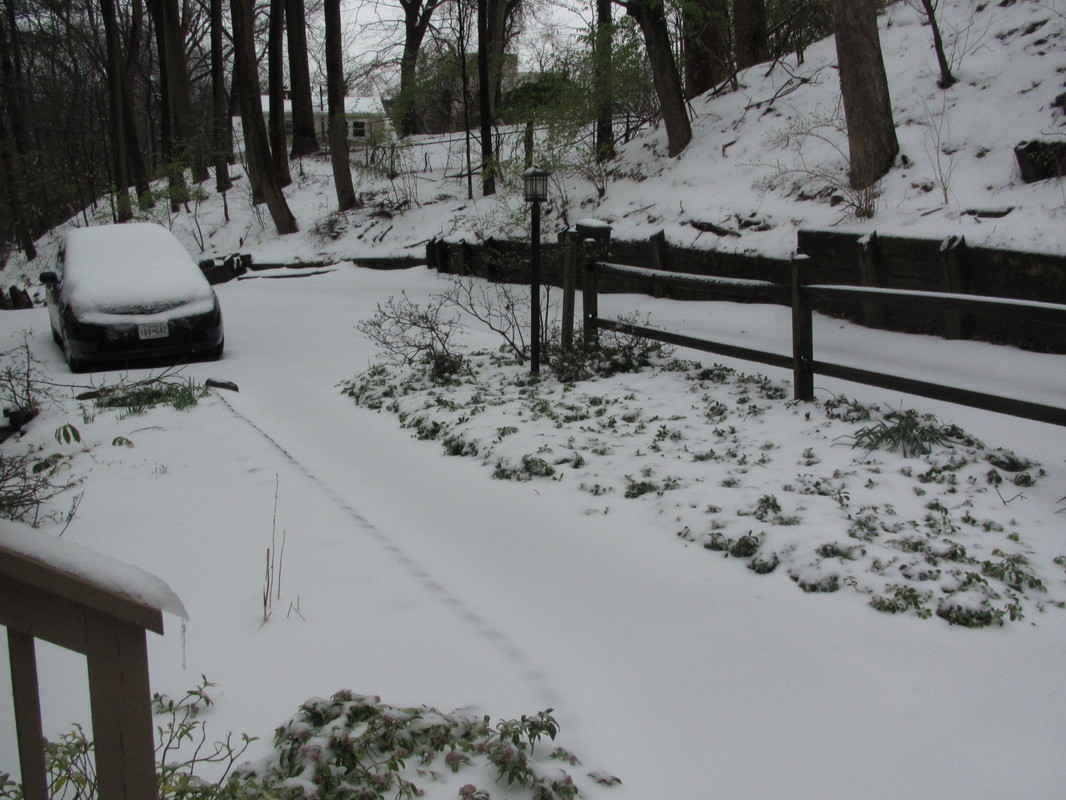
And since my husband and I just came back from another visit to Santa Barbara, only two weeks this time, the stark contrast in the two places is very evident to me.
First picture - my front yard last week.
Second picture - the beach in Santa Barbara a 15 minute walk from our cottage.
First picture - my front yard last week.
Second picture - the beach in Santa Barbara a 15 minute walk from our cottage.

Santa Barbara can't be beat, but the work space I had last year was challenging ... a very small unheated, uninsulated finished shed. BUT, it was all mine and I cranked out a lot of work in that little space, wearing long underwear and my down vest every morning when it was 45 degrees inside and out. It did warm up later in the day.
|
|
So, let me show you a few parts of sewing these dresses.
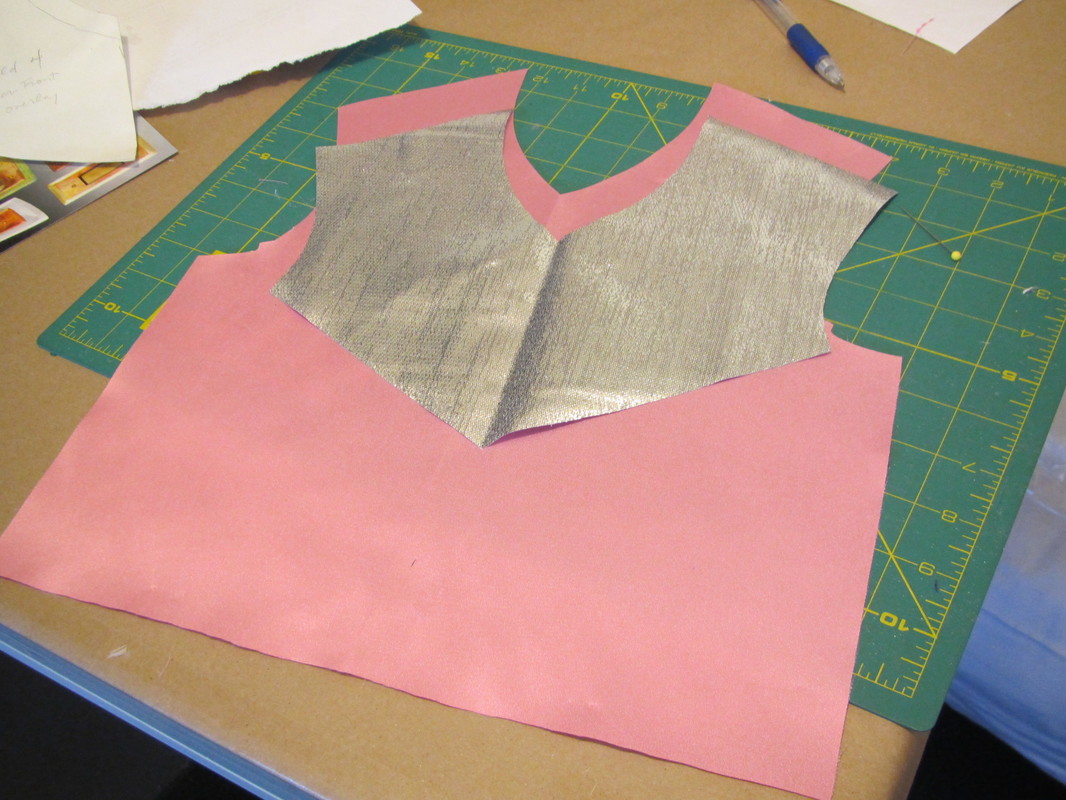
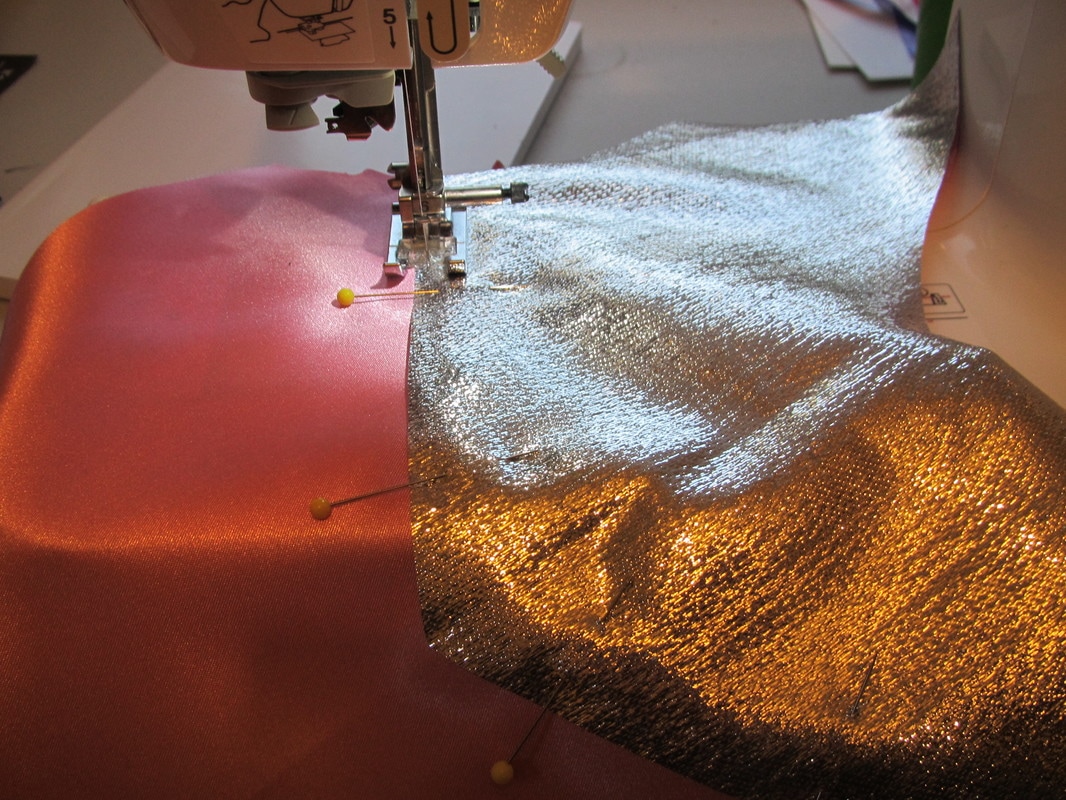
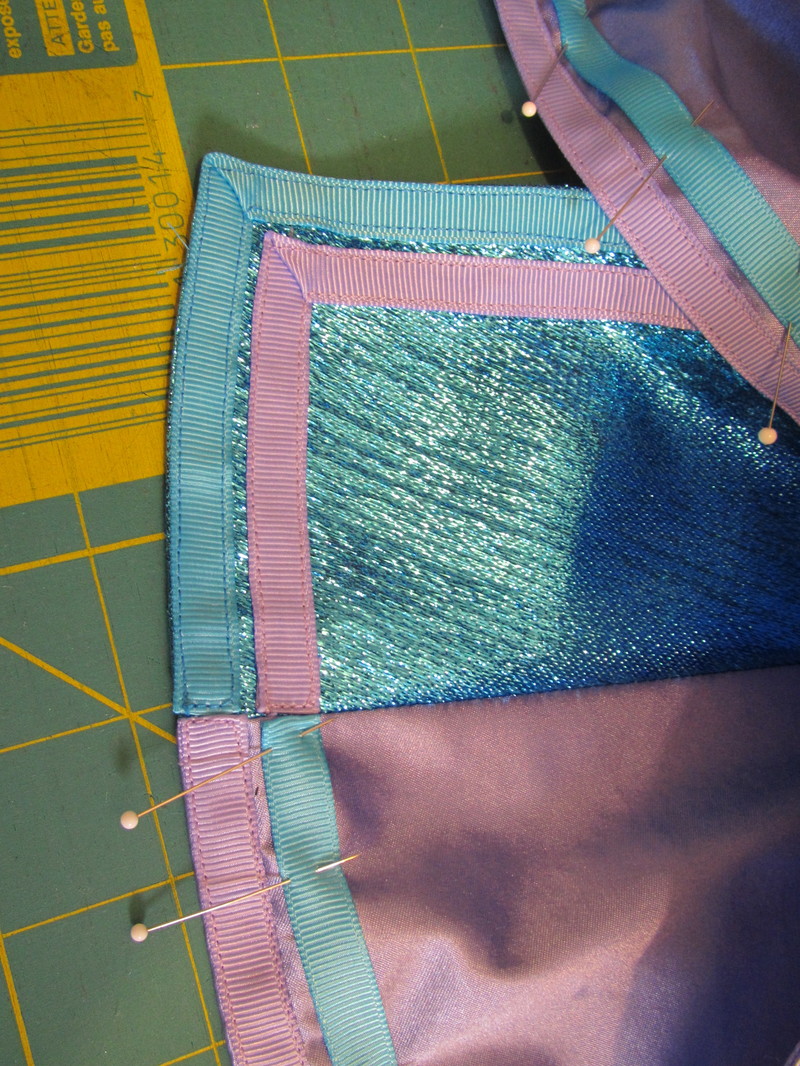
First all the color breaks are done in a nice and easy way. The contrast part is simply laid over the full part of the garment piece and top stitched in place.
First all the color breaks are done in a nice and easy way. The contrast part is simply laid over the full part of the garment piece and top stitched in place.
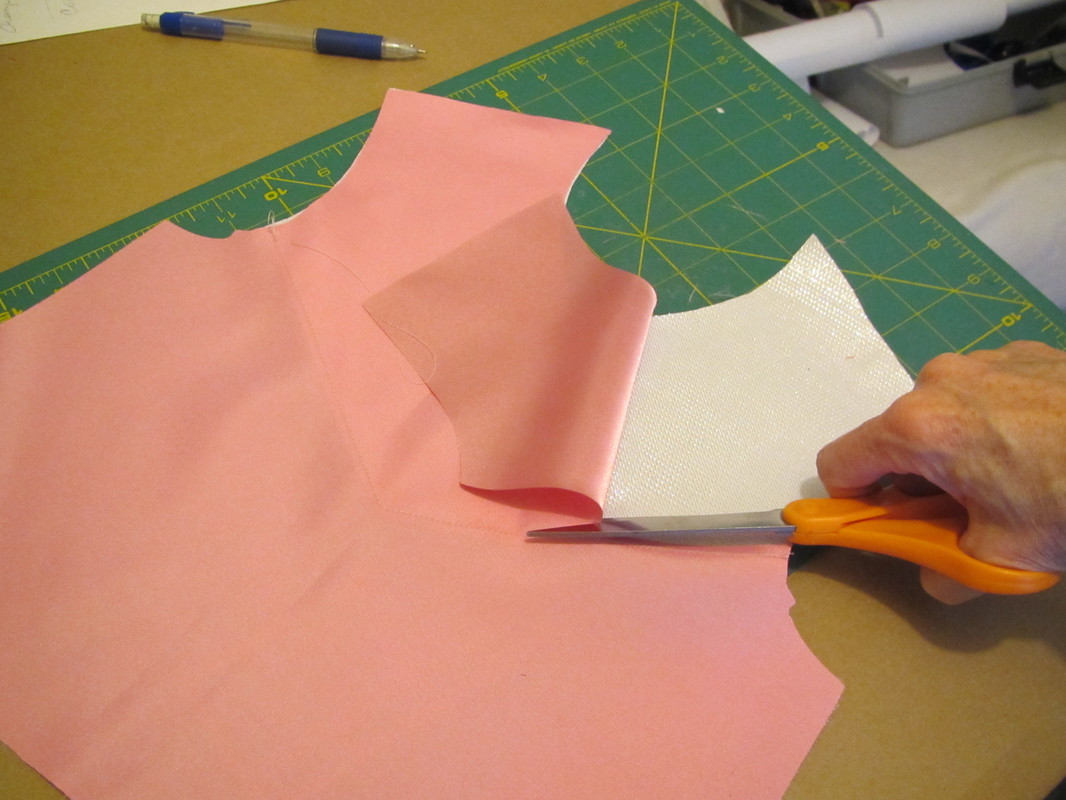
Then the extra, unneeded under layer is trimmed away. Piecing this way is easier and leaves flatter and smoother color joins.
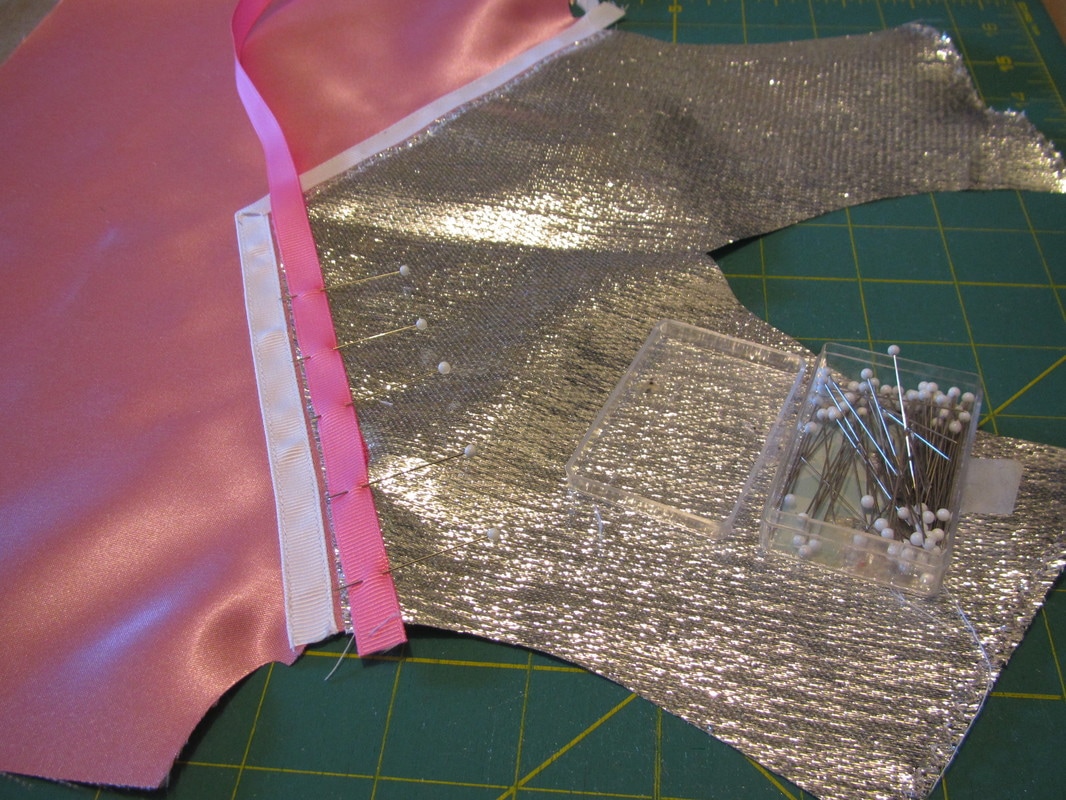
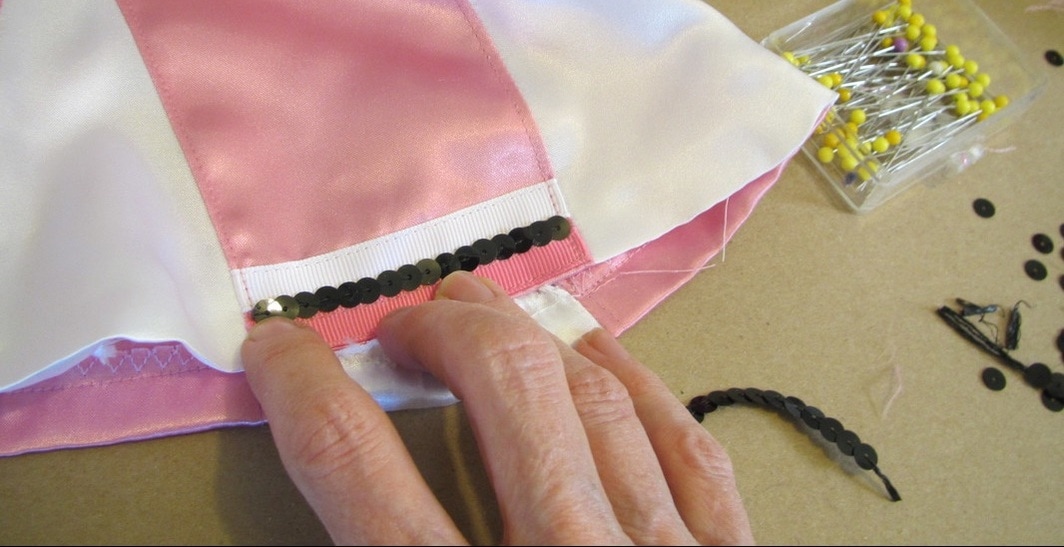
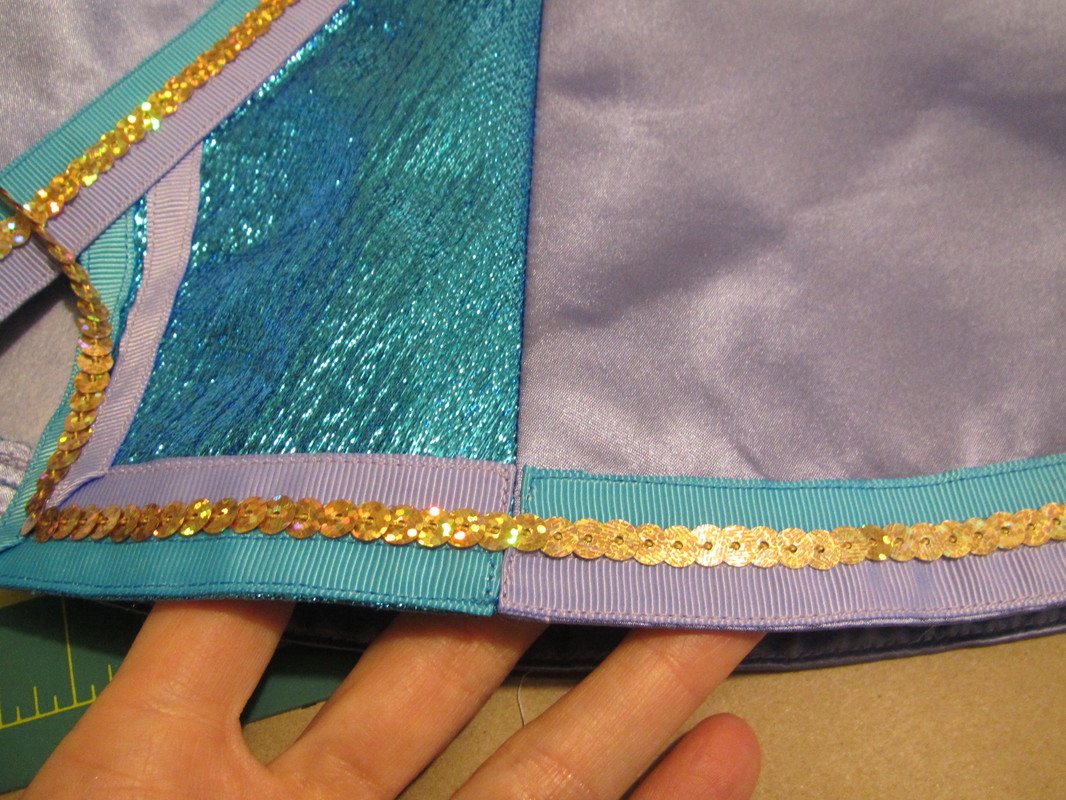
The ribbon trim is lined up on both sides of the color break, pinned and stitched down.
All three dresses are trimmed with two colors of grosgrain ribbon with a single string of sequins in the middle. You can machine stitch right through plastic sequins, but I think glueing looks better is less risky.
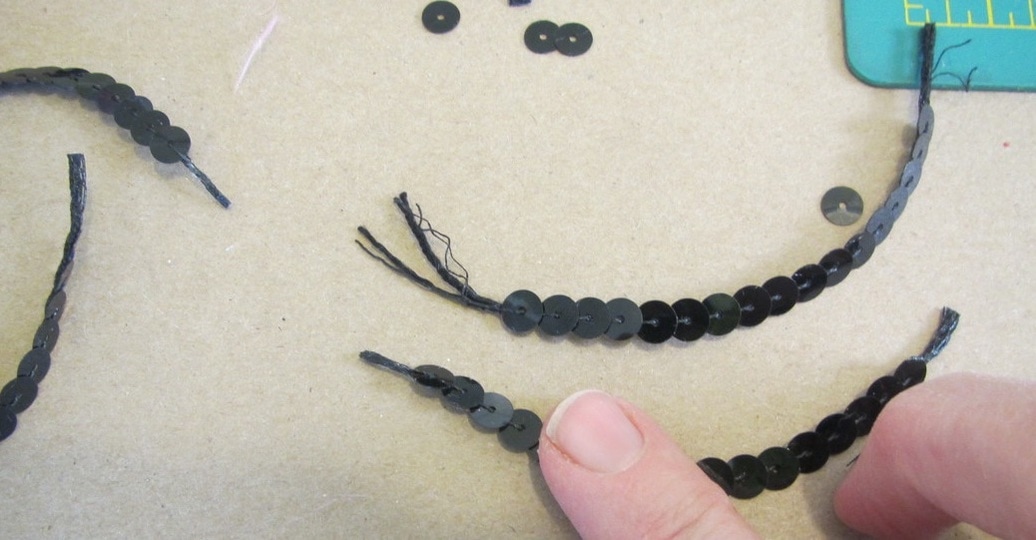
Gluing works especially well for the skirt with all the little panels because so many short piece of sequins have to be applied and it is easier to deal with the cut ends using glue.
First cut the sequin strands longer than needed and strip off the sequins until the row of sequins is the desired length, leaving the extra string.
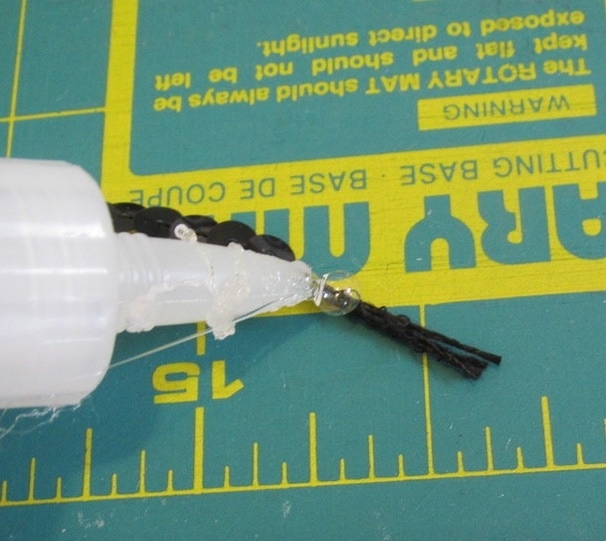
Apply glue to the string and then along the back of the sequins.
|
This is my favorite fabric glue, grabs super fast and is perfectly clear.
|
Tuck the string ends under each side of the cut piece and press in place.
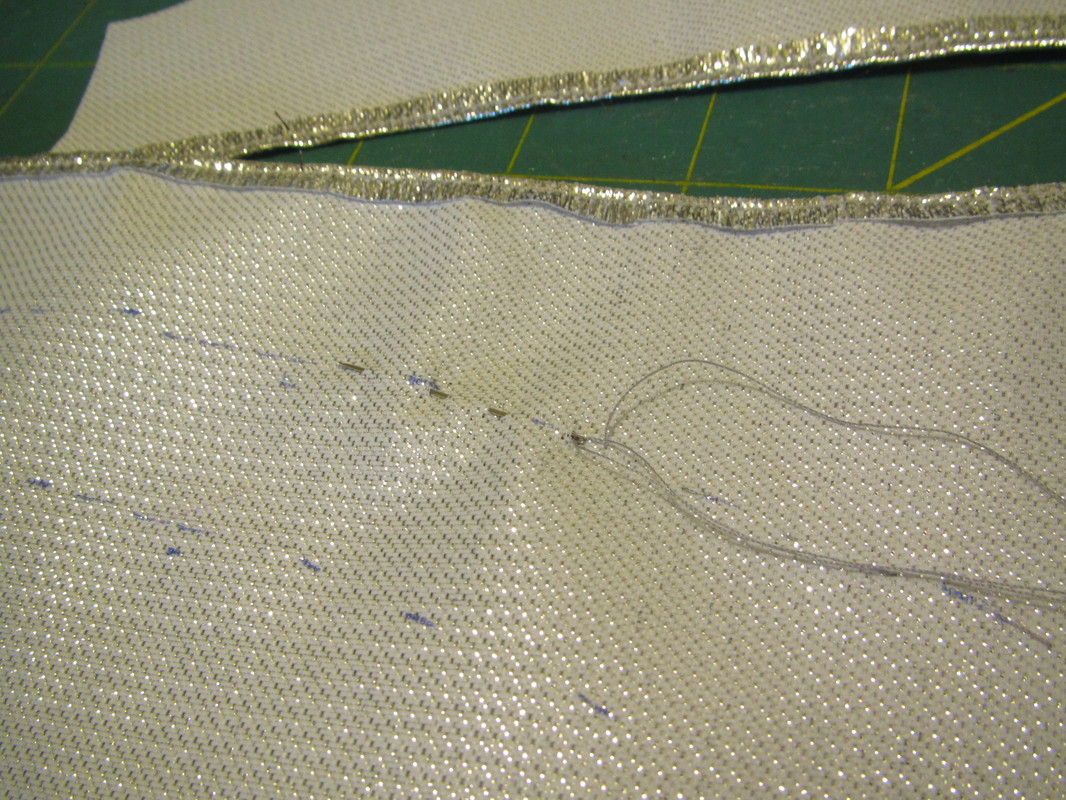
The sleeves don't have color breaks to use as a guide for placing the ribbon trim. The fabric needed to be marked, but this silver metallic fabric was impossible to mark on, so I used a fabric marker on the wrong side of the fabric and then hand basted a line of thread that would show through to the right side.
Then pinned the ribbon along the thread line as my guide ready for machine stitching.
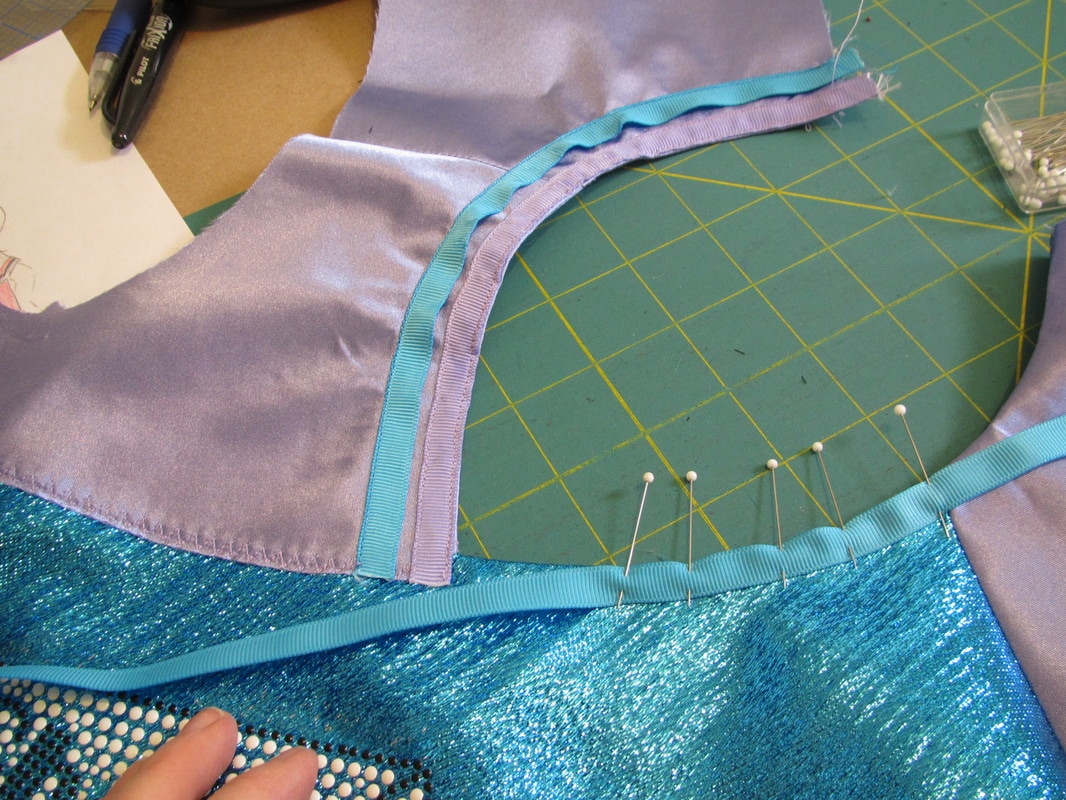
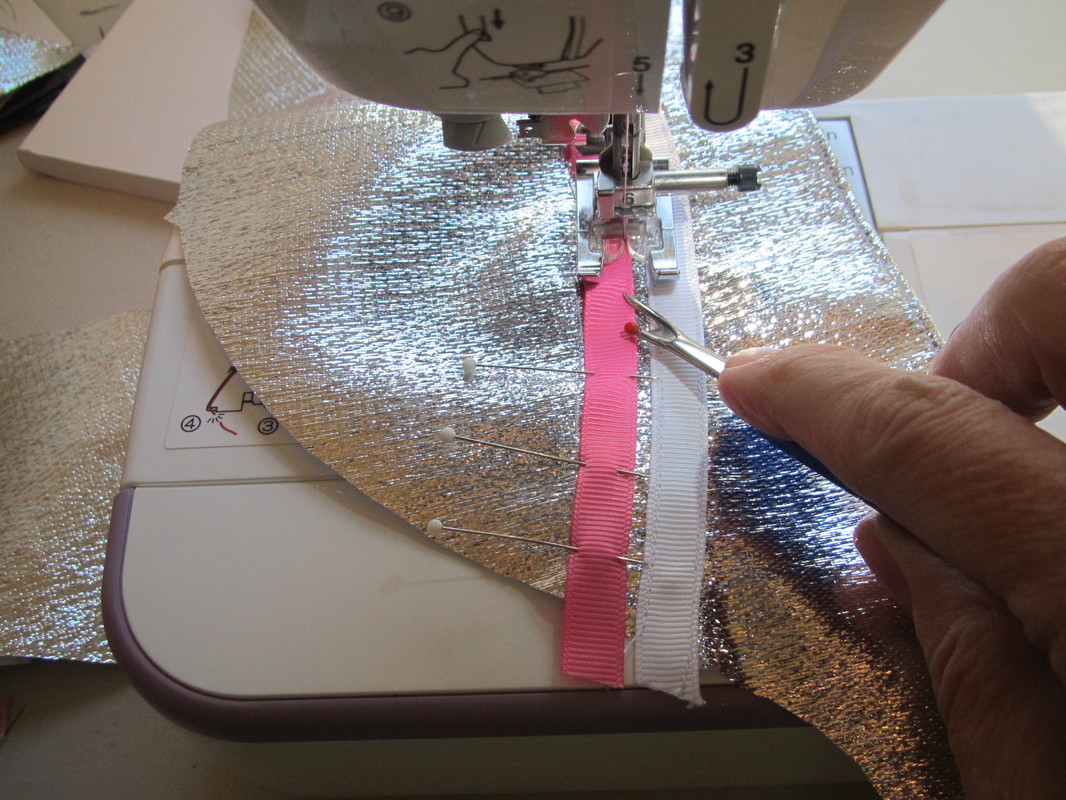
Another problem is when the ribbon goes around a curve. I used only grosgrain ribbon because it will ease around a curve, satin ribbon just won't.
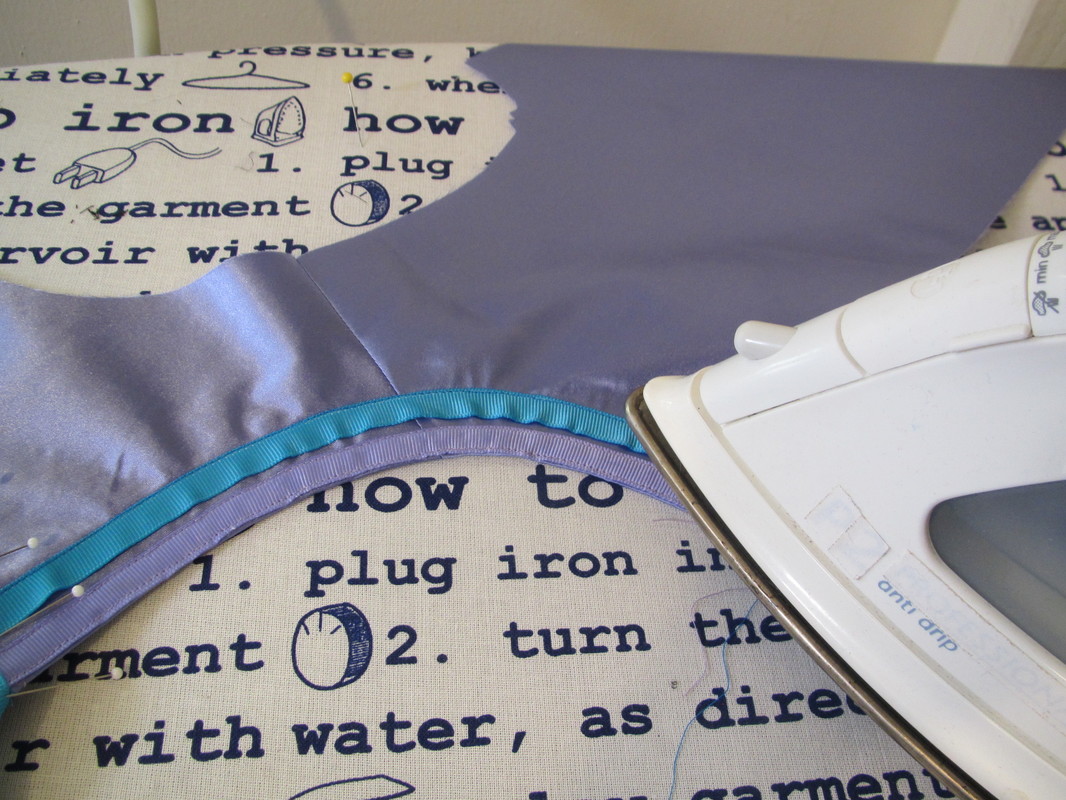
The outside edge of the curved ribbon needs to be stitched down first. Then gently steam the fullness out of the inner curve and stitch it down.
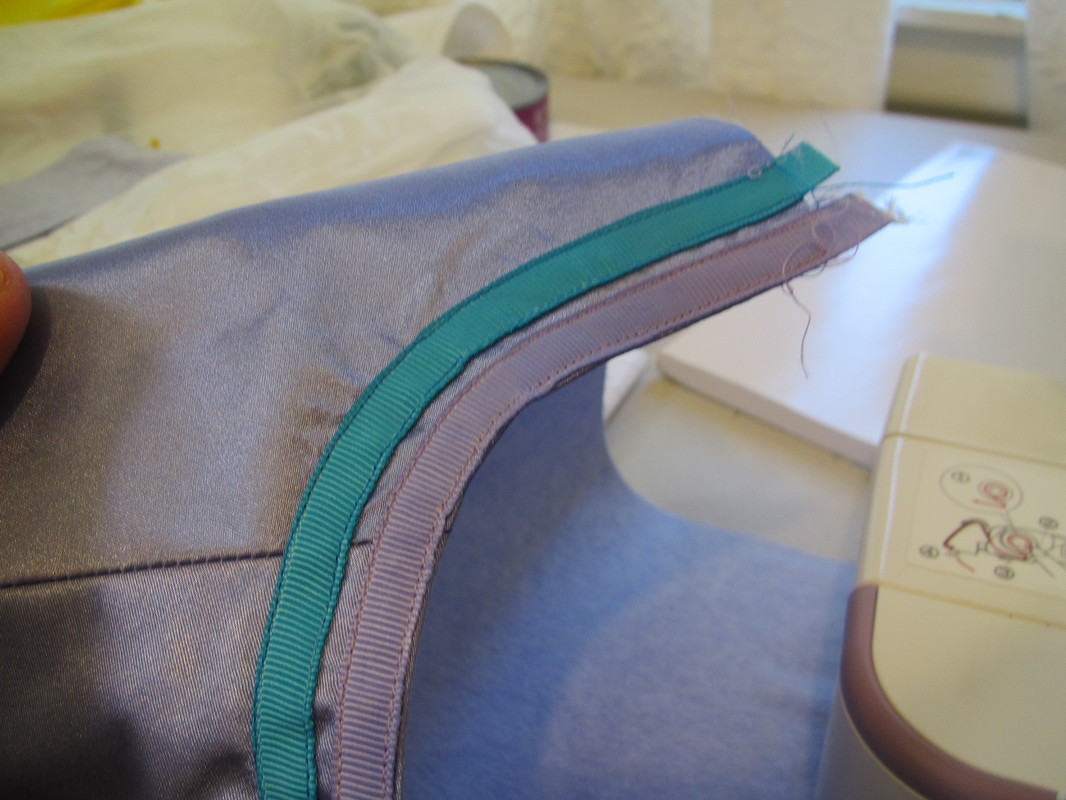
Pretty smooth.
Cheerleader outfits always have LOTS of color breaks and can be fussy to sew.
But, can be very satisfying when finished.
Please note one end of the sequins is not glued yet. When I'm working with a very long piece, I do it in sections. Looks like I was waiting for what I had done so far to dry before proceeding.
Please note one end of the sequins is not glued yet. When I'm working with a very long piece, I do it in sections. Looks like I was waiting for what I had done so far to dry before proceeding.
Looking at all these photos brings back memories ...
 RSS Feed