
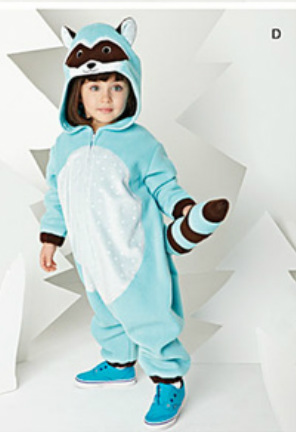
As I said in my last posting, I love to make little kid costumes. It reminds me of my toy making days, which I miss ... sometimes. I miss the creativity, but not the tight and pressureful deadlines!
| 
|
I want to show you how to make the face on this raccoon and also show you that even though when I think everything is worked out ... sometimes it isn't.
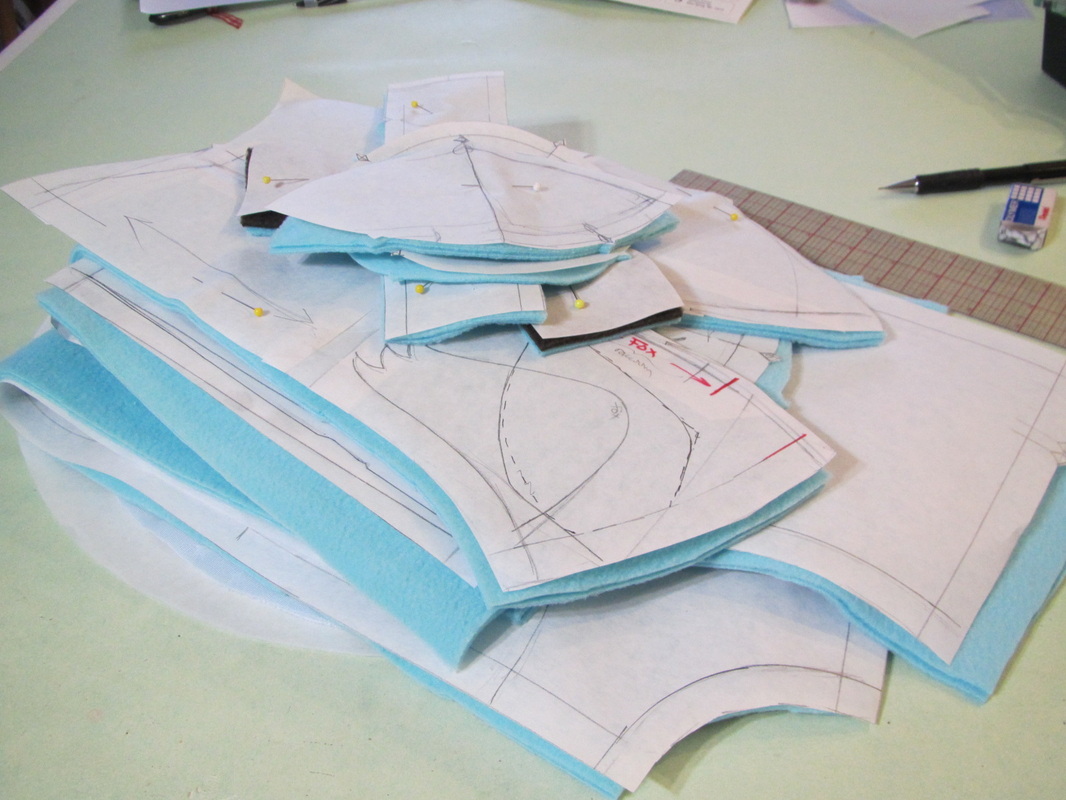
Here is my pile of raccoon pieces and here is the basic hood shape for the raccoon (also the owl and fox). The face will be applied while this piece is still flat.
Here is my pile of raccoon pieces and here is the basic hood shape for the raccoon (also the owl and fox). The face will be applied while this piece is still flat.
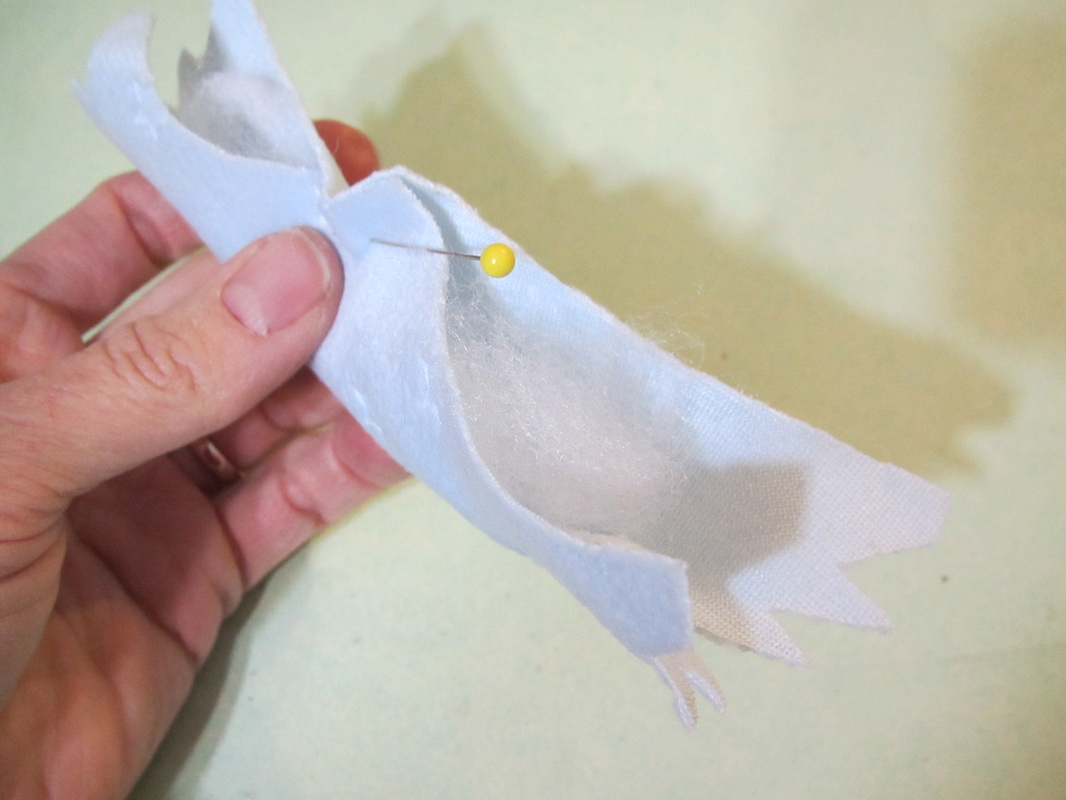
The face is made up of two main units. First the lower muzzle piece that is cut twice, so the lower edge can be stitched and turned which allows it to be lightly stuffed and closed up around the sides and top with a small outward going seam.
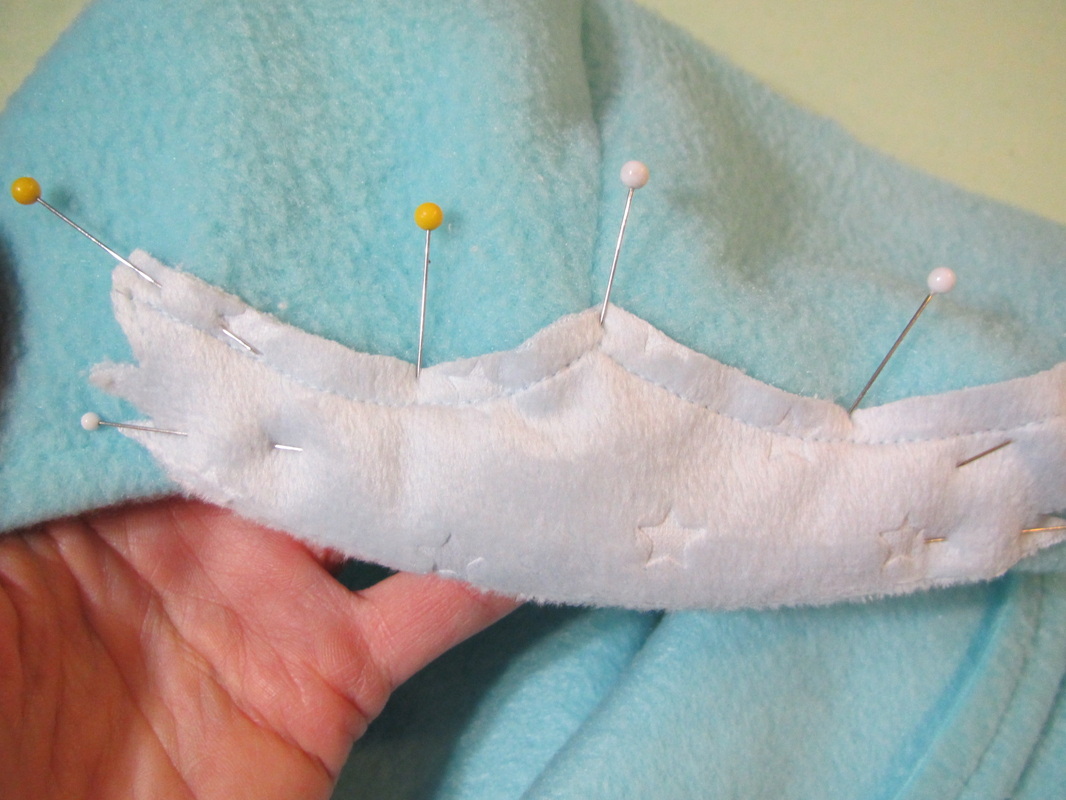
After it is prepared, this section is pinned to the front of the hood, where marked and machine stitched in place. The eye mask piece will cover the cut edge of the upper piece,
but ...
but ...
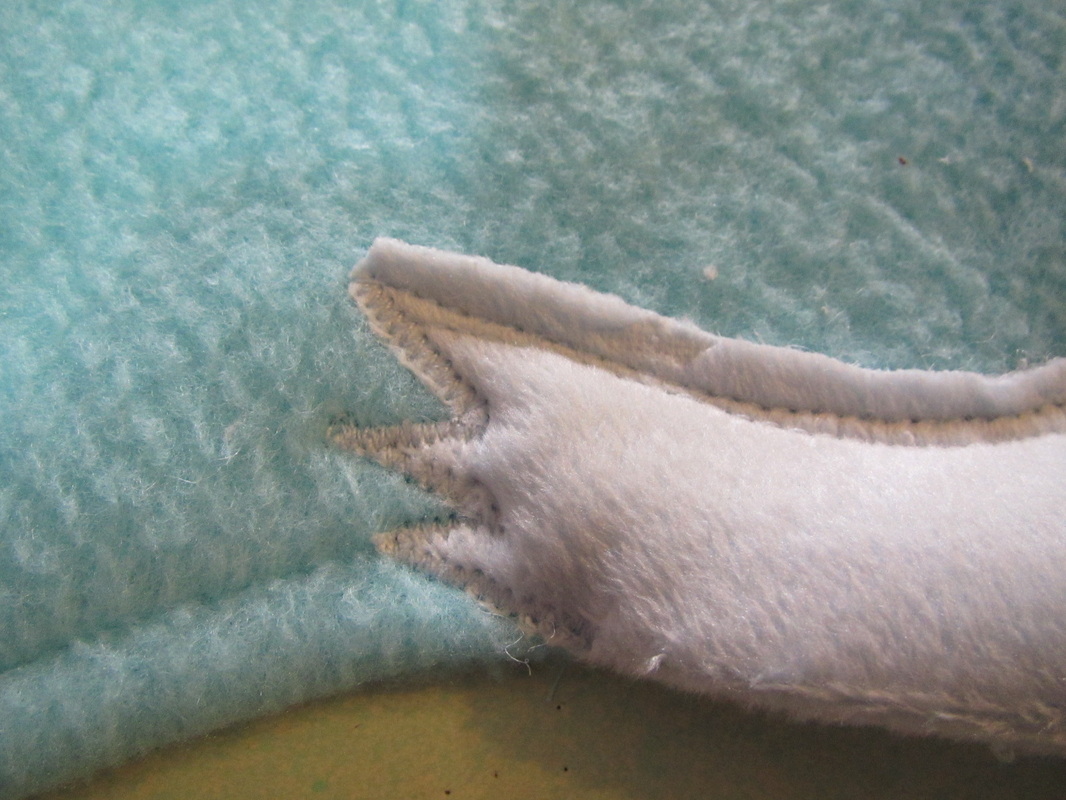
The whiskers on either side need to be secured with a narrow zig-zag because they will show.
This muzzle piece projects down below the edge of the hood's hemmed edge.
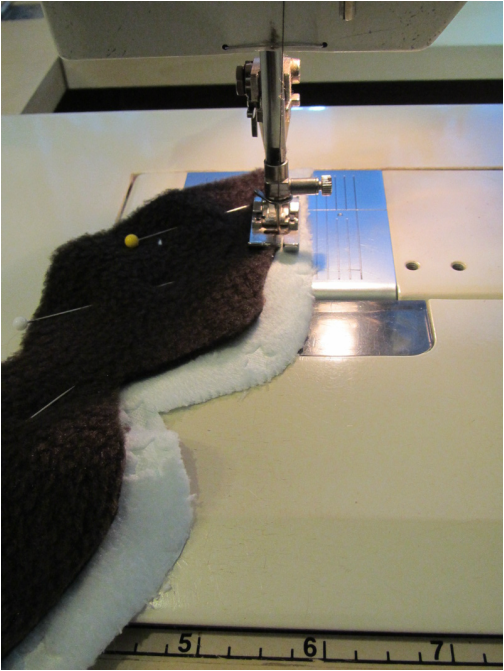
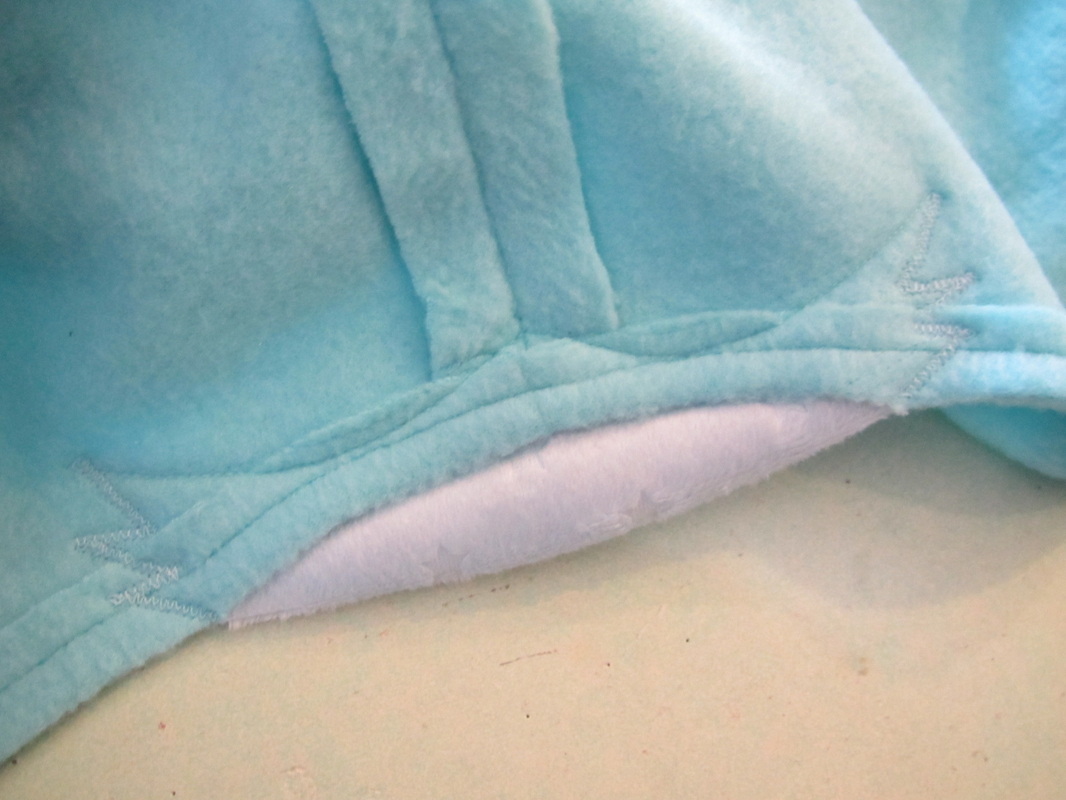
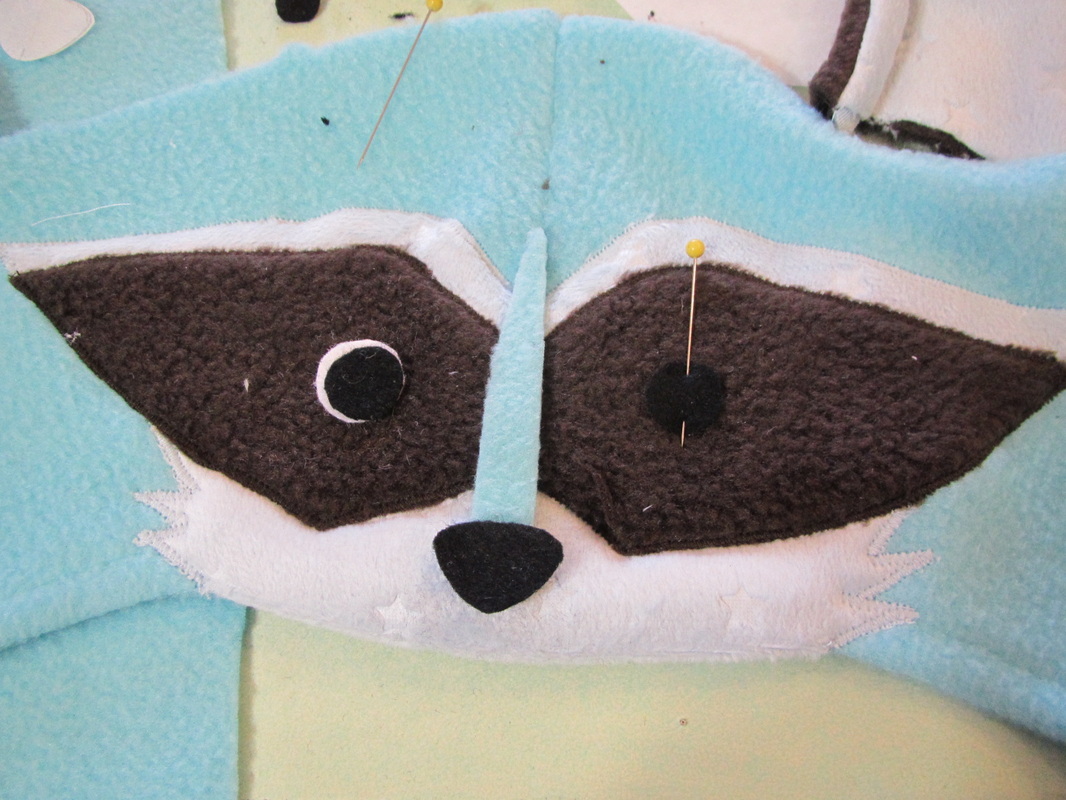
To prepare the eye mask unit, first layer the smaller dark piece over the larger light colored piece and neatly zig-zag along this one side.
Then trim away the excess of the light piece from the back as shown in the next photo.
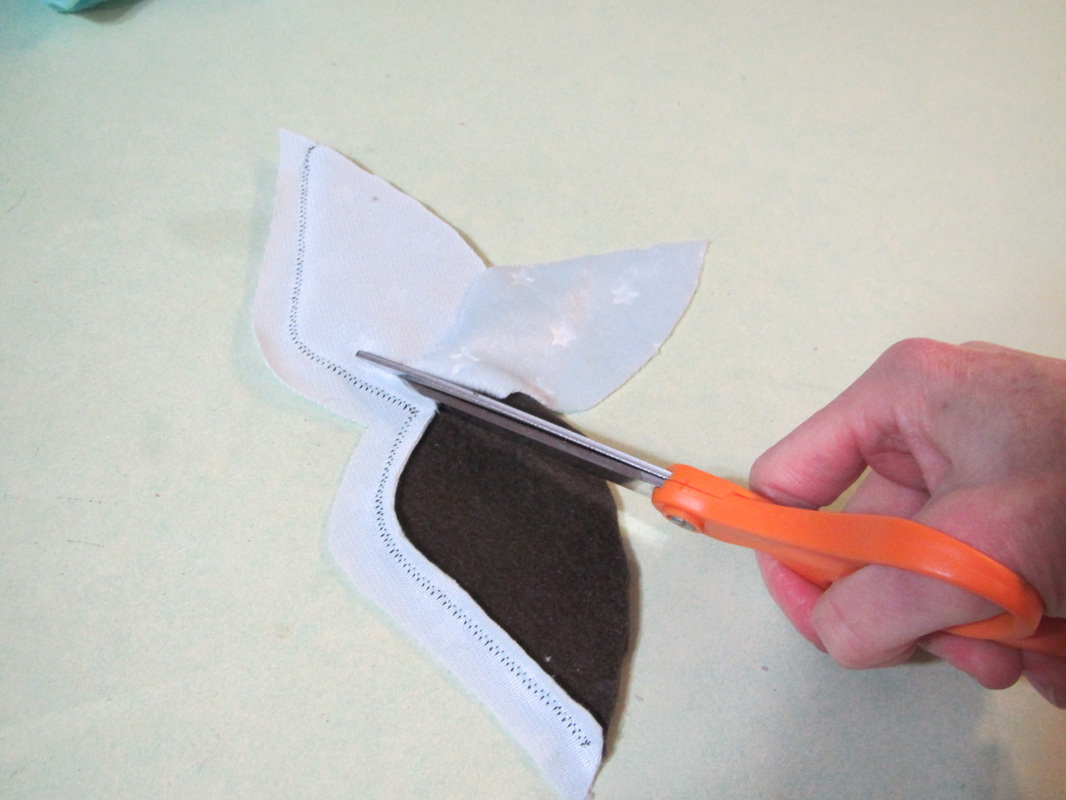
I decided to make these two pattern pieces in this manner, because it is MUCH, MUCH easier to get them lined up correctly rather than have the lighter colored piece be a skinny strip to start off with. And it is just a tiny bit of fabric that needs to be cut away.
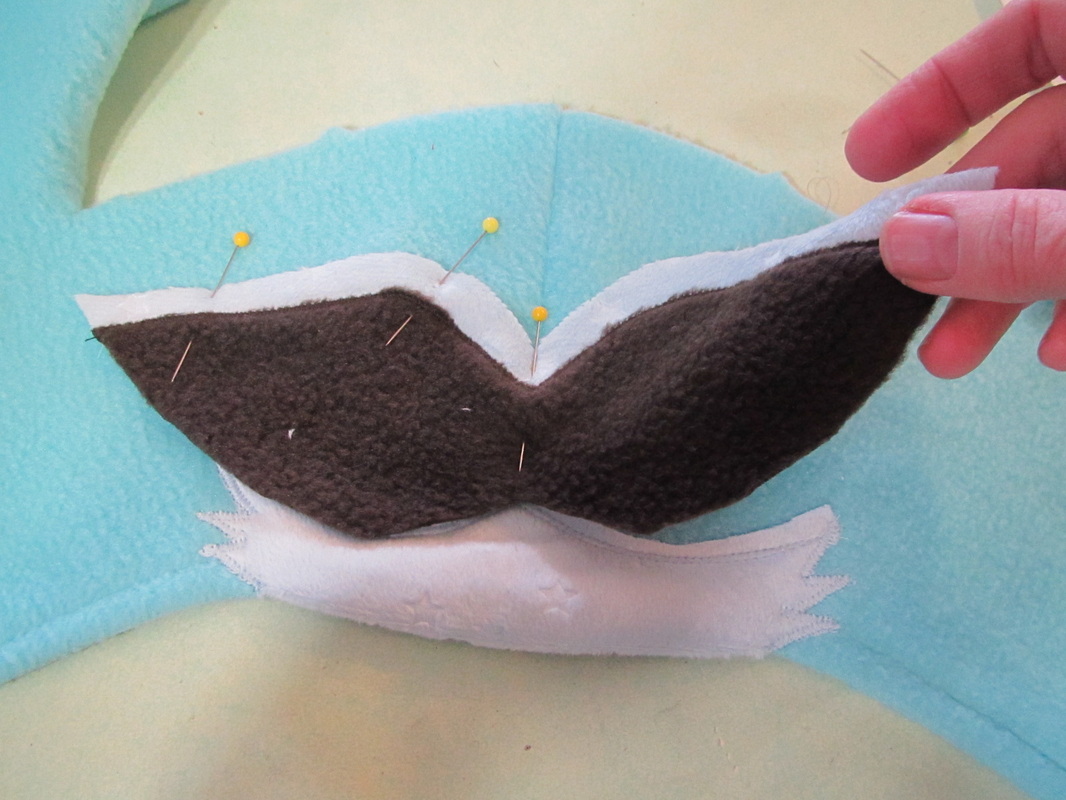
Layer the mask unit over the muzzle where marked and zig-zag the edge in place.
| 
|
Now, I can start playing around with the other component parts of the face. You can see I am having trouble deciding what to do about the center strip above the nose.
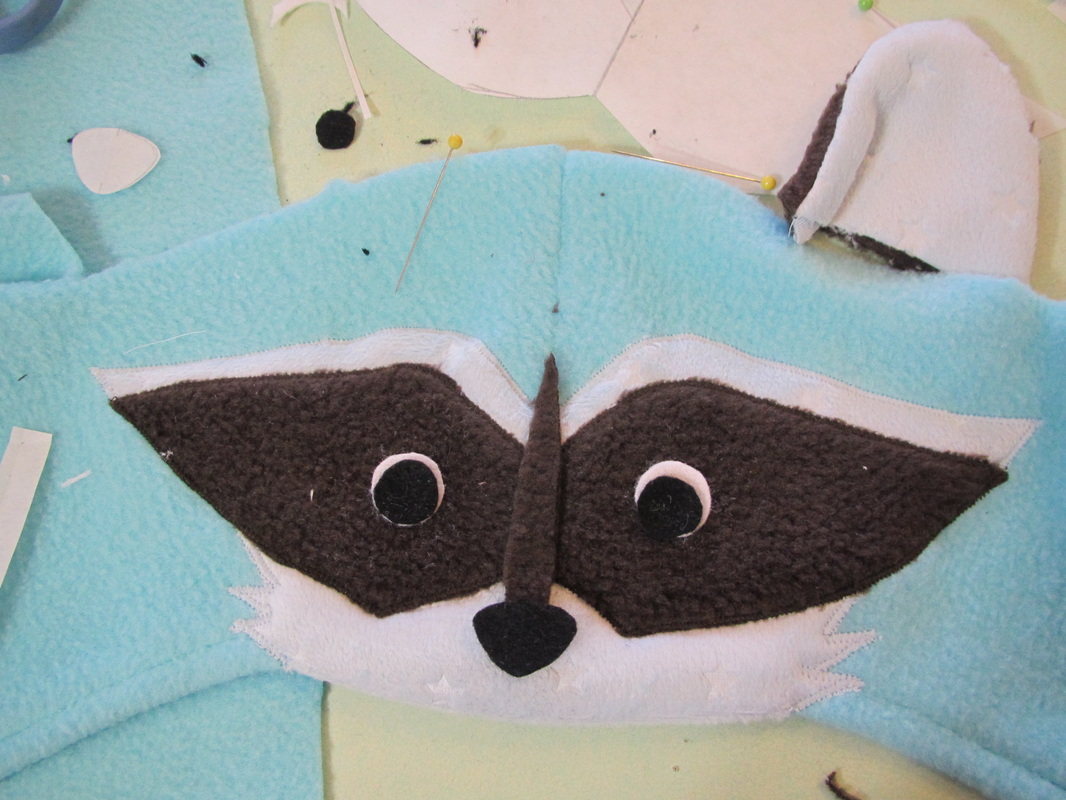
Also, I want to point out the importance of eye placement. Back in the day, I worked on a few toys that were licensed by the Muppets and got to bring my prototypes to their workshop for critique and approval while I was working on them. They taught me that the best eye placement, to make a static toy face look "alive", is to have the eyes slightly crossed. This gives the impression the toy face is focusing on something not too far from him. It works!
Also, I want to point out the importance of eye placement. Back in the day, I worked on a few toys that were licensed by the Muppets and got to bring my prototypes to their workshop for critique and approval while I was working on them. They taught me that the best eye placement, to make a static toy face look "alive", is to have the eyes slightly crossed. This gives the impression the toy face is focusing on something not too far from him. It works!

After settling on the eye placement and stitching all those pieces in place, time to dive into my embroidery thread box. My older sister and I both tend to keep our embroidery thread like this. She has nick-named this style of storage, the "rats nest" ... ha ha. If I were more serious about embroidery, I would do a better job of thread storage.
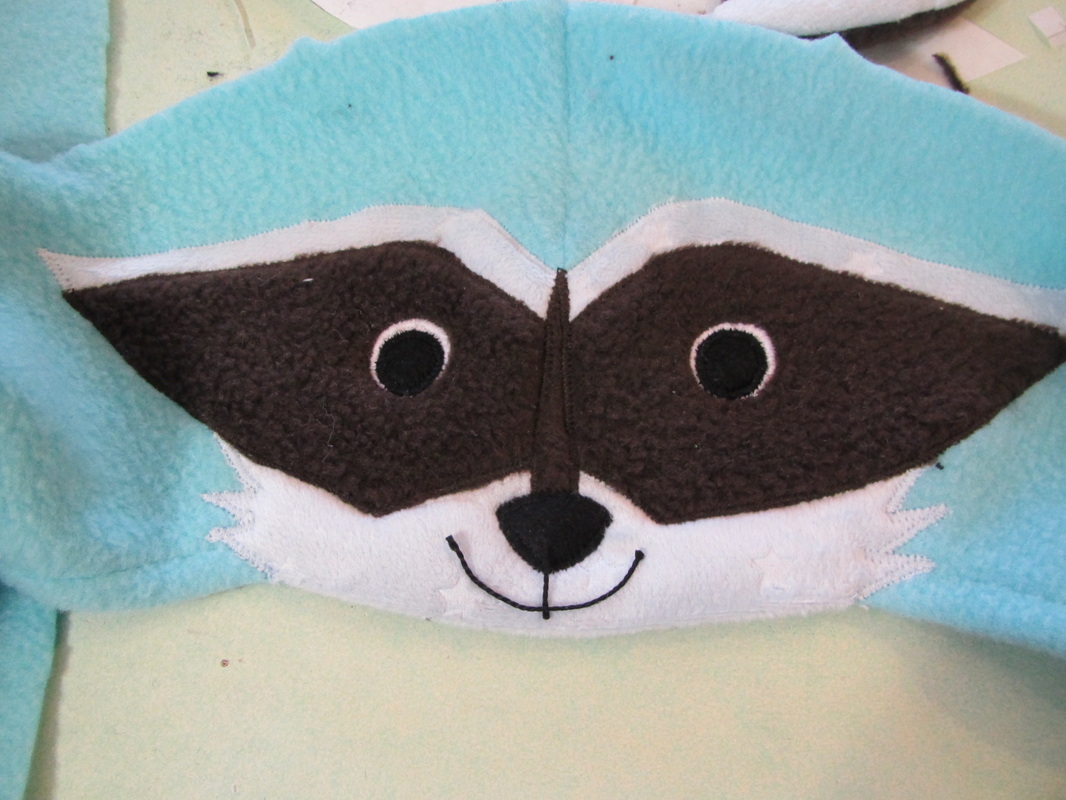
Again, I play around with different mouths by cutting small pieces of thread and laying them down in different shapes.
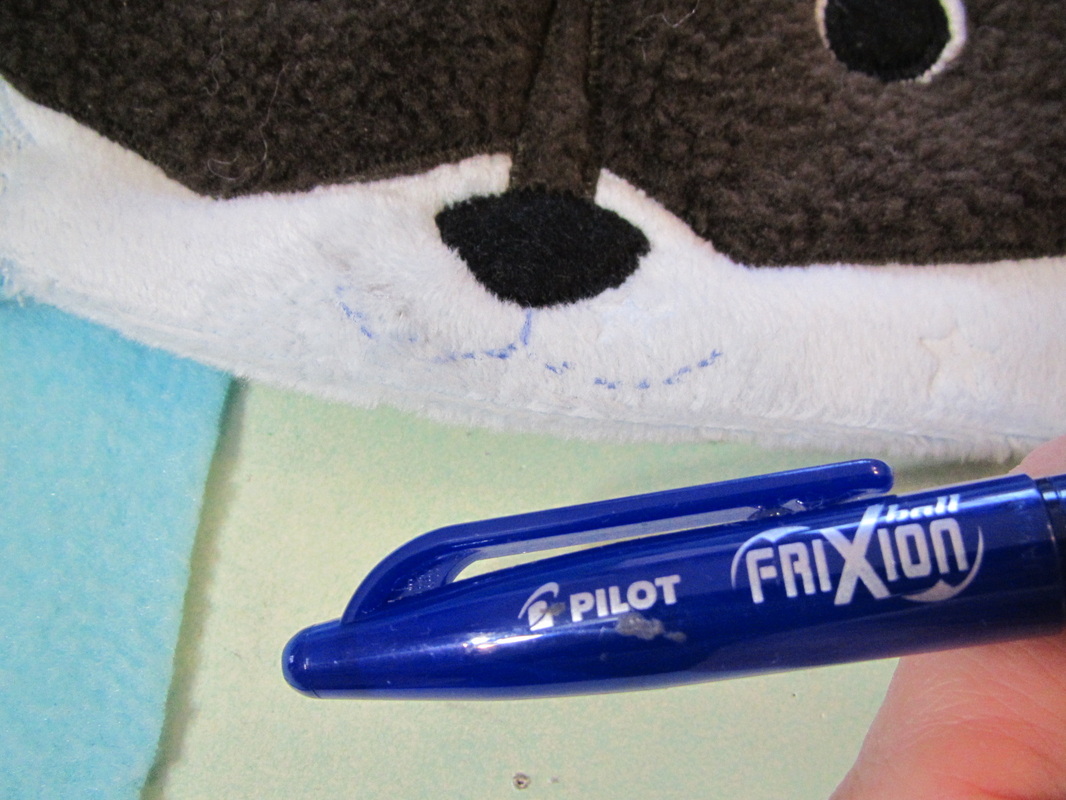
When I am happy with the mouth, I lightly mark it with my favorite pen. This pen disappears with just a little heat from an iron, but I still mark as lightly as possible.
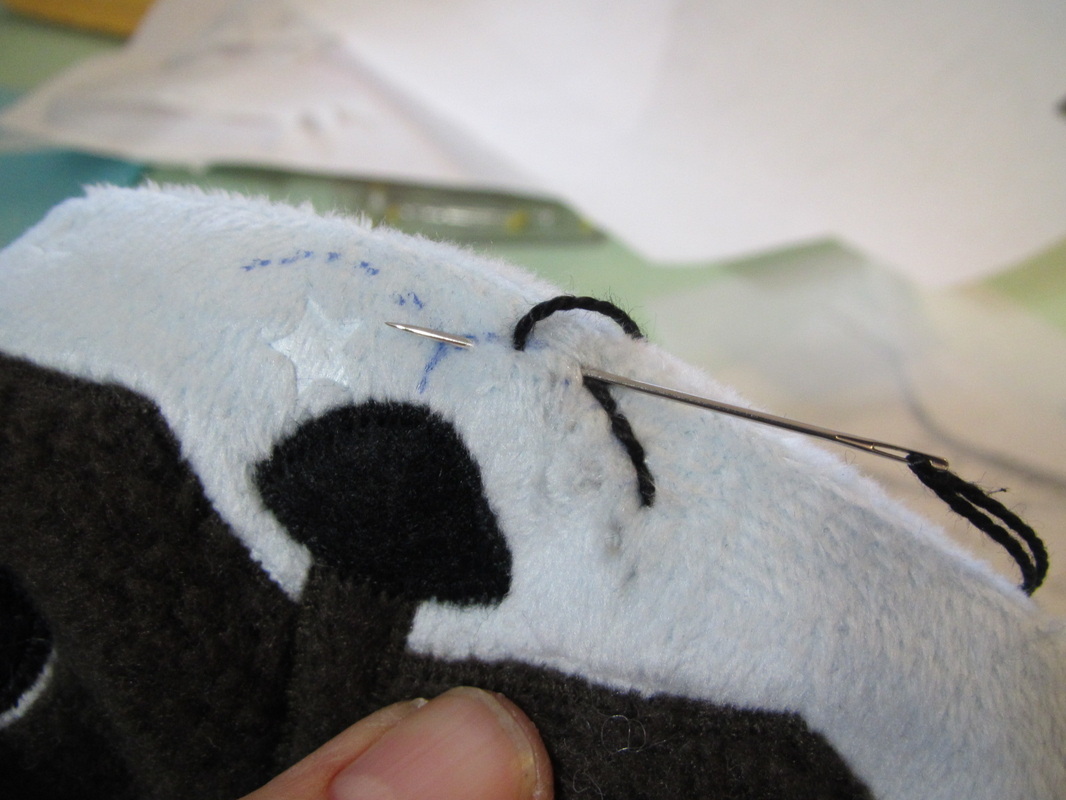
I use a simple back stitch to make the final mouth line.
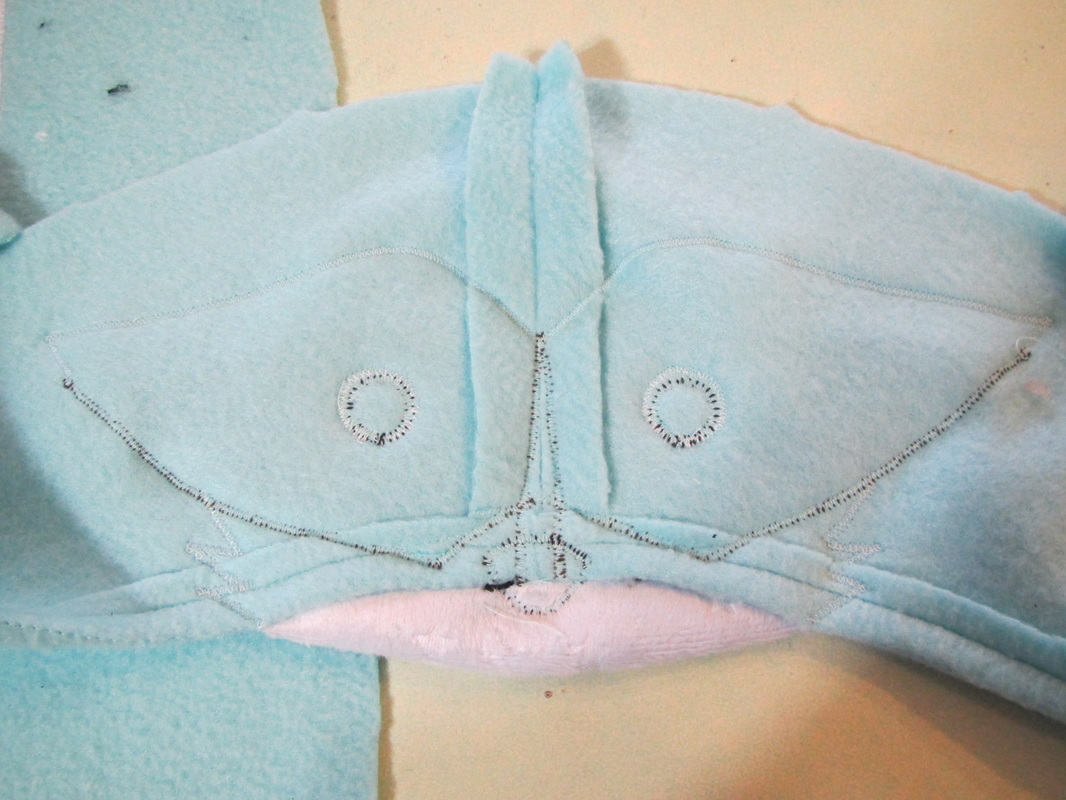
And this is what the face looks like from the inside.
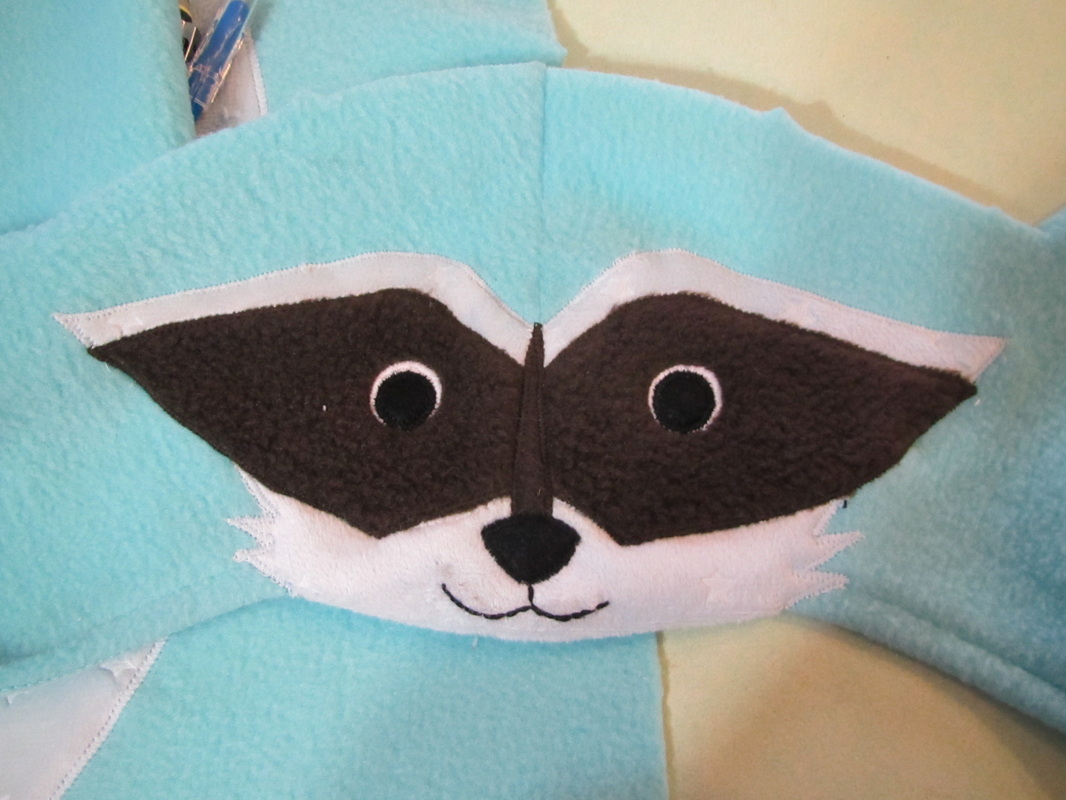
And here is the finished face from the outside ...
but WAIT!!
I changed my mind one more time. LOOK!
but WAIT!!
I changed my mind one more time. LOOK!

WHAT'S DIFFERENT??
Yep, you guessed it. After agonizing whether to have that center face strip brown or blue. I decided to just get rid of it. By the time I finished the face, it was so complicated that I thought #1 it looked too busy AND #2 it was just getting too confusing to make a clear pattern for.
This required really careful stitch removal. Remember, everything on the face is zig-zagged. I am very good with a seam ripper. You would be surprised how often I change my mind or correct things while sewing final samples.
Partially, it's because I'm working fast and often go ahead to the final sample when maybe I should have done one more muslin. And, of course, when you sew ... things go wrong.
They just do.
 RSS Feed