Andrea Schewe Design
  • Home
  • Costumes
    • Reader's Gallery
    • Fantasy Costumes
    • Theatrical
    • Historic >
      • Easier to make
    • International
    • Costumes for Kid's and Babies
  • Crafts
    • Home Decor >
      • Pillows
    • Fashion Accessories
    • Doll Clothes
    • For Kids and Babies
  • Blog
    • Past Blogs by subject >
      • My patterns by number
      • Sewing basics
      • Personal sewing Projects
      • Fashion History
      • Fun and funny stuff
      • Guest Bloggers
      • Crafts and Home Dec
  • Links
  • Contact

FINALLY ... Fantasy Dress #1487 for sale!!

1/21/2014

28 Comments

 
I am happy to report my new fantasy dress pattern can now be purchased at the Simplicity website and, I assume, at any store that sells Simplicity patterns.

Simplicity usually doesn't take this long to release its new catalog.  I have no idea what happened.  Maybe just the holidays got in the way ...

Really, this is a fairly easy and straight forward pattern, so I don't have any tutorials, but I do have a story about it that will give you an eye into the limitations and considerations Simplicity has to take when publishing a pattern and fitting it into their little standard sized envelope.

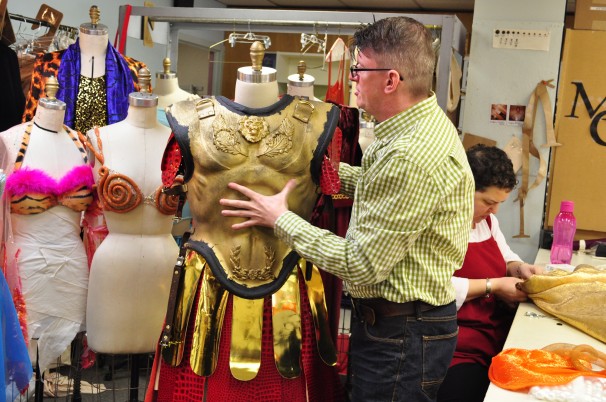
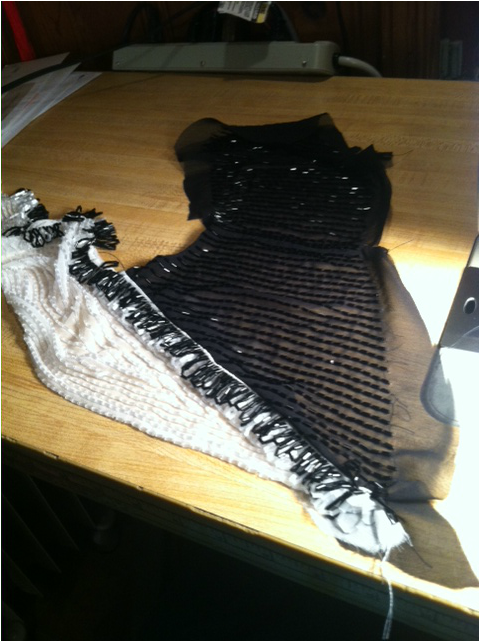
To tell this story, I need to show you the photographs I took of these costumes before I packed them up for their trip to New York.
Picture
Picture
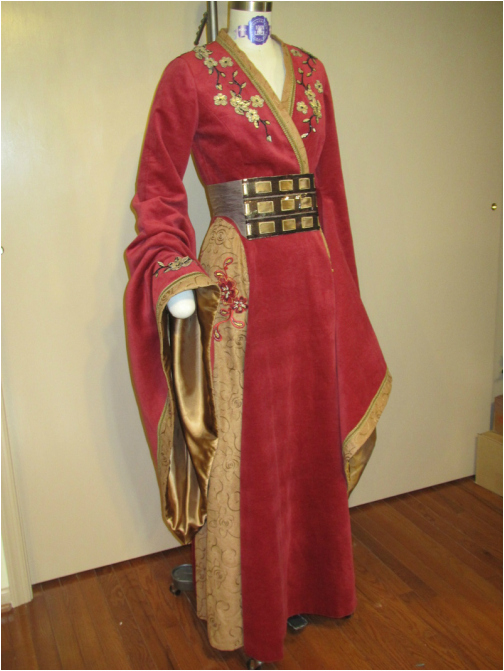
So, nothing was changed on this dress.

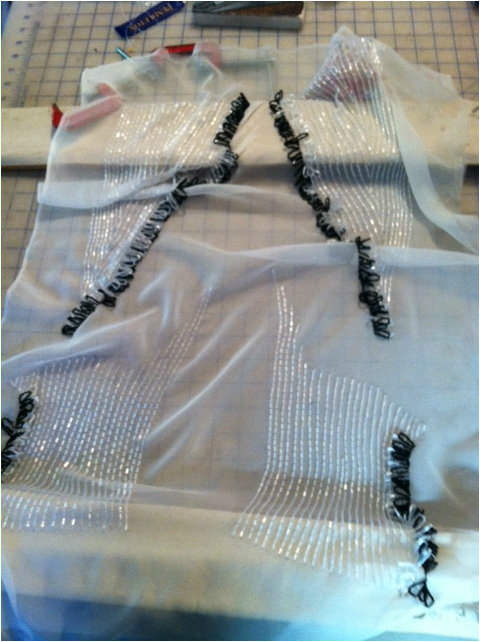
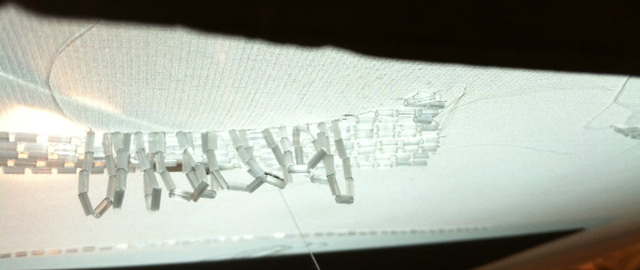
I made it out of no-wale corduroy (the red part) and embroidered tricot velour with a poly-satin lining for the sleeves.  I used appliqués that Simplicty sells on their website ... link to the red one ... and a link to the gold ones. BUT they are really silver. I painted them with metallic gold fabric paint before applying them. AND I sewed them on.  I don't often trust iron-on things.

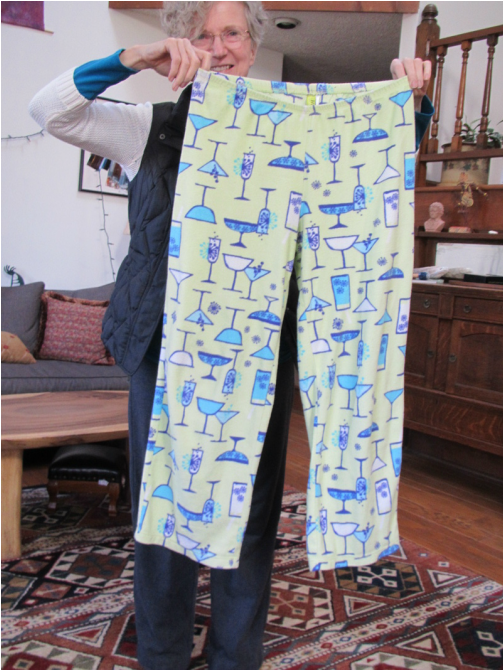
If you like the trim I used, it is still available at Joann's.  I took this photo 5 days ago.

Picture
Picture
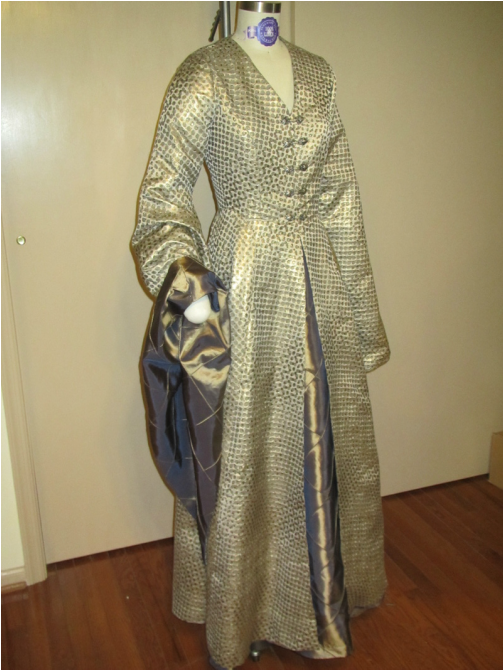
The story is different for the other two dresses.

Before I get into that, though, please note that I also took this photo 5 days ago at Joann's.  The fabric for this dress is also still available.

Now onto the story ...

Shortly after I sent in these three dresses, I got a phone call from Simplicity telling me that they were planning to eliminate one of them.  When this happens, it's usually either because the pattern pieces are too big, or the sewing is too complicated.  There are limits to the amount of tissue and number of guide sheets that can fit into the envelope.

Picture
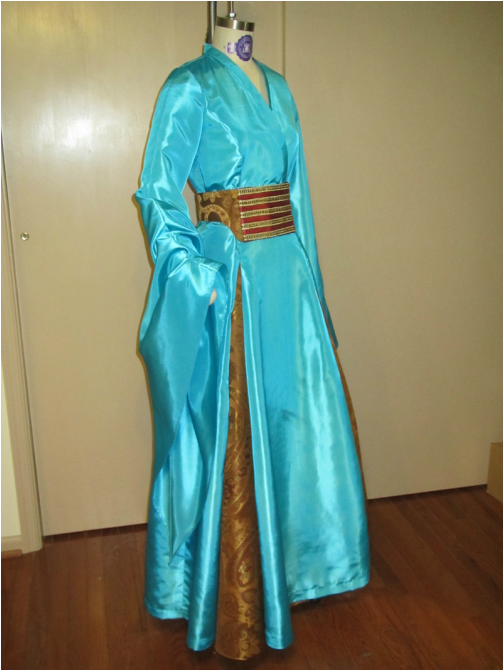
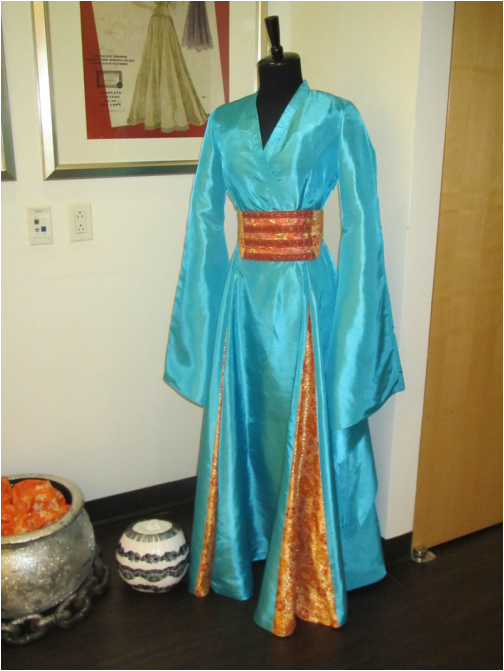
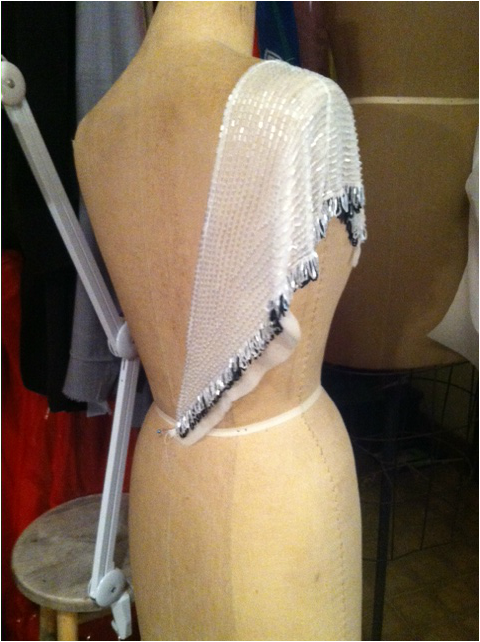
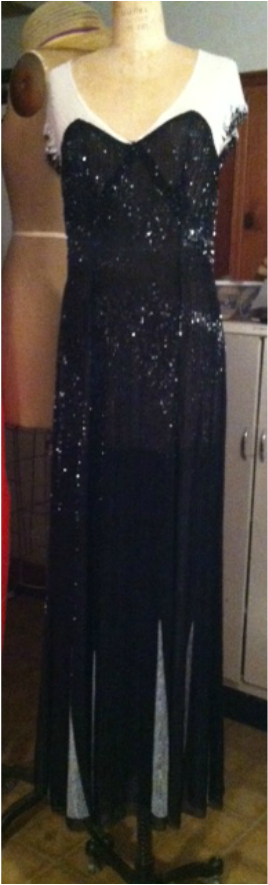
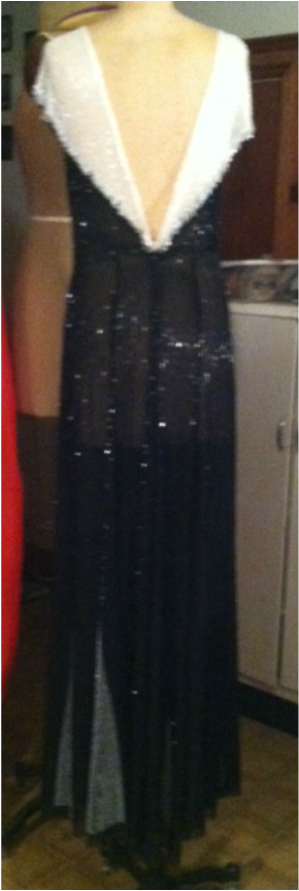
So now, look carefully at the two photos of the turquoise dress here.  One was taken in my studio and the other I took at Simplicity.  They had this dress in their reception area last time I visited.  Can you tell what's different?  Actually the change of brocade fabric might give it away.

Give up???

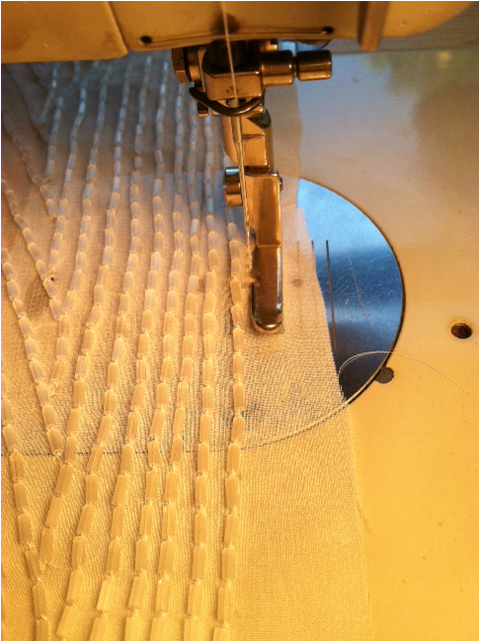
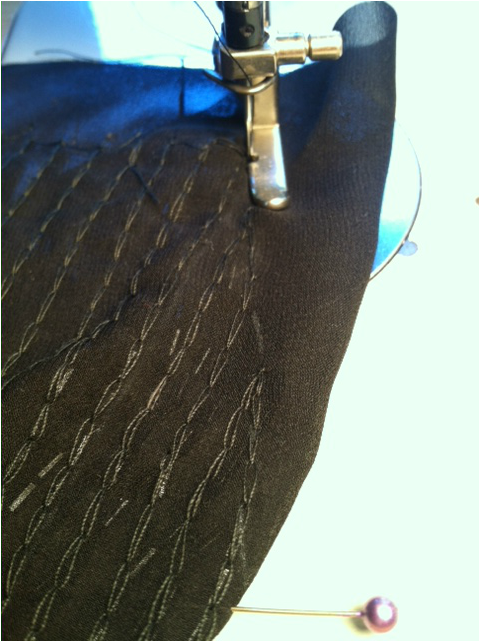
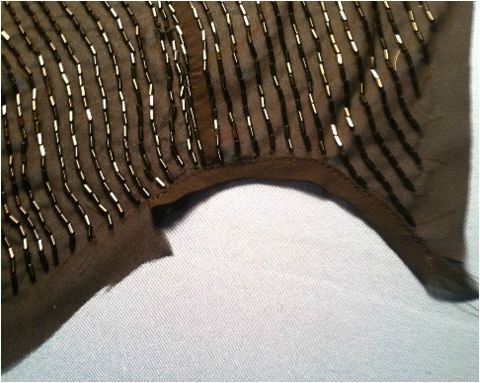
When I sent these dresses in, the turquoise one and the gold one had completely separate underskirts.  The over dresses had splits in the seams that I finished with long straight facing pieces.  I put the facings on the straight grain since the edges of the skirt panels are on the bias and I wanted to control any stretching that might happen and I thought they would hang straighter that way.

I like the skirt and dress being separate.  I think the dress would move better, but there wasn't room in the pattern for the large dress pieces with those huge sleeves AND the very flared skirt pattern as well ... sigh ...

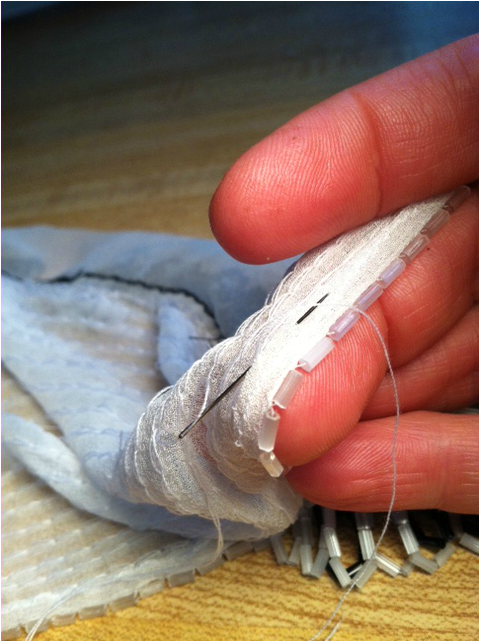
So these two dresses now have godets (triangular wedges) sewn into those skirt seams.

I have to say, looking at these two photos, I really can't tell the difference.  The dress will move differently though.

I will be less expensive to make this dress now.  That underskirt required quite a bit of fabric.
Picture
But, if you like, you could still make a separate skirt under this dress.


First, make a flared skirt that has no gathering at the waist.  You don't want any bulkiness there.  This means a waistband and zipper or at least an open placket and hook. The dress should cover that.


Then, leave the skirt seams open up to the point indicated on the pattern and cut straight strips of the dress fabric to make facings for the skirt split openings. 


I hope this pattern will be a jumping off point to some wonderful original creations.


Sincerely, Andrea
28 Comments

Fixing my favorite pajama bottoms

1/20/2014

1 Comment

 
Picture
I LOVE these pajama bottoms!  

Everything about them is perfect and they are so soft and so warm.  I sleep better in them than anything else.

But, the elastic has gotten all stretched out and they keep sliding way down on my hips ... too far down, really.
  So, I've got to replace the elastic.

First the old elastic has to come out and like most elasticized, store bought garments, the elastic has been put in with WAY too much stitching.
Picture
To start the process of getting this kind of stitching out, run a seam ripper under a line of stitches and then try pulling at stitches on the other side.  If you are lucky, and sometimes I am, you can find the right thread to pull and the chain stitch will release.
Picture
I had more trouble that usual this time and had to resort to breaking the threads between the elastic and the fabric, a painstaking process.
Picture
But, I was lucky in one section and the surface threads came right up!!
Picture
All this is much easier if you have a sharp seam ripper.  I buy them in bulk.
Picture
So I can toss them as soon as they get dull.

Check out Wawak.  They've got seam rippers on sale right now. I would much rather have a bunch of cheap sharp seam rippers than one ergonomic dull one!
Picture
The elastic has been applied with a two step process ...
so after getting one set of stitches out ...
Picture
I've got another set to tackle.
Picture
I make sure not to loose the label.  It's much easier to get dressed with the back easy to find.
Picture
Now, I pull out my box of elastic and determine 1/2" will be the best size.  I am going to make a casing, not stitch into the elastic.  I think stitching into elastic stretches it out and if I make a casing, it will be super easy to slide out the old elastic and put in new, if I ever need to in the future.
Picture
Whenever possible, I make my casing right over the elastic. This saves SO much time and then you know exactly how big to make the casing.
Picture
When you reach the end of the elastic ...
Picture
Just leave the needle in the fabric and pull more elastic out and continue.
Picture
When finished, join the ends of the elastic and close up any opening left in the casing.
Picture
The picking out took longer than the replacing, but well worth it.


As I said ... I LOVE these jammies.
1 Comment

Theresa LaQuey - bonus!

1/18/2014

0 Comments

 
Several people have asked if there is a video of Theresa singing in the beaded dress she made to wear at the Savoy in London ... AND ... I'm happy to say there is.

Enjoy!
Click here to read about the dress.
0 Comments

Weird materials

1/17/2014

0 Comments

 
Picture
This is not the kind of costume that one would expect a classic Shakespearean Repertory Theater to be making ... is it?
When my husband and I moved to the Washington DC area twenty years ago, one of the first things we did was to get season tickets to the Washington Shakespeare Theater.  And as the name would suggest, we have seen a lot of serious and classic plays, not all Shakespeare, but lots of realistic period costumes. 

I think most of you know I kind of got my start sewing of the theater and work for a few years in some of New York's professional shops.

So, when I found out the Washington Shakespeare Theater was going to do "A Funny Thing Happened on the Way to the Forum" I really wanted to see it, especially after I read this article in the in the Washington Post.

Here are the opening paragraphs ...

When the Shakespeare Theatre’s costume department saw the designs for the company’s production of the flamboyant 1962 musical “A Funny Thing Happened on the Way to the Forum,” the team realized it would have to use entirely new skills — particularly when it came to the feathery marabou trim.

“We would never be making gold stretch sequin panties for Lady Bracknell,” draper Randall Exton says. “So it has been a huge educational experience.


Picture
Photo from The Washington Post
Picture
This is the sketch for the costume on the dress form in the photo above.   


I attended this with my husband, son and daughter-in-law just after New Year's and we all enjoyed ourselves immensely. 

Below are a few more pics. One of them shows that costume above in action!
Picture
Take a good look at his thighs ... If they seem a little extra muscular, look again. Those are very padded leggings.  Ha Ha! 

Seeing the play in person, it took me a few minutes before I picked up on that.  They did a great job getting the muscle shapes very realistic.
Picture
Picture
Picture
But, a little post script on this ...

When I was telling Martha McCain about these costumes and the weird materials.  She reminded me that she costumed a production of "Mandragola" at the very same theater here in Washington and her costumes used some pretty weird materials, too.


These dresses, for example, were padded with form rubber ... not very period correct construction, but OH what a wonderful effect!

0 Comments

Beautiful Photos of the textile industry in the US

1/16/2014

3 Comments

 
Picture
Last Sunday I opened the Magazine section of the New York Times to see an article with really beautiful photos taken at textile factories here in the United States.

In addition to the striking photos it tells the history of the textiles industry here.

Here are the first two paragraphs and a link to the rest.

In 1776, America didn’t have a single textile mill. There were no spinning mules, no water-powered looms. There were only rumors of what such things might look like and a few nonfunctioning models built from those rumors. Nearly every American woman, except the wealthiest, knew how to spin her own yarn and weave her own cloth, even as across the Atlantic women were moving out of the home and into millwork as England — bent on protecting its export market by safeguarding its trade secrets — industrialized the manufacturing of textiles.

Samuel Slater was 14 when he began working at a cotton-spinning mill in Derbyshire, England. Seven years later, in 1789, he disguised himself as a farmer to pass English customs and board a ship to the United States. When he arrived in America, he got a mechanized loom up and running, then a textile factory and later factory towns, eventually becoming known as both Slater the Traitor and the father of the American Industrial Revolution.


Click here to read the rest of the article.
Picture
There are 19 photos to see, if you follow the link above.  Can you guess what's in the photo below?
Picture
They are die cutters for collars, cuffs and pocket flaps from a men's shirt factory.

AND ... When looking for the "on-line" version of this article which tells about how the domestic textile is shrinking, I found another article from September 2013 about how the textile is returning to the US ... interesting.

It compares costs and advantages of producing clothing domestically or overseas.

Click this to read this September article.
Picture
But, I find part 2 of this article even more interesting.  It is all about the lack of skilled workers here.  Read the opening of this article below.

MINNEAPOLIS — It was past quitting time at a new textile factory here, but that was not the only reason the work floor looked so desolate. Under the high ceilings, the fluorescent lights still bright, there were just 15 or so industrial sewing machines in a sprawling space meant for triple that amount.

The issue wasn’t poor demand for the curtains, pillows and other textiles being produced at the factory. Quite the opposite. The owner, the Airtex Design Group, had shifted an increasing amount of its production here from China because customers had been asking for more American-made goods.

The issue was finding workers.

“The sad truth is, we put ads in the paper and not many people show up,” said Mike Miller, Airtex’s chief executive.


Click here to read the rest.

How many of you remember the TV ads from the International Ladies Garment Workers Union with all the women singing? 

"Look for the union label ... when you are buying a coat, dress or blouse ... remember somewhere our unions growing, our wages going to feed the kids or run the house ...  We work hard, but who's complaining, for with the ILG we're paying our way ... so always look for, the union label ... it says we're able to make it in the USA-A-A-A!!

And, I want you all to know, that was from memory! ... from the 1970's!!


I have watched the sewing jobs leave America and never thought they would be making their way back here. It will be interesting to see how it plays out.
3 Comments

Theresa LaQuey - Guest blogger ... the saga of the beaded dress continues - part 5 ... wearing

1/15/2014

4 Comments

 
Picture
From Andrea ... Finally we get to see Theresa enjoy wearing this incredible gown.
Here are links to all the other parts of this story, if you missed them or want to read them again.  Part #1, Part #2, Part #3, and Part #4 and here for my little update that has two short videos of Theresa actually beading.

Now, onto the wearing of said beaded gown. 


Joe and I swung by the Savoy's concierge the evening before the event, just to make sure that we knew what form of transportation we should use to get there.  I was praying for a taxi, but sadly found out that the whole city of Westminster was shut off to traffic so we would have to take the tube.  Joe and I had much discussion about this, as I had to report to rehearsal a 4 pm and the event didn't start until 8 pm.  We had thought about bringing our evening clothes to the hotel and changing, but as we hadn't heard from Alex, the bandleader whether that would work out, we opted to get into evening clothes and take the tube down there.  
Picture
This photo was taken when we arrived at the hotel with the Savoy's orchestra leader, 
Alex Mendham and my husband Joe DiPietro.  As you can see, I HAD to have a gown fancy enough to look like I belonged with these chaps.  


I met Alex at a California Art Deco Society event several years ago.  We found out we were both musicians, we ended up singing together at another Deco event and became fast friends.  This is how I got this great opportunity.
Picture
The 4 pm rehearsal
It was about a half mile walk to our underground station, and another half mile to the hotel. I taped over the buckles of my evening shoes hoping they wouldn't catch the beads.  Once we got into the hotel, alas I lost part of a line of beads. Good thing there are so many and I had designed the beading for such a mishap. The whole evening was splendid, although I did lose another line of beads crawling over equipment backstage when I got up to sing.  I also would have wished I hadn't said I would lead the conga line, and didn't know this meant shaking maracas as opposed to having hands free to deal with the gown.   I did splendidly at the task, but there is going to be some bead and hem repairing to do before another wearing of the gown.  
The fireworks display over the Thames was incredible.  We all locked hands in the rain (oh I guess I hadn't mentioned the rain part with all of the walking) and sang Auld Lang Syne.  It was around 3 am when we finally went toddling off to the tube station in the rain.  My evening shoes had not been as supportive as I thought, feet were hurting badly.  
Picture
When we managed to get through the drunken throngs to Embankment Station, we found that it was closed.  More walking, now off to Charing Cross.  Closed.  I finally asked a police officer and we were directed over to Leicestershire Square, where we were in a half hour queue to get into the station.  We finally arrived back at our hotel around 4 am, exhausted, with a slightly trashed gown, happy we had the experience and thinking of just building a fire at our house next year and toasting with a bit of champagne.  

Happy New Year everyone!
From Andrea ... and you thought the story was over??? Well think again. Here is a post script I just got from Theresa.

So, a little update on the gown.

We had to go to this fake New Years Eve party. It is annual, comes  the weekend after New Years Eve.  We weren't sure if we would attend, as I thought we might be too burnt out from our trip. I also thought I wouldn't wear the new beaded as it had suffered so much damage from the London New Year's Eve death march in the rain back to the hotel.  


Before the party last night, I pulled it out of its bag and put it on the work table to see how bad the story was with the gown.  To my amazement, it only had about 12 rows that were broken or in trouble.  Also some hem that had been walked away by the death march.

It only took me about 20 minutes to get the thing shorn up for another wearing.  A gown so heavy with beads is kind of like an expensive Italian sports car, needs a tuning up before taking it out on the road. As Joe says, "it's a Fiat, fix it again Theresa"

It was great to be with old friends and the gown was a wow!  I think I got about five or six new dress orders from just wearing the gown.  It feels great when you have created something so swell that folks want just a little piece of.  I had really thought that after London I had killed the dress, but it seems as if it will see another party or performance. Didn't lose a bead last night.  As our mother would say, I can now sit on my laurels.

4 Comments

Theresa LaQuey - Guest blogger ... the saga of the beaded dress continues - part 4 - assembly 

1/14/2014

1 Comment

 
I keep sneaking out of bed in the middle of the night to get five or six hours in during the weekend, but also spend good time with my honey.

From Andrea ...  TO BEAD OR NOT TO BEAD, that is the question!

Click this to read yesterday's post if you missed it.

By the Monday before we leave, the black panels are done.  Oh but oops, I am wondering if I have any white chiffon for the yoke.  I go spelunking in the fabric boxes and find some.  Yet another whew!  Same process, mark fabric, stretch, bead.  I send Andrea photos, just to let her know I have made it to the white.
Picture
The final touches, the looped fringe.  I had always wanted to try this, but was never so bold. 
The fringe is also done with the tambour hook, but instead of one bead per stitch, I use 8 beads still using the same chain stitch as the rest of my beading. 
Picture
Since it is just a chain stitch,  a whole line tambour beading can come undone if one stitch is broken or not done well. I keep having nightmares of thousands of beads from the fringe spilling out on the dance floor at the Savoy, with other guests slipping and sliding as my dress unravelled.  But, nightmares can be helpful to get one out of bed to complete the task.  The earlier I get up, the more I am on the UK time schedule. By Christmas Eve I am cutting out the gown and putting it together.  This is the easy part.  

The dress will be sewn up without a lining.  I will wear a silk crepe slip under it, that I made for another dress.  An unlined dress hangs better and is much easier to clean.  Which reminds me of the instructions for washing a beaded dress I have in a 1920's homemaking book I own.  

It says "wash beaded dress the way you would wash any other dress, just don't put it though the ringer" !!! 


Can you imagine all the cracking a crushed beads!  But, that is how to remove beads, if needed, without disturbing the chain stitch.  Smash any unwanted beads with a hammer and carefully remove all the pieces.
I cut around the beaded areas, don't have to make seam allowance perfect as the beads determine what the shapes are.  

Here I am stay stitching the neckline. This will make hand rolling a hem easier.
Picture
I mainly use french seams as much as possible as they are more durable and look nicer with sheer fabric. In order to stitch as close to the beading as possible, I need a zipper foot.  I have a vintage Singer foot that I like the best for this, because it stitches closer than my Bernina's.  
Picture
I use the zipper foot for the french seams and darts, everywhere I need to stitch right next to the beading.
Picture
Picture
I hand roll the hem along the neckline and check how it is hanging.
Picture
I can now attach the yoke to the bodice.
Picture
The underarm is finished with a strip of self fabric bias that will also be hand slipstitched in place.
Picture
By the time we leave to be with family for Christmas Eve, the gown is pretty much together.  I do the try on.  It looks wonderful, but the weight has caused the waist to be way too big.  And you know, I only used 3 kilos of beads, not the 6 I had hoped to. 

From Andrea ... a kilo equals about 2 1/4 lbs.  So 3 kilos is about 6 1/2 lbs. and 6 kilos is about 13 lbs.  That seems like too heavy of a dress for me!

My girlfriend Kimberly marks the hem and I figure out a way for a quick alteration that I can do in London.  I also do a quick alteration to the long black silk slip I made two months ago, cutting out the back as this gown has such a low back.  I pre-press the hem, roll the gown up in and put it in my carry on luggage.  I'm not letting that dress out of my clutches after all the work that went into it.

I did the hem and the alterations on New Year's Eve in our hotel room.  The reason that I did it in London is that I still wanted to finish another outfit before we went. 
Picture
Picture
Yeah, I know ... crazy, but how often does a girl get to London for New Year's?

From Andrea ... tomorrow read about the dress's debut at the Savoy.
1 Comment

Theresa LaQuey - Guest blogger ... the saga of the beaded dress continues - part 3

1/13/2014

0 Comments

 
Hello from your beading blogging friend out on the west coast.  I know I have been away for a while, but hopefully you will understand why, as I tell you the tale of the beaded gown that should have been made in six weeks not three. 

From Andrea ... read my beading update from December 23rd, to see two short videos of Theresa beading and for links to her first two blogs.
Picture
After completing the first panels of the dress and looking at the timeline to complete the gown, I realize that I am going to have to change out what I am doing a bit to make the deadline ... leaving for London December 27th.  Yikes!
The center front panel is too intensely beaded.  I had wanted it to be super solid, but what with the timing I couldn't get there. I initially just marked the straight grain of the fabric with a white dressmaker's pencil and then intended to do close rows of beading. I would have measured and marked more, if there hare been time instead of eyeballing it. But you see, this was a whole new try for me.  I had never done a beaded gown like this one, with the line by line beading. To speed things up, I decided to slowly open up the vertical lines ever so slightly while working towards the back.  Make it look like it was intentional, I say to myself.  And anyway, it is going to sparkle so much that few will notice.  

Picture
I am also thinking to myself, why the heck did I even try this exercise, I could have knocked out a vermicelli gown in a week.  (Vermicelli is a style of beading that is a simple wandering line of beads that can eat up square inches of fabric so much faster).


This is an example of a vermicelli pattern done without beads.  Kind of looks like spaghetti, right?

On to panel two, second skirt side front and one bodice back. I am checking and rechecking that I am beading the left side front.  Yep, that mistake has been done before, beading two right front panels.  Now THAT is something you really don't want to have happen.
Picture
After that first panel, my beading chops are really warmed up.  It always takes 3 to 4 days to get my speed up.  By this point, my dog is wandering outside under the beading loom, looking up at me forlornly with that "mama why do you do this to yourself look when we could play in the back yard?"  My husband is questioning my sanity.  Dig in I say, keep putting up those hanks of beads.

It's the gall-derned Savoy, girl!  No matter how crazy they think you are, this is the right thing to do.

Picture
I manage to get the second panel off of the loom finished in two days.  Whew.  Only 13 days left ... onto the back panels. At this point even Andrea knows why I am not blogging.  I start to wake up a 4 am in order to work on the gown in peace.  I feel like I am catching up, but, oh darn it!  I have to stop for two days to throw my annual Christmas party for about ninety people.  The party has been Grintched by a lovely man who has a gorgeous large Julia Morgan home in Alameda.  I had promised this months ago.  He has staff to help me, but I still have to cater for ninety.  Whole weekend lost.  Argh.
Picture
Monday morning the 16th, 4 am again.  Back at it, beginning to think that the whole household is right, I AM crazy.  Back panels and whole bodice front and one back bodice to go, and that is before the white yoke.  Yep, I am crazy.  I pound the beads onto the silk all week long and think, I still have the whole weekend to get through this white yoke.  Then, yet another disaster strikes. Saturday morning Joe accuses me of leaving the marriage.  When work gets intense he doesn't get enough time with me and this was one of the worst gripes I had heard to date.  Hmmmm . . marriage???  gown??? ( Never the less, he was lovingly taking care of all things in the house, laundry, cleaning and also rubbing my very sore shoulders.  Taking good care of all of us, me and pup). I choose marriage as I can't manage beading in an upset household.
Picture
Picture
Joe ... the good husband.
But Joe often has to take a backseat! 
Picture
From Andrea ...

Will Theresa finish the dress??? Will she save her marriage???
Stay tuned, next installment tomorrow. 

0 Comments
<<Previous
Forward>>

    From Andrea 

    I am a commercial pattern maker who is now "sewing over 50"!
    I love to sew and hope to encourage others to come back to sewing.
    The water is fine!!

    Archives

    August 2019
    July 2019
    June 2019
    May 2019
    April 2019
    March 2019
    August 2017
    July 2017
    June 2017
    May 2017
    April 2017
    March 2017
    February 2017
    July 2016
    June 2016
    May 2016
    April 2016
    March 2016
    February 2016
    January 2016
    December 2015
    November 2015
    October 2015
    September 2015
    August 2015
    July 2015
    June 2015
    May 2015
    April 2015
    March 2015
    February 2015
    January 2015
    December 2014
    November 2014
    October 2014
    September 2014
    August 2014
    July 2014
    June 2014
    May 2014
    April 2014
    March 2014
    February 2014
    January 2014
    December 2013
    November 2013
    October 2013
    September 2013
    August 2013
    July 2013
    June 2013
    May 2013

    Archives by Subject

    To search for blog posts in specific categories, use the drop down menu above by hovering over the word "Blog"

    Enter your email address:

    Delivered by FeedBurner

    RSS Feed

    Andrea Schewe participates in Amazon's associates program.