
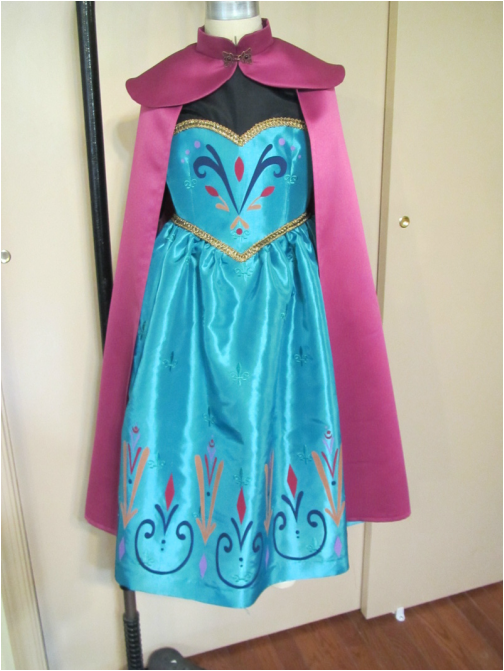
Now for the cape!
Elsa's cape only needs three pattern pieces. I'm going to use one of the pattern pieces right from the same pattern all the other pieces have come from, (read previous blogs on making this dress, part 1, part 2 and part 3) but two of the pieces you will have to make yourself. But don't worry I'm going to give LOTS of guidance.
Materials needed are: the cape fabric, a little bit of interfacing and a nice hook closure for the neck.
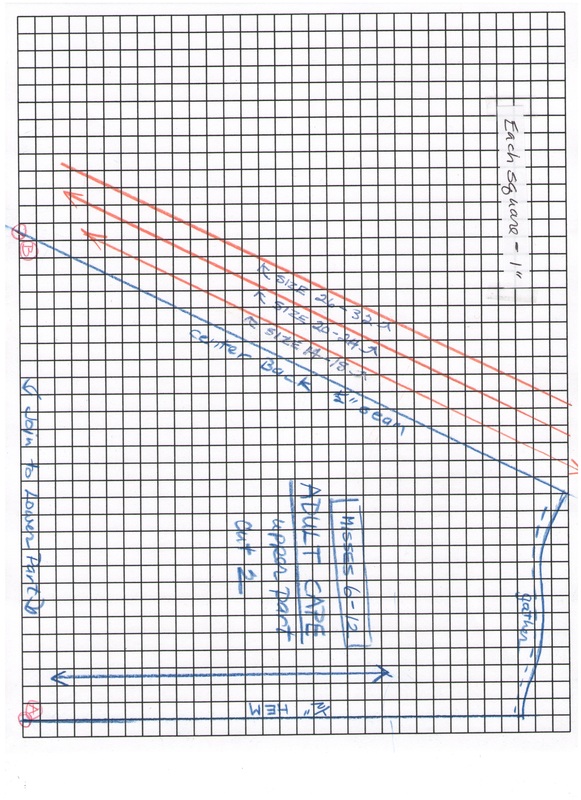
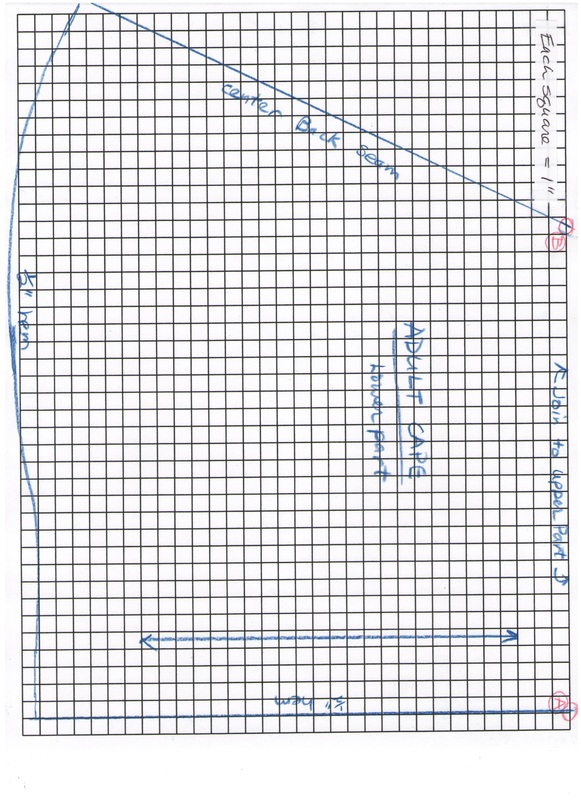
Below are 1" grid diagrams to make a pattern for the large main cape piece in three size ranges, the same as the pattern we've been using.
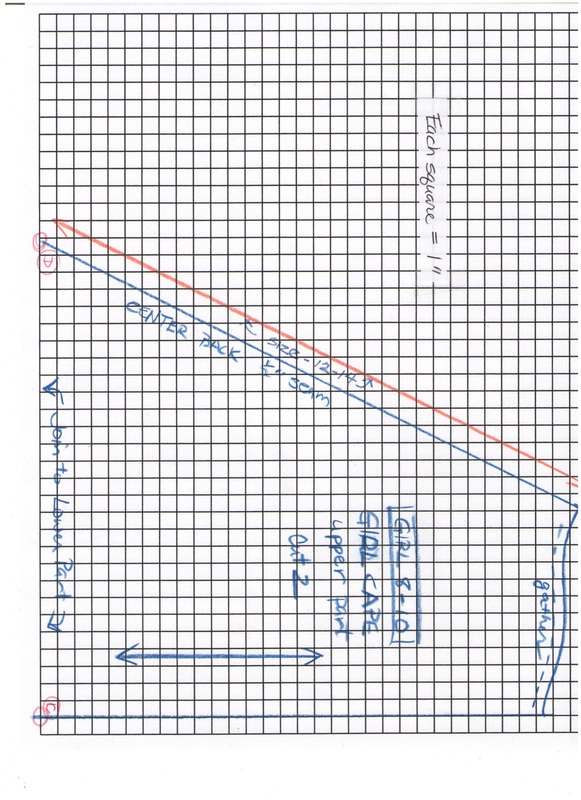
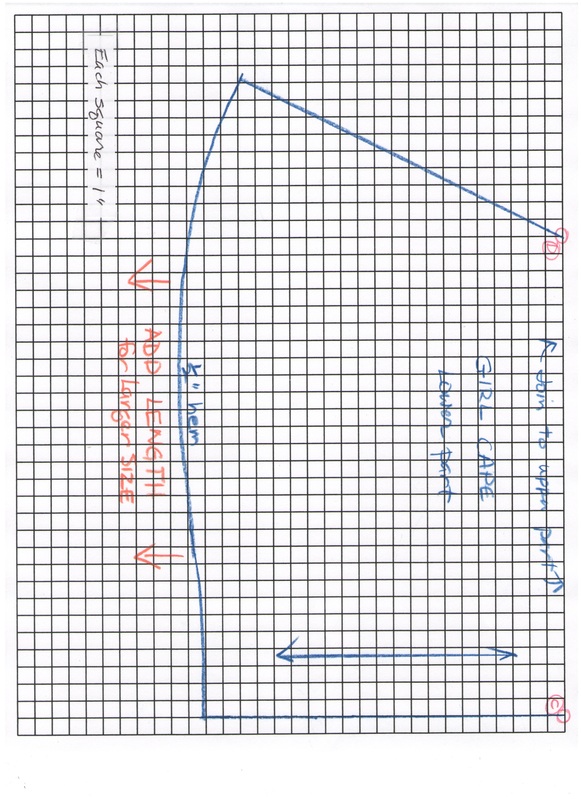
Again, I'm giving these diagrams as jpegs and as Word documents. The adult size and the girl size are on two sheets and need to be joined. The child size fits on one sheet.
I would have just given a diagram with measurements to draw out, but that subtle up and down curve at the top of the cape is really important so it hangs correctly over the shoulder.
Elsa's cape only needs three pattern pieces. I'm going to use one of the pattern pieces right from the same pattern all the other pieces have come from, (read previous blogs on making this dress, part 1, part 2 and part 3) but two of the pieces you will have to make yourself. But don't worry I'm going to give LOTS of guidance.
Materials needed are: the cape fabric, a little bit of interfacing and a nice hook closure for the neck.
Below are 1" grid diagrams to make a pattern for the large main cape piece in three size ranges, the same as the pattern we've been using.
Again, I'm giving these diagrams as jpegs and as Word documents. The adult size and the girl size are on two sheets and need to be joined. The child size fits on one sheet.
I would have just given a diagram with measurements to draw out, but that subtle up and down curve at the top of the cape is really important so it hangs correctly over the shoulder.
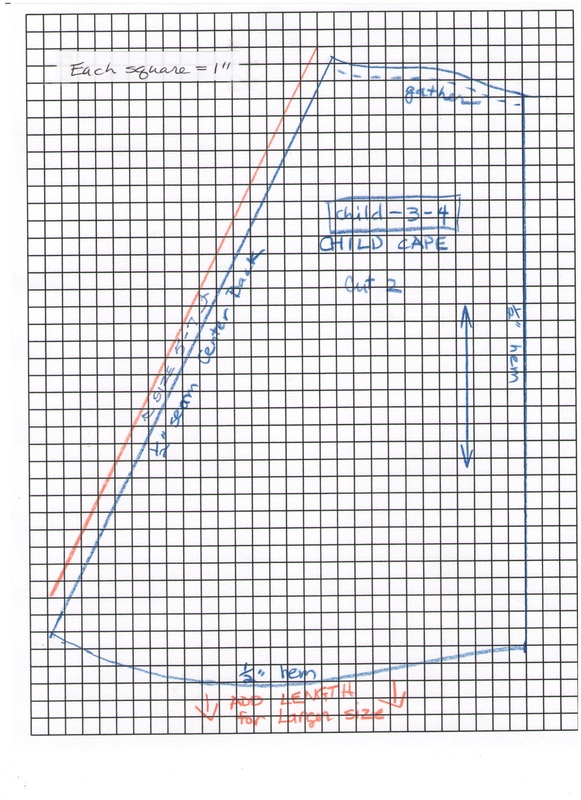
| child_cape_-_word.docx |
| girl_upper_cape_-_word.docx |
| girl_lower_cape_-_word.docx |
| adult_upper_cape_-_word.docx |
| adult_lower_cape_-_word.docx |
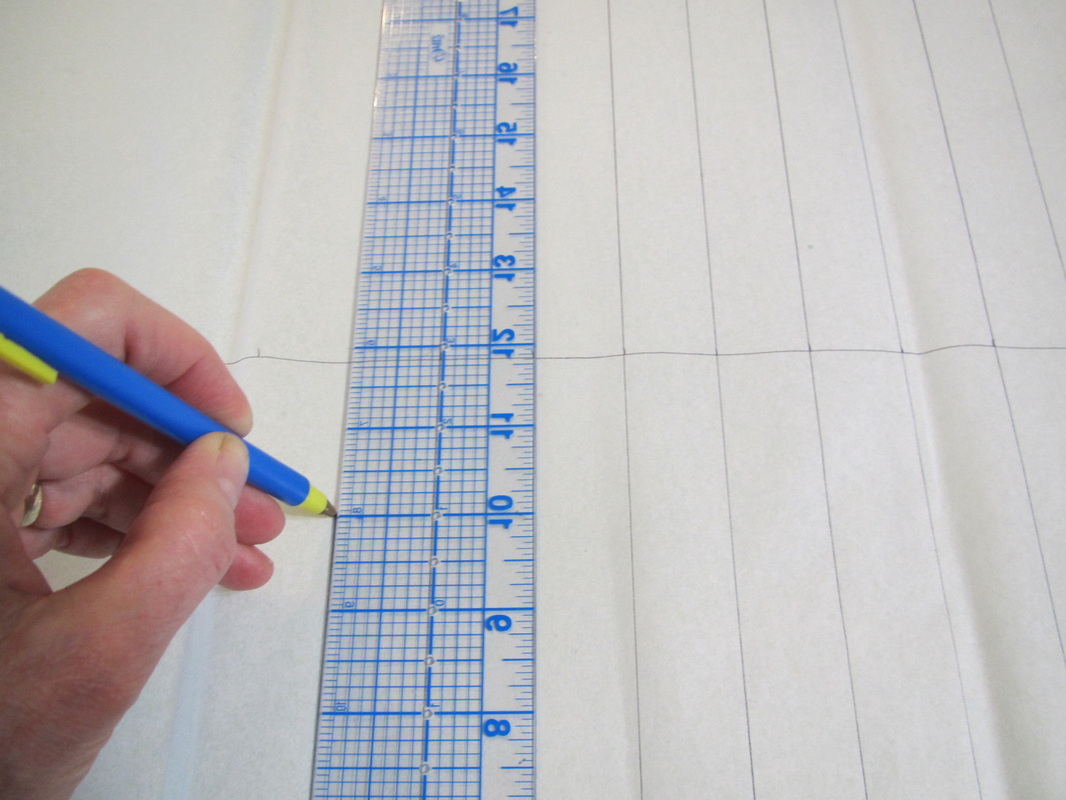
To make these diagrams usable, draw a 1" grid onto a large sheet of paper. I am using some sturdy gift wrapping tissue.
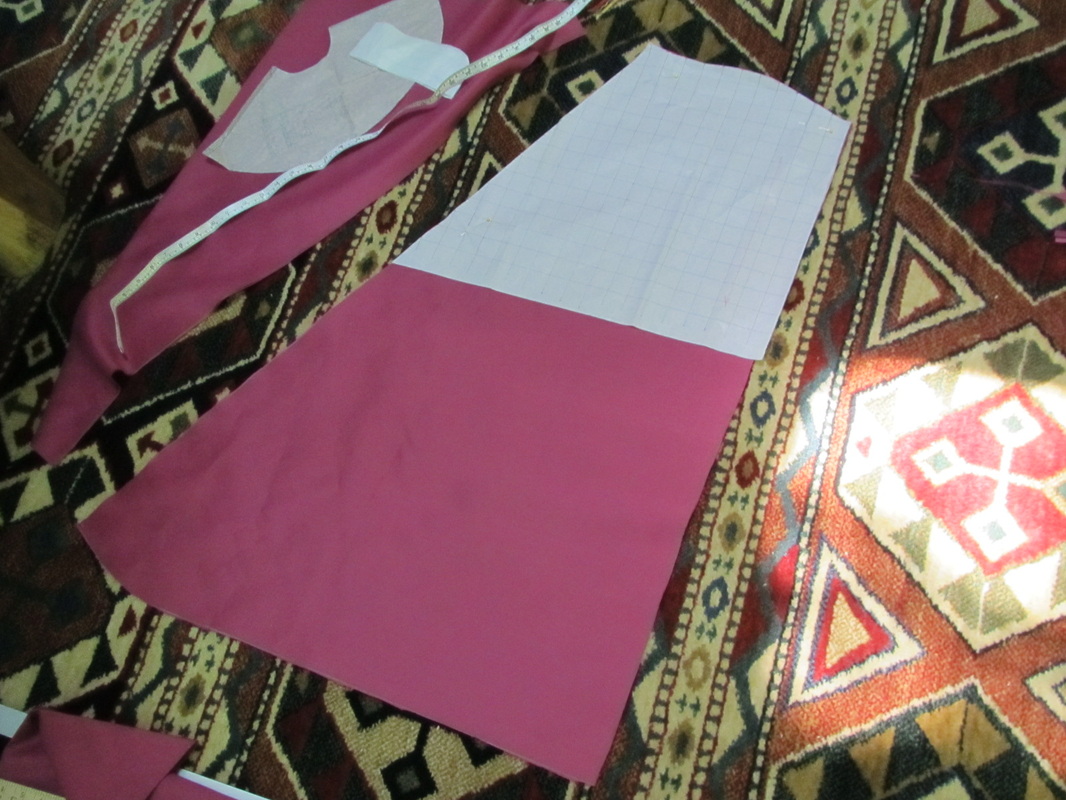
This pattern piece will be HUGE if the entire thing is made. I recommend just making the upper part and using a tape measure or yard stick to get the dimensions for the lower part.
This pattern piece will be HUGE if the entire thing is made. I recommend just making the upper part and using a tape measure or yard stick to get the dimensions for the lower part.
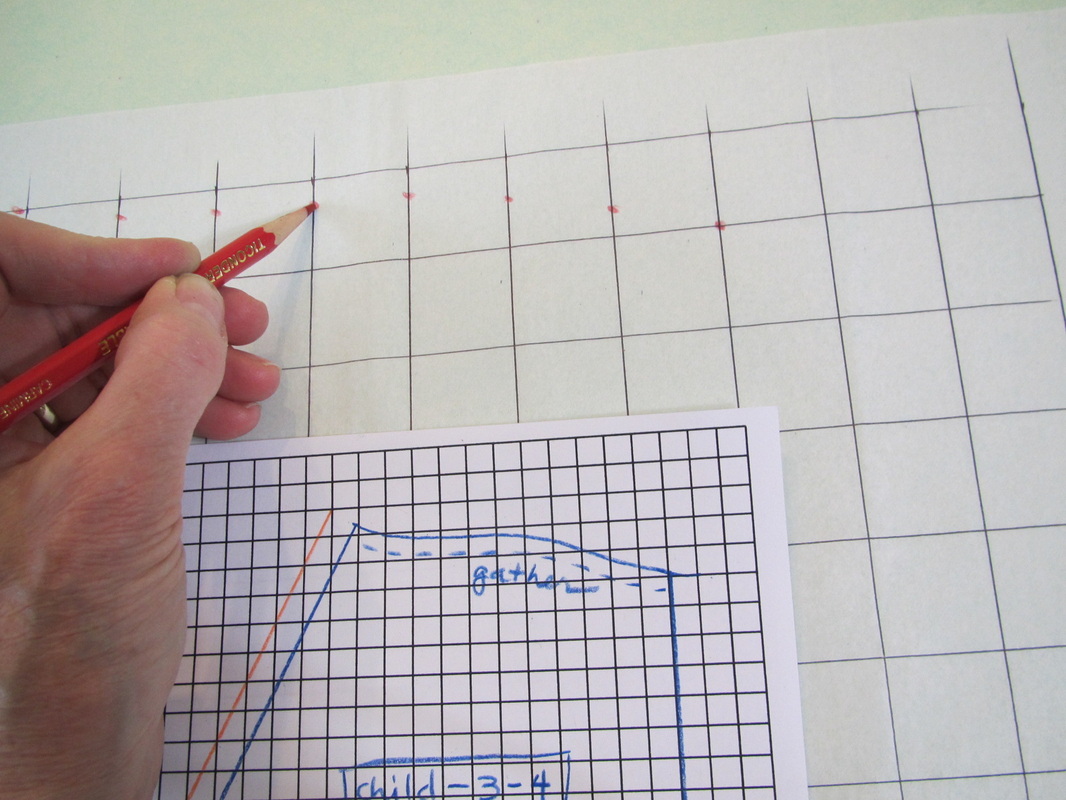
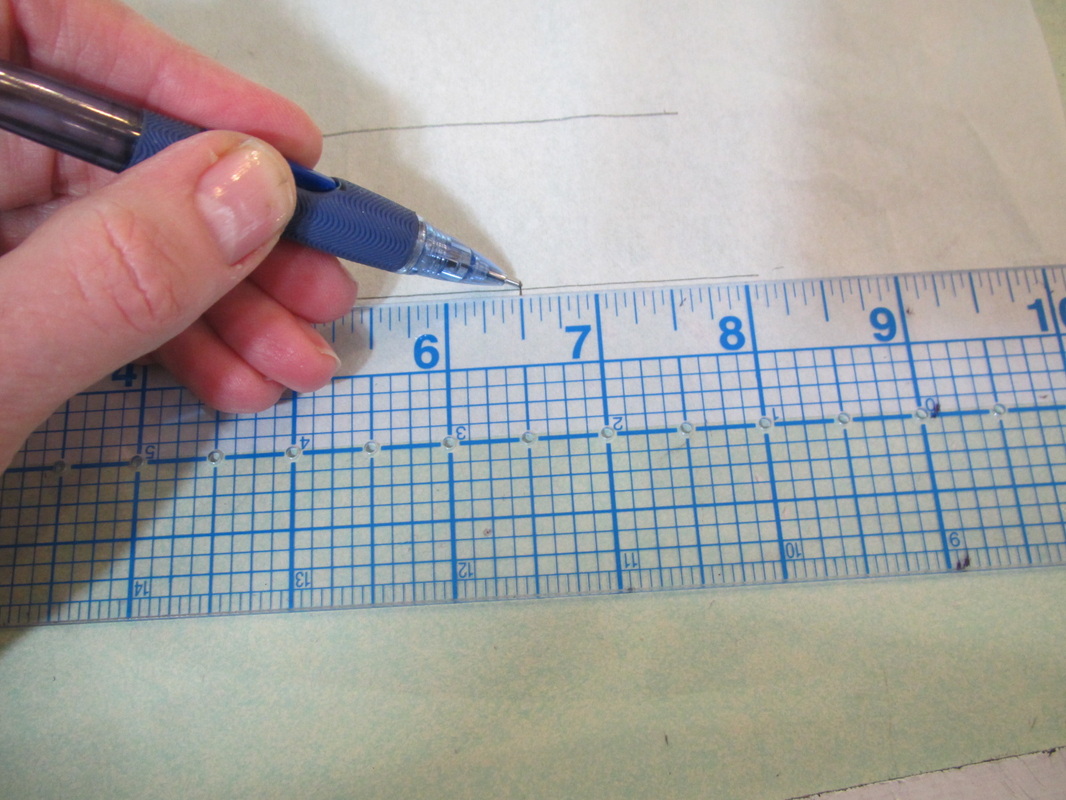
Using the grid pattern as a guide, put dots where the pattern lines and the grid lines intersect.
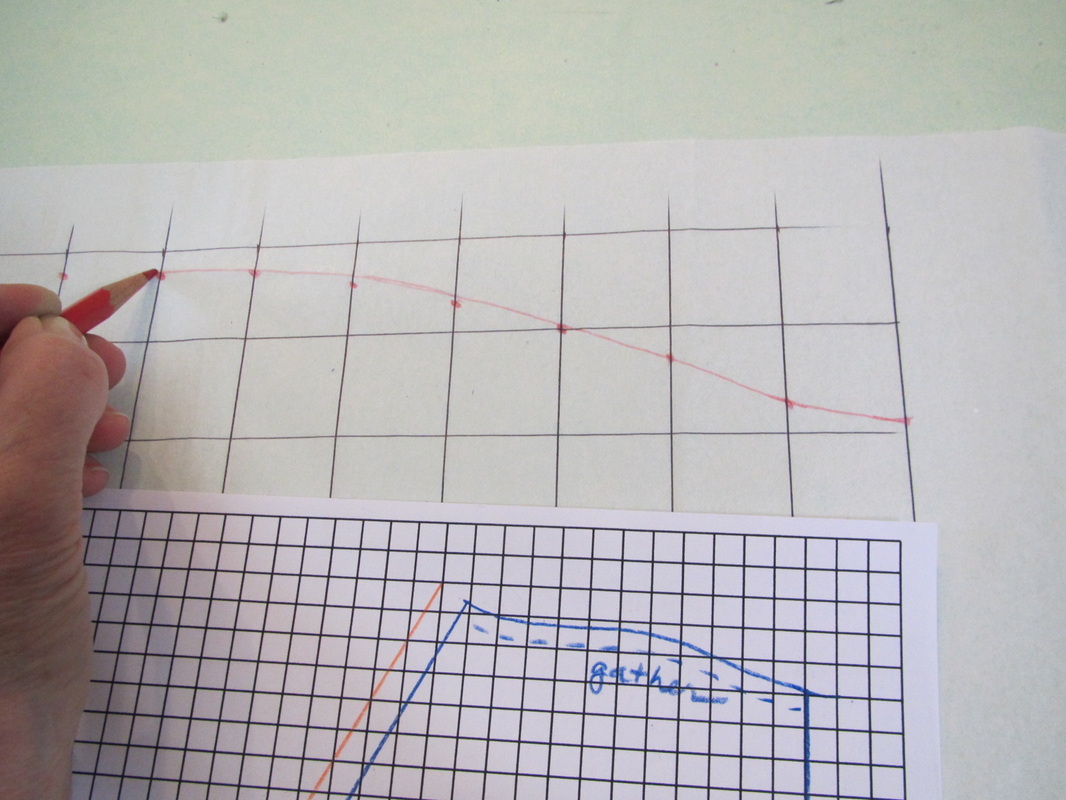
And then connect them like a dot to dot picture.
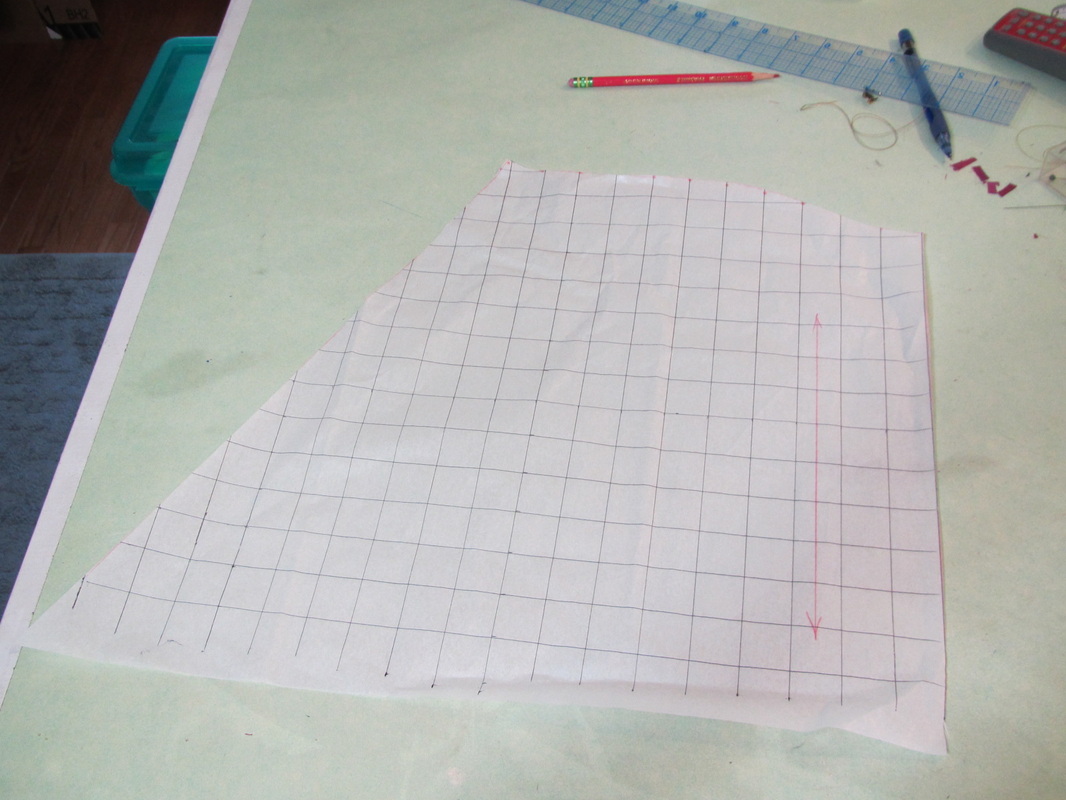
Cut this pattern piece out. This is just the upper part of the long main cape piece.
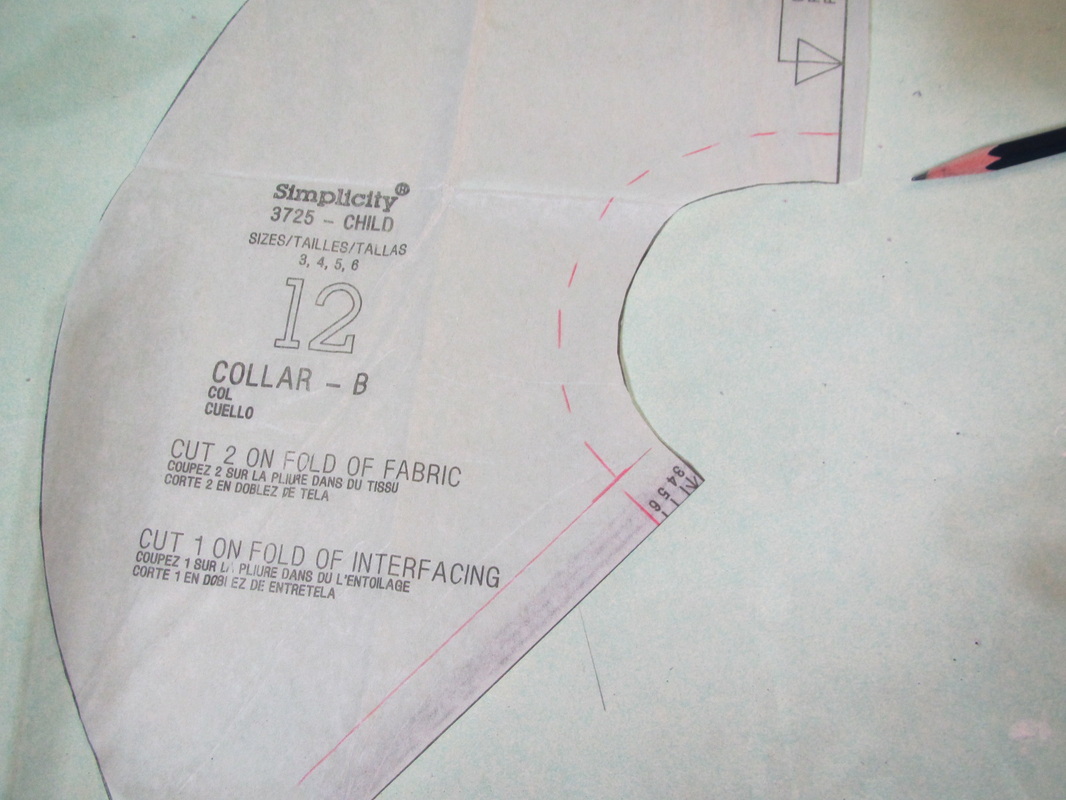
For the short shoulder length outer cape, use the pilgrim collar piece #12 from the pattern.
To make the band collar that fits this, first draw on the stitching lines, 5/8" in from the cutting line.
To make the band collar that fits this, first draw on the stitching lines, 5/8" in from the cutting line.
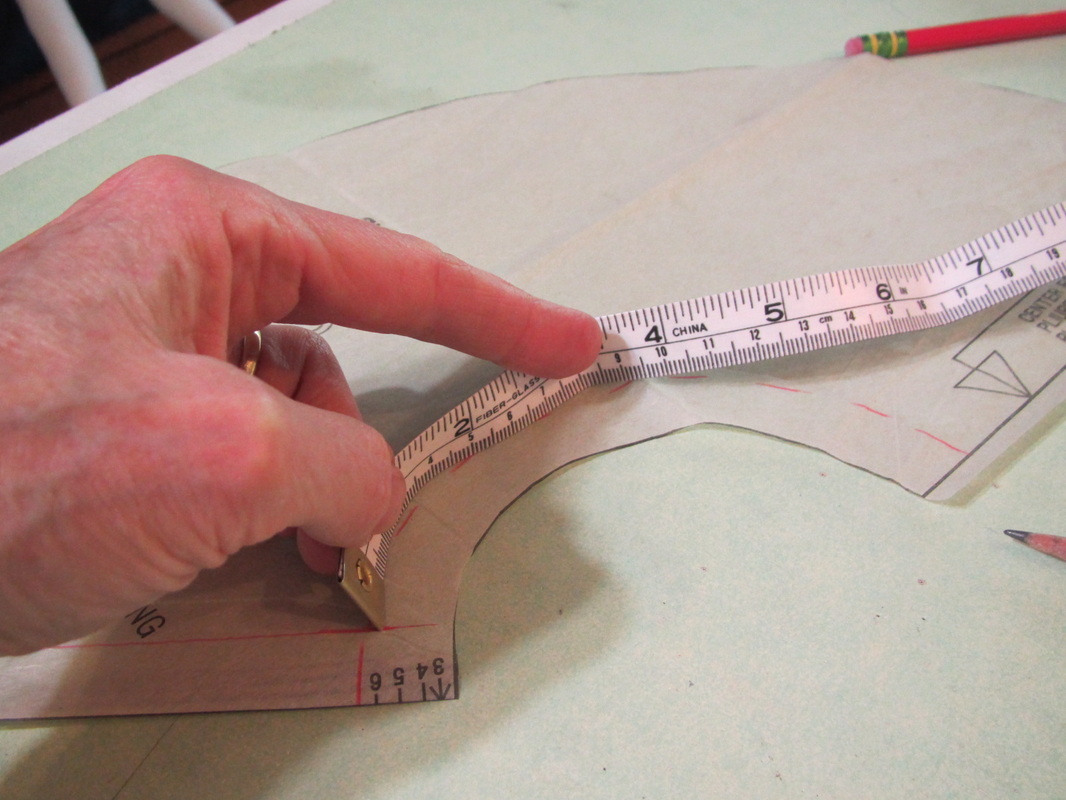
Measure the length of the neck stitching line.
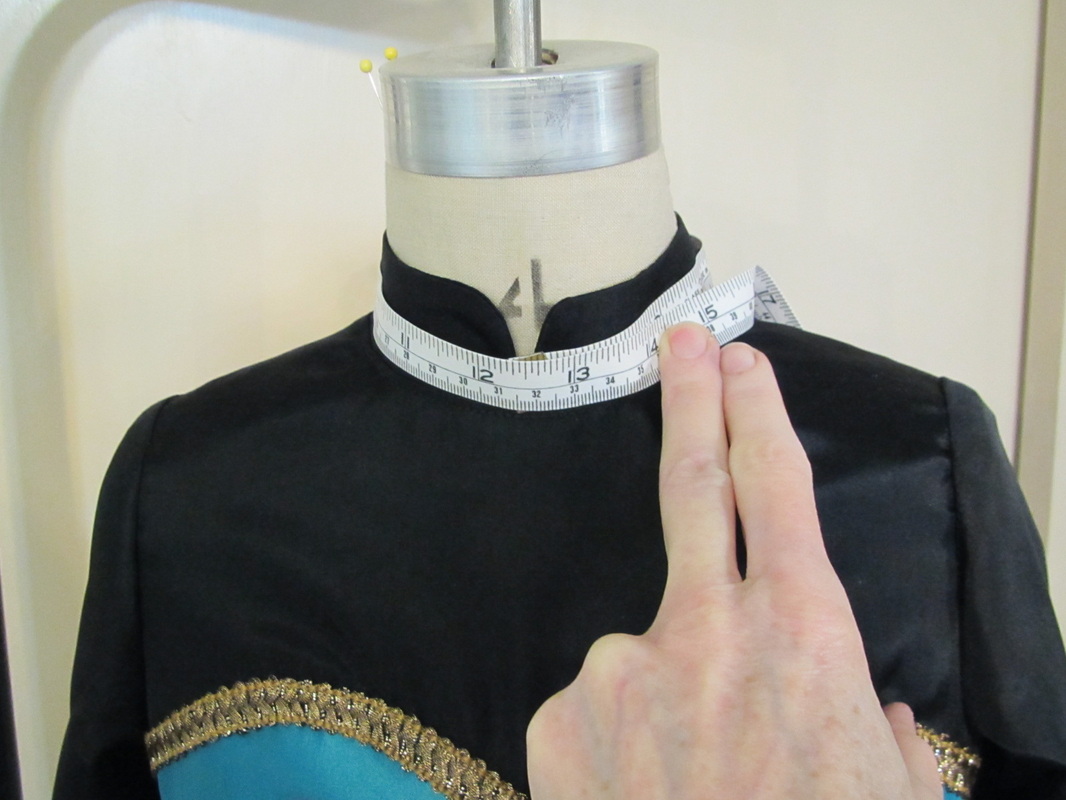
Check to be sure it will fit comfortably around the collar of the dress and adjust the pilgrim collar pattern if necessary.
Draw a long rectangle the same height as the dress collar (for me 1 1/4") and the same length as the neck seam on the pilgrim collar. Add 5/8" seams all around.
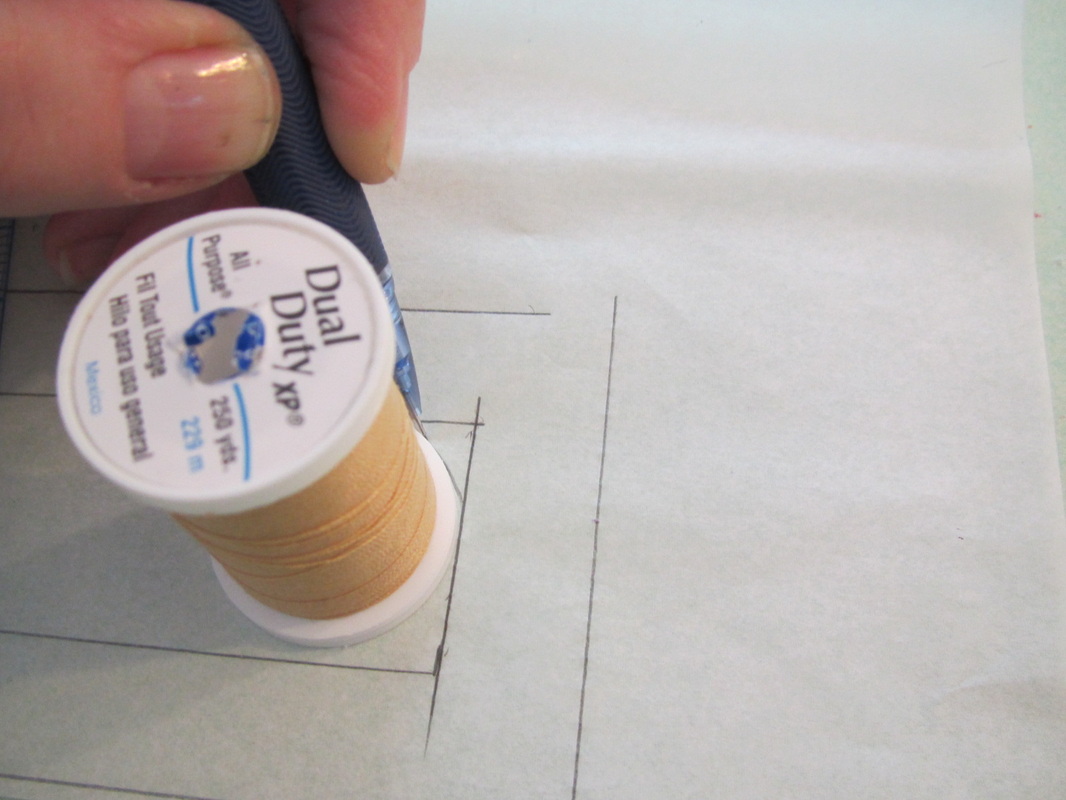
Round the front corners with something round like a spool.
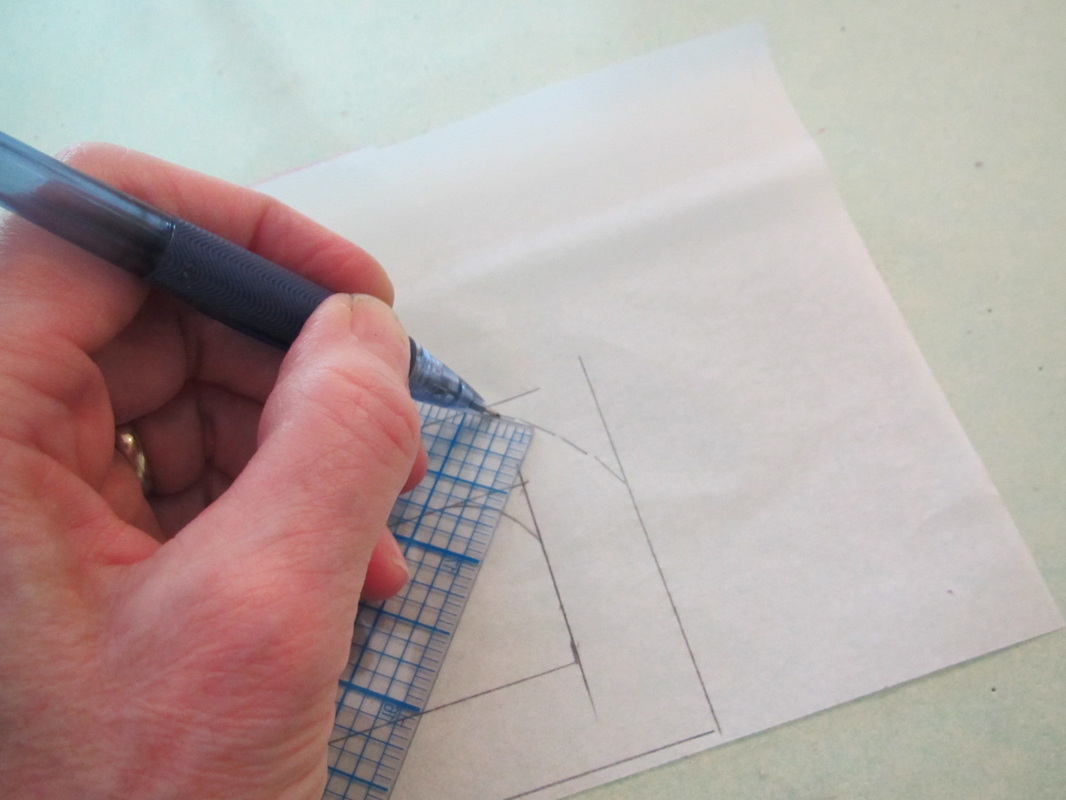
Add seam allowance to the rounded part, too.
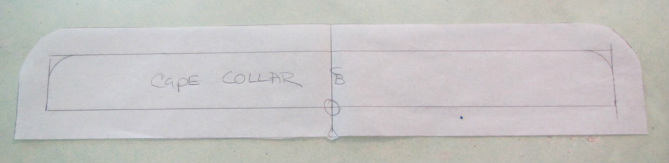
And cut this out. The three pattern pieces are now ready for cutting the fabric.
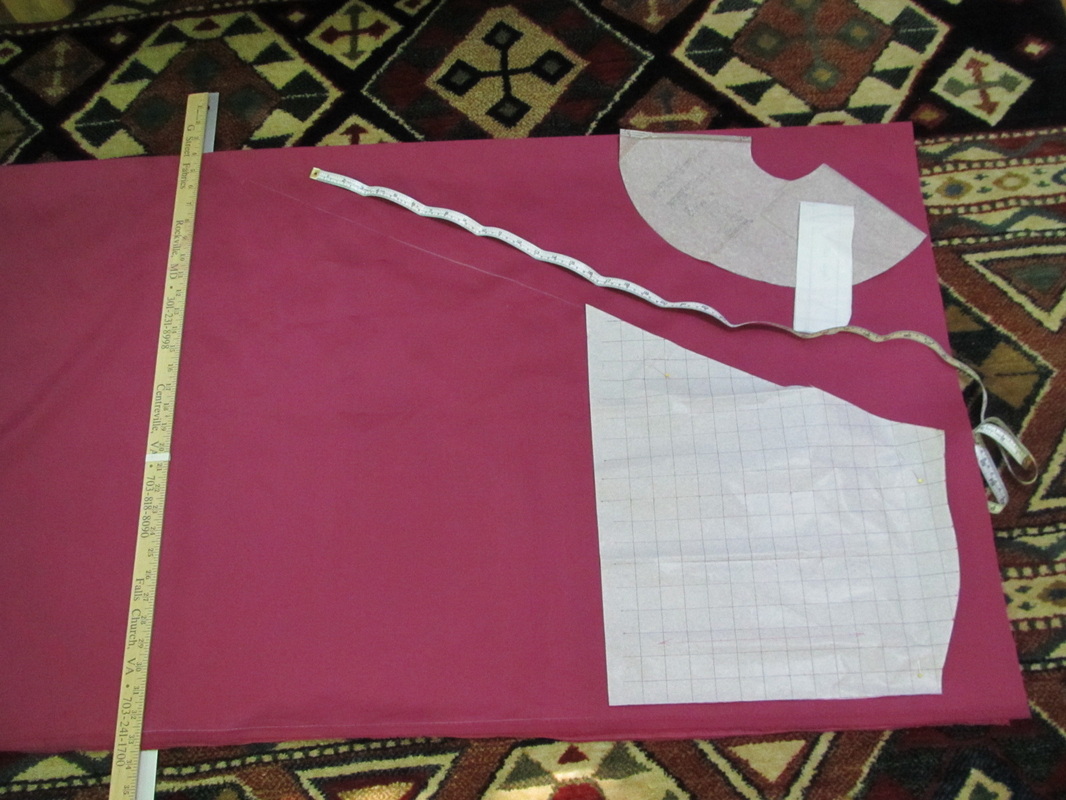
I lay the fabric out on my living room floor to make it easier to measure out the length dimensions for the main piece. The measurements can be taken off the grid pattern, but you should also measure your Elsa. The front edge of the cape (the shorter edge on the straight grain should be the length from her neck to the floor when finished. And add 5" or so to that measurement for a train at the back seam.
I took the remaining fabric back to my work table to cut the upper cape and collar ... so much more comfortable.
So this is what you should have ... 2 large main cape pieces, 2 smaller upper cape pieces, 2 collar pieces and one collar piece cut from interfacing.
Tomorrow ... the sewing.
So this is what you should have ... 2 large main cape pieces, 2 smaller upper cape pieces, 2 collar pieces and one collar piece cut from interfacing.
Tomorrow ... the sewing.
 RSS Feed